Preparing and Using Sinew
To make many of the more advanced tools and weapons associated with wilderness survival you will need two animal products, sinew and rawhide. What sinew is, how to obtain it, and how to process it is the subject of this post.
What is Sinew?
Sinew can be obtained from the tendons of any mammal. Tendons are the tough stringy things that attach muscles to bones. When these tendons are processed into sinew they provide a wonderful material that can be used to make super strong cordage, good sewing thread, and they can be used as a binding twine to attach arrowheads, arrow fletchings, knife blades, spear points, drill points and etc. Sinew is as tough as nylon, and it is impregnated with its own natural glue that can be activated with a little moisture. Sinew shrinks a little when it dries so that is binds things together tightly. Sinew will last for hundreds of years if it is protected from moisture. In short, sinew is a super material that has no modern equivalent. The only down-side to sinew is that it must be kept dry. If you get it wet it will soften and stretch, and whatever you have bound together with it will come apart. If you think that any sinew that you have used may be exposed to moisture, you must coat it with pine sap or some other agent that will waterproof it.
How do You Obtain Sinew?
One of the most widely available sources of sinew is from the deer, although elk or buffalo will work just as well. The most useful sinews are located in the lower legs and along the upper back lying over the back straps. If you hunt deer you can remove both the leg and back sinews when you are butchering. If you have friends that hunt you can ask them to bring you the lower legs when they butcher. The lower legs have no usable meat on them and most people just cut them off and throw them away. Hunters will usually be glad to give you this part of their kill even if they do think you’re a little strange for wanting it. You can even go to most packing houses during deer season and they are often glad to get rid of any legs that they have. All of my friends know that I want deer legs and I usually get anywhere from twenty to fifty a year just for the asking. Pictured below: deer leg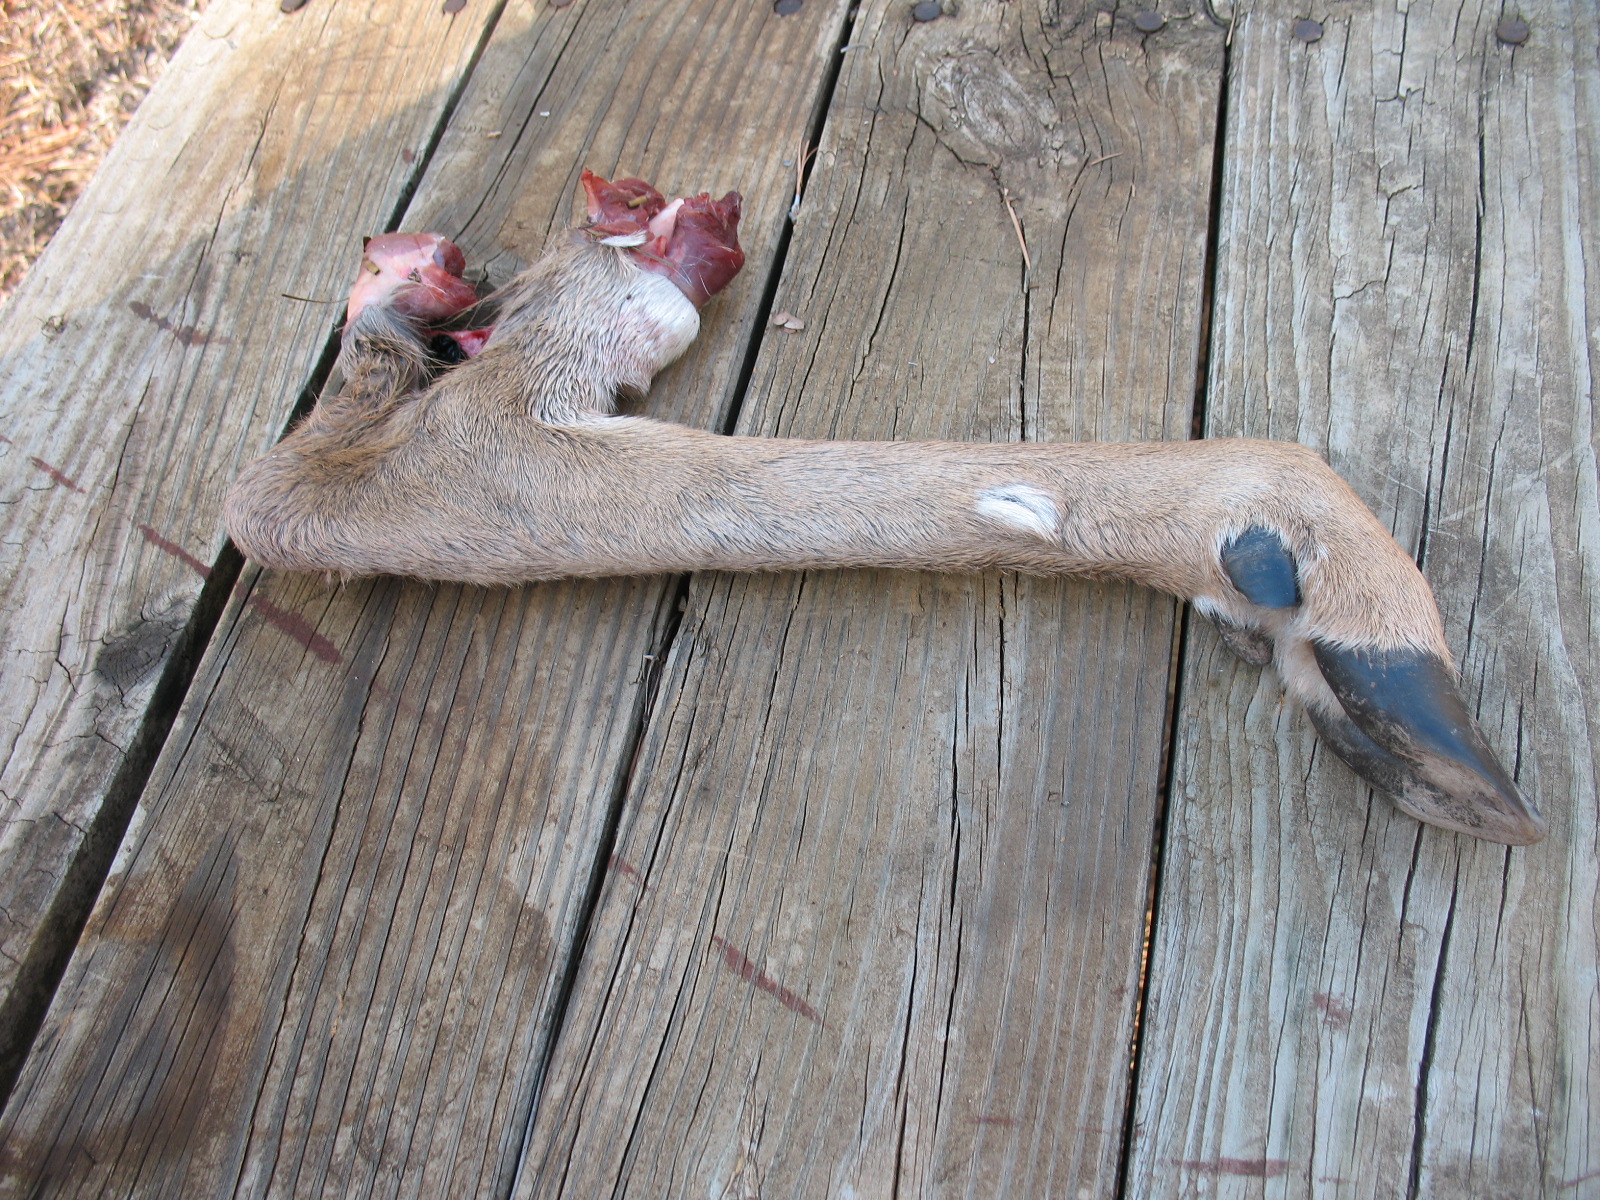
How do You Process Sinew?
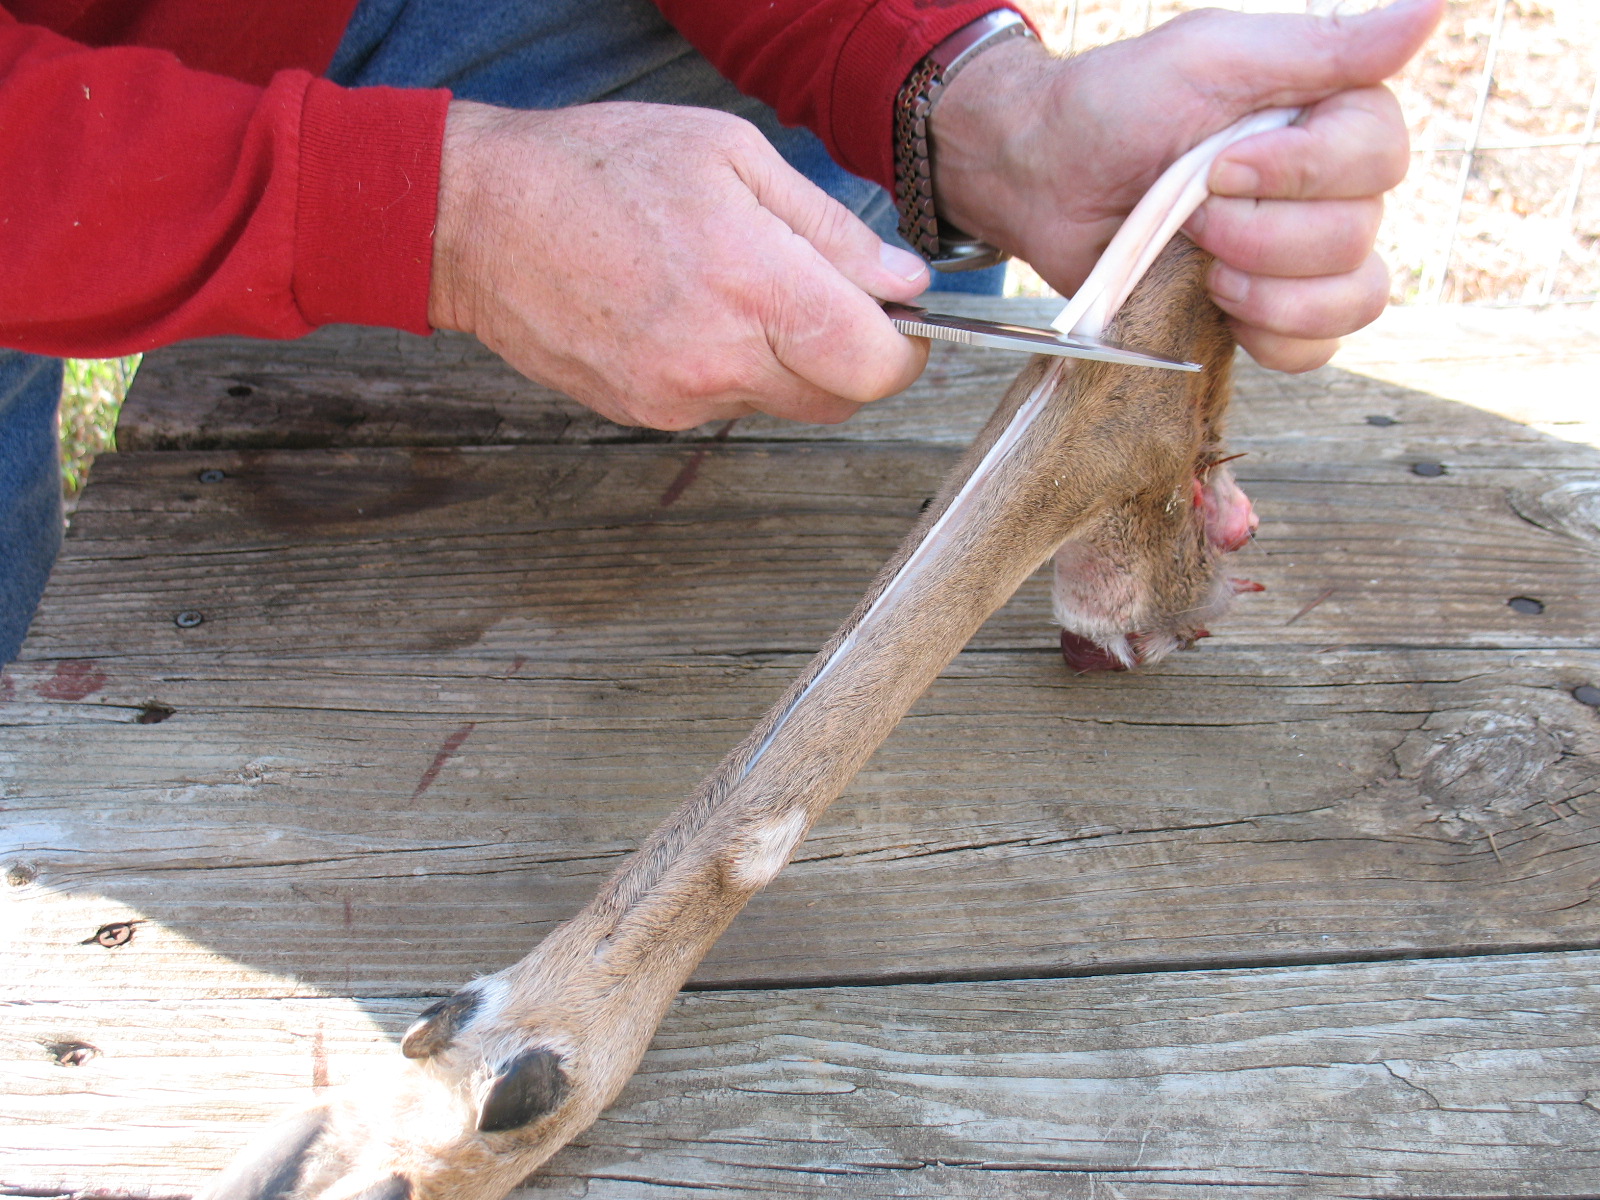
To remove the sinews, you need a sharp knife or a good sharp flake of flint. Slice down the back of the leg from knee joint to just above the dew claws and peel the skin back. Lying just below the skin is a white membrane. This membrane encases the tendon which lies in a shallow groove down the back of the leg bone. 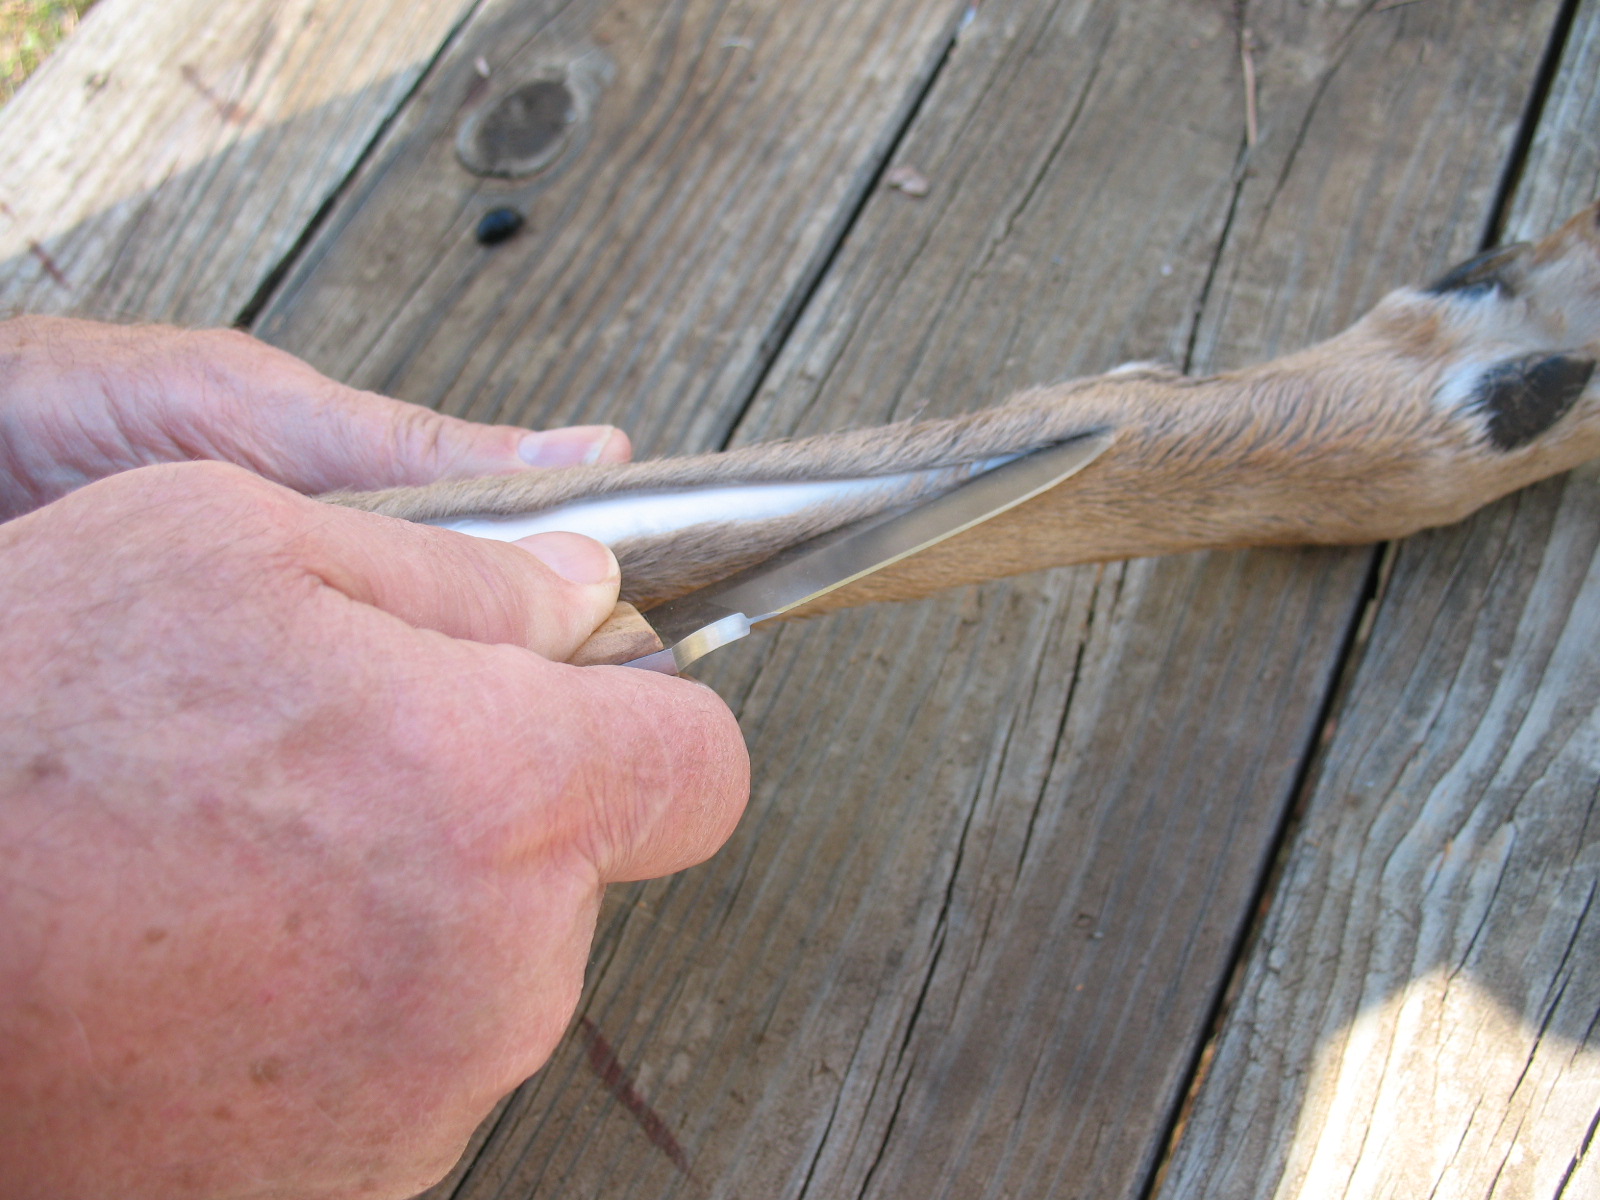
Split open the membrane and you will see a milky white cord looking thing. This is the tendon. 
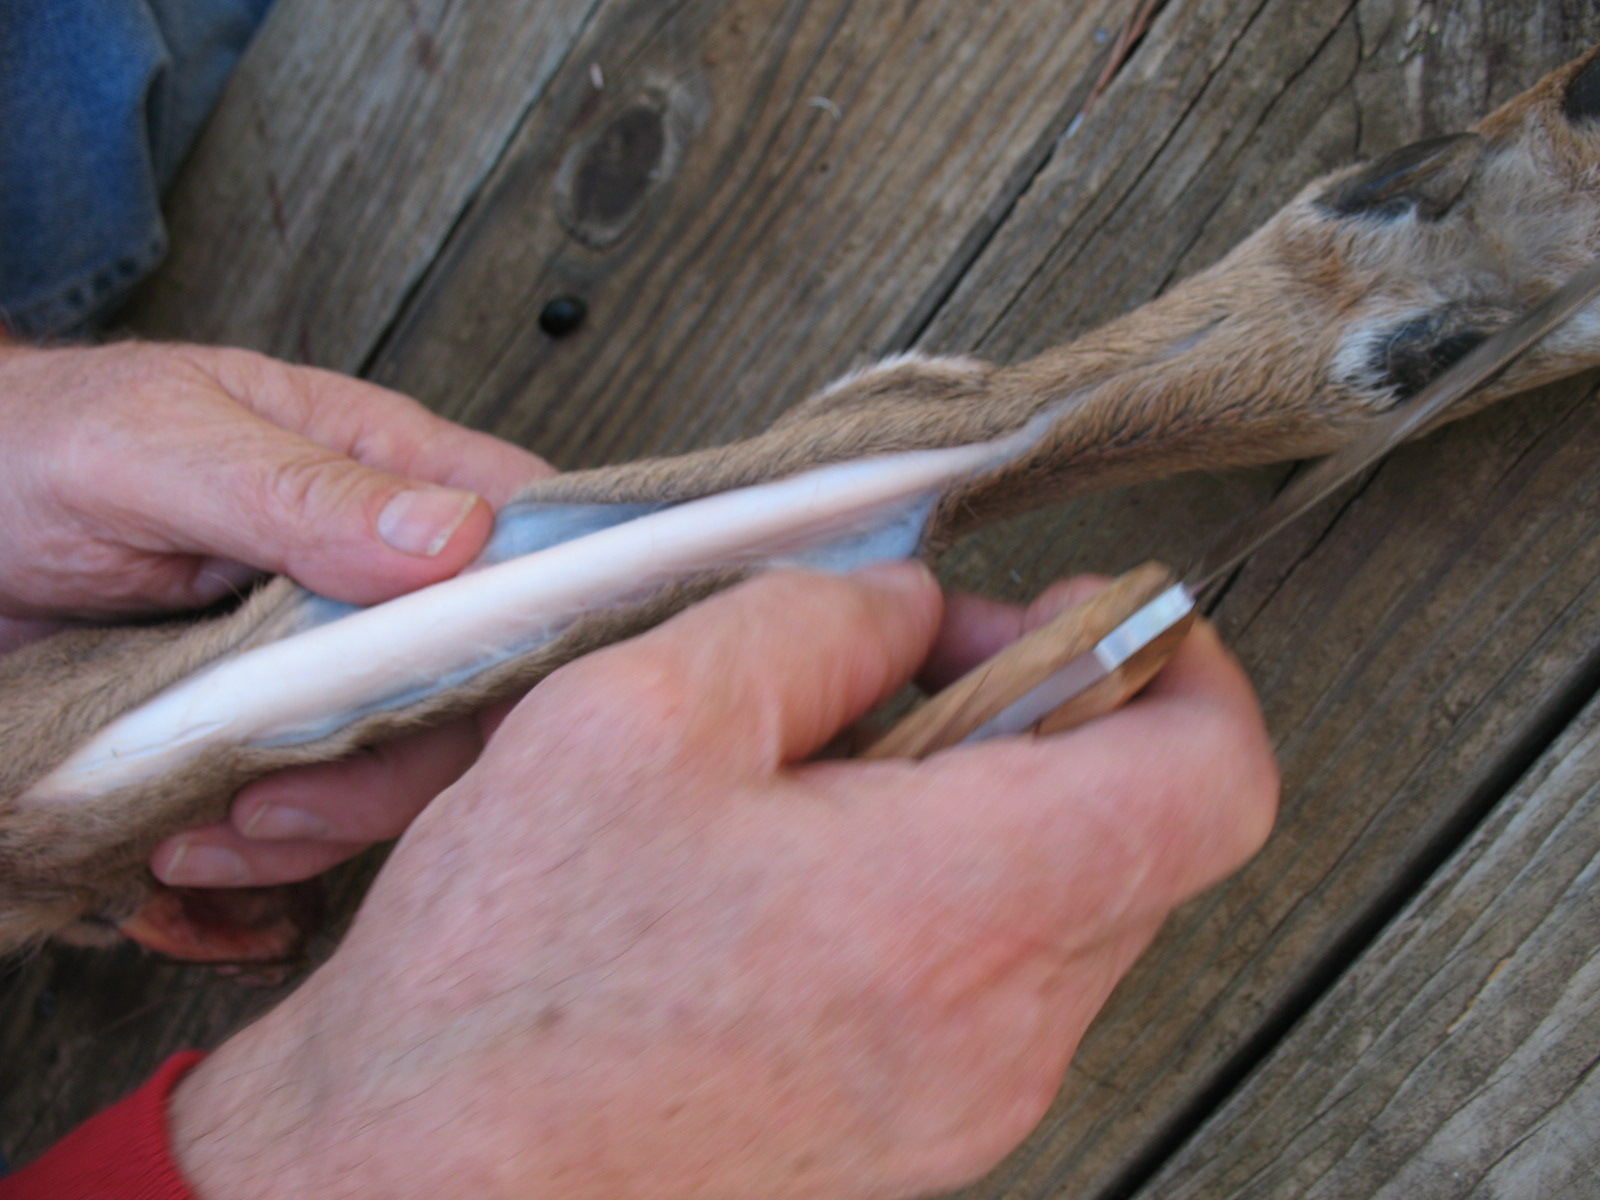
You can usually slip your finger under the edge of the tendon and lift it up out of the bone a little. When you get the tendon up out of the groove, run your knife up and down to loosen the tendon even more. 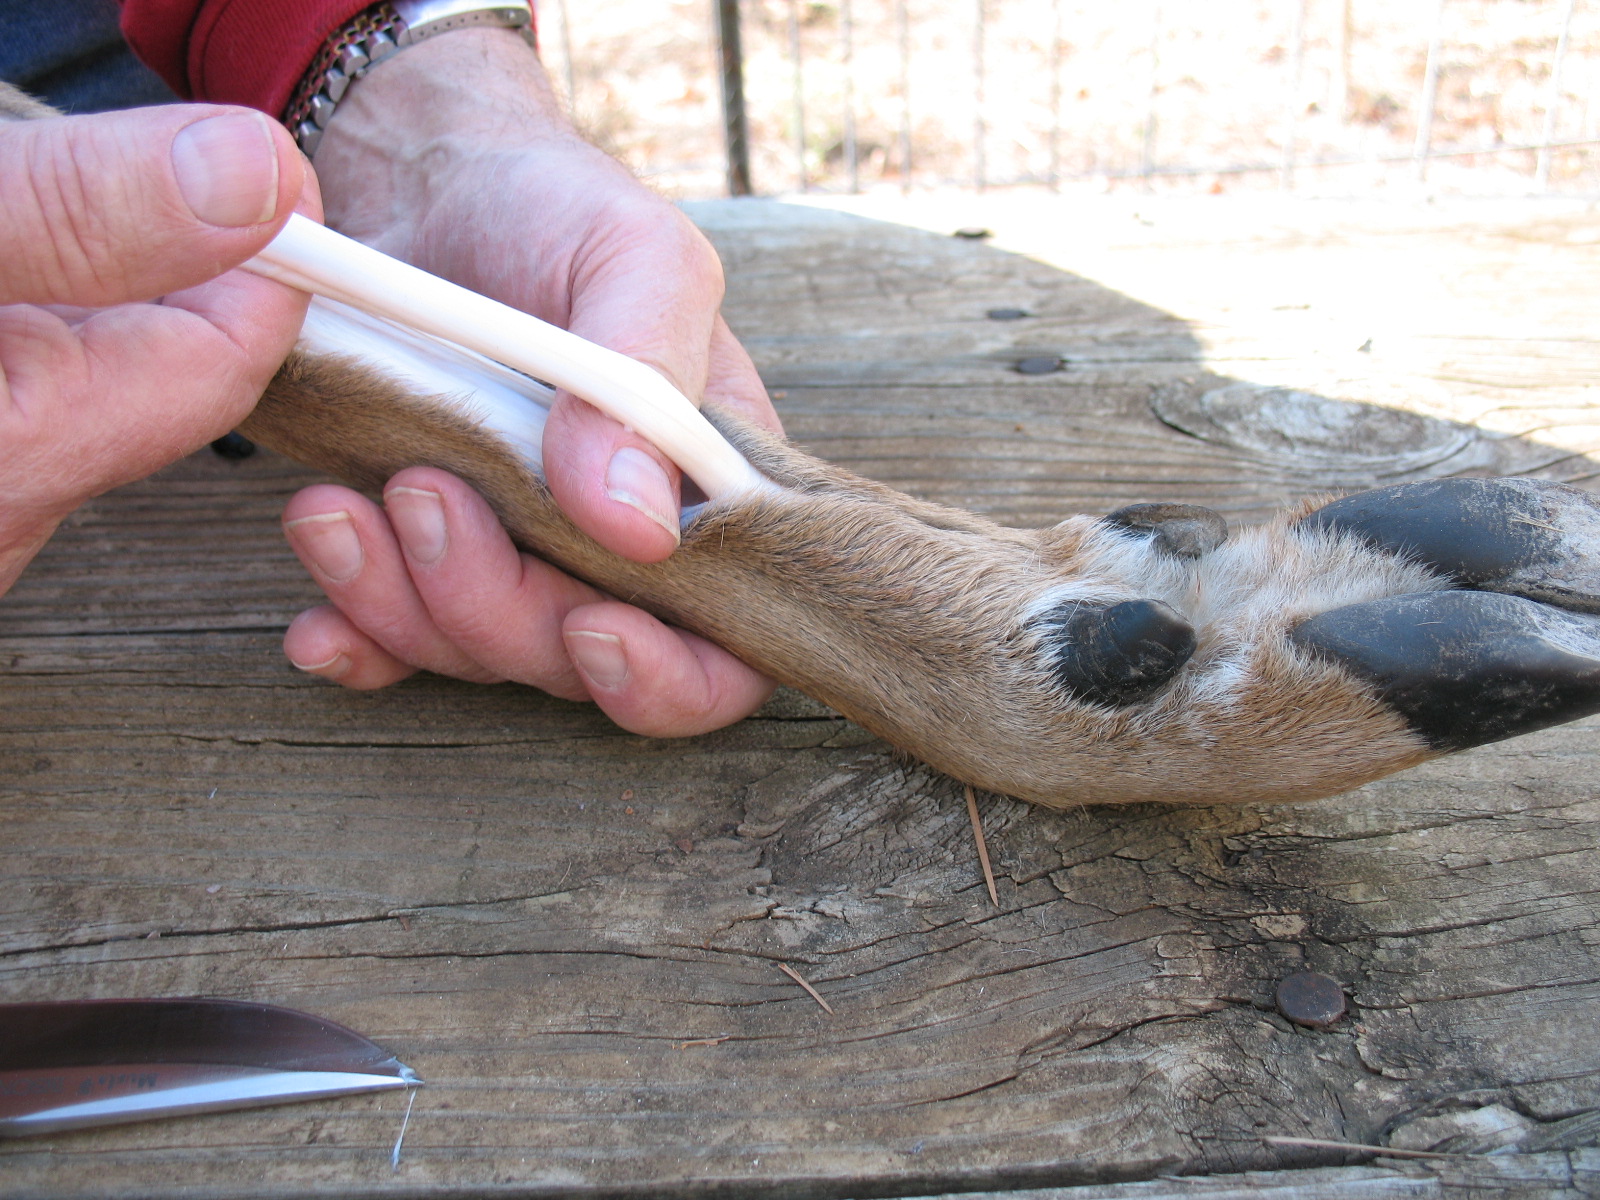
I usually run my knife down toward the hoof, and when I can’t go any farther, I turn the blade up and slice through the tendon freeing that end. You can then grab the tendon with you hand and peel it out down toward the knee joint. When you pull up as much of the tendon as you can get, cut that end off with your knife. 
There may be some membrane left sticking to the tendon (kind of a slimy case) and if you can remove this it will be helpful although it’s not vitally necessary.When you have a white floppy tendon in your hand, the hard part is done. 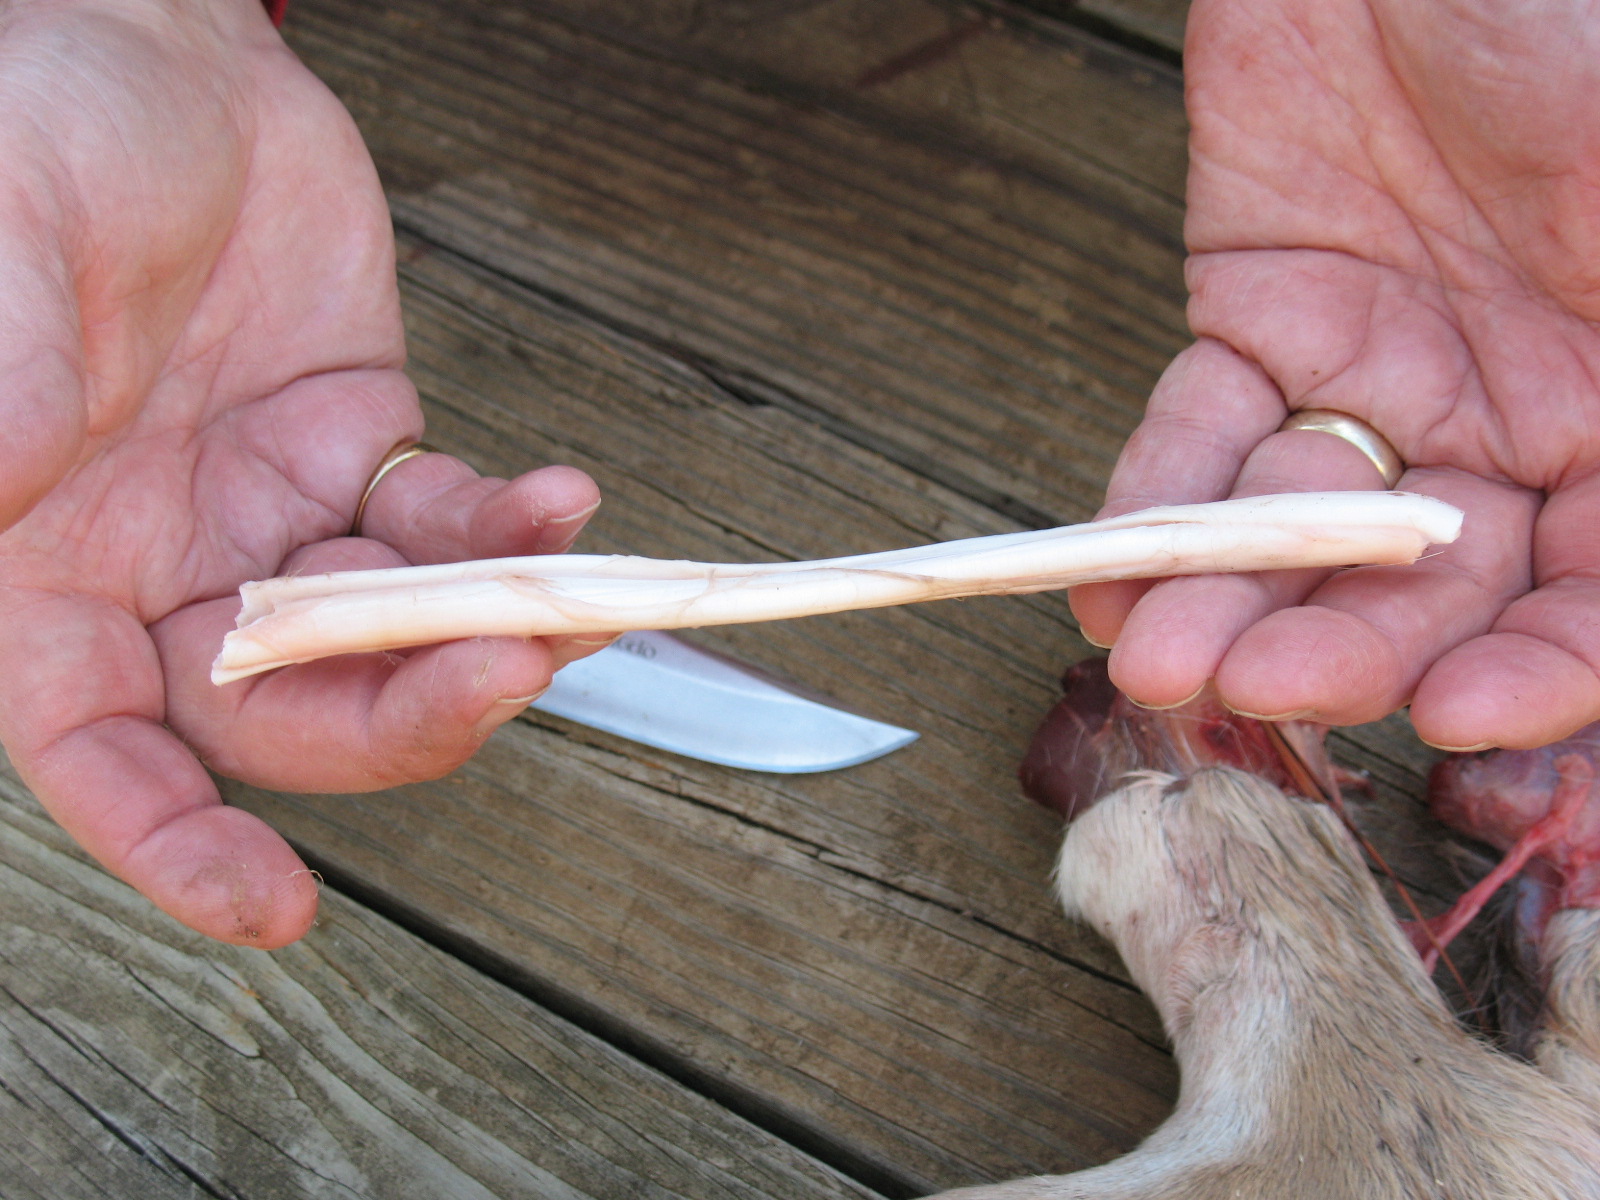
Just set the tendon out in the sun or on the kitchen drain board if your spouse is out of town. In less than twenty-four hours the soft wet tendon will be hard, dry, and kind of a translucent yellow color. It looks a lot like plastic. 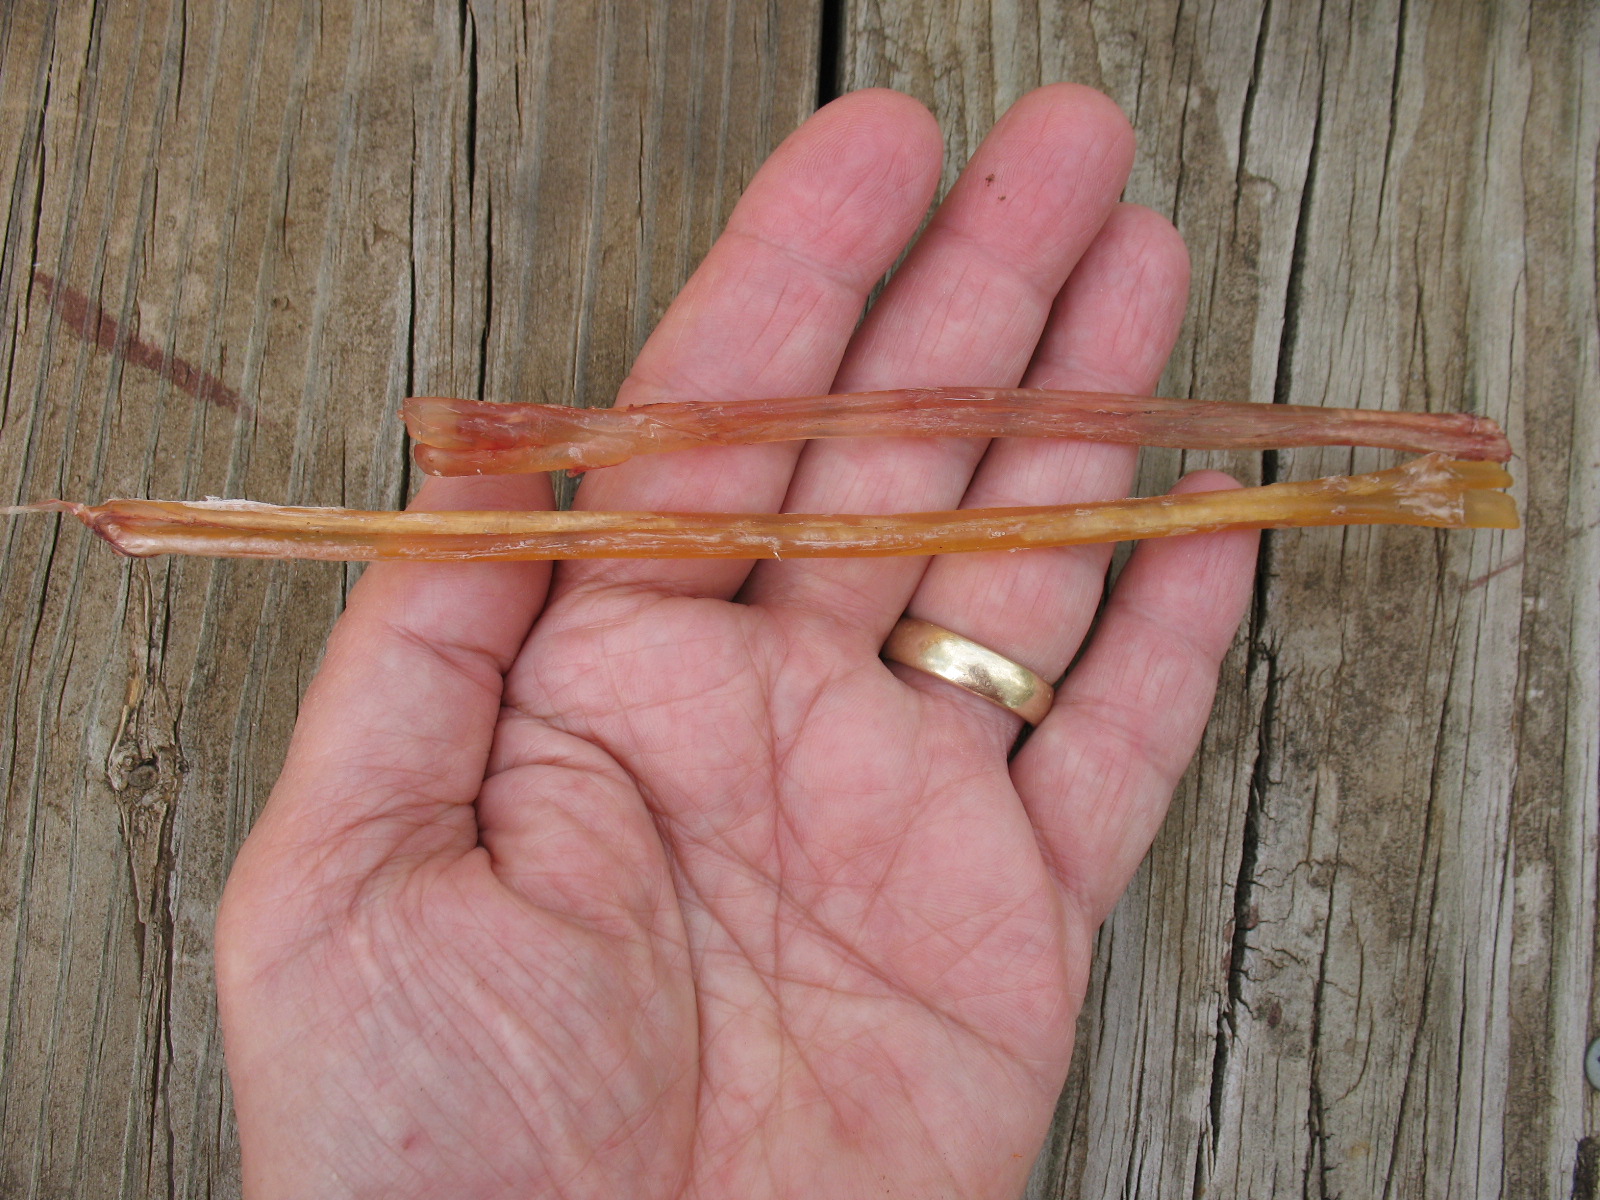
Now take the dried tendon and use a smooth round rock or the round end of a ball peen hammer and start pounding. What ever you pound with, it needs to be rounded. Flat edges, like the flat of a hammer or axe, will cut the fibers in the sinew. 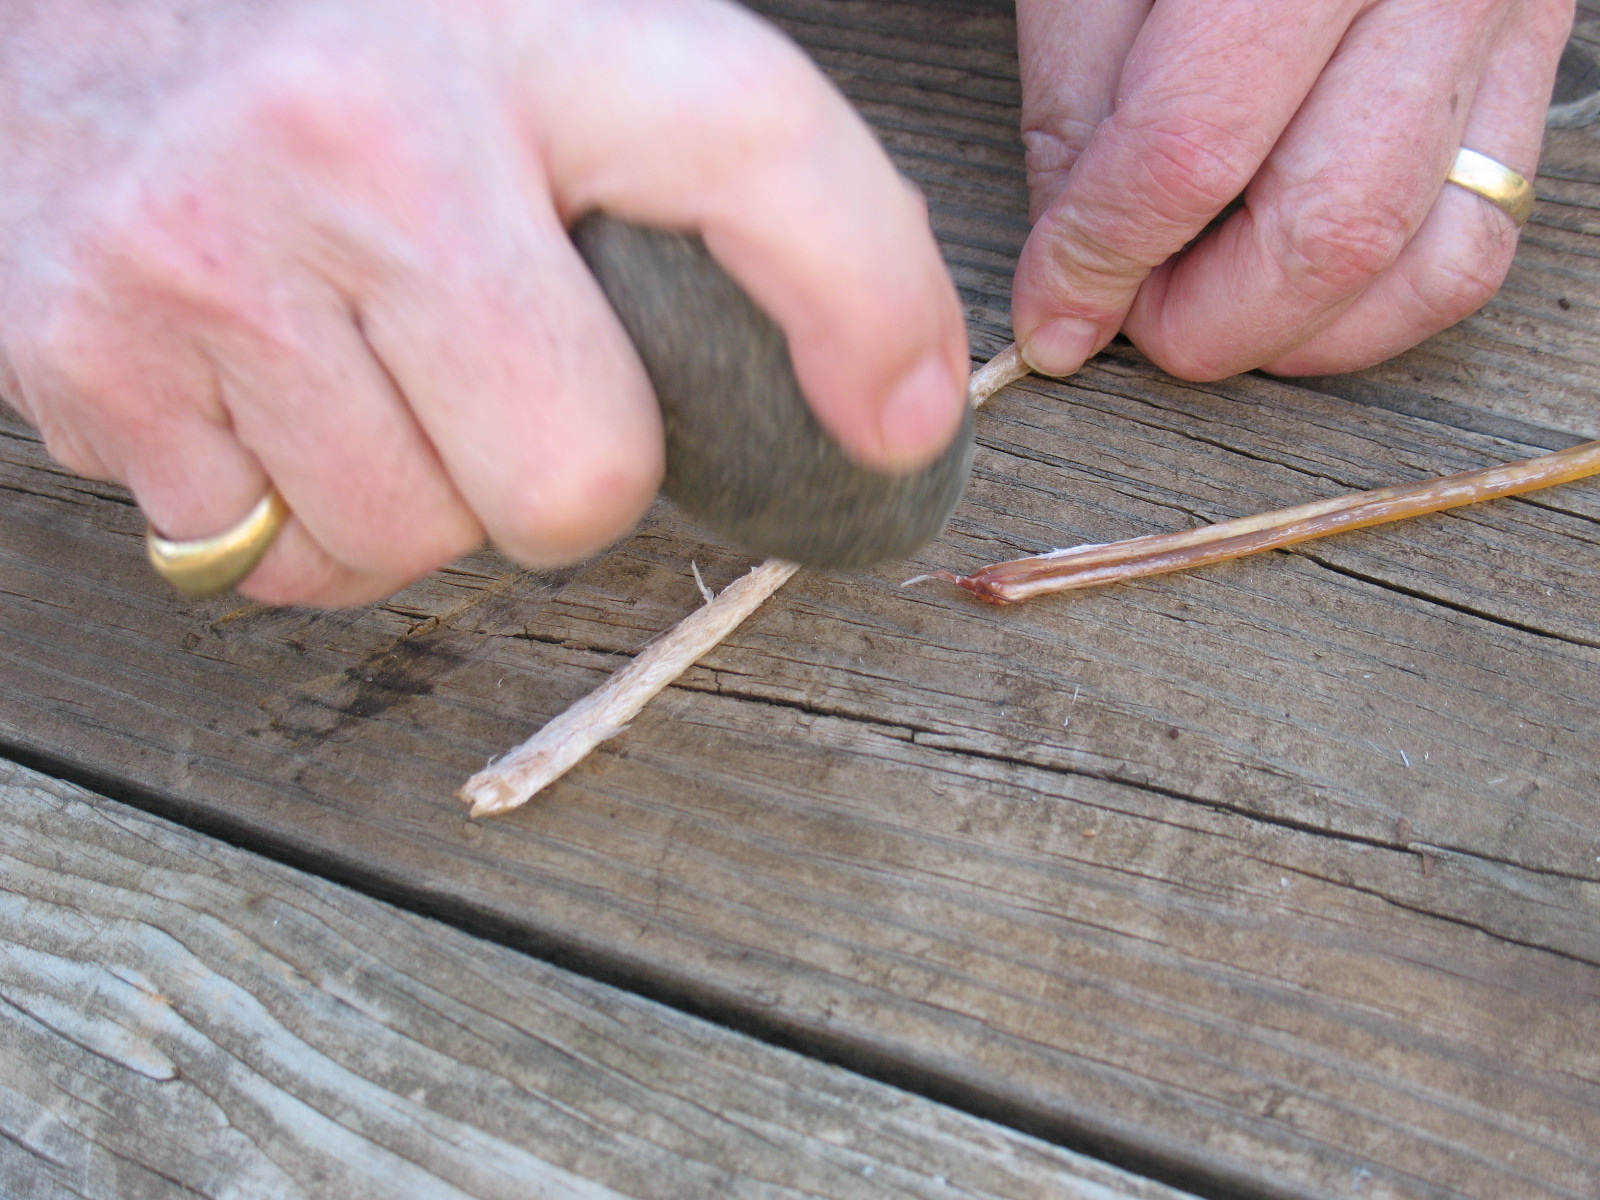
As you pound, the sinew will start to turn white, and it will begin to separate into fluffy white fibers. You can now take you fingers and pull apart the fibers is small bundles about the thickness of a pencil lead or smaller. 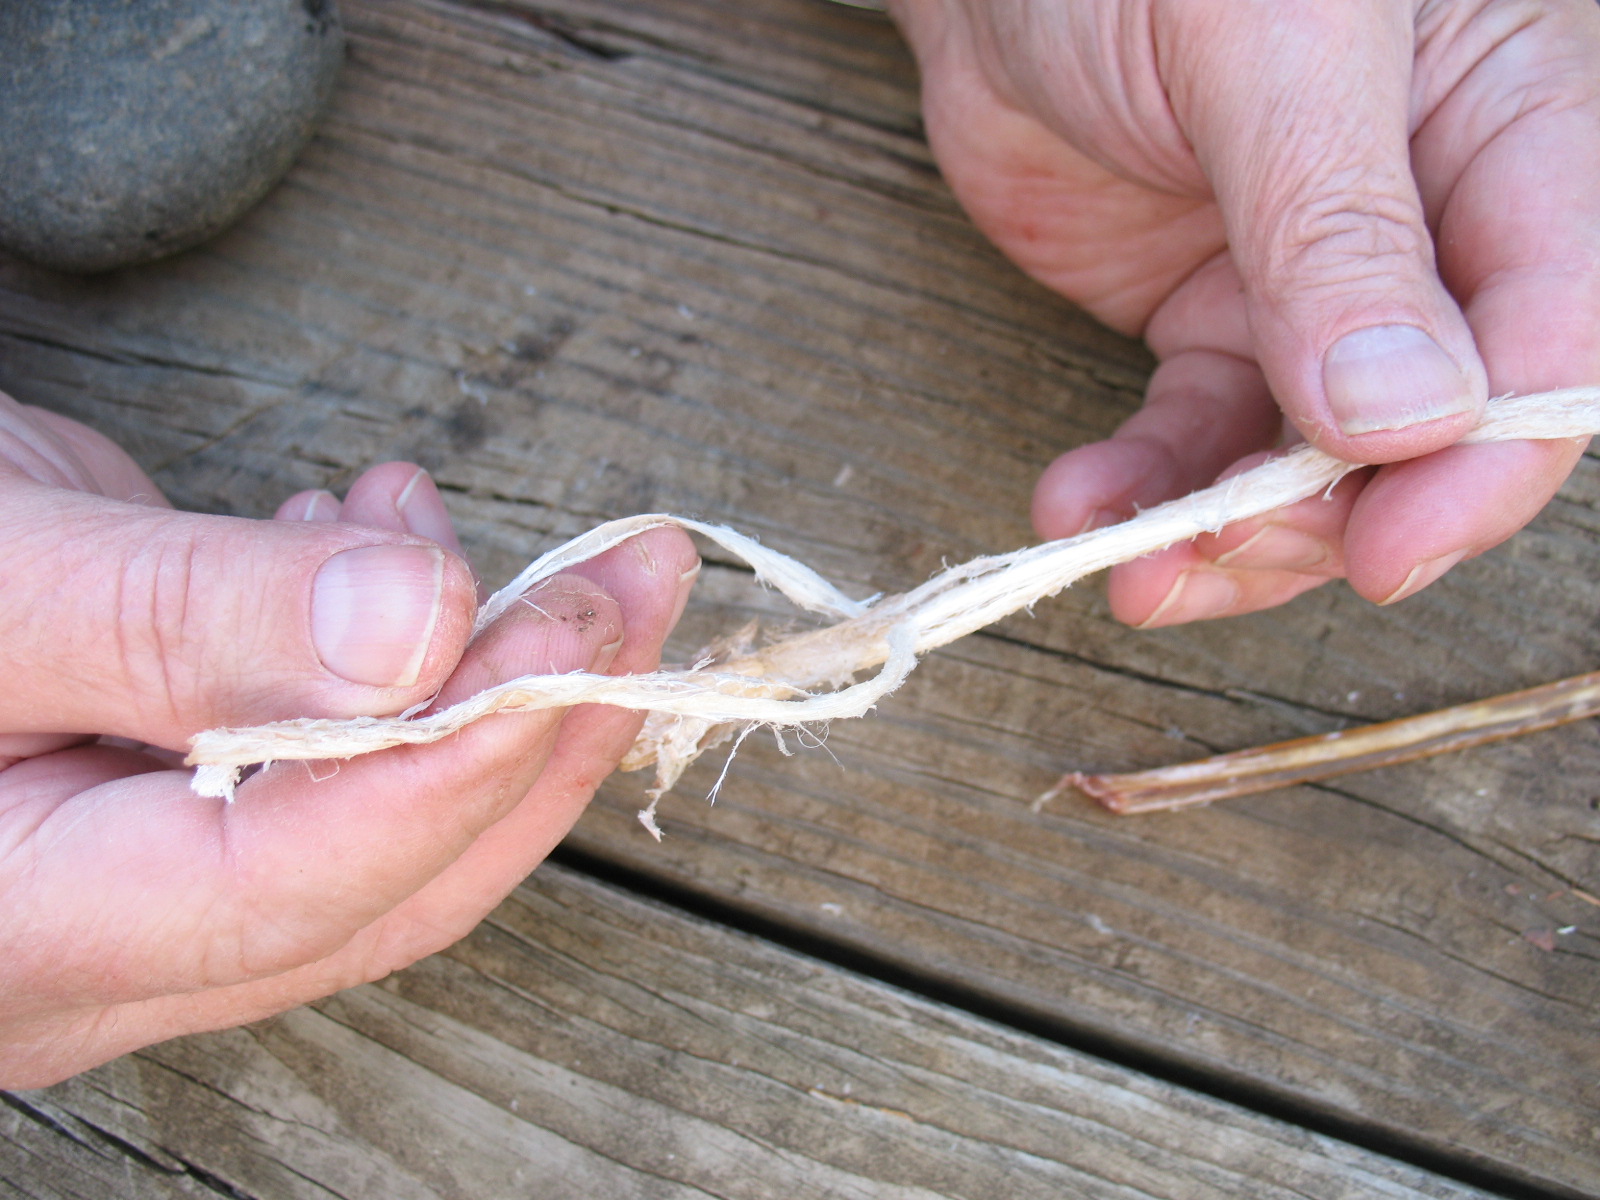
These little fiber bundles are what you’re looking for. You can use them to back a bow, make a bow string, sew leather together, tie on arrowheads etc.
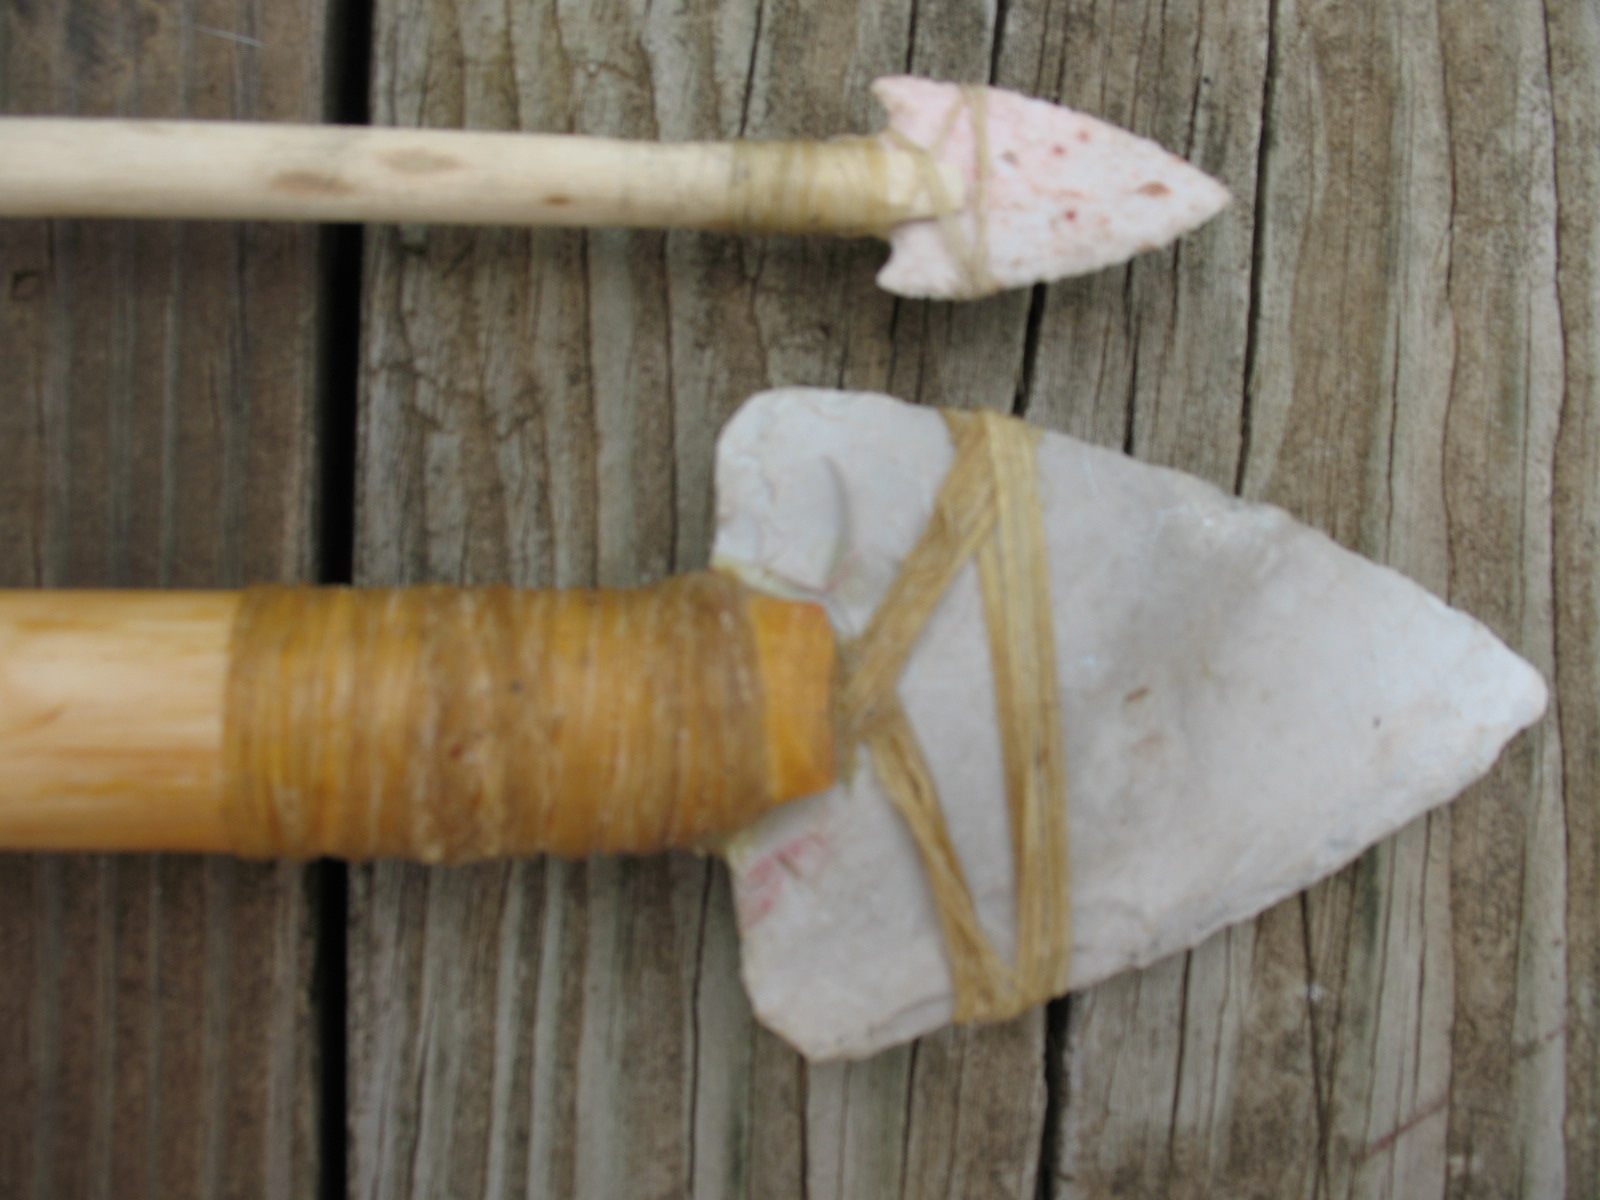
To use the sinew to, for example, tie on an arrow head; all you have to do is pop a piece in your mouth and chew on it a little. Don’t be squeamish. It’s no different than chewing on a piece of deer jerky. The saliva in your mouth and the gentle chewing will soften the sinew in seconds. Don’t chew too long or you will wash all of the glue out of the sinew.
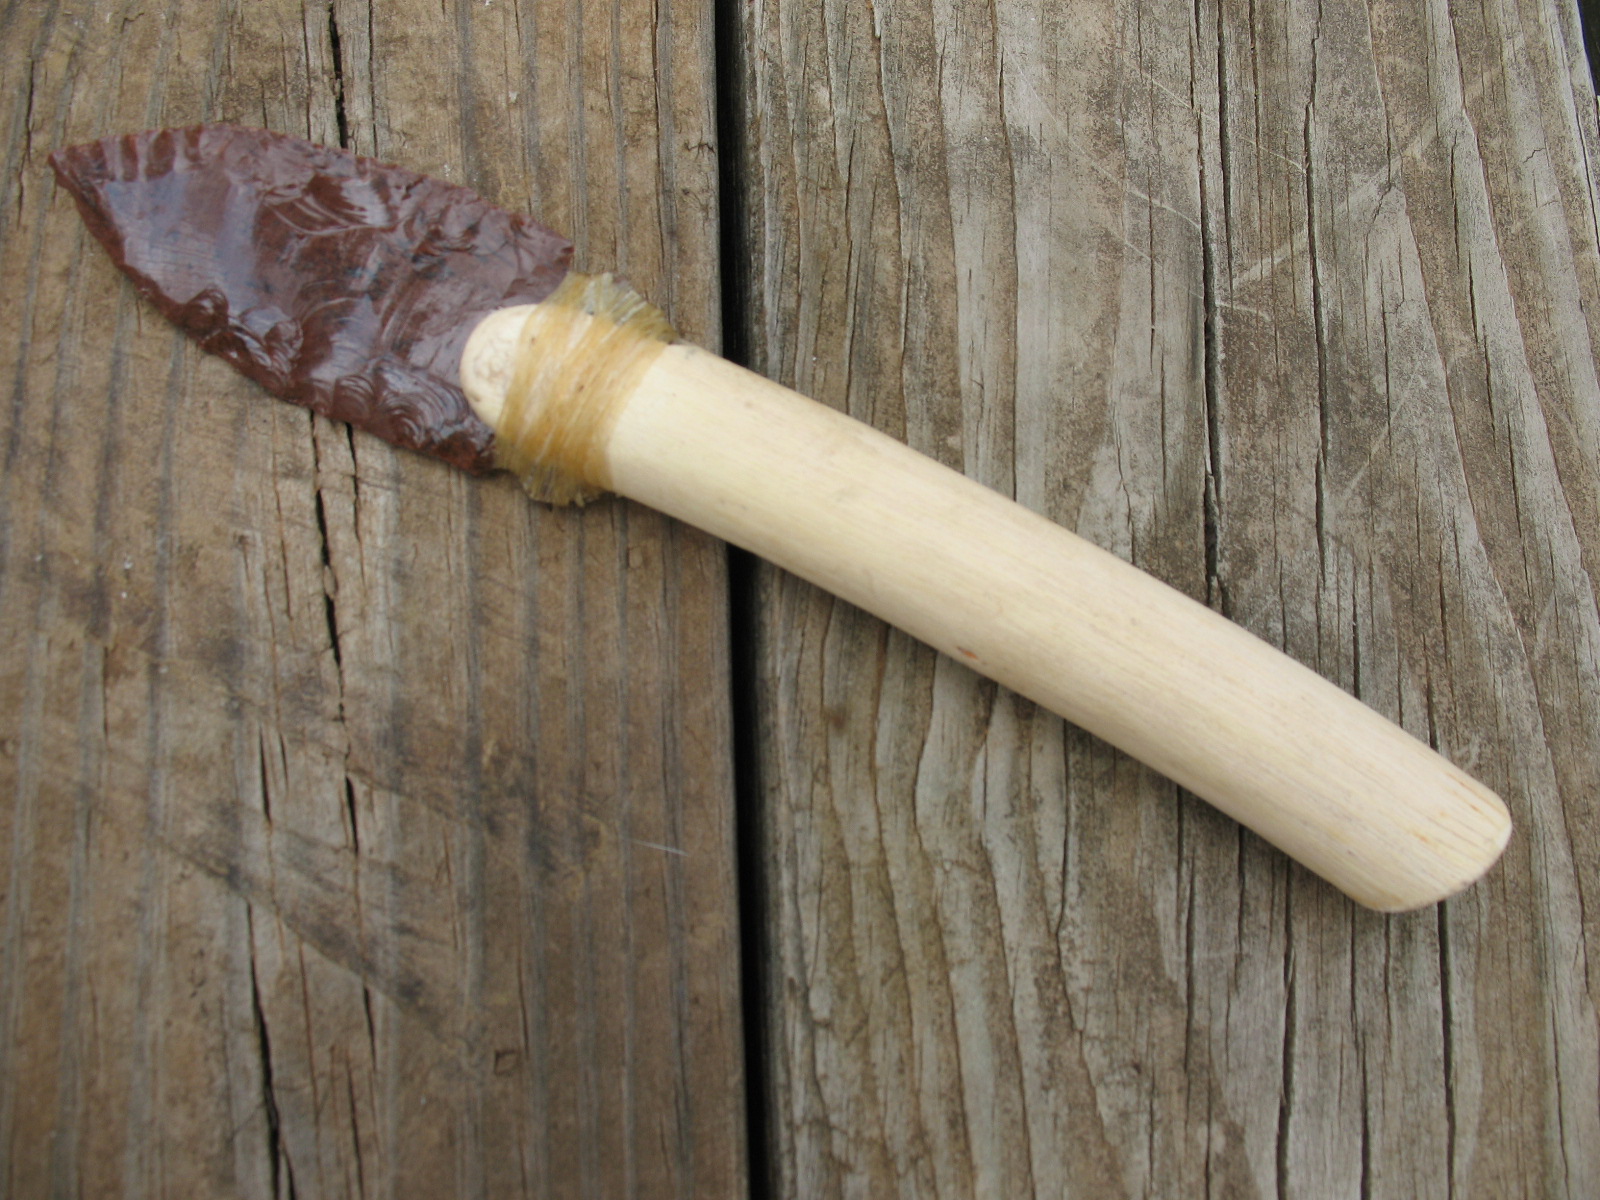
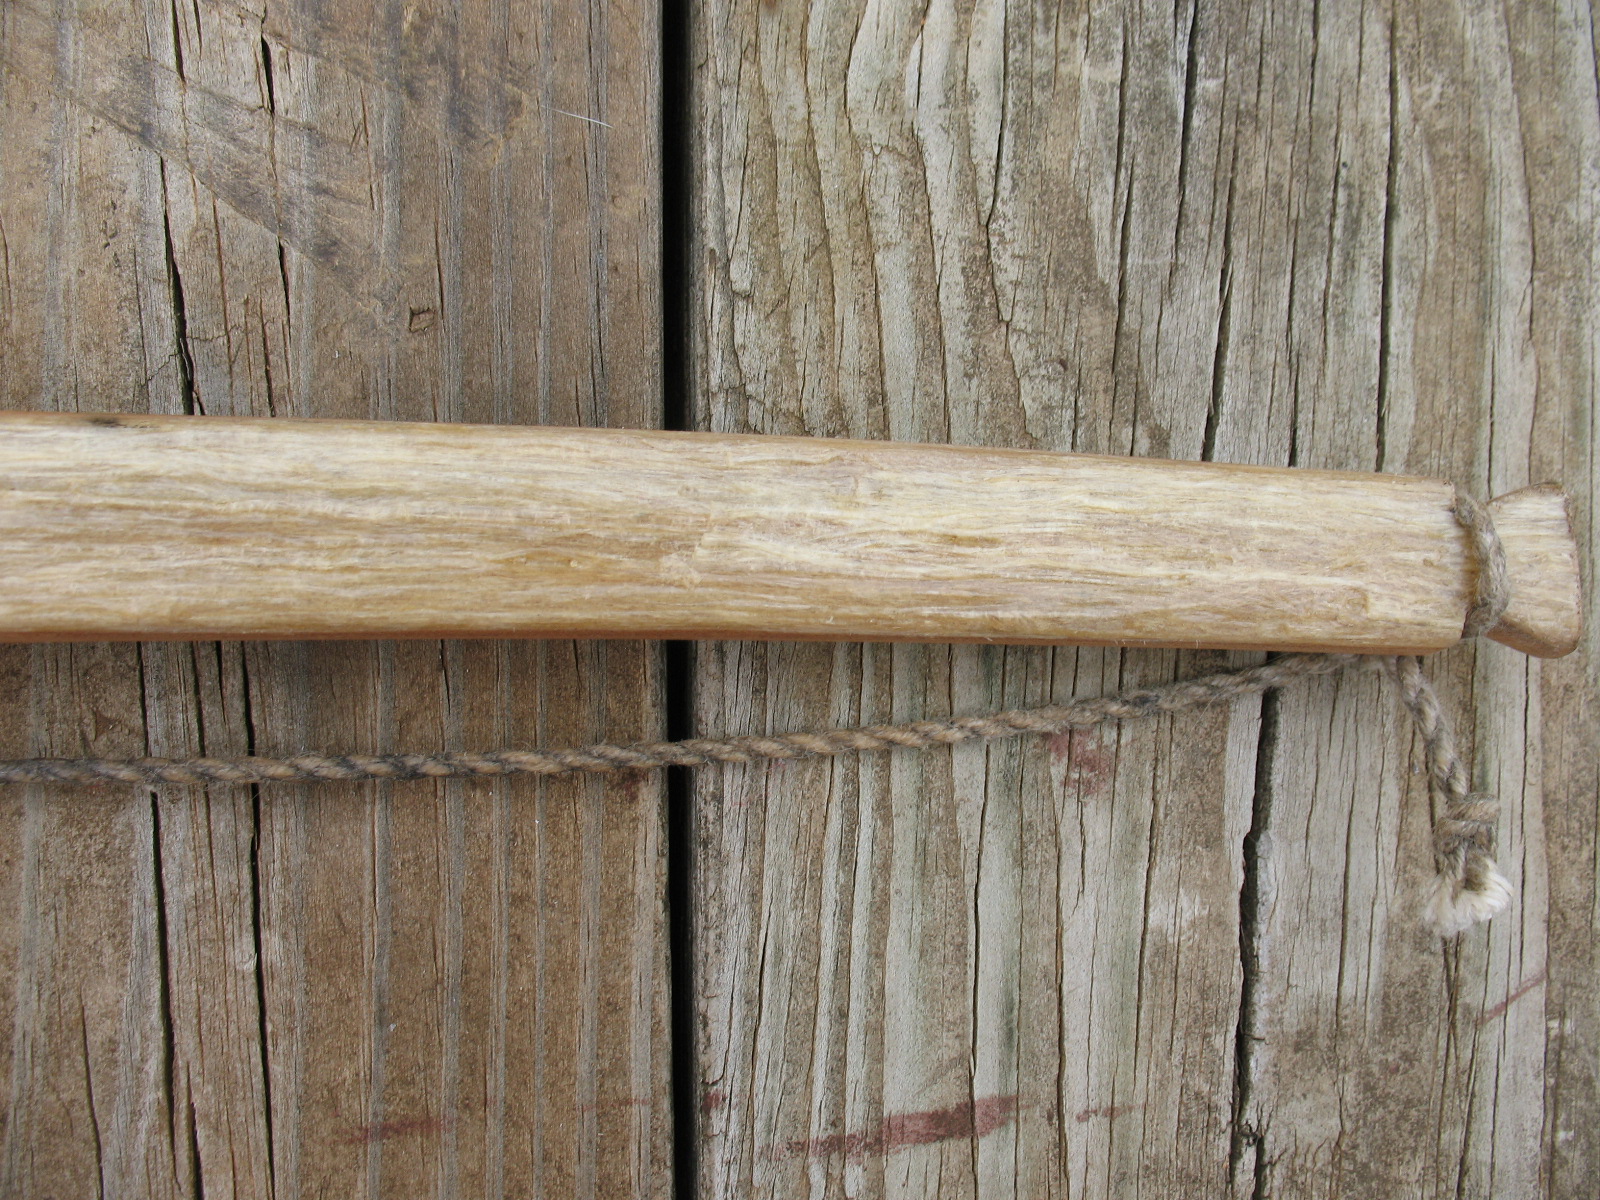
When the sinew is soft remove it from your mouth and wrap it around your arrowhead. You don’t have to tie it off because the sinew will stick to itself. Set it in the sun for twenty or thirty minutes and it will dry hard and tight. Coat the sinew with melted pine sap or carpenter’s glue and let it dry. Pictured below: sinew bow string, arrowhead, spearhead, and knife blade all attached with sinew; and sinew backing on an elm wood bow.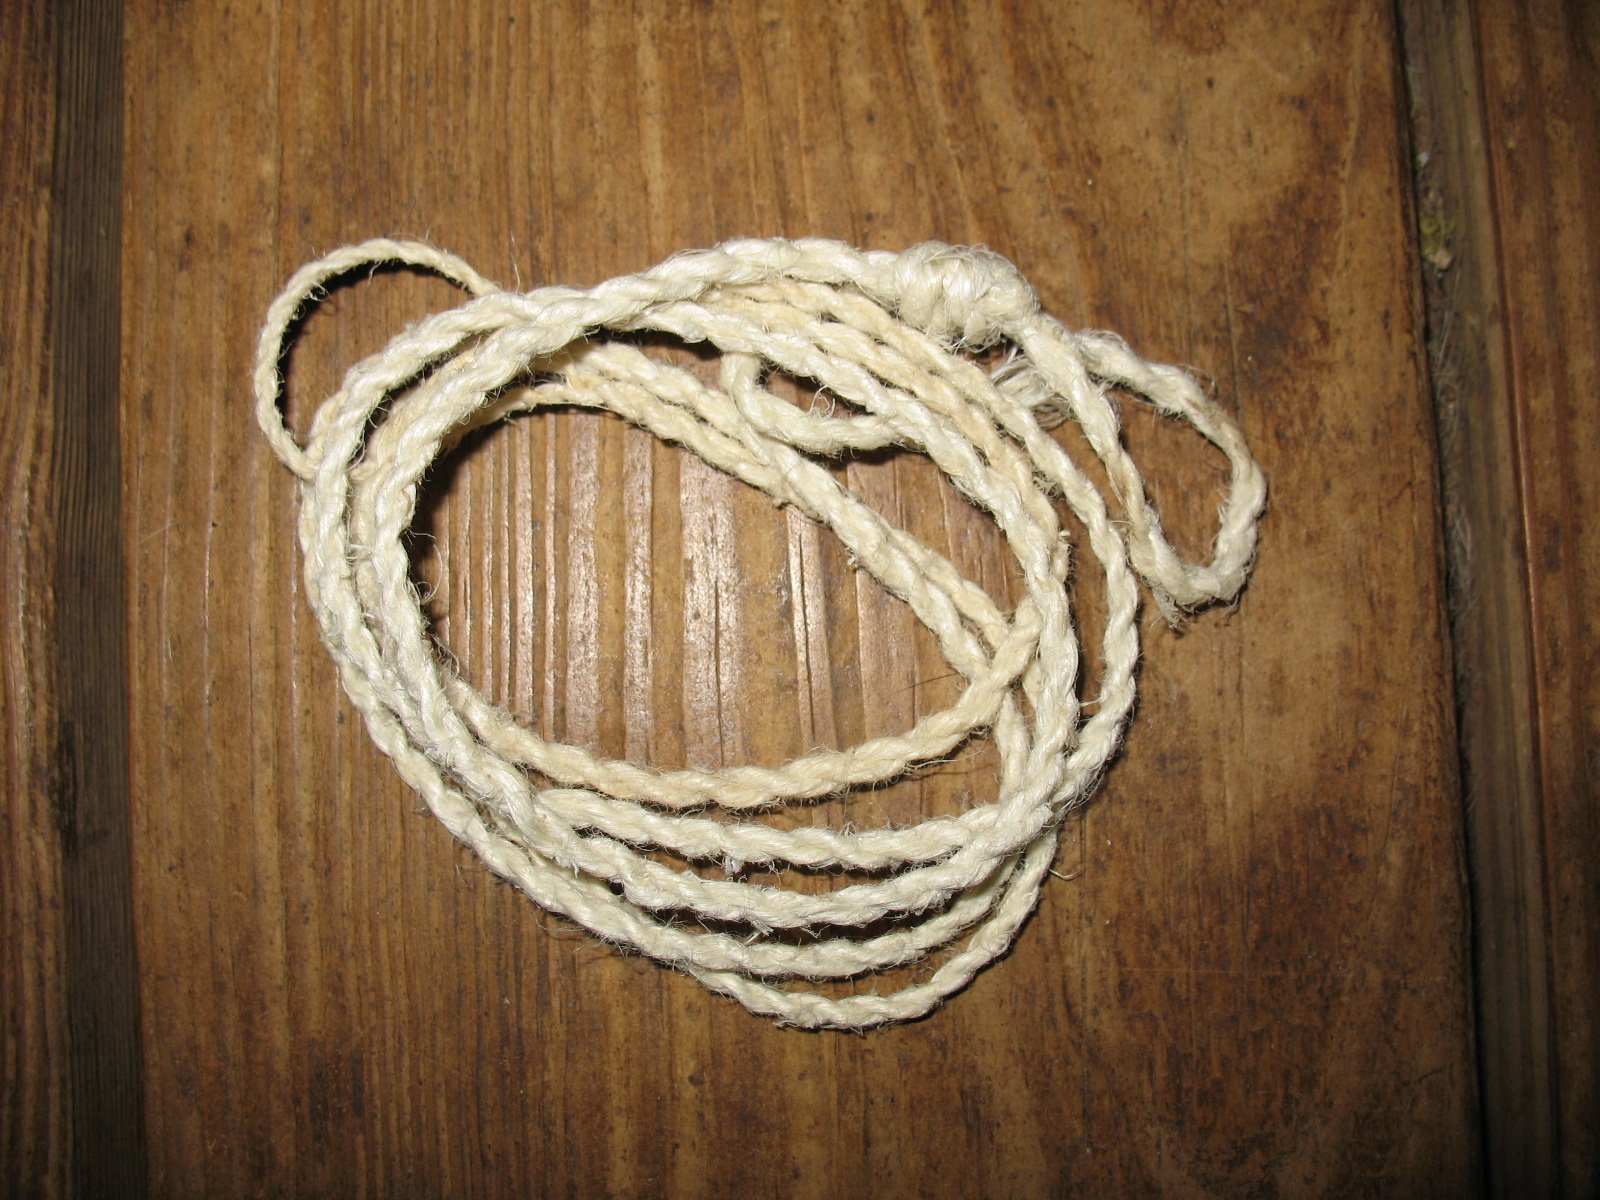
That’s all there is to it. Amazing isn’t it!
Trackbacks & Pingbacks
- Welcome to the site! Please post an introduction thread. - Page 32
- Dhananjay Parkheº JayErudite Thinker, Passionate Author, Ambivert Speaker, Calculated Risk-taker Entrepreneur, Dedicated All-in Mentor10 Really Weird Chinese Medical Treatments And Their Effects – Listverse
- 10 Really Weird Chinese Medical Treatments And Their Effects – Fluky
- 7 من أغرب العلاجات الطبية الصينية - مجلة وسع صدرك
- Survival Kills – DiscoverySurvival.com

That’s an amazing amount of knowledge that I’ve just been taught by your instructions. I never knew that that was anything on a deer that was even useful. Thanks for spending the time to help educate the lesser men like me to the more and more useful things leftover from our game kills.
How do I make a bowstring
Ken,
Making a sinew bowstring is a pretty difficult skill. The hardest part is learning how to splice in new sinew fibers and to keep the string a consistent thickness. The longer sinews that you have the easier it is because you have less splices. It is best to practice by starting off with artificial sinew so that you don’t have to worry about splices, then move to yucca fibers so that you can learn to splice without using up a lot of hard-won sinew, and then finally making a real sinew string. To get started on string making go this this article on my blog https://sensiblesurvival.org/2009/02/25/primitive-bow-making-part-5/
Good luck,
Hank
Wow, i think it would be fun to hang out with you and pick your brains. This is an incredibly useful piece of information and ill always remember it now, thanks for sharing. Roger in Lexington, KY.
I’ve been looking for how to do this for awhile now. Great information and visuals. Thanks for putting this out!
Necessity shows the need to know this information, thanks.
Very informative, thanks! Can you comment on how to make longer lengths to tie things or how to bind together those little strings into something like the bow string?
Go to menu on the right and click on the link to “Primitive Archery” Scroll down to Primitive Bow Making Part 5. This is a post on how to make a primitive bowstring using the reverse wrap method. This method works for either plant fibers or sinew.
Where else on the animals body can you find sinew. Isn’t there going down the back to get longer strands
Yes, backstrap sinews are longer and thinner. Good for bow strings and tying on fletchings and points.
Sure am glad to see this post. Appreciate the information, it’s tremendously useful.