Making Glass Arrowheads – Part 2
Once you have roughed out the shape of your point, it is time to bring out the pressure flaker and start working down to your finished point. Most knappers do their pressure flaking with a deer antler tine or a piece of large guage copper wire mounted in a wooden handle. I personally use deer antler because that’s what I’ve got. You’ll also need a palm pad to protect your hand while you’re pressure flaking. I use a piece of heavy leather, like belt leather. The pad is oval shaped and a little bigger than the palm of my hand. The leather needs to be flexible so that you can close the pad around the piece that you are knapping and hold it tight. Shown below: Pressure flaking tools. 
When you pressure flake, you need to be fairly precise on where you remove a flake. Pressure flaking is how you will finish out the shape of the point and how you will straighten out the edge of the arrowhead so that it is sharp and will penetrate well. You want to try and make your flakes long so that you will not be left with a bulky point that’s fat in the middle. The trick to pressure flaking is to push in and down on the edge. If you just push down you’ll end up taking off a short flake and you’ll have a point that’s fat in the middle and then drops off at a too steep angle to the edge. Pictured below: How to take off flakes so that you keep the edge centered.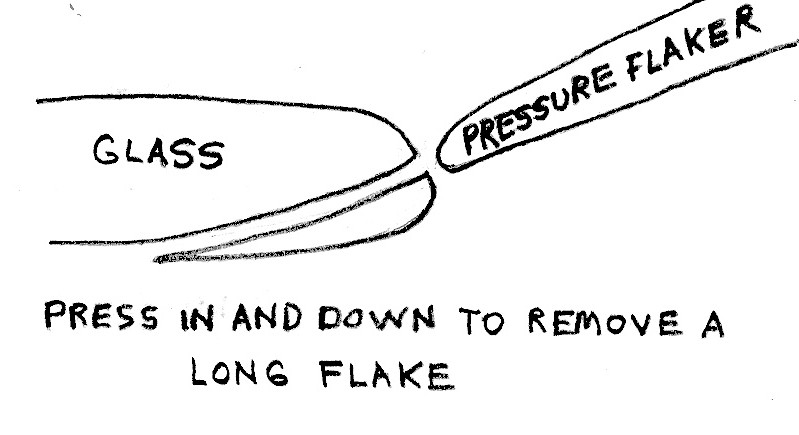

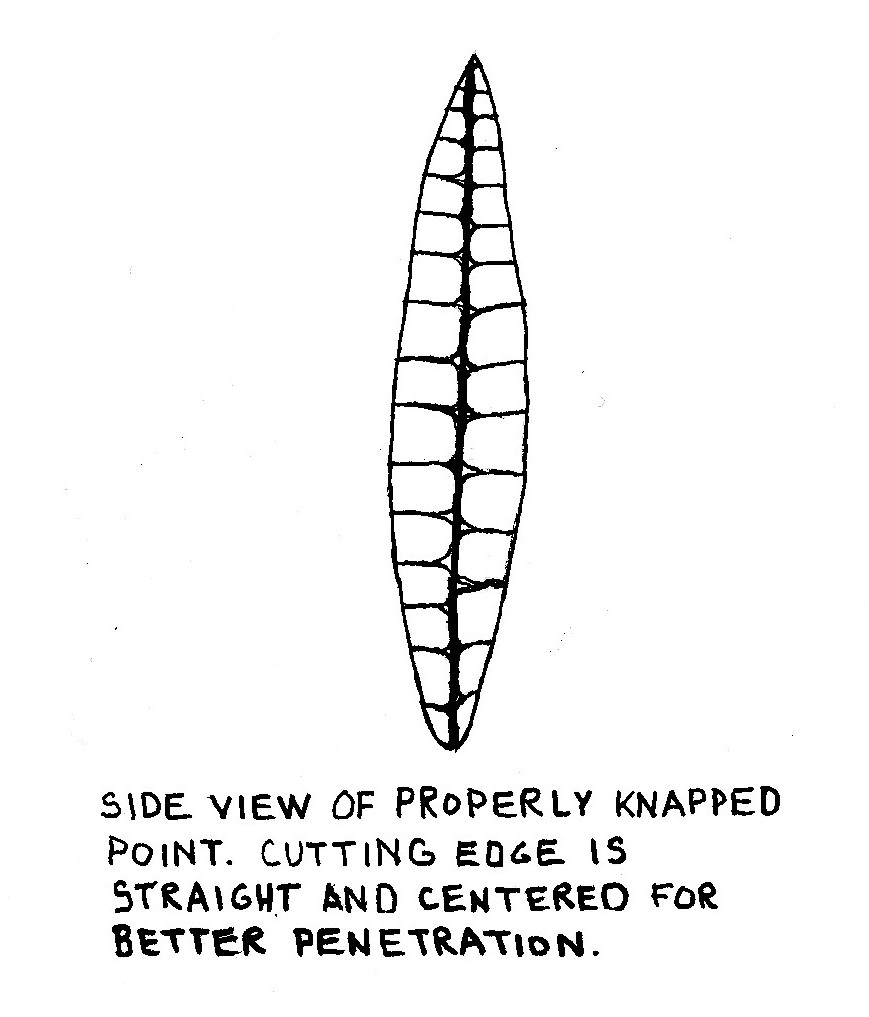
It takes practice, but that’s why you’re using glass, so you can practice. If you have a thin edge, pushing in and down may crush the edge rather than taking off a flake. You can prevent this by rubbing the edge on a piece of sandstone to grind it flat, and then using your pressure flaker to take off a flake. Turn your point up on edge and look at it frequently. You want the cutting edge of the point to run straight and to be centered. In other words, remember to flake both sides of the edge. Show below: Top: Improperly knapped edge; Bottom: Properly knapped edge. 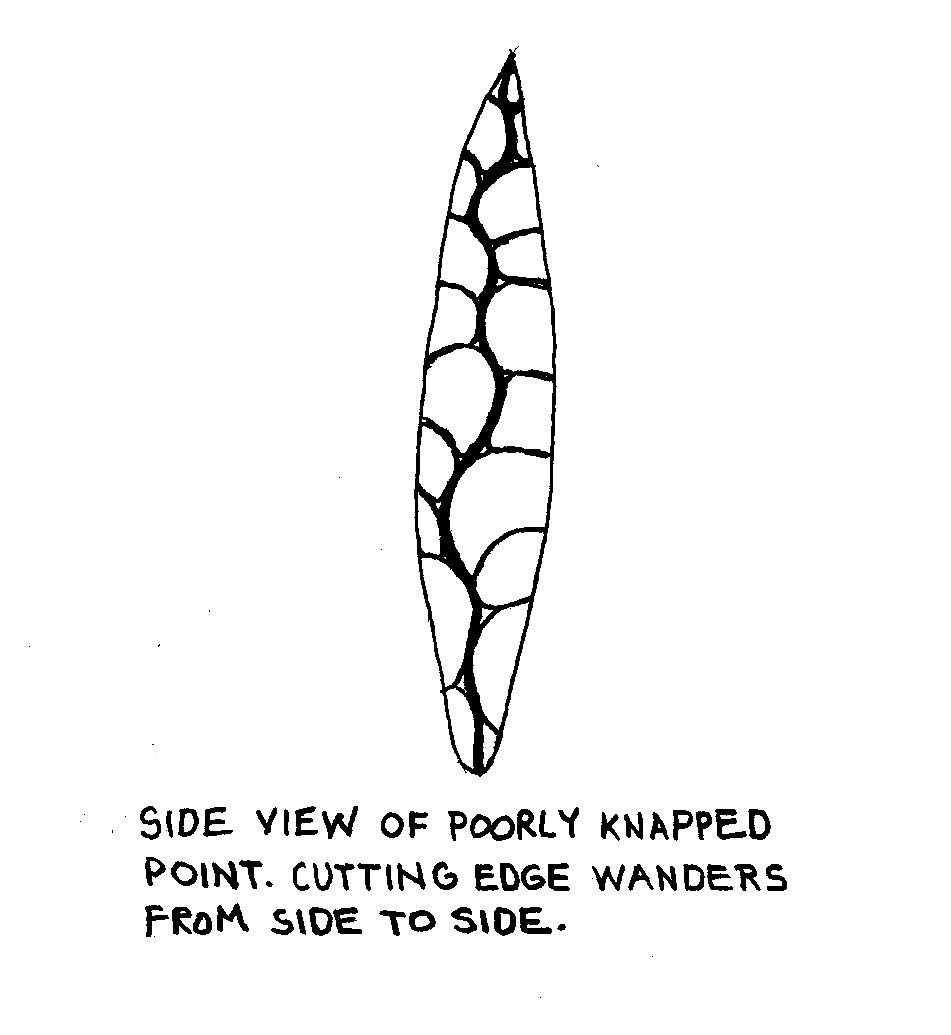
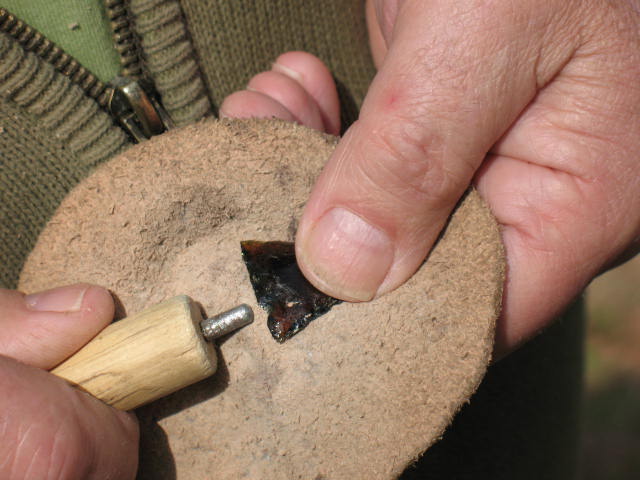
The final step to finishing up your point is to cut the base notches for mounting the point on an arrow shaft. I made a special tool for cutting notches. I just drove a six penny nail into a wooden handle and clipped the head off of the nail. I use the same flaking motion to carefully cut the notches, and “shazam” I have a finished glass point. Pictured below: Finished point without notches, flaking notches, and finished point with notches.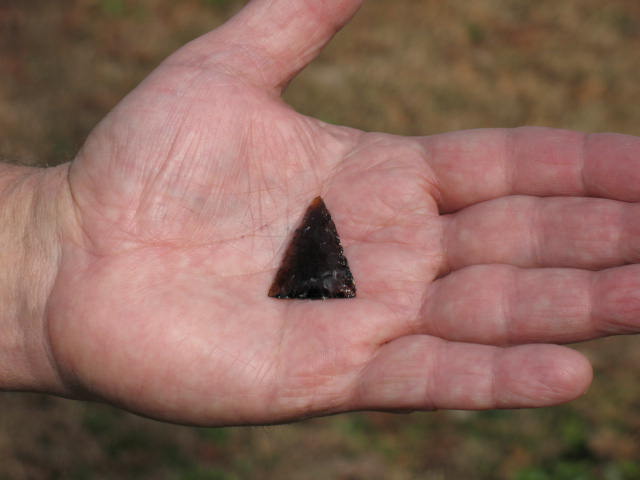

By the way, I have since learned that Native Americans used glass, when they found it, to make some of their points. Ishi, the famous “last wild Indian” made beautiful points from broken bottles, so this is not just some modern invention. Shown below: Finished glass points.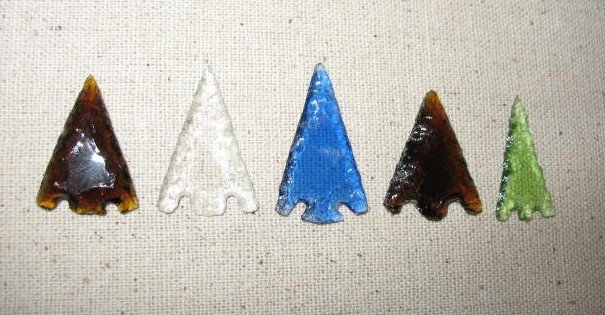
So there you have it. A cheap readily available supply of knapping materials. Practice and enjoy. You’ll find that your skills will improve, and you can move on to using that flint and obsidian that you’ve been afraid to bust into; or you may, like me, get hooked on knapping glass. Either way it’s a great hobby.

Also, if things ever get bad enough that this becomes the main source of hunting one can always take window glass and file/sand to make edges. Did it once just to see if it would work and it did, not sure how it would compare to a flaked glass head though. Doing that also makes a fairly decent knife for low impact jobs such as skinning and other light cutting.
A really good source of thick glass would be ashtrays.
A really good source of thick glass would be ashtrays which are cheap at garage sales.