Make a Survival Brush Shelter
This is a skill that everyone should master. I taught my own children how to make a survival shelter when they were five or six years old. They loved it. What could be more fun to a kid than building your own little home in the woods? 
The reason that this is an important skill is because hypothermia, often referred to in news stories as “exposure”, is the leading cause of death among those who are lost in the wilderness. You can survive for several days without water, you can survive for weeks without food, but the loss of your core body heat will kill you in a matter of hours. It doesn’t have to be freezing cold for you to become hypothermic. If you are tired and wet, and the wind is blowing you can become hypothermic at temperatures as high as 55 degree Fahrenheit.
There’s really no reason for this to happen. Your body is constantly churning out heat at 98.6 degrees Fahrenheit. All you have to do is keep this heat from escaping, and you will survive. Follow these simple directions to make a survival brush shelter that will help you retain your body’s vital core heat.
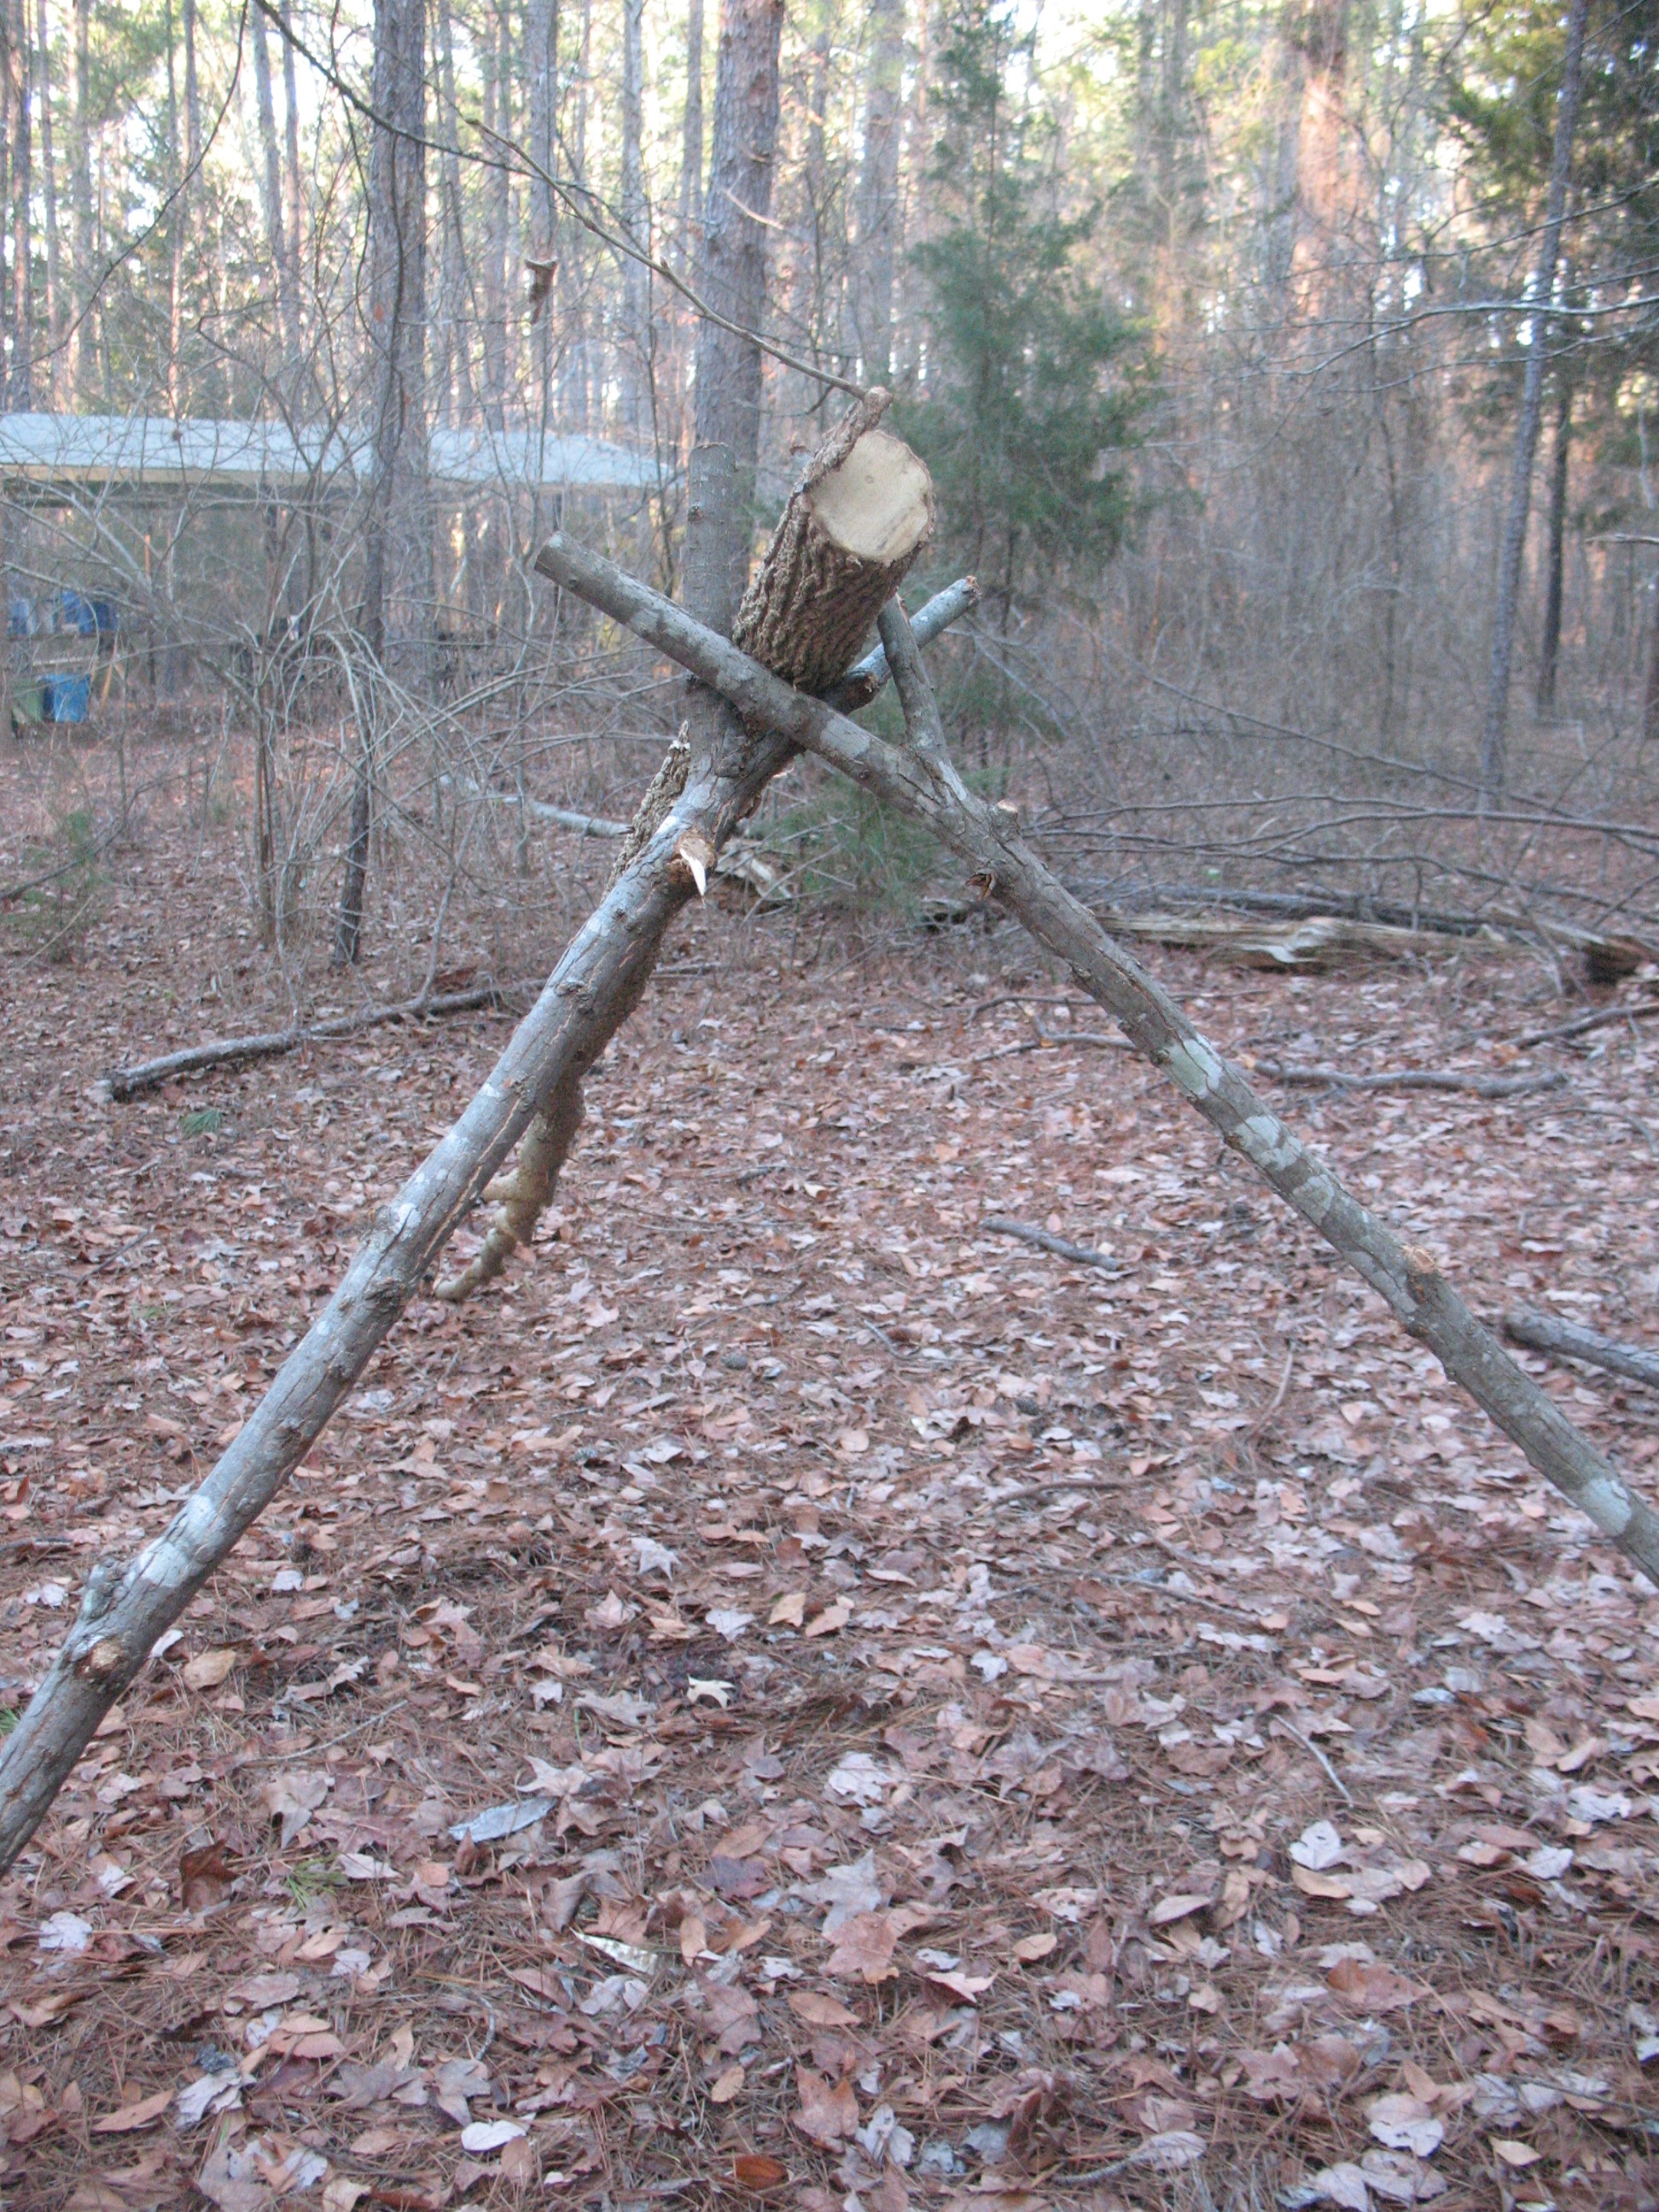
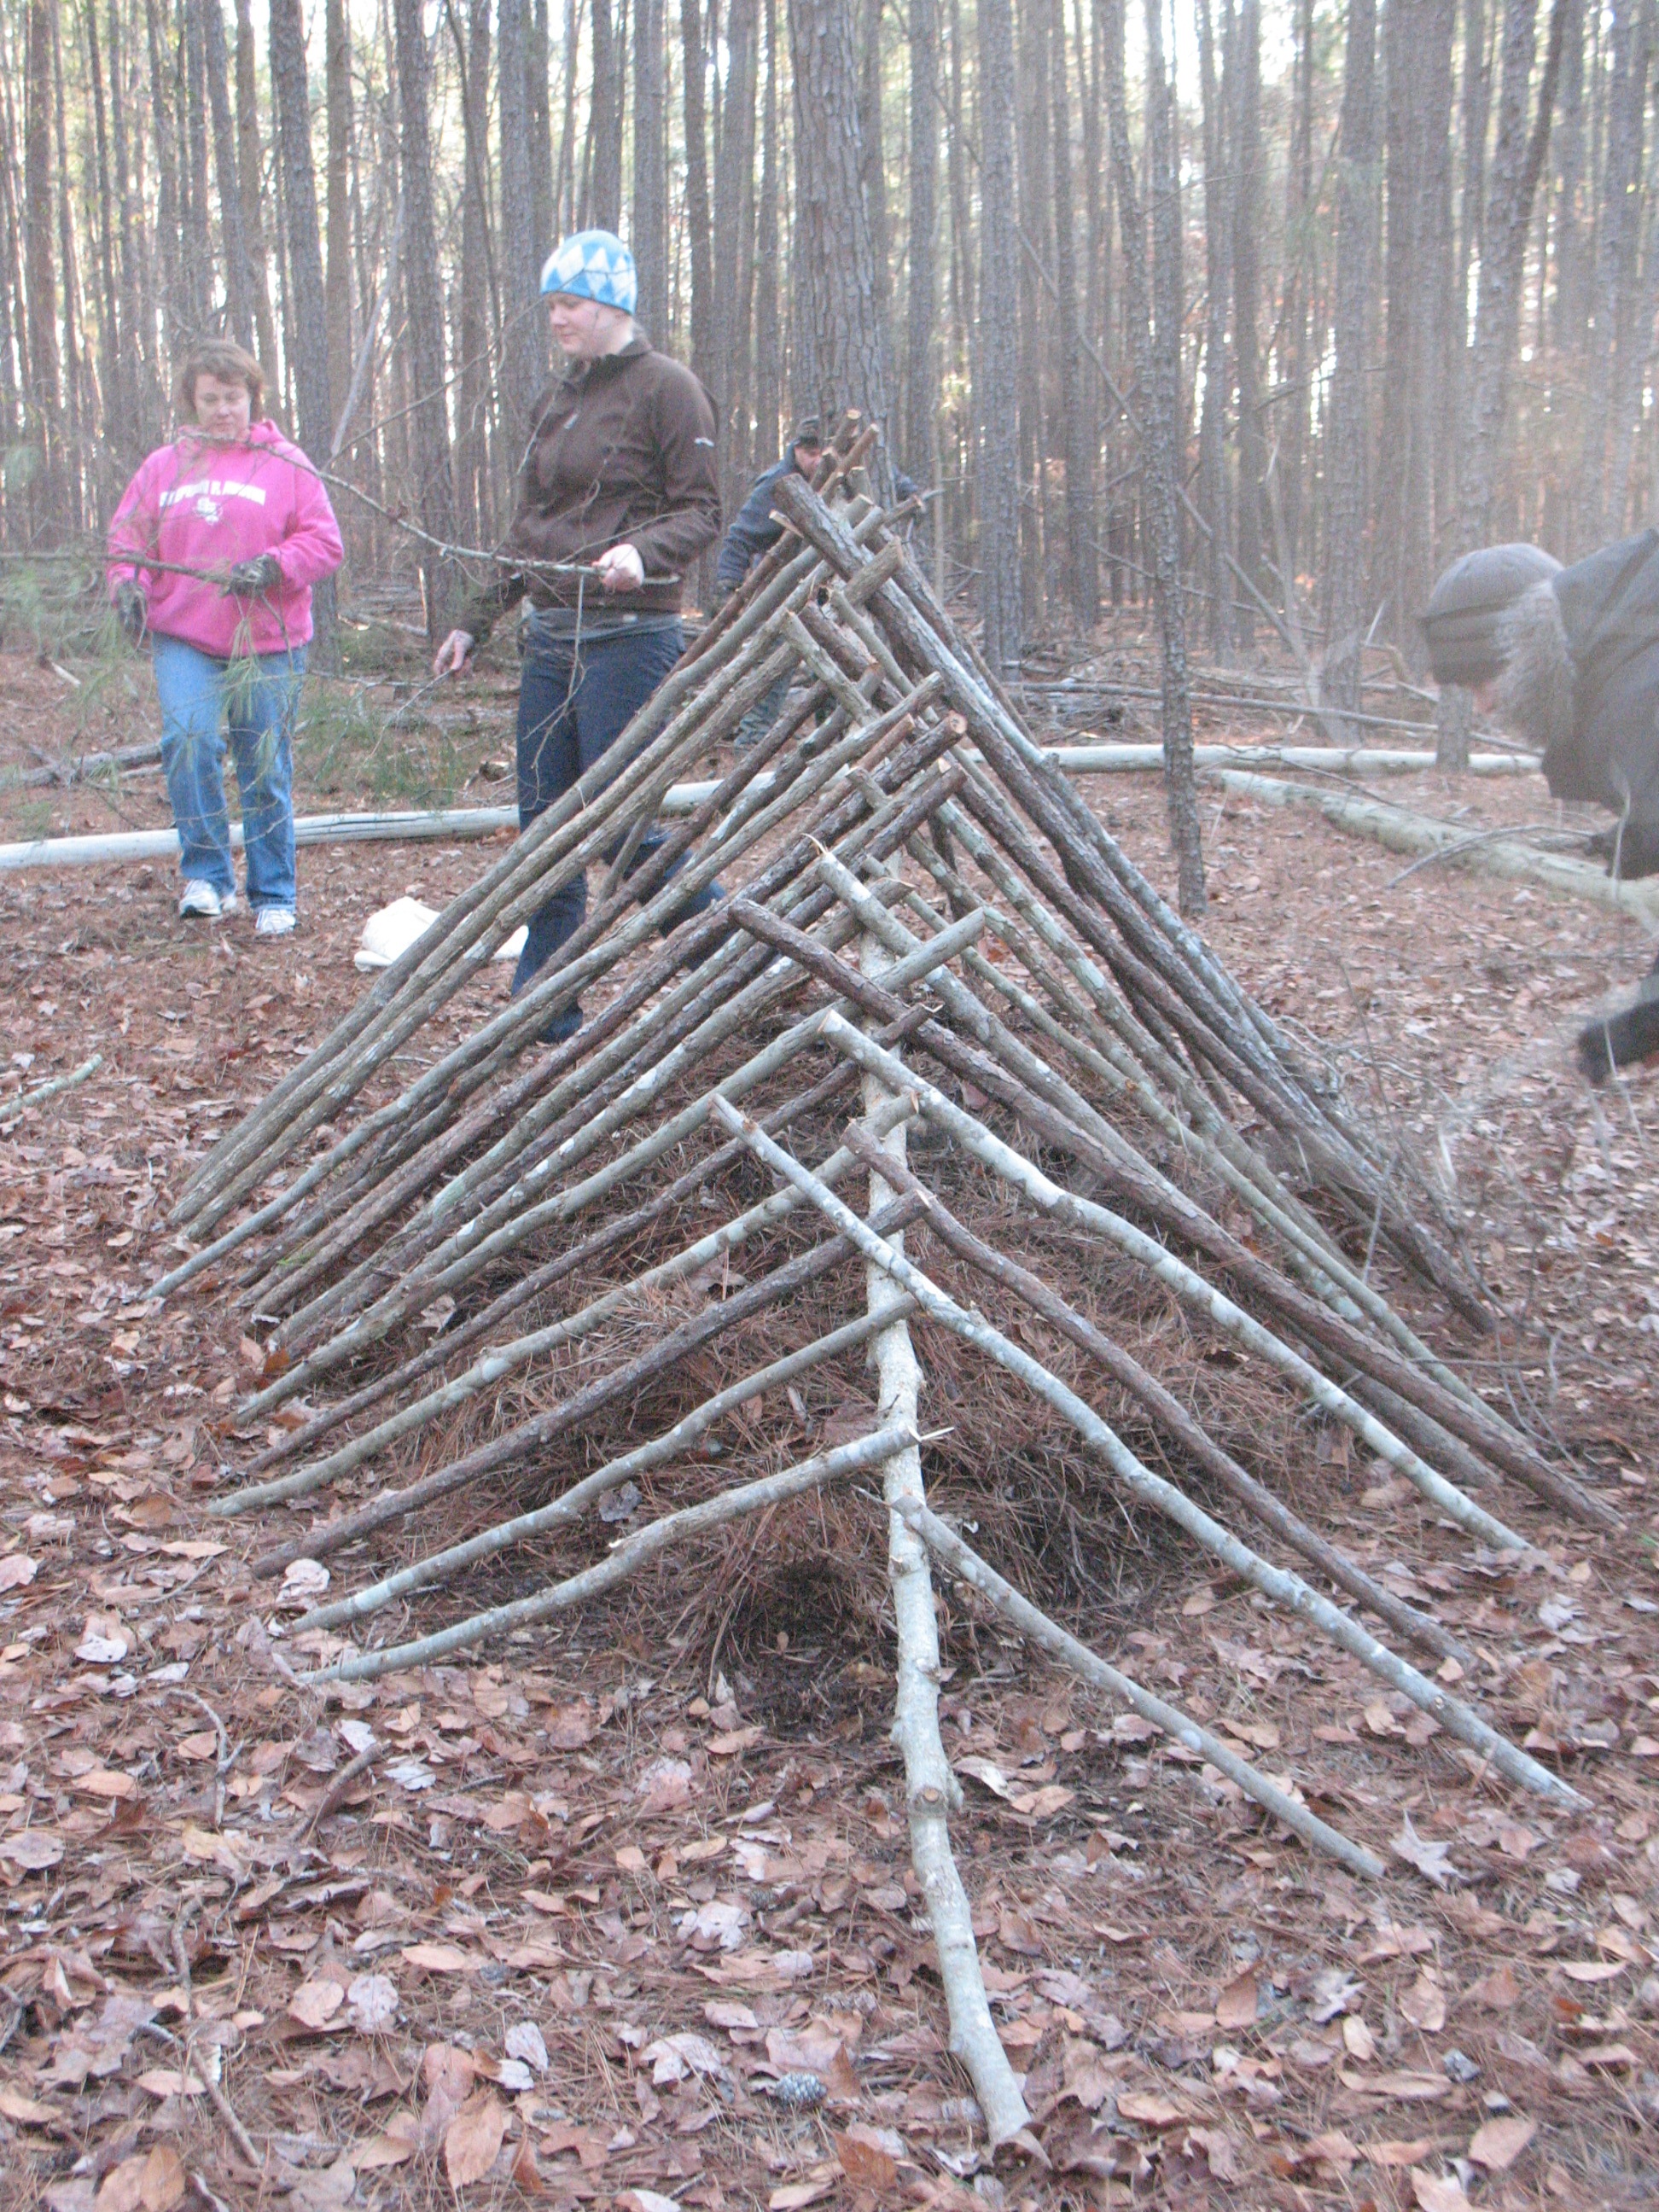
Before you do anything else, look for the right location. You want to build your shelter where raw materials are readily available. You will need an assortment of sticks of varying lengths, and you will need a lot of branches or pine boughs. You will also need piles of leaves, pine needles, or grasses. So don’t build you shelter in the middle of a field where you will have to carry all of this stuff over a considerable distance. Another thing to look for is a tree with a strong, low lying limb, or a tree with a fork that is three or four feet off of the ground. This tree will support the ridgepole of your shelter. If you find a good location, but it doesn’t have a tree to support your ridgepole; you can use two forked sticks and lock them together to support the ridgepole. This is the method that we have used in the pictures below.
When you’ve found the right location, it’s time to gather your materials and start construction. First you will need to set up the main support poles for your shelter. You will need to select a long, solid pole for the ridgepole. This pole should be ten or twelve feet long and three or four inches in diameter. Prop one end of the ridgepole up in the fork of your selected tree or as we are doing here, you can use two forked sticks and lock them together around the ridge pole to support it.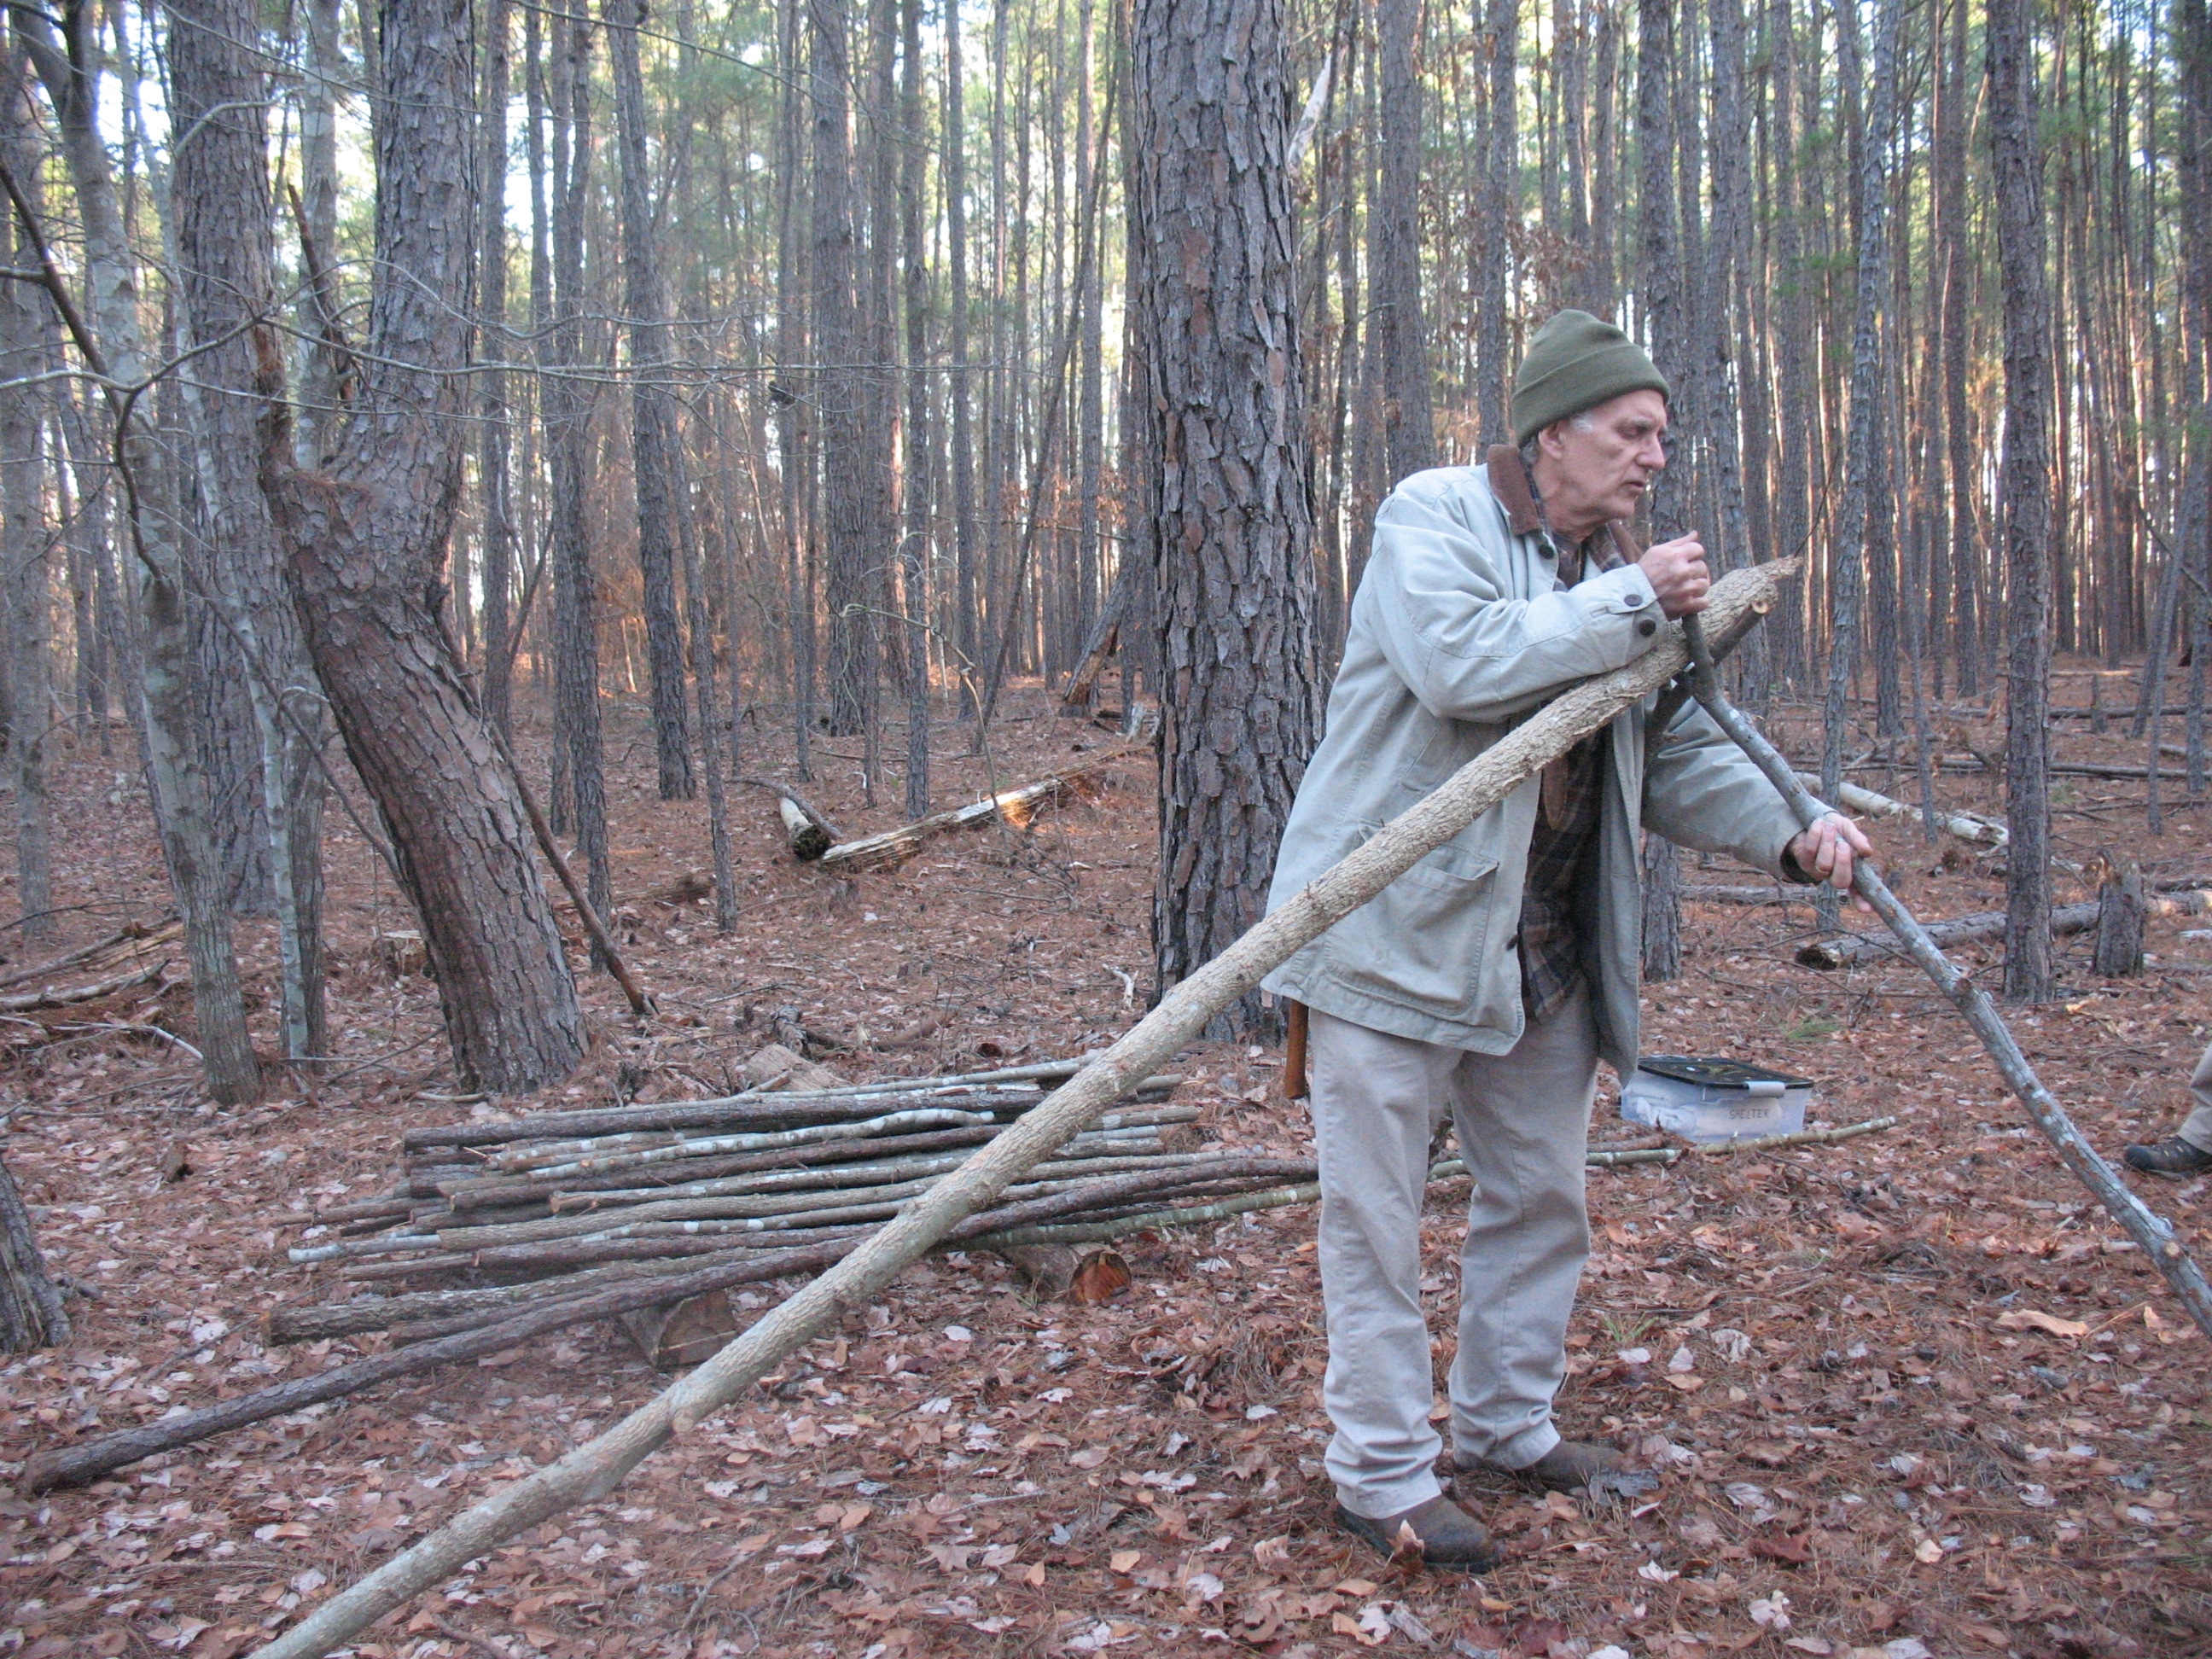
 When you have the main poles up, it is time to gather materials bedding materials. For bedding you will use the driest and cleanest leaves, needle, or grasses that you can find. They need to be dead. Green bedding will have a lot of moisture in it, and being damp will contribute to hypothermia, so no green pine boughs. Lay your bedding materials down next to the tree you have selected. We will be building our shelter over the top of the bed, so locate your bedding accordingly. Make a pile of leaves or needles that is about four feet wide by seven or eight feet long. Pile the bedding up about two feet thick then lay down on the pile to compress it. After compressing the leaves if you’re not at least six inches off the ground, add more bedding.
Now if you have a sheet, a blanket, or a solar emergency blanket, fold it in half lengthwise and lay it down on top of your bedding. This is not necessary for survival, but it will make for a more comfortable night’s sleep. Lying inside of a blanket is not nearly as prickly as lying inside of a pile of pine needles. 
When your blanket is in place, pile another two feet of leaves or needles on top of it. 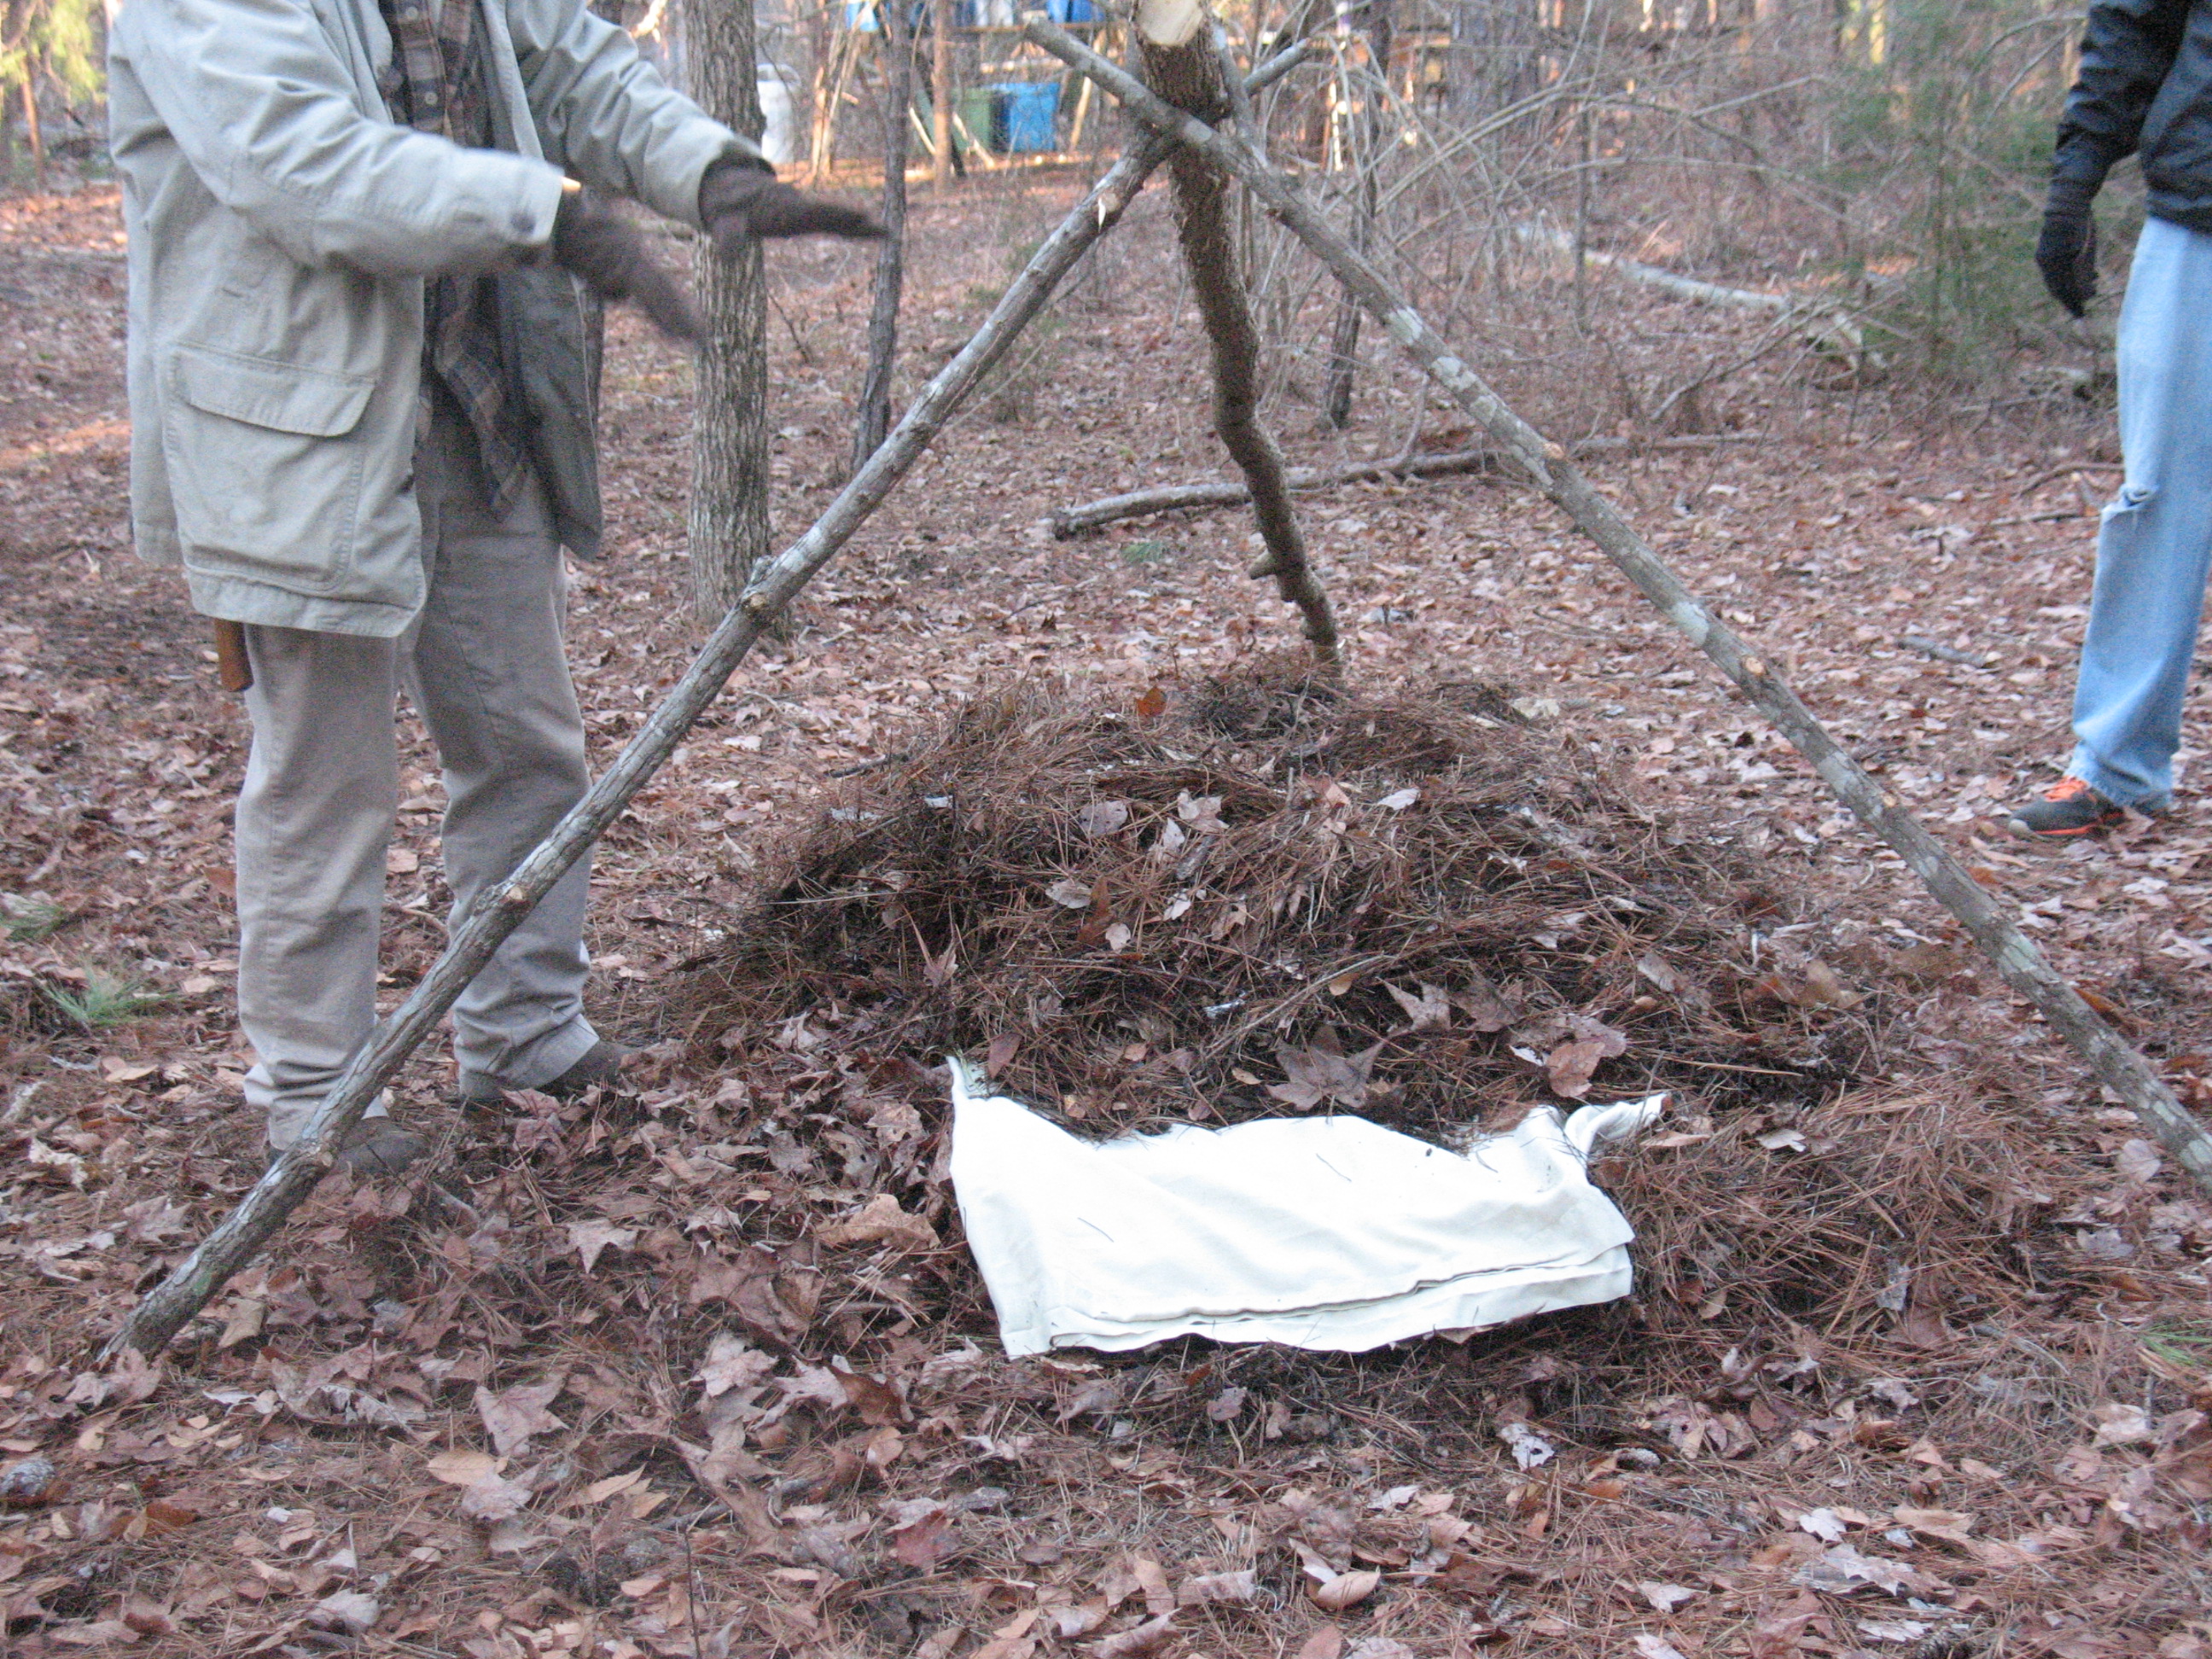
Next you will need to lay a bunch of shorter poles up on the ridge pole. These “ribs” should come out at about a forty-five degree angle and should be about six to eight inches apart. Leave an opening on the high end of the shelter so that you will have a door to crawl inside. 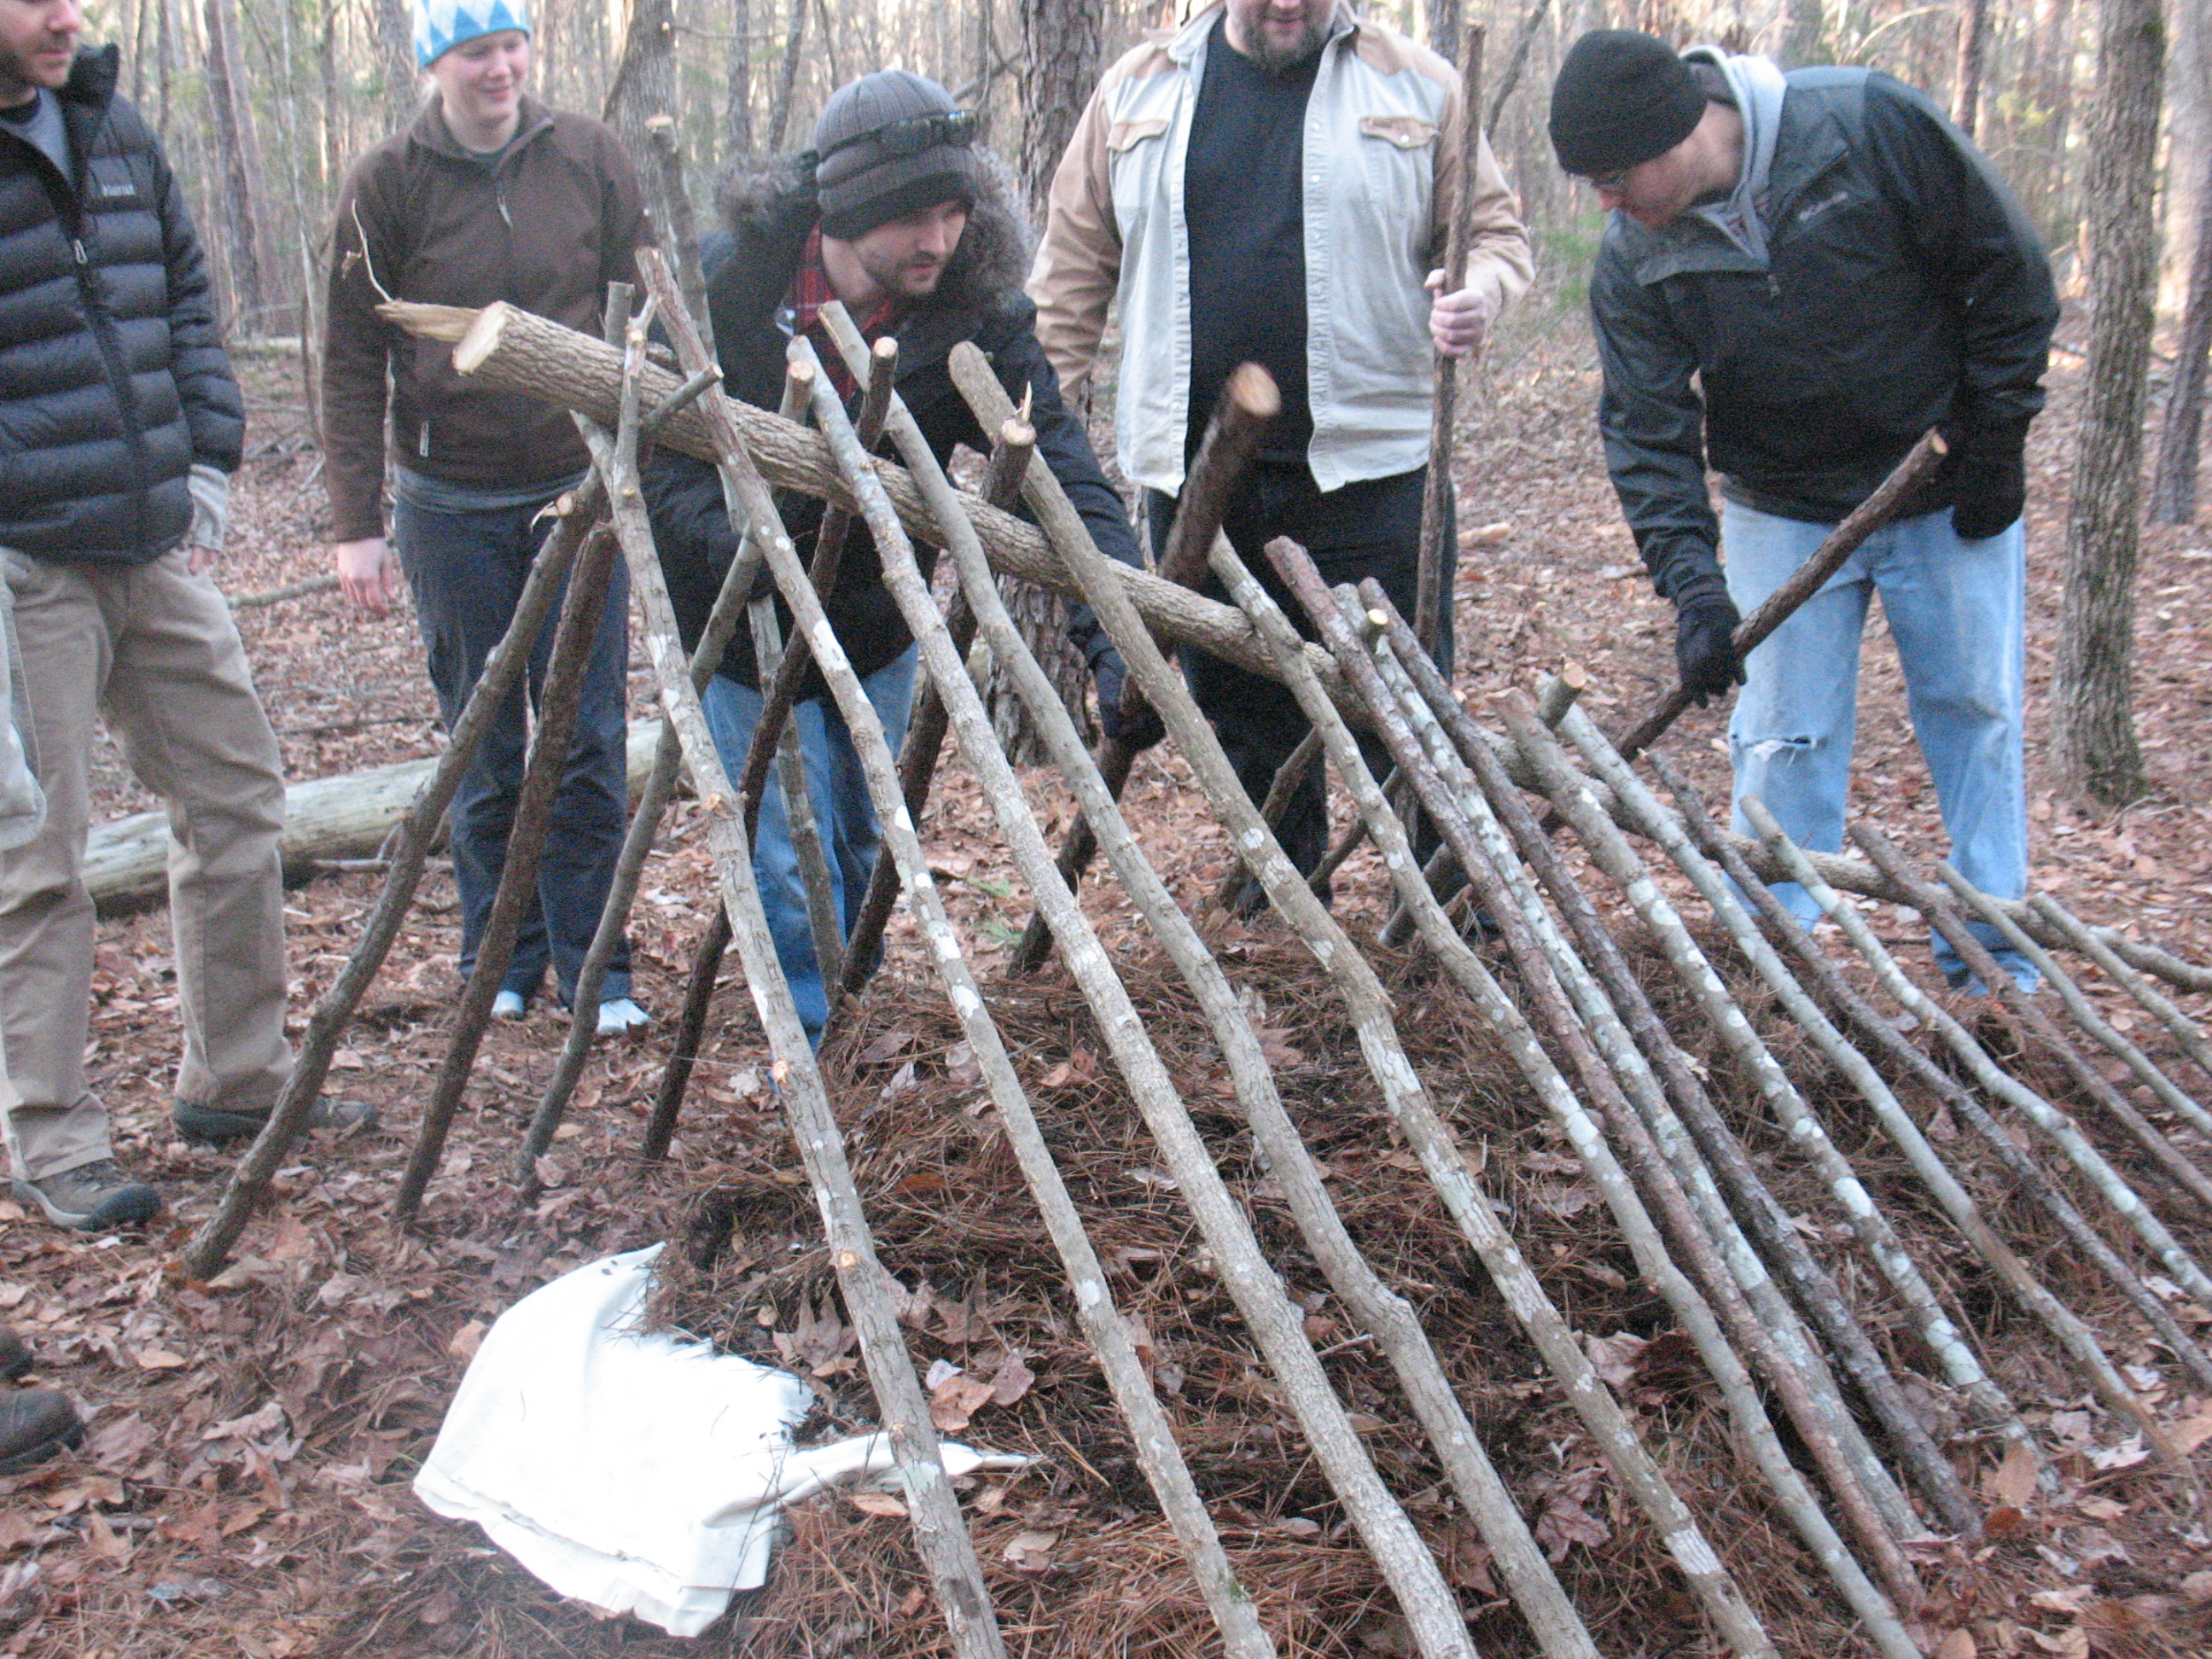
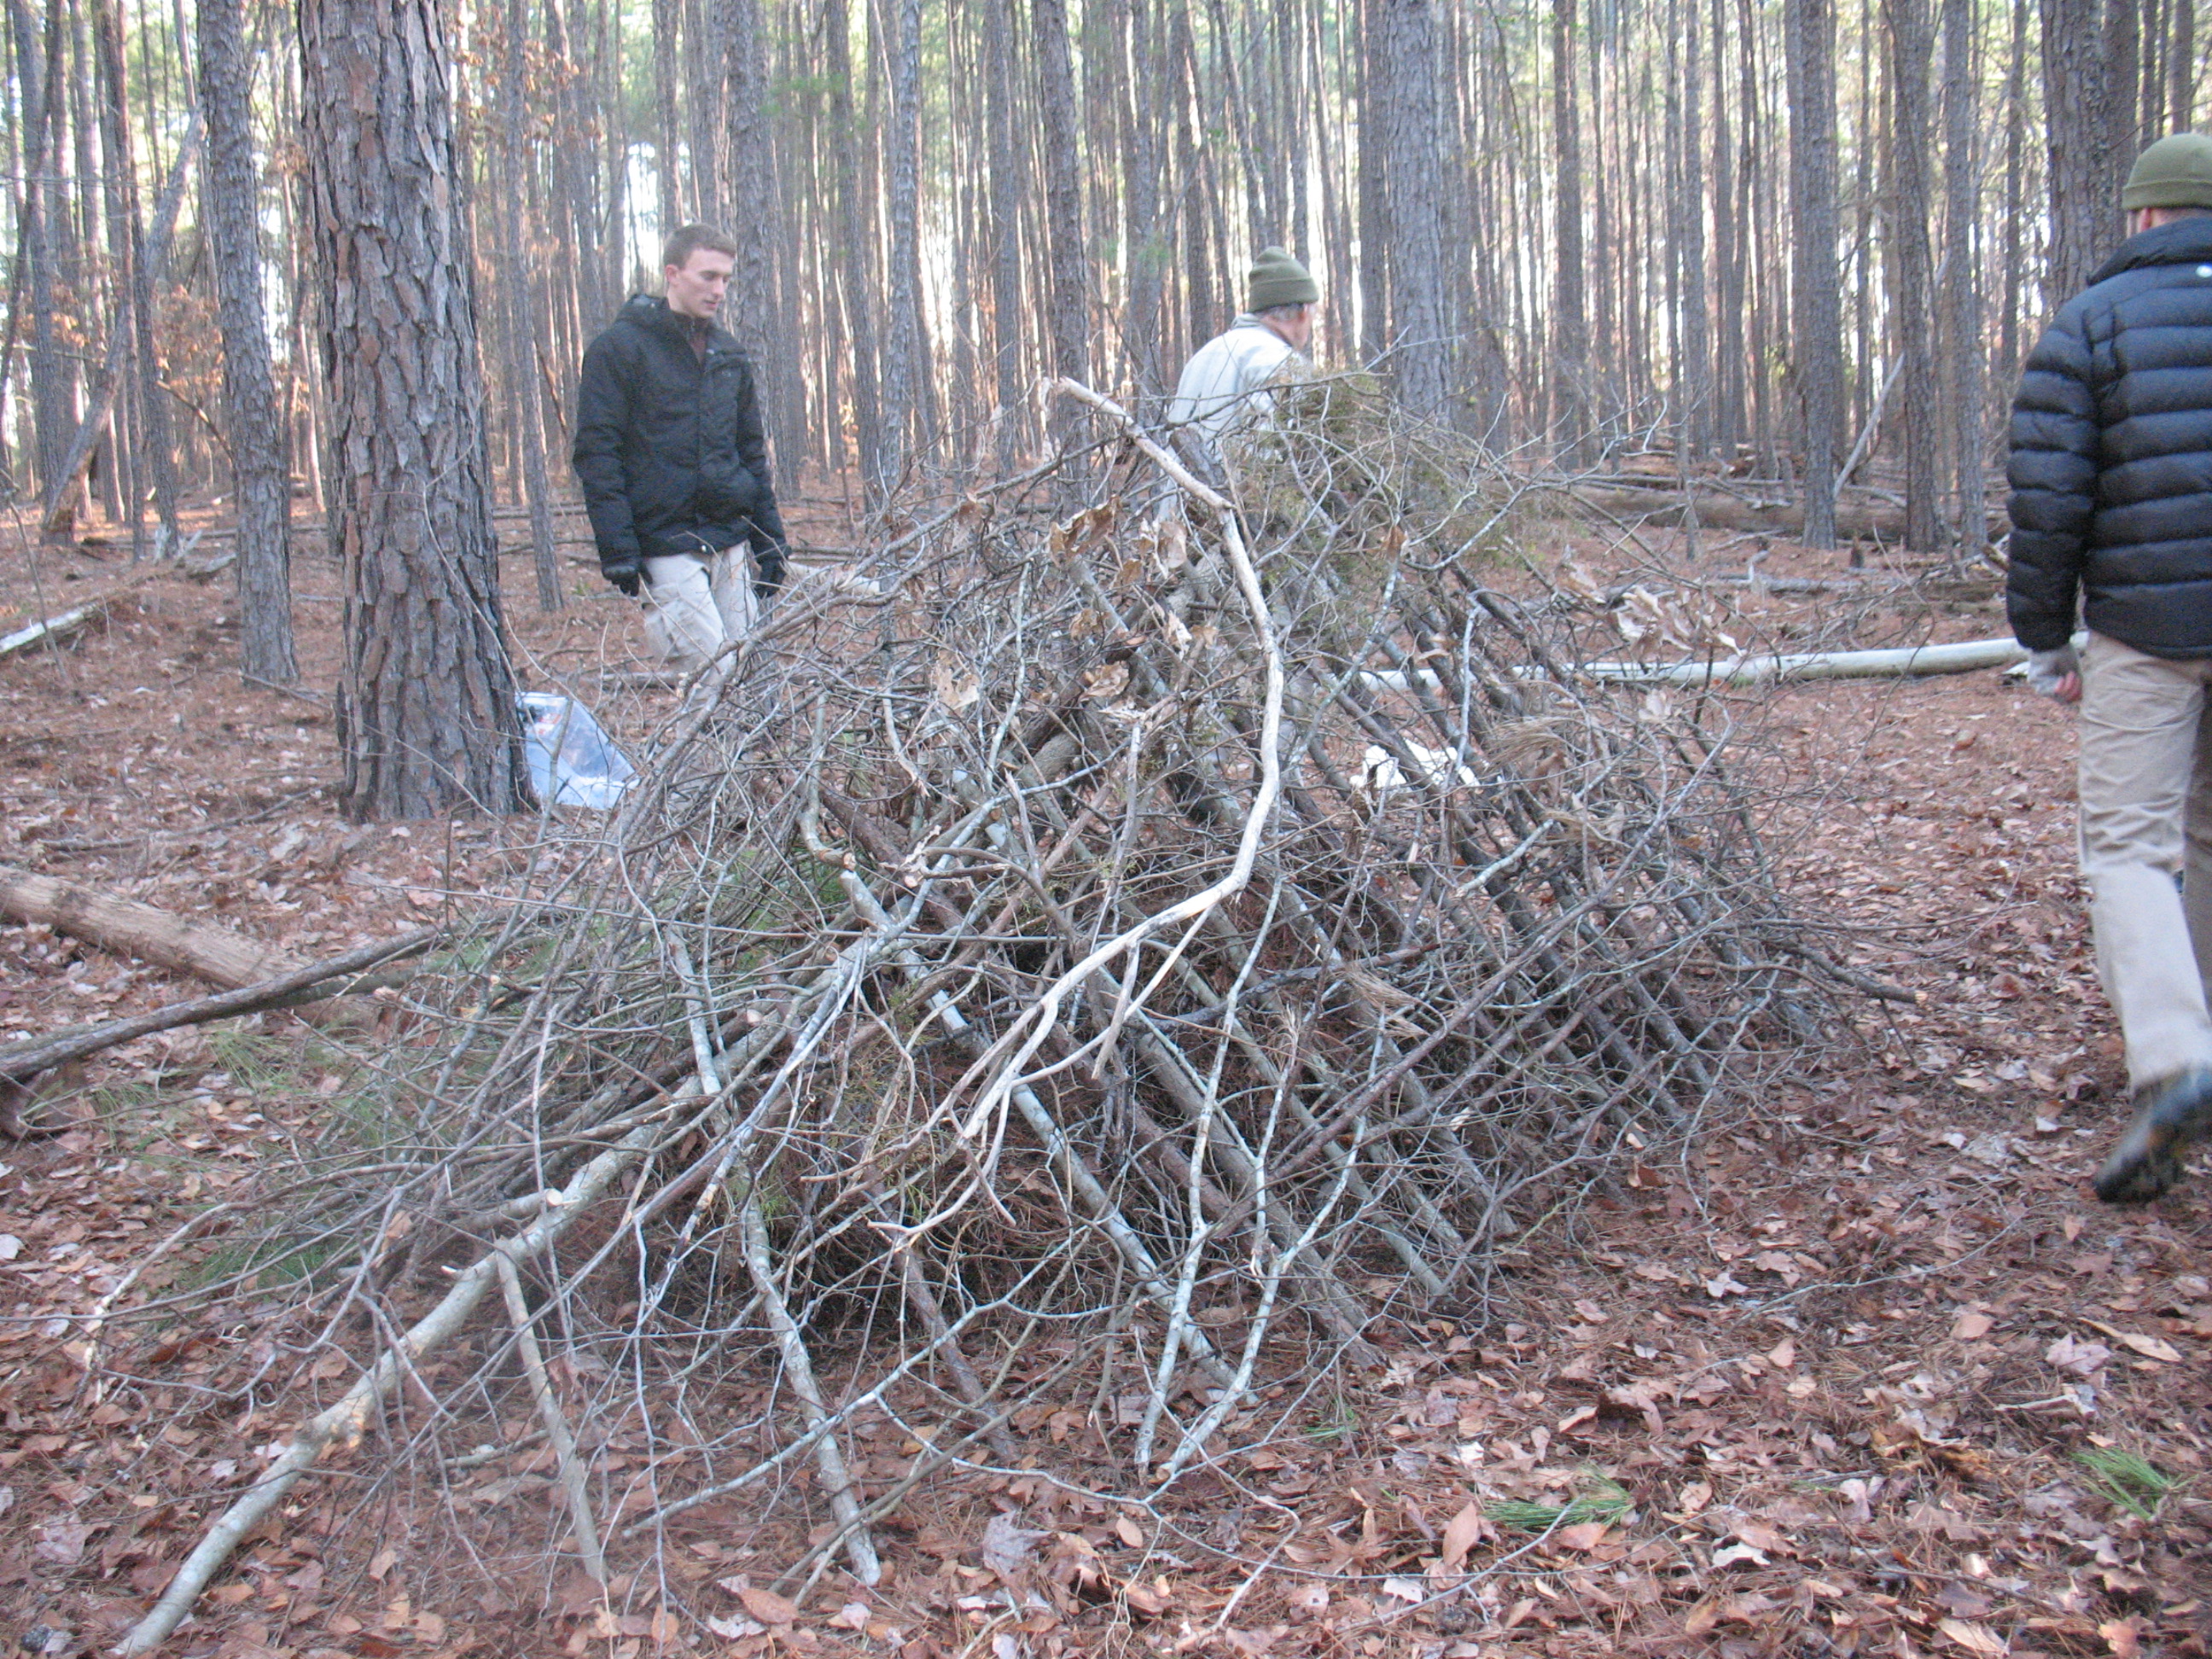
When the ribs are in place cover the whole shelter with a layer of pine boughs or branches. The purpose of these boughs is to hold up the leaves and debris that you will pile on the outside of the shelter.
Now you can gather piles and piles of pine needles, leaves, and grasses and pile them up on the outside of the shelter. You want this layer to be about two feet thick or more.
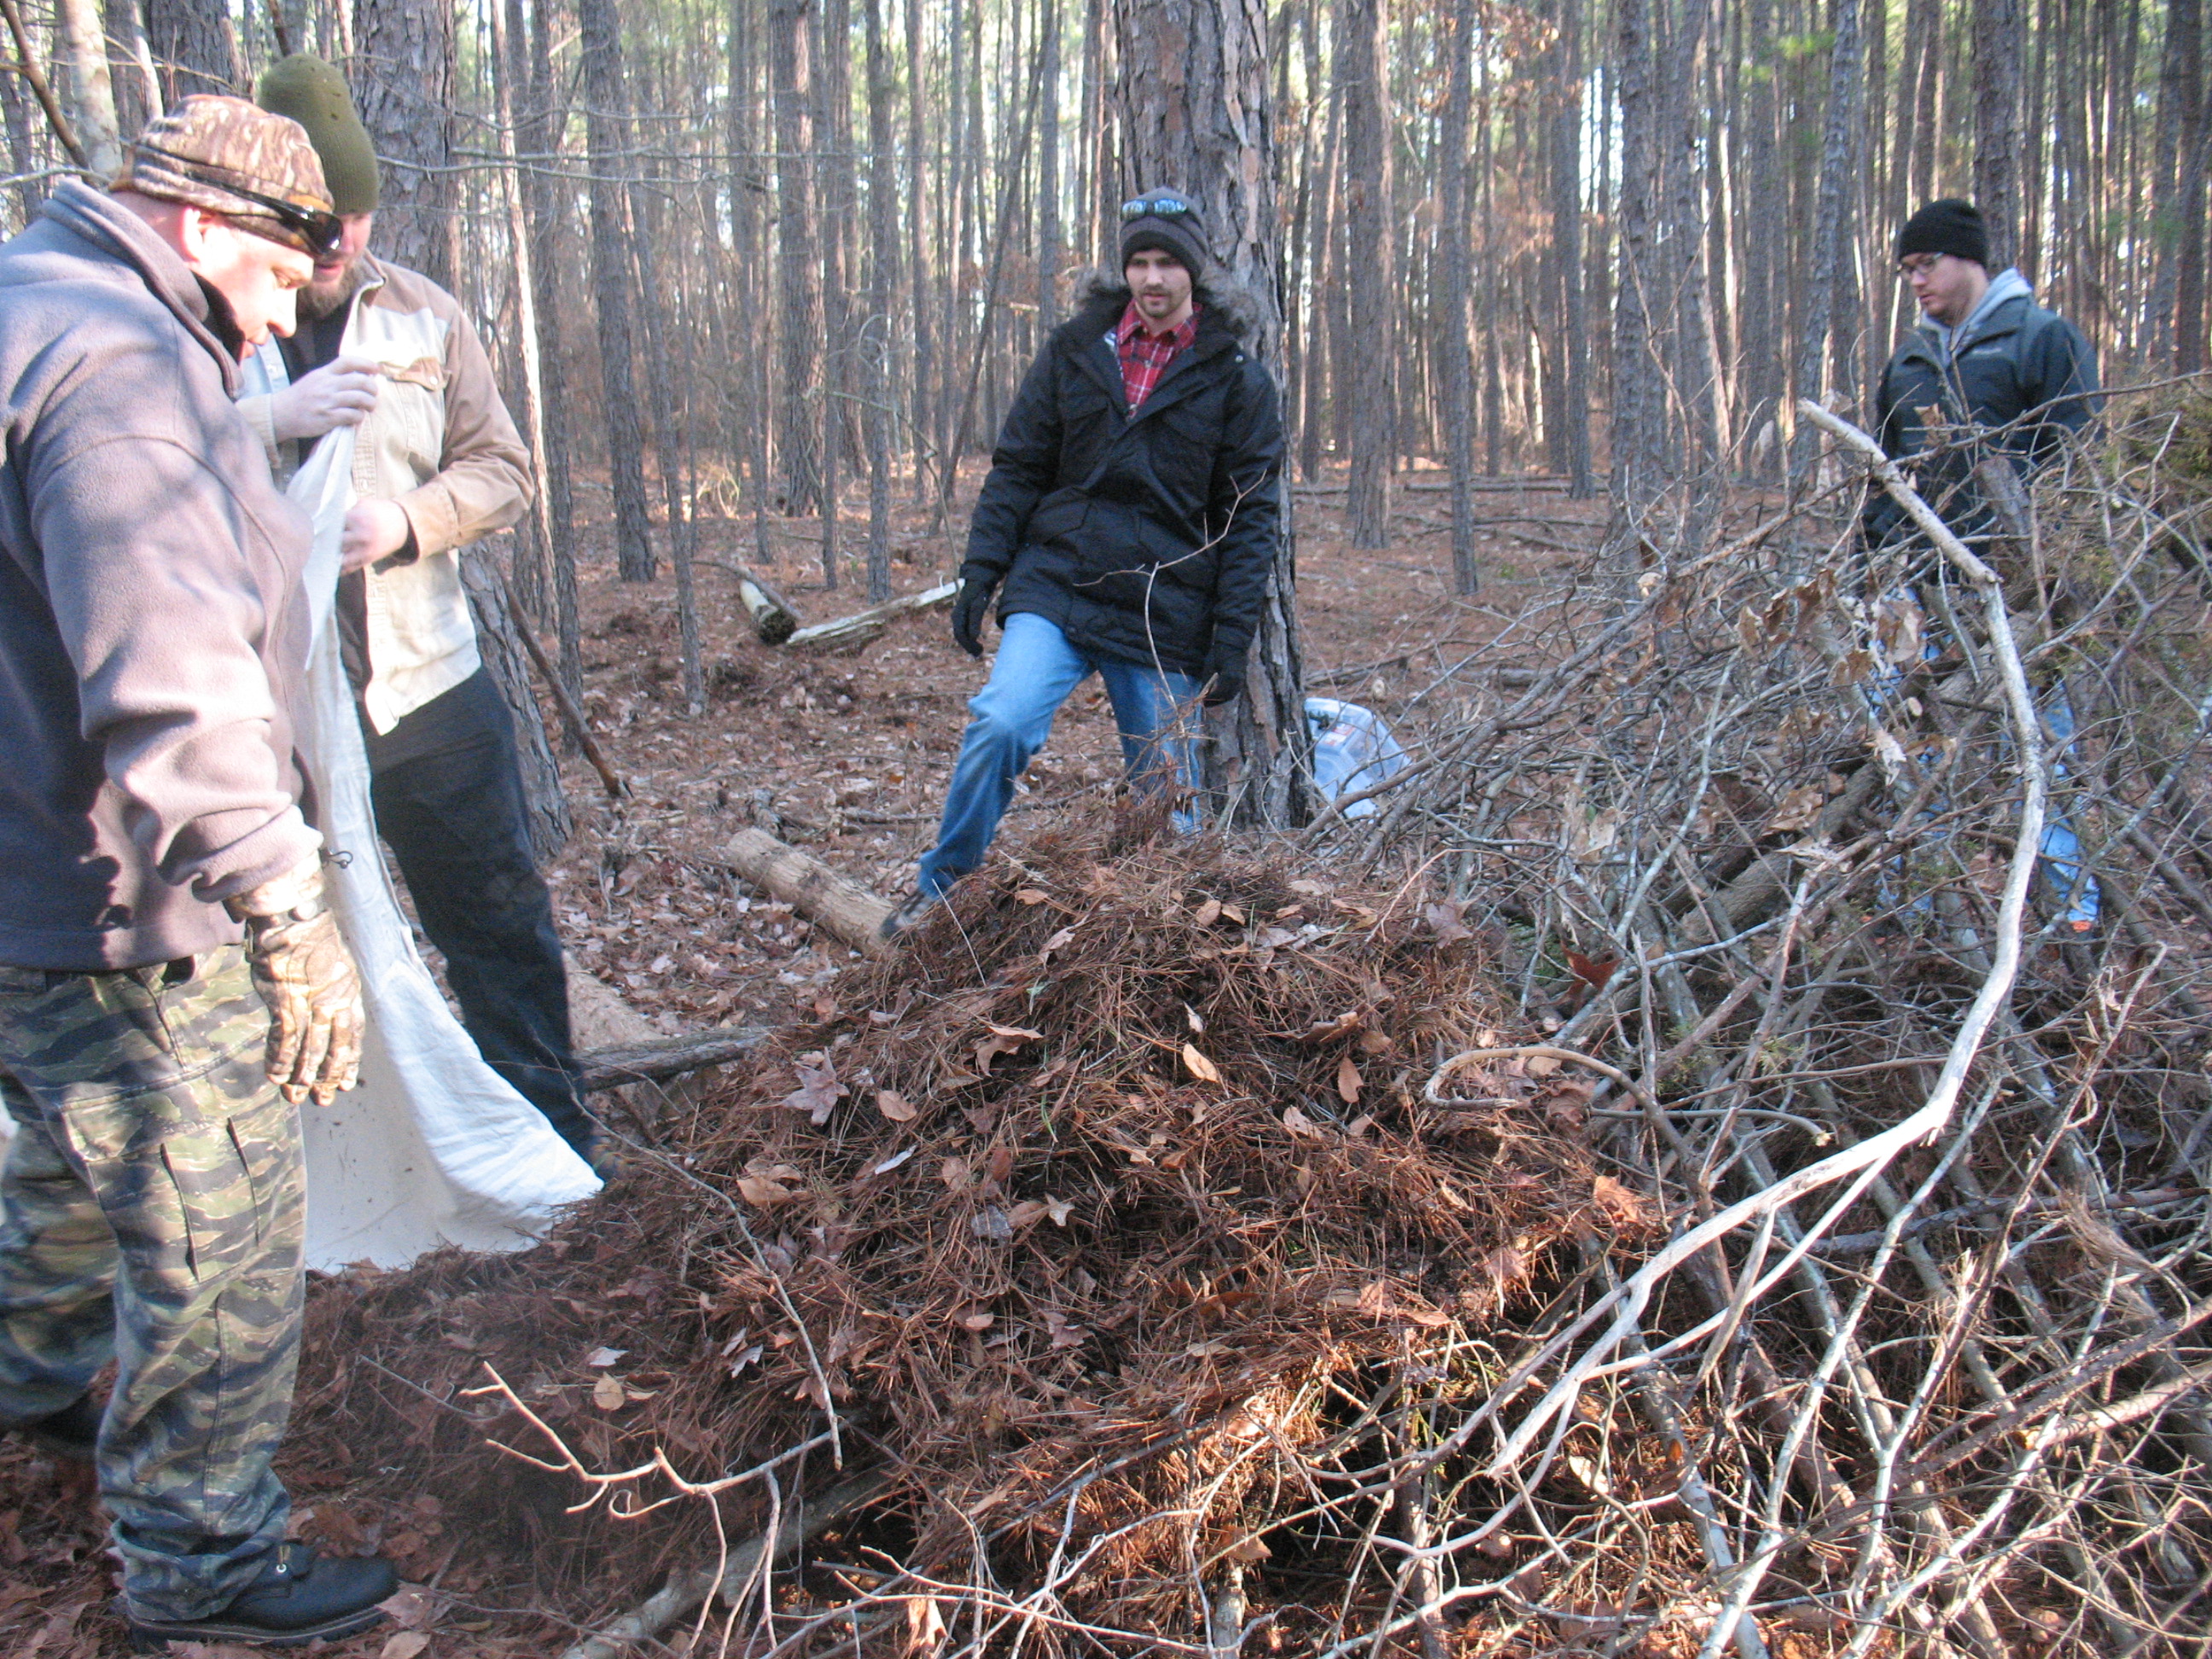
If you are expecting high winds you may want to add another layer of ribs over the top of the debris to keep it from blowing off.
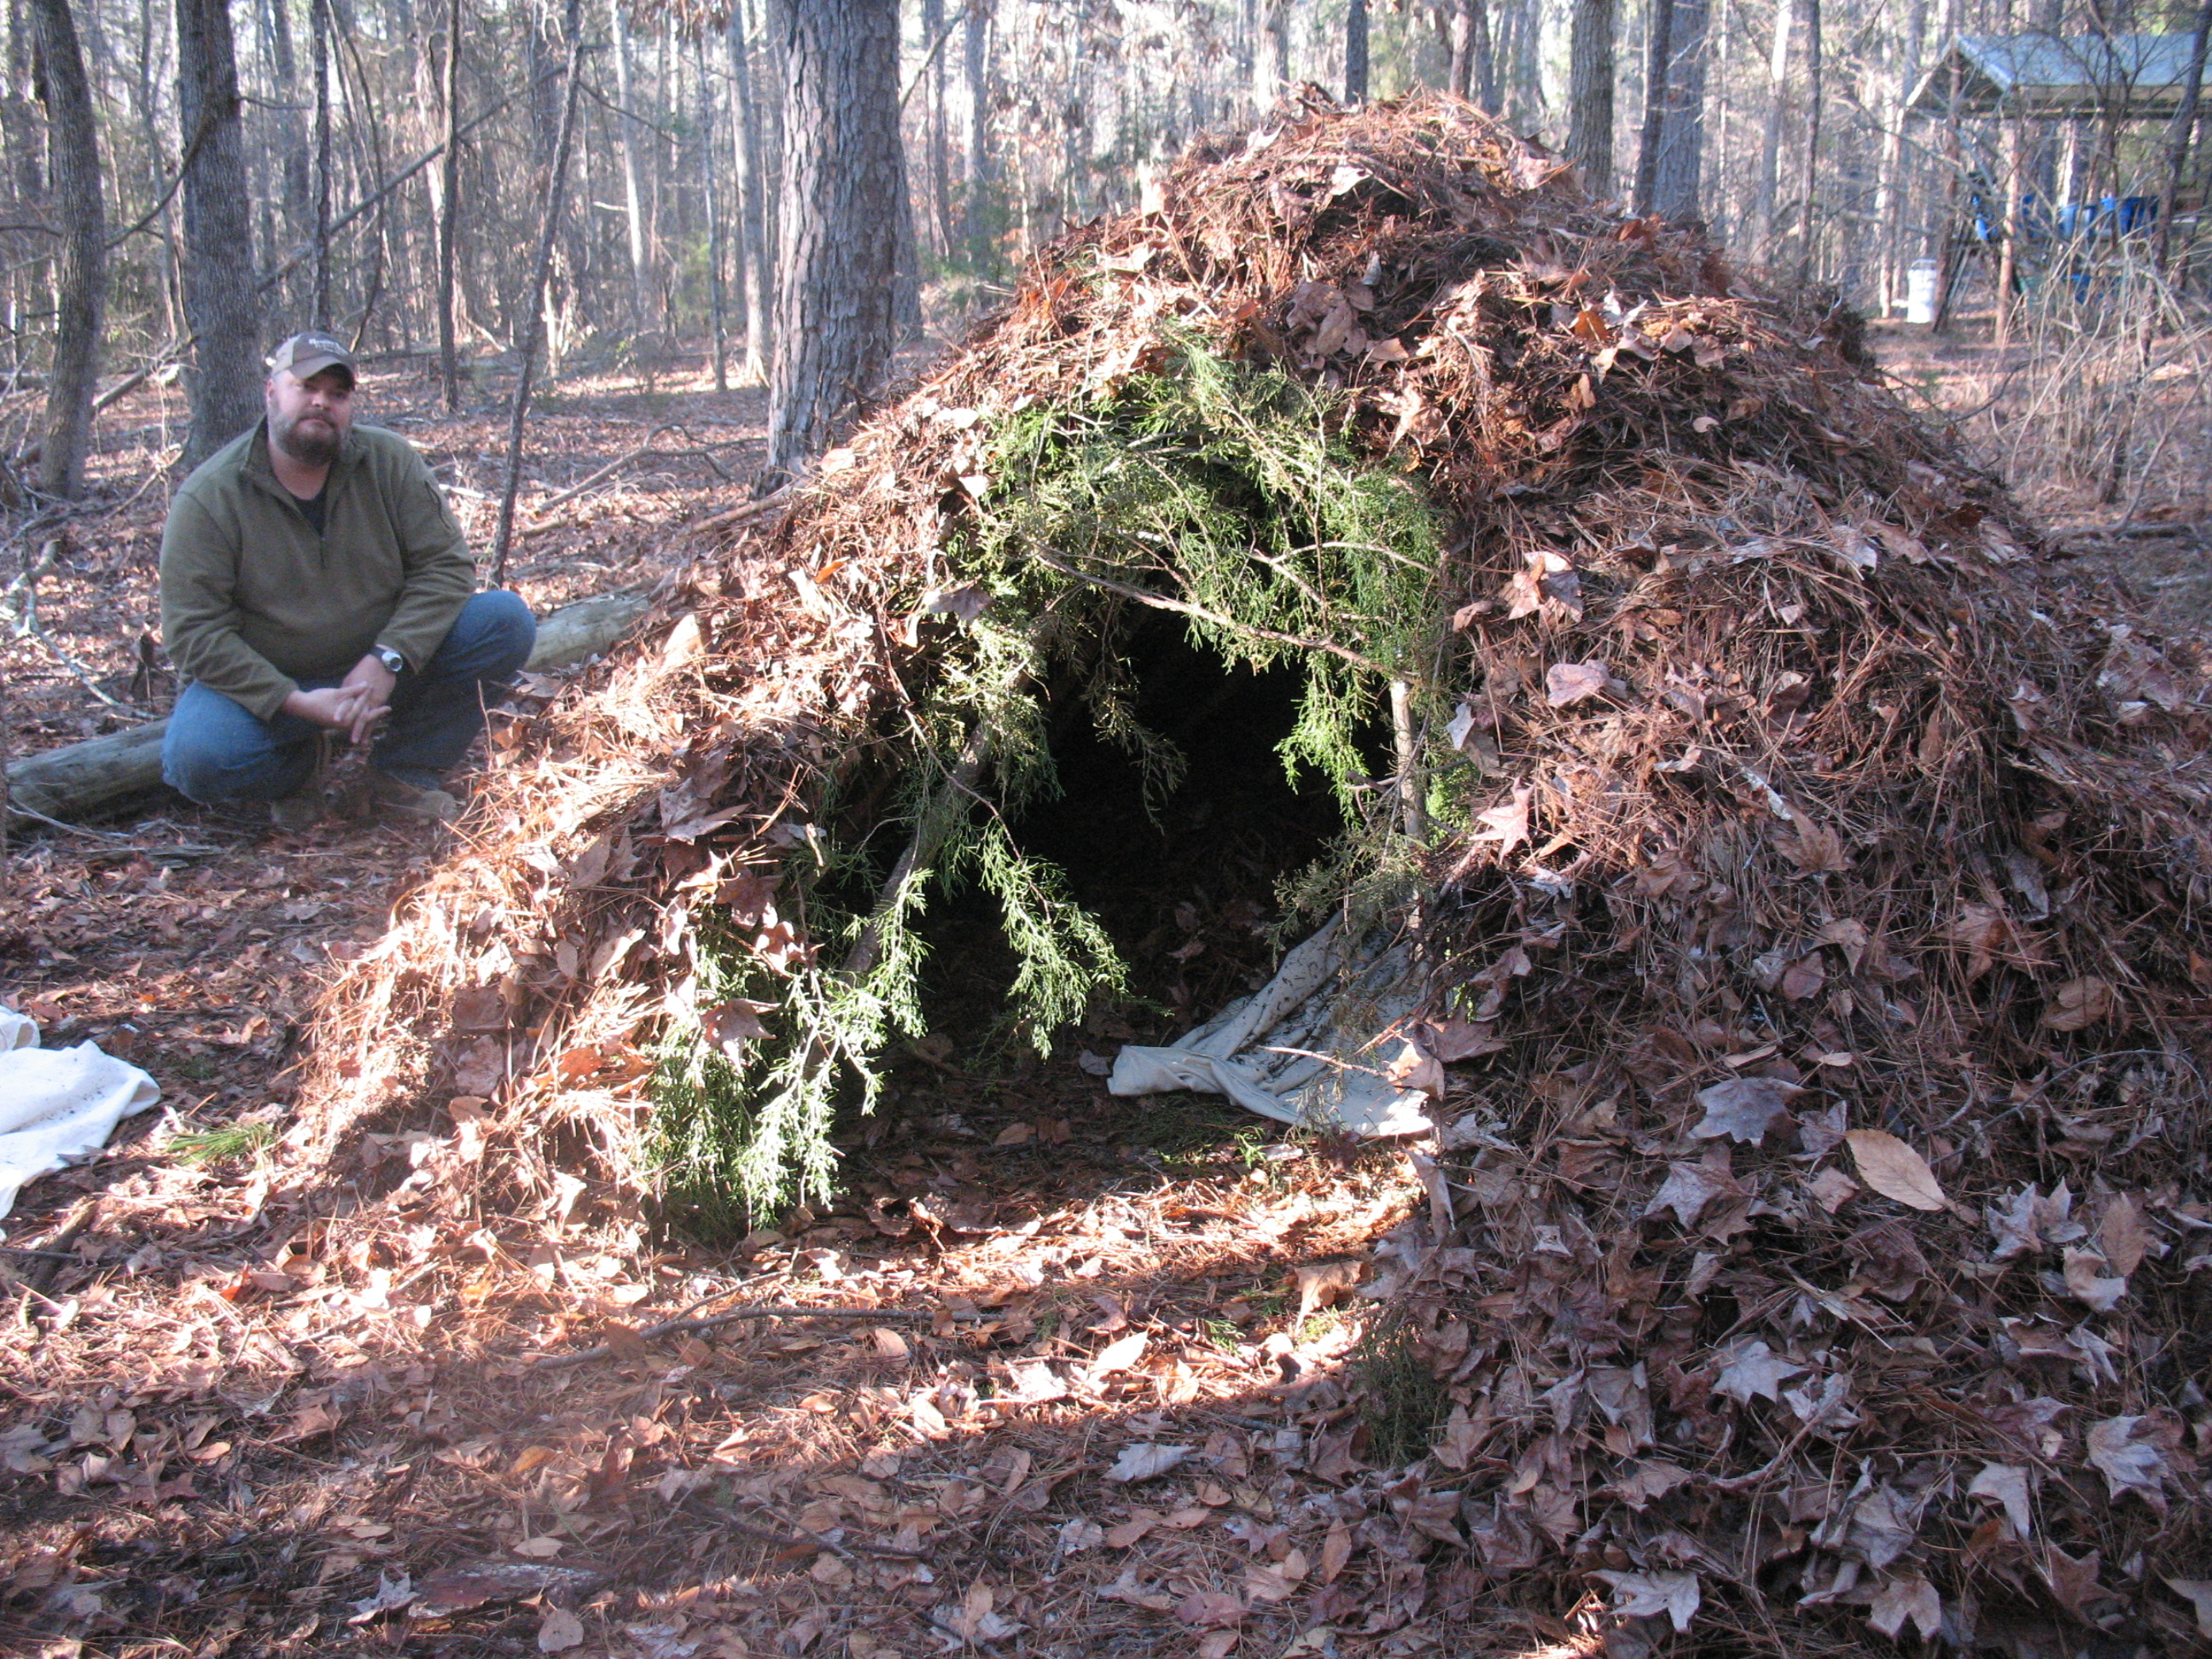
If you have time, you can weave together a door; or you can just use a couple of pine boughs to seal off the entrance after you crawl in. This will help retain more of your body heat within the shelter. 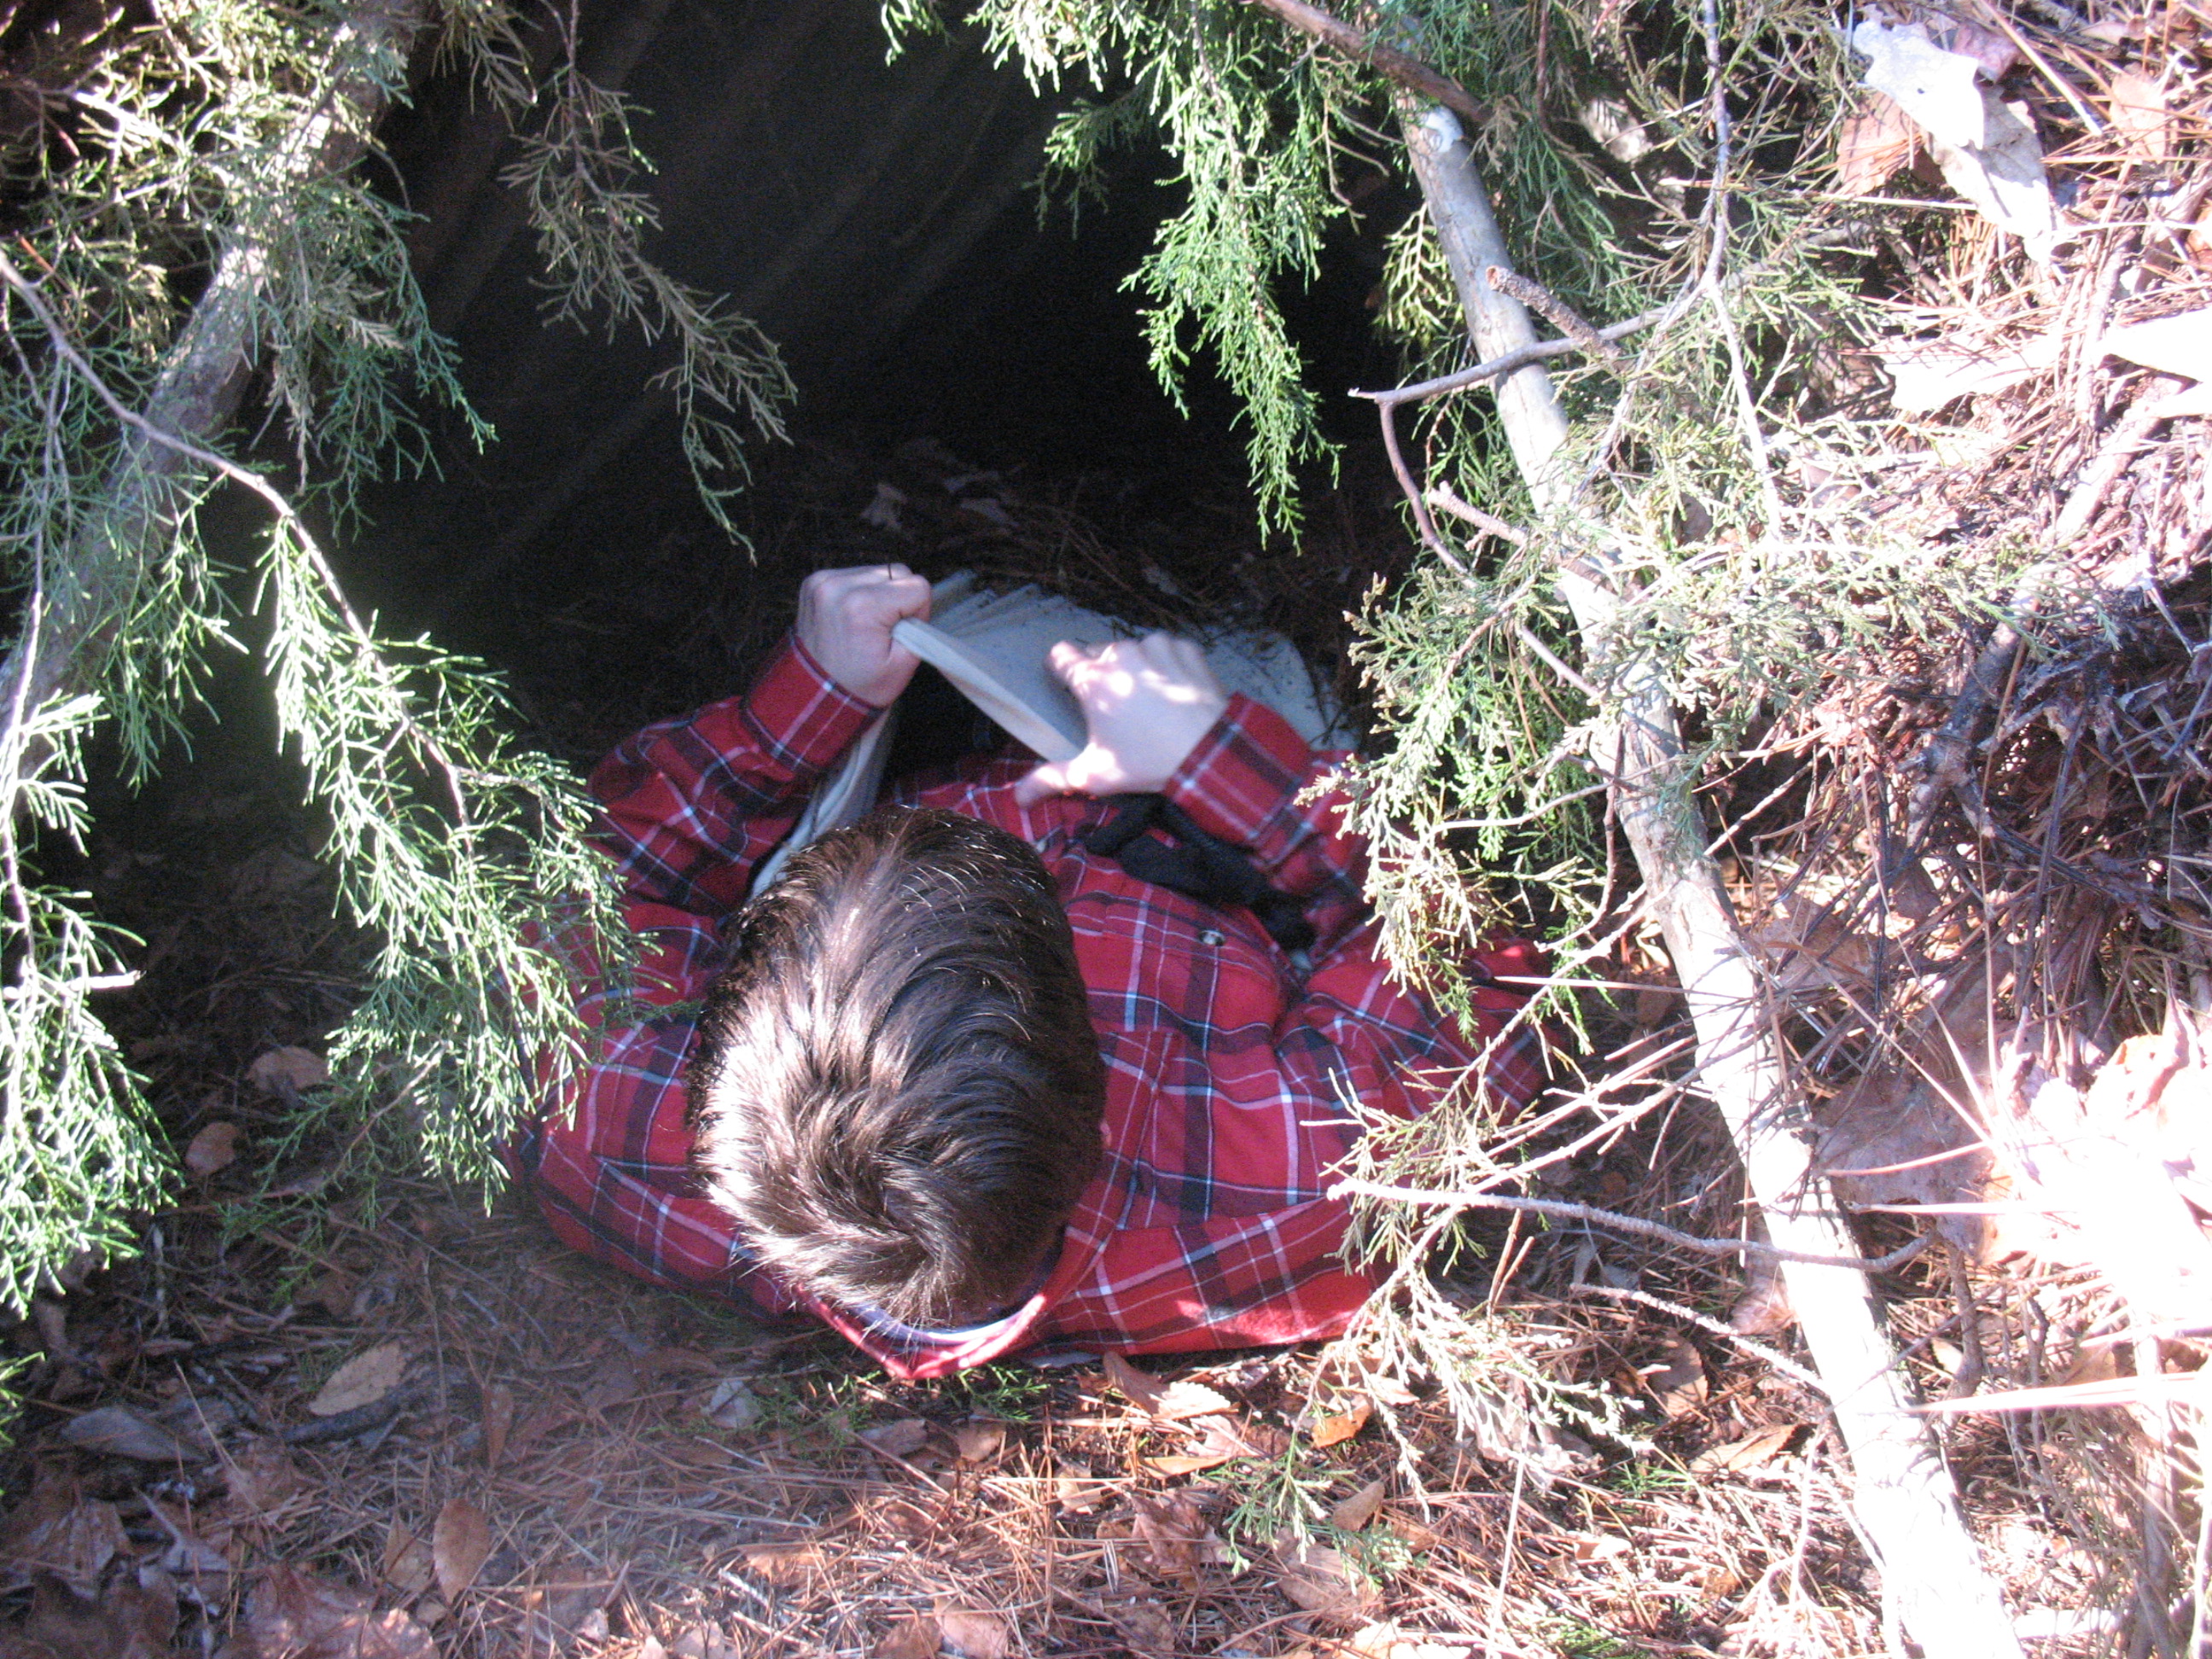
So there you have it. It may not be a four star hotel, but it will keep you alive in a bad situation.

Just wanted to add my two cents here. This came from some time back in a wilderness survival class that I took. Rather than spend the time to cut your poles we typically found two saplings that are about 6-8feet apart. When I say sapling I am looking for one of these to be something less than 2 inches in diameter and flexible. So for one of these saplings simply bend it down to the other…using some vine or even a shoe string tie it off to the other about 3 feet from the ground. Voila you have the start….now you do everything exactly the same as in your post starting with the ribs and finishing it out.
Advantage here is that you save some time and frustration with that initial pole…and when you are done…there is one less dead tree!
Good comment. There are a lot of ways to get one of these shelters going. The basics remain the same for all of them. Keep it small, insulate yourself from the ground, pile on lots of debris to insulate yourself from the weather. Thanks for reading, Hank
in 1985 new years eve with a foot of snow, upstate new youk me and a friend spent two nights out doors along the old erie canal. we found a low lying limb and threw a tarp over it i know we (cheated)covered with pine boughs and duff we used a good sized fire and a reflector. don’t fool yourself it was cold… really cold and a lot of work. our trip was cut short in the middle of the night because of some deer pochers but it was an experience to remember i am learning as much as i can from your sight
Yes, you definitely have to except a different definition of comfort when you are in a survival situation. As long as you wake up on the right side of the grass, you’ve had a comfortable night. Thanks for reading, hank