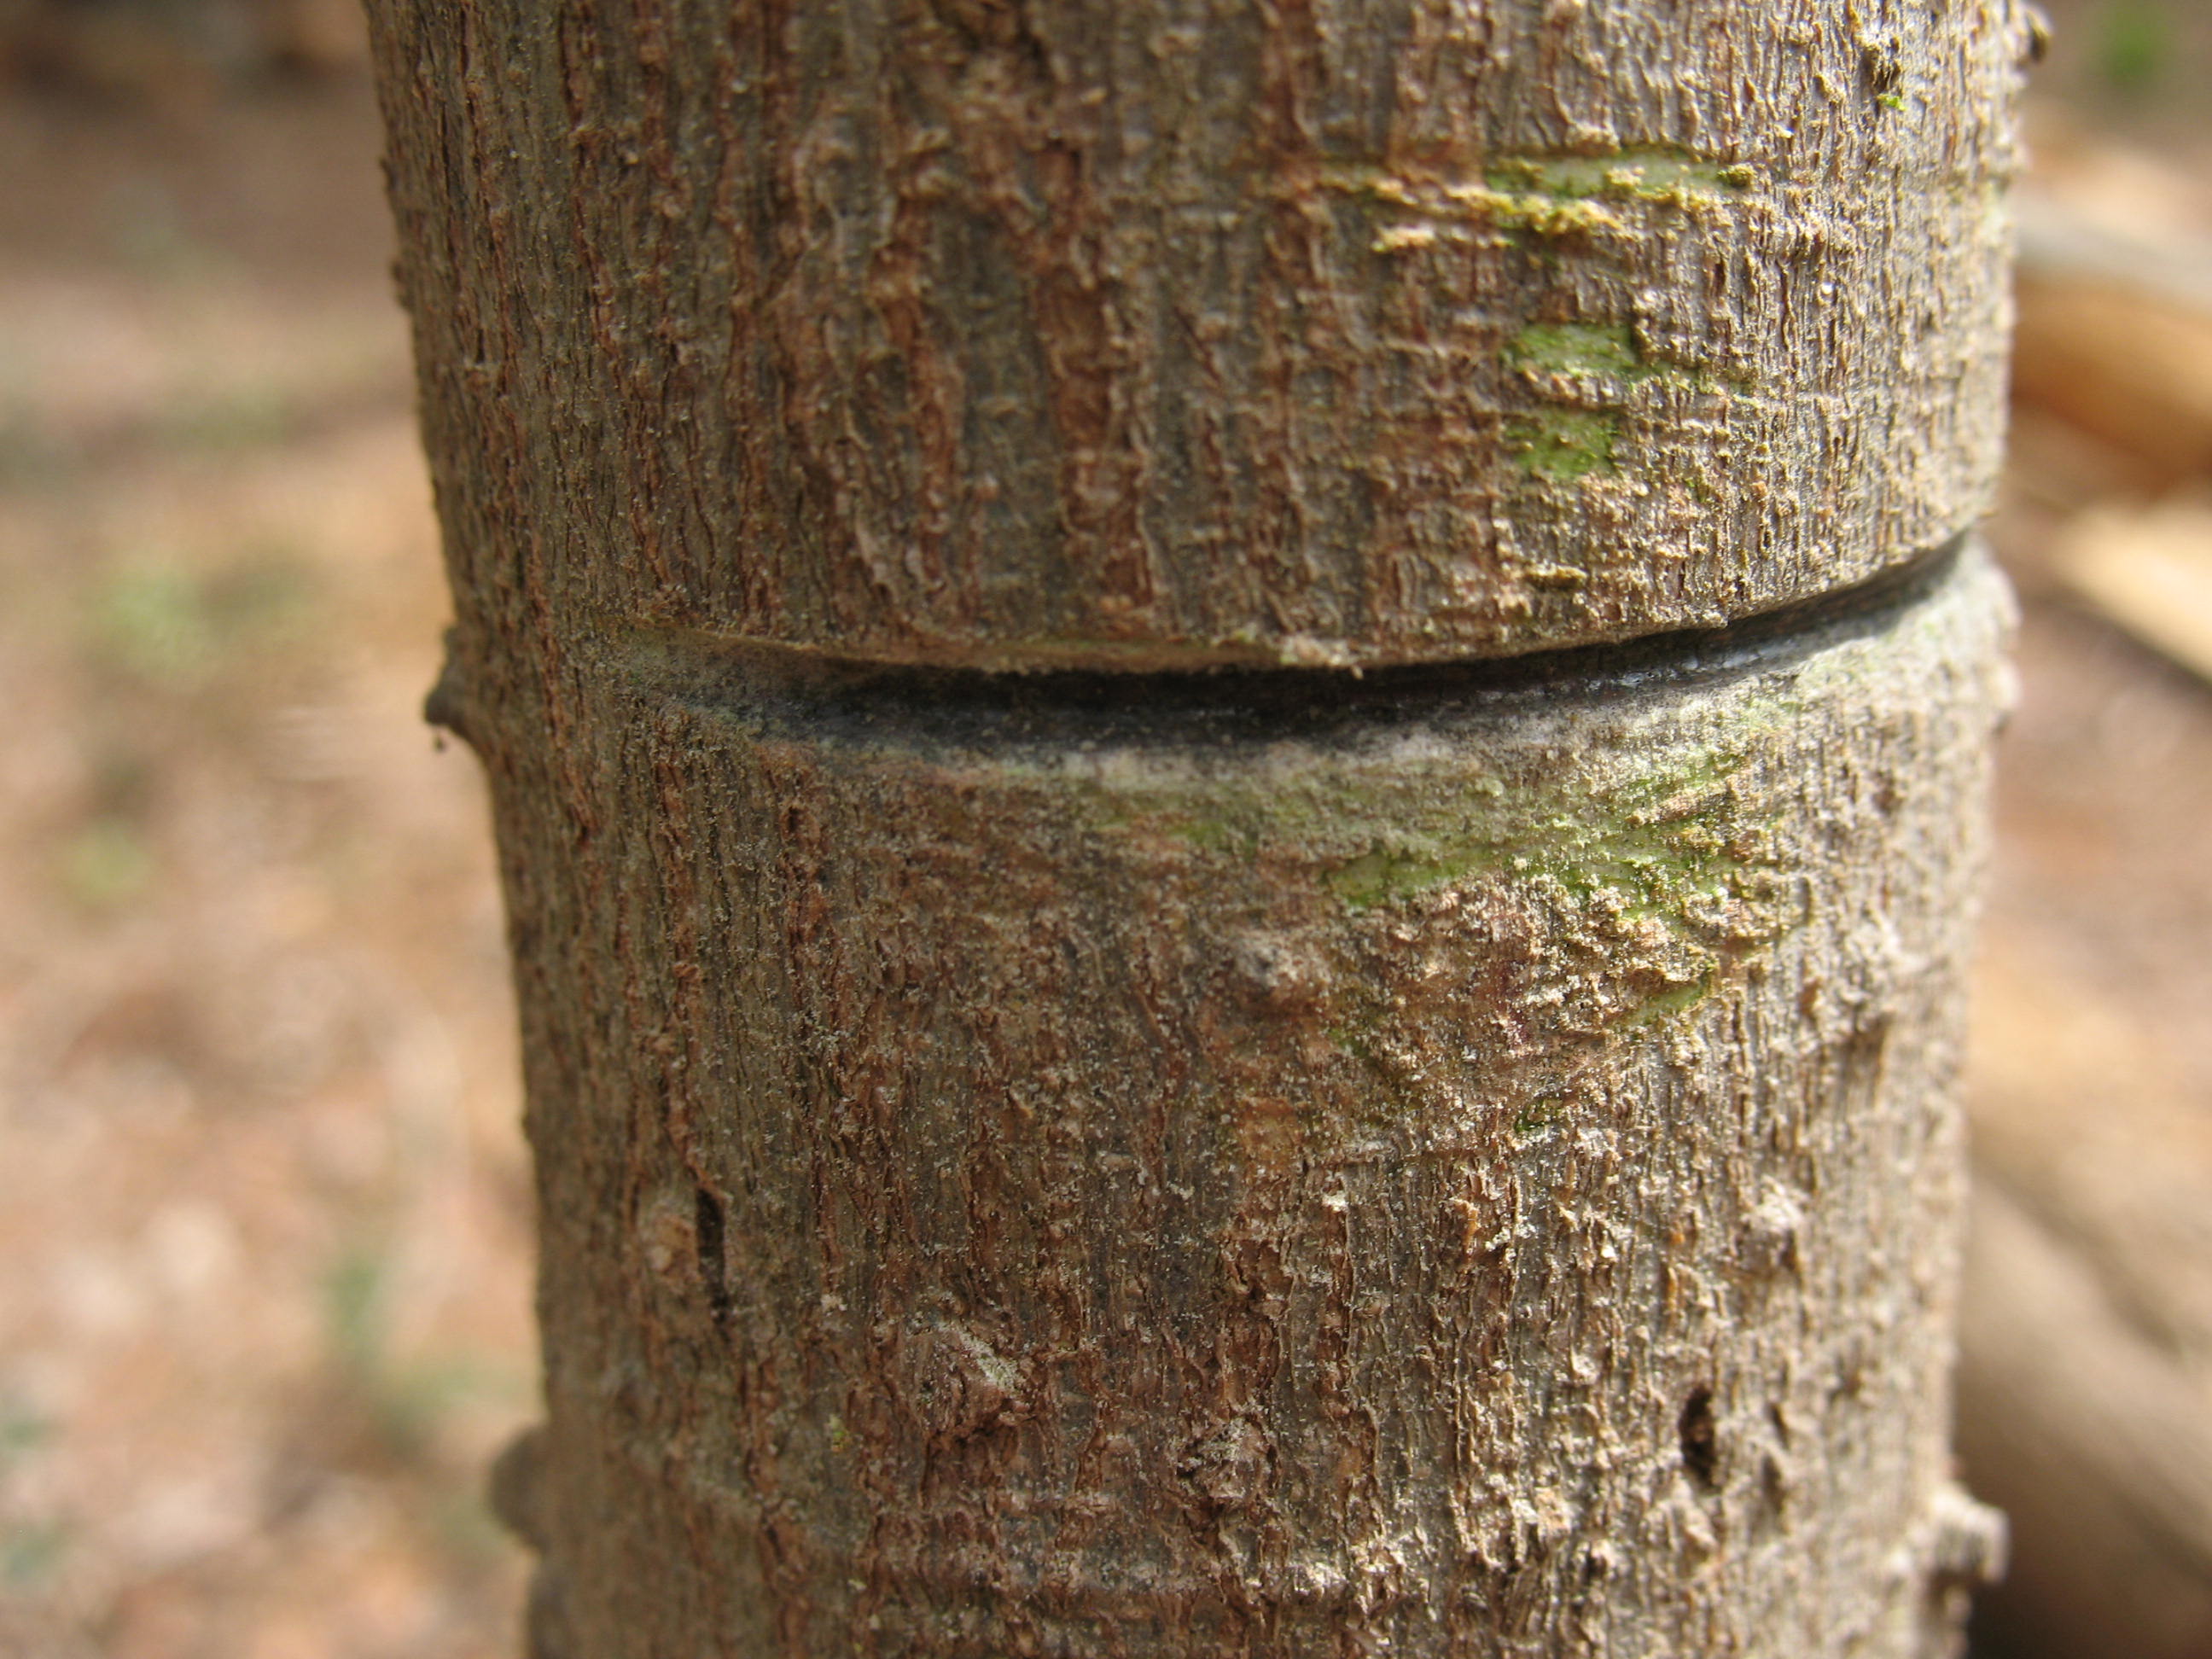
I have been in need of a new deer rifle, so I recently traded for a bolt action Mossberg .30-06. The rifle that I acquired is one of a family of Mossberg rifles known as 4 x 4’s. They come with either a long-bolt or short-bolt action depending on the cartridge length. Mine, being chambered for .30-06, is a long-bolt. The 4 x 4’s are available with a variety of different stocks including synthetic, wood, and laminated wood. Mine is a plain Jane with the black synthetic stock. 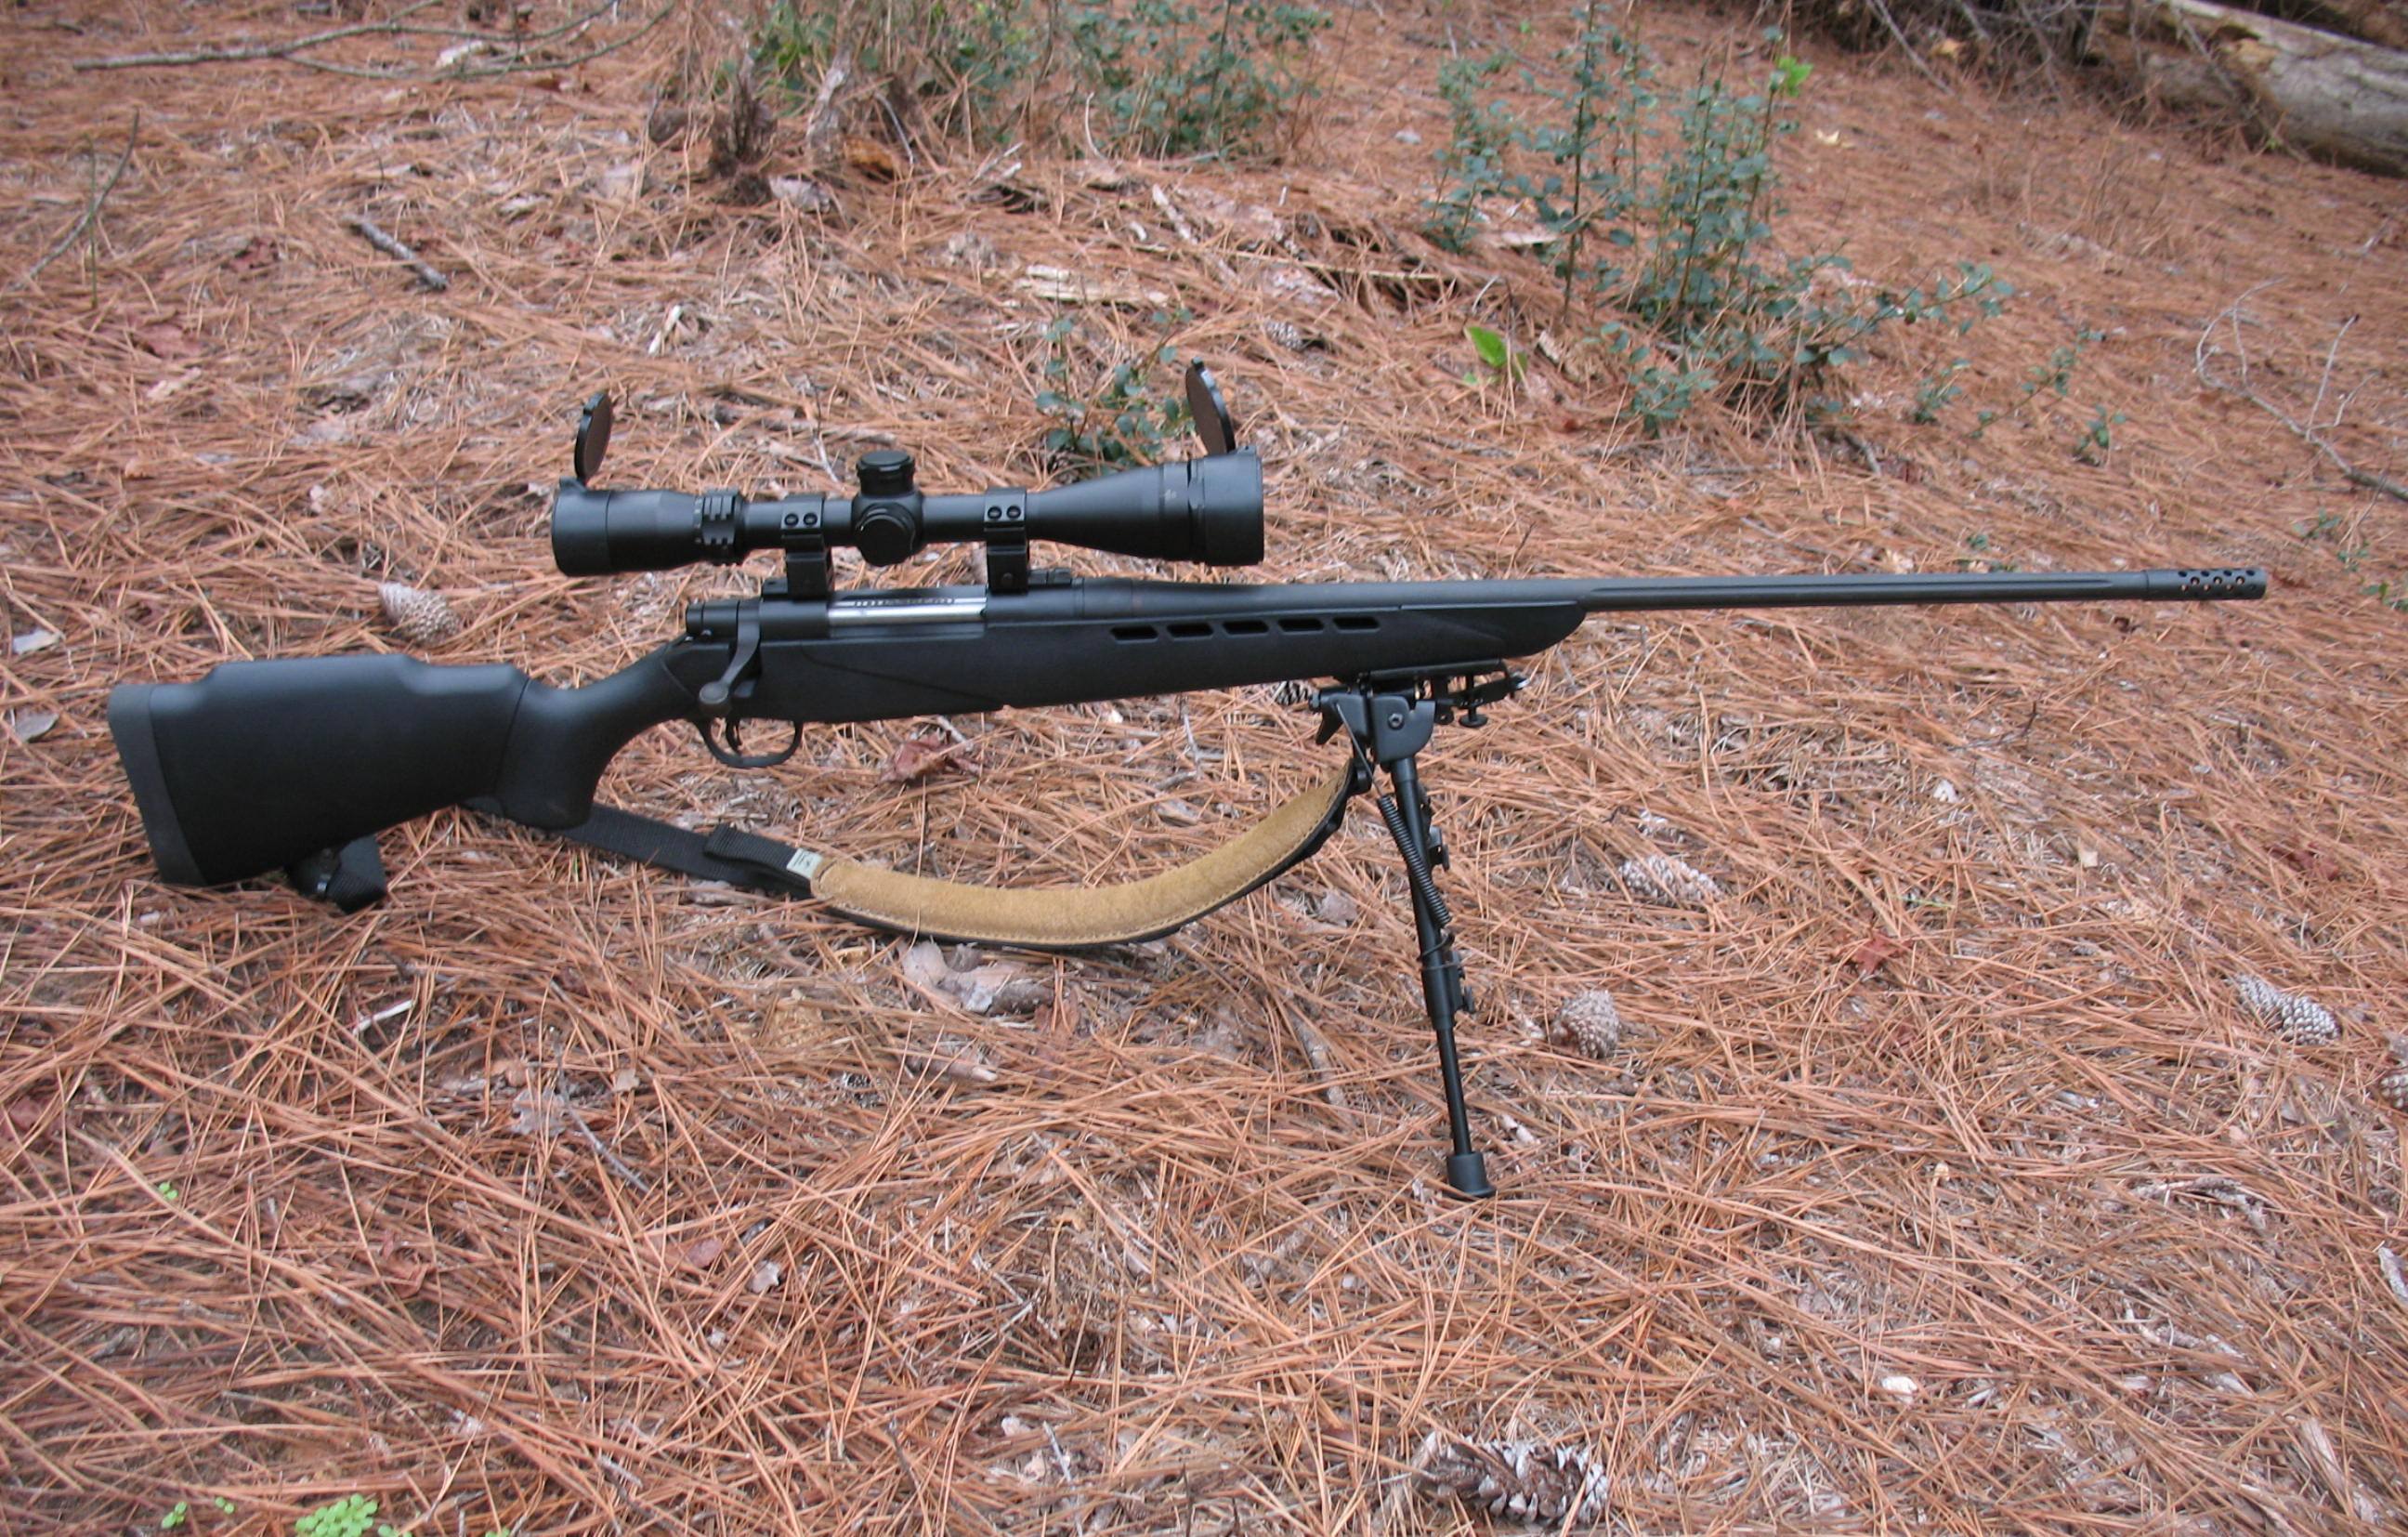 The barrel is free floating and fluted to reduce weight and help dissipate heat faster, although I don’t anticipate firing enough rounds fast enough to overheat the barrel. Not at a dollar-and-a-half a round, anyway.
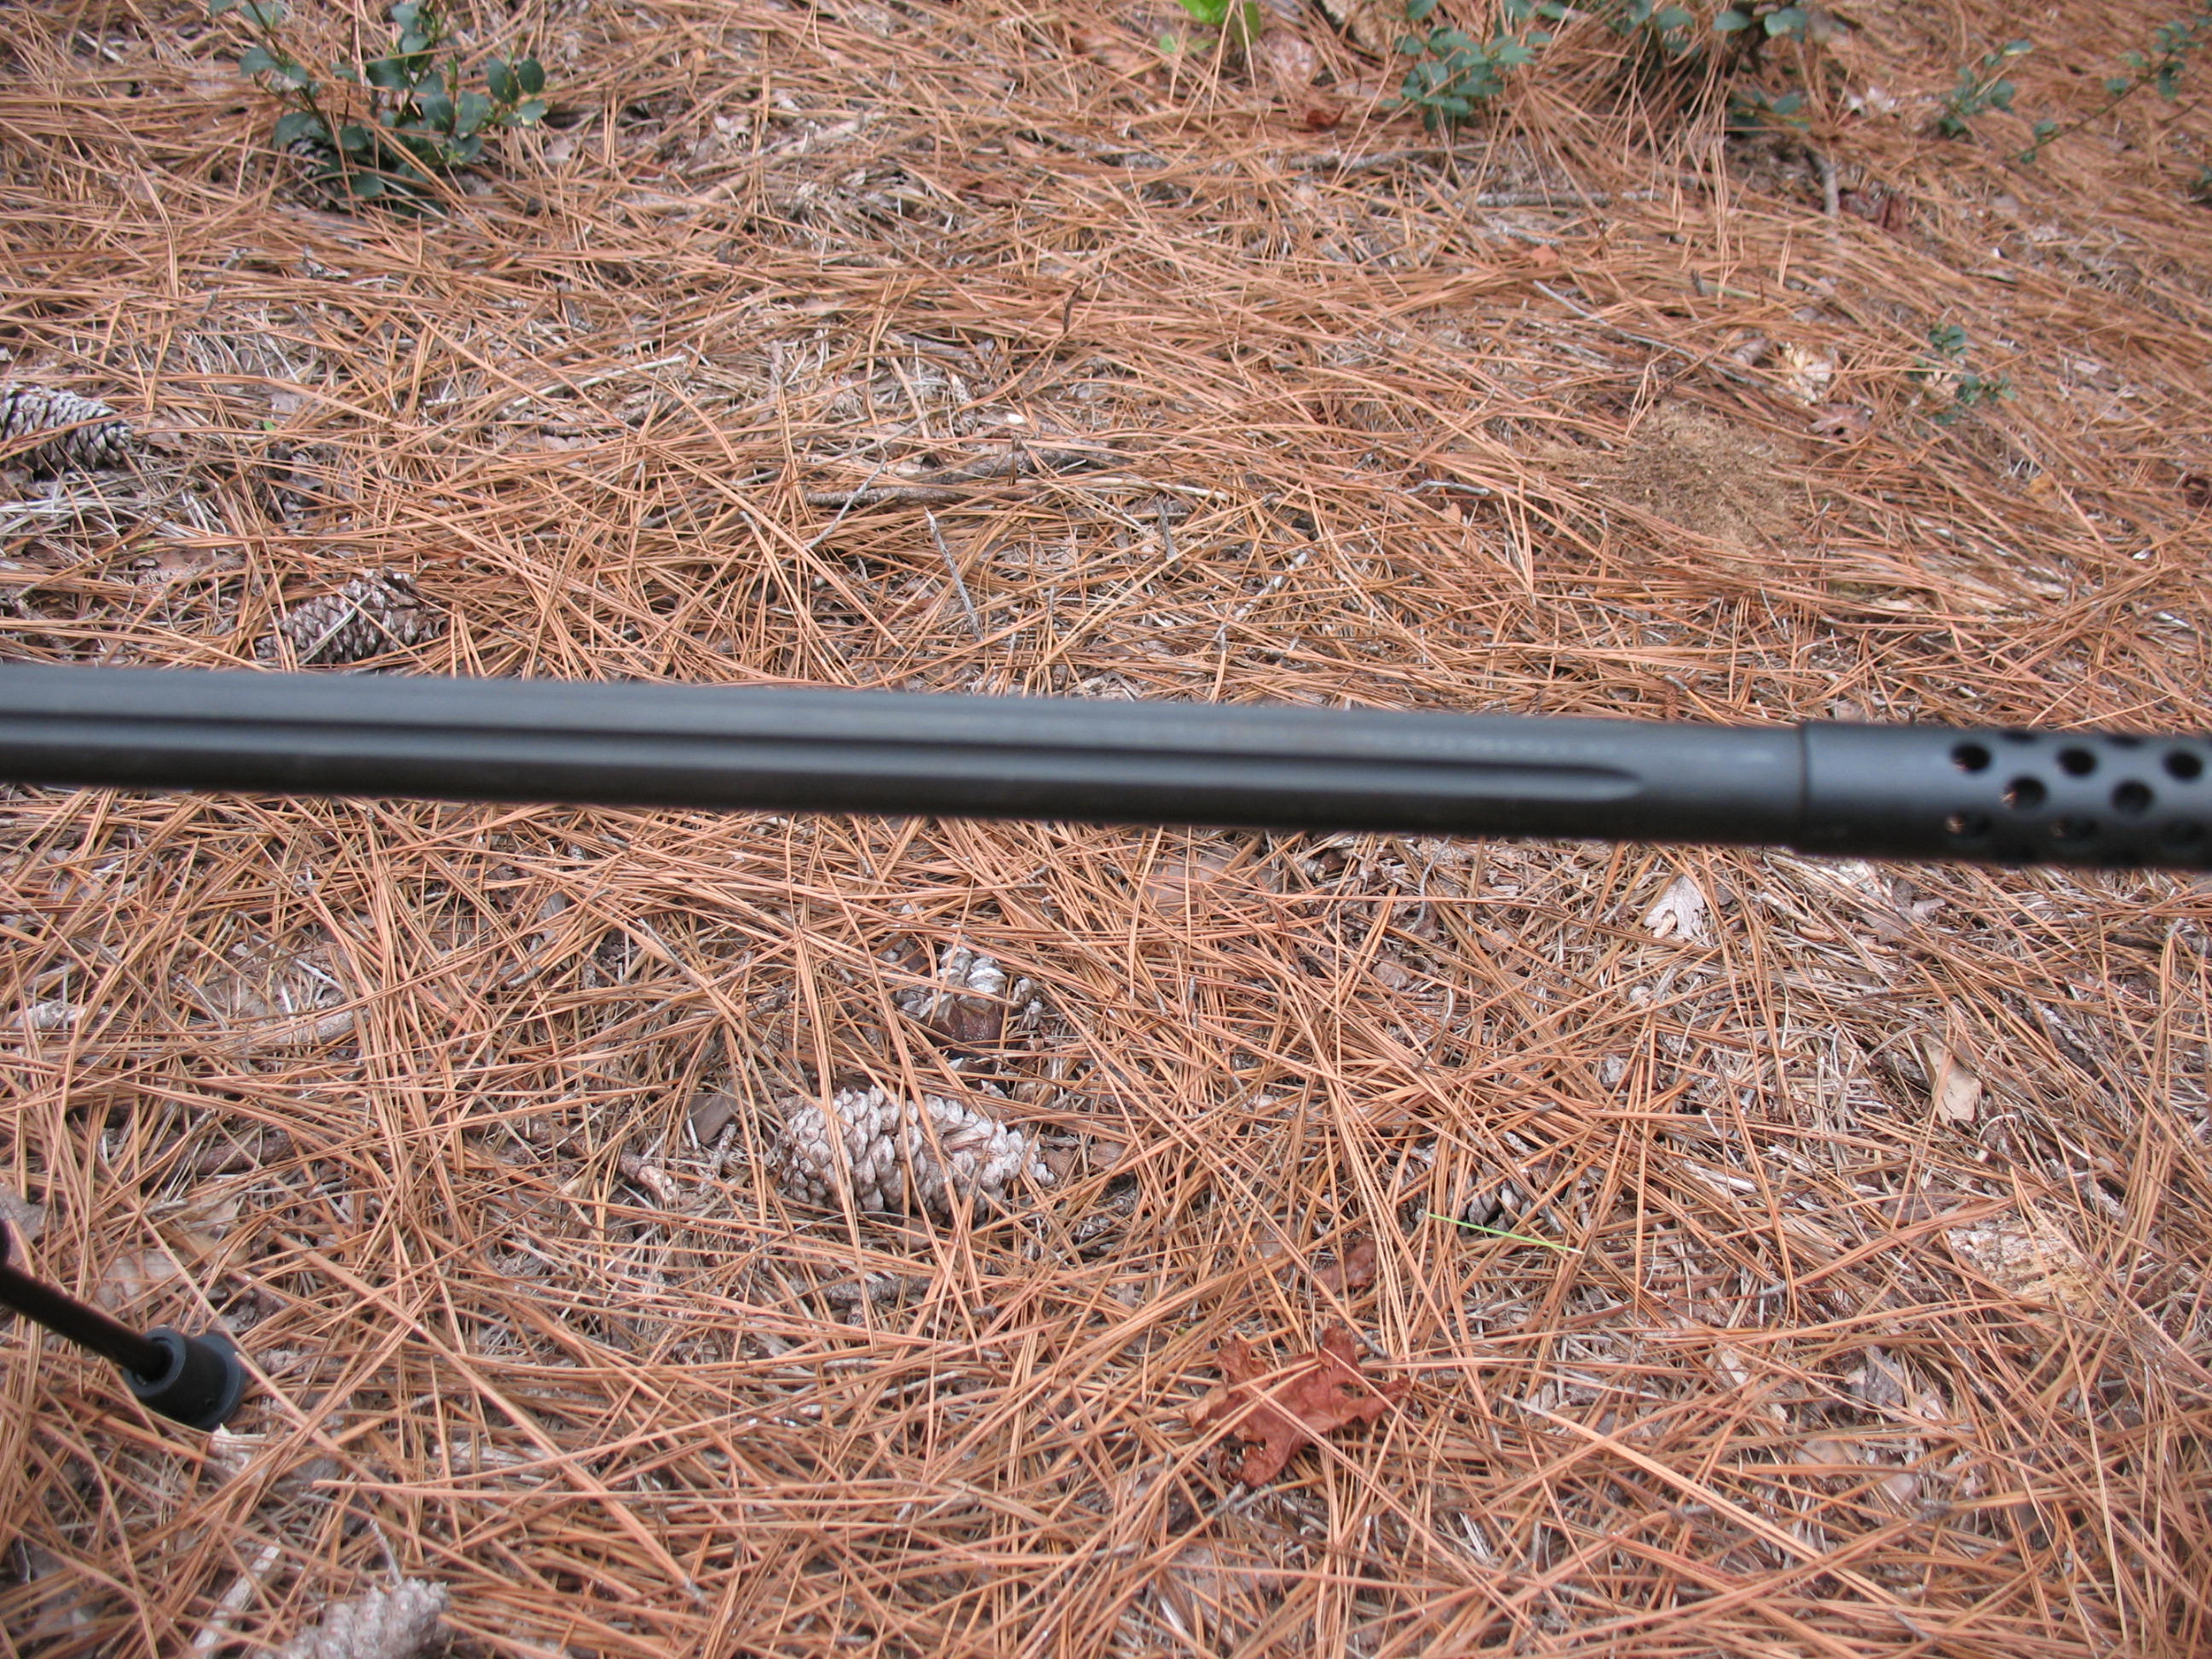
The barrel also has a nice threaded muzzle brake to help reduce recoil.
My 4 x 4 has a 4 round box magazine, which is a feature that I prefer over the tube feed magazine. Replacement mags are available for around $20, but I figure that anything I can’t hit with five shots is going to be long gone anyway. 
These rifles come equipped with weaver bases and can also be purchased as a package with the scope already mounted. Mine already had the scope when I traded for it. Mossberg has the retail price for this rifle listed as $534.00, but I have checked on the internet and found prices of around $450.00.
Now for my impressions about this rifle:
First the stock. As I said, I have the black synthetic stock. It is not pretty. If you are looking for skip checkered, burl walnut, this is not your gun. The stock feels fine, and it comes with a recoil pad which is nice because the .30-06 is not a gentle round, especially with a light stock. 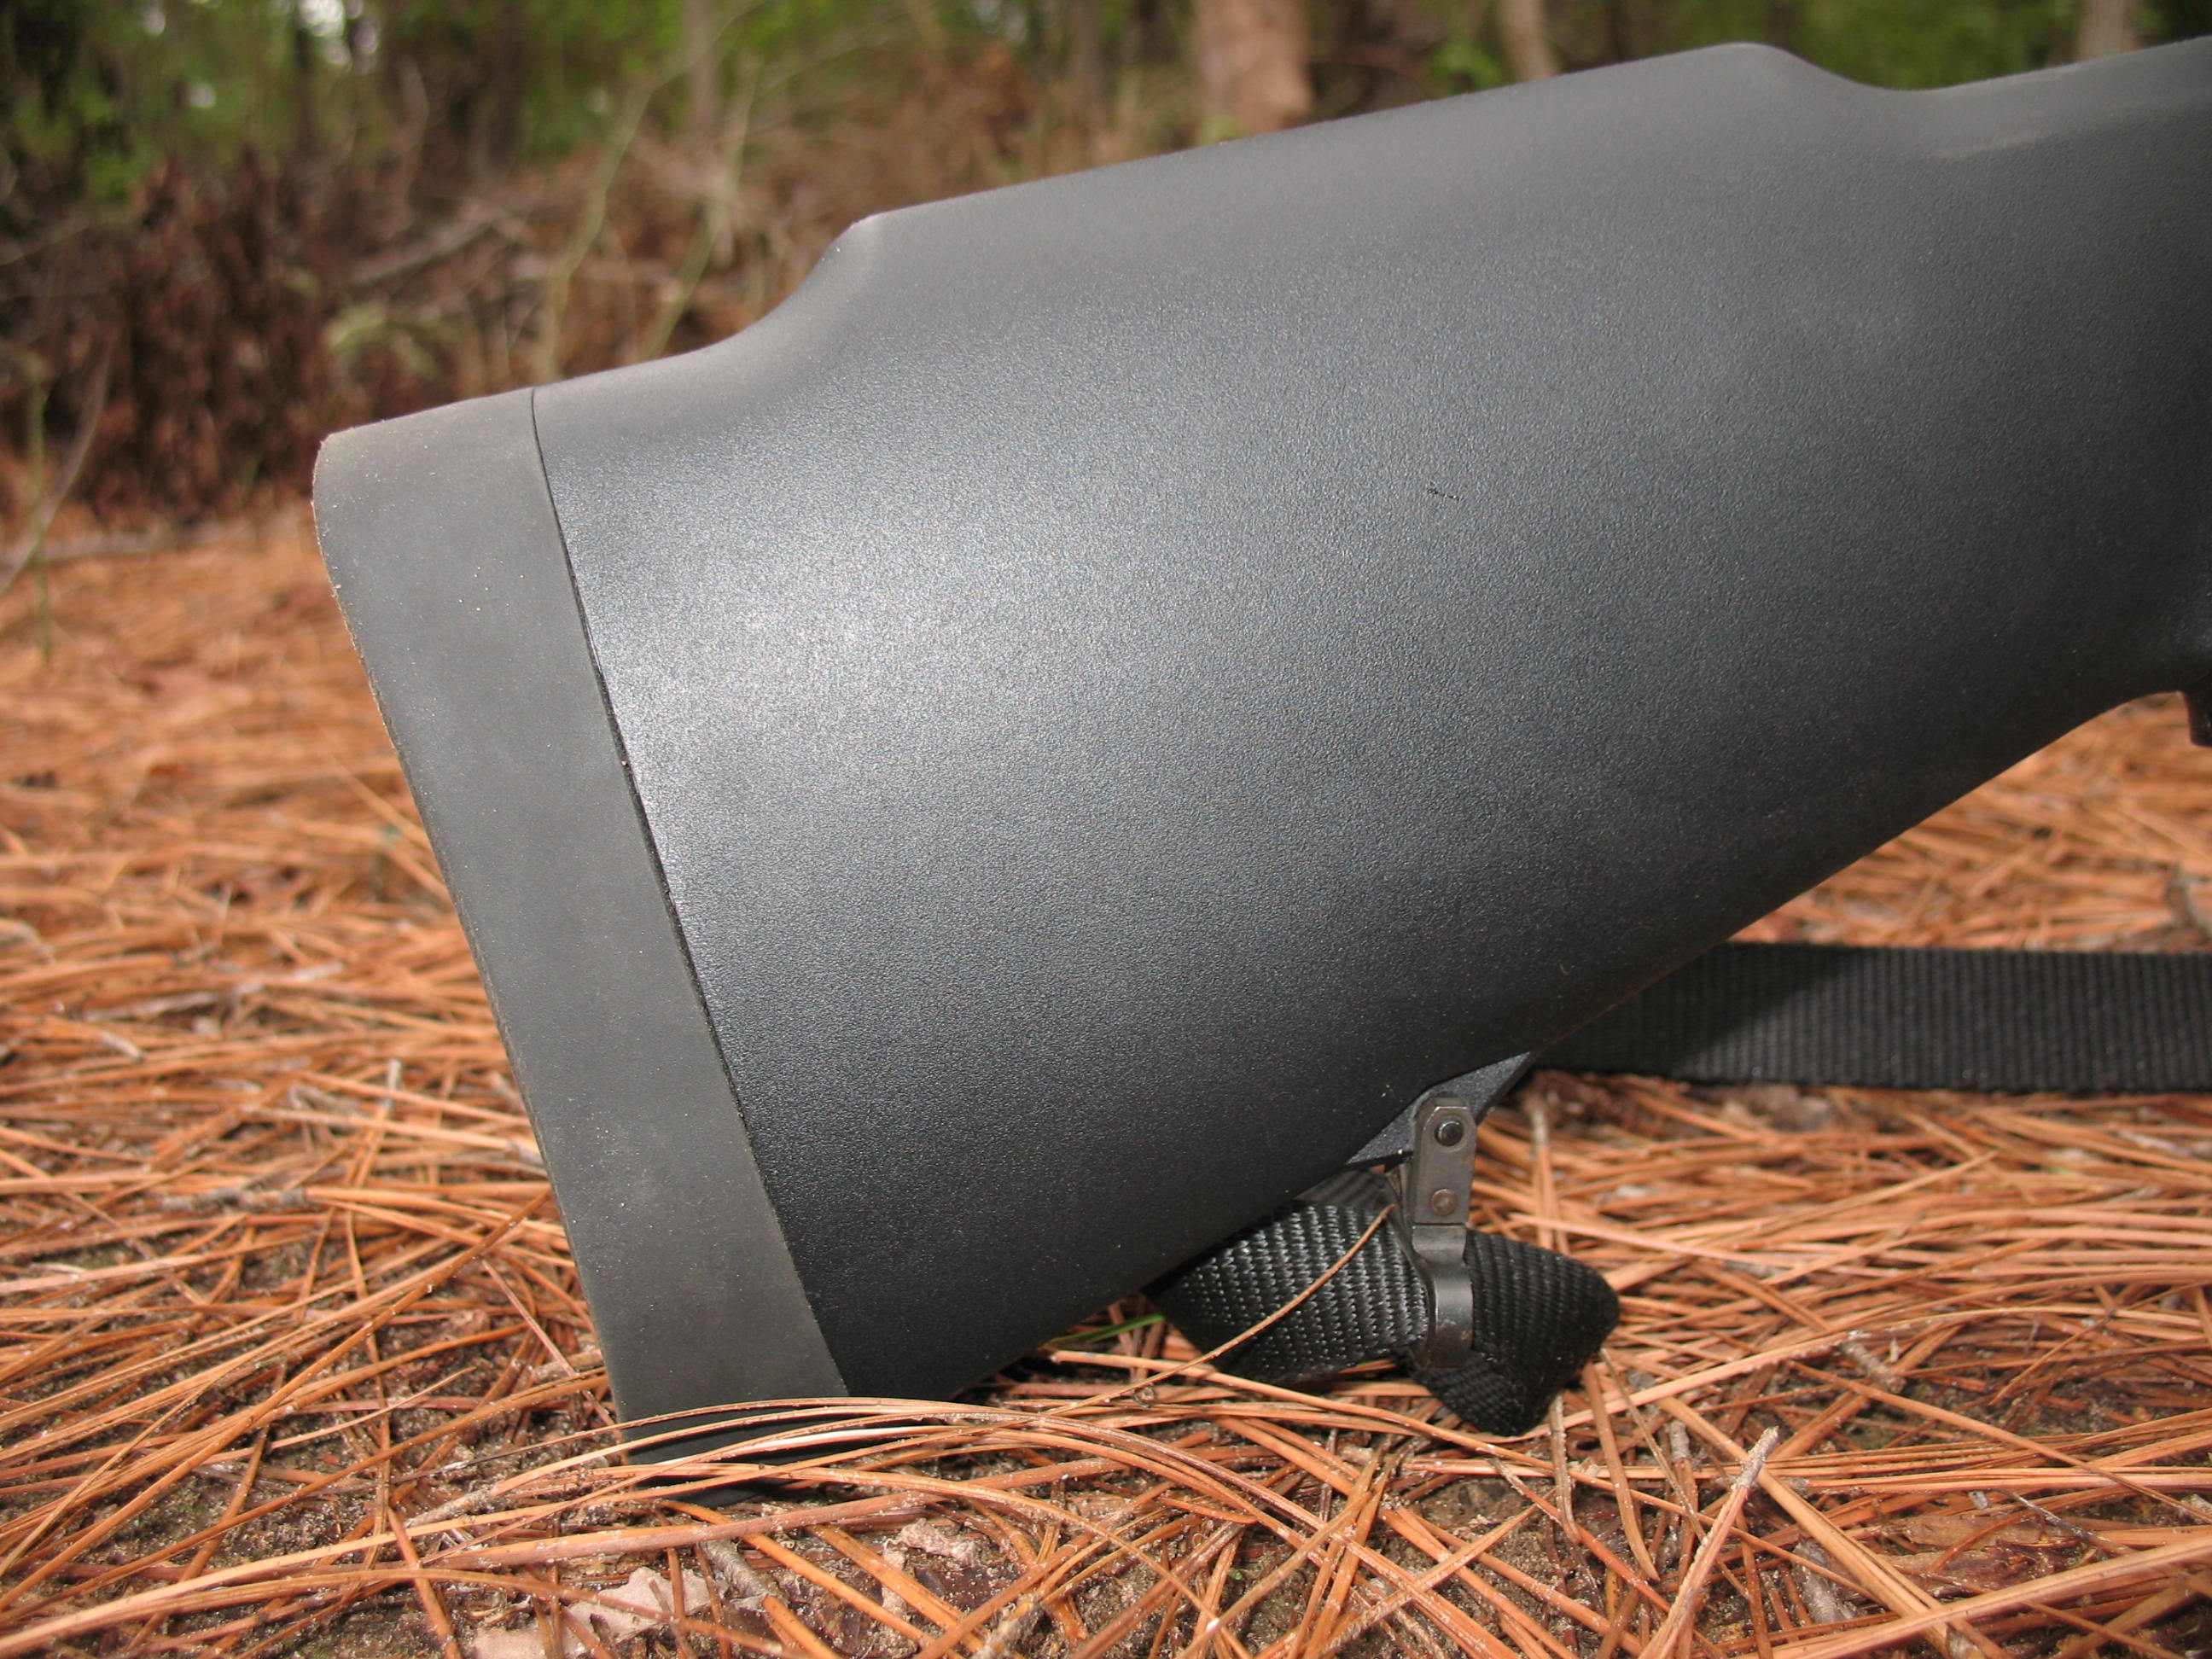
Sling mounts are molded into the stock which looks kind of cheap, but they hold a sling just fine. All of this is fine as far as I am concerned because I hunt to eat, and neither I nor the deer are interested in style points. 
The bolt on this rifle is very smooth, much smoother than on my son’s Remington 770. My rifle is used, but it has not been used much, so I am assuming that it comes out of the box with a pretty smooth action. 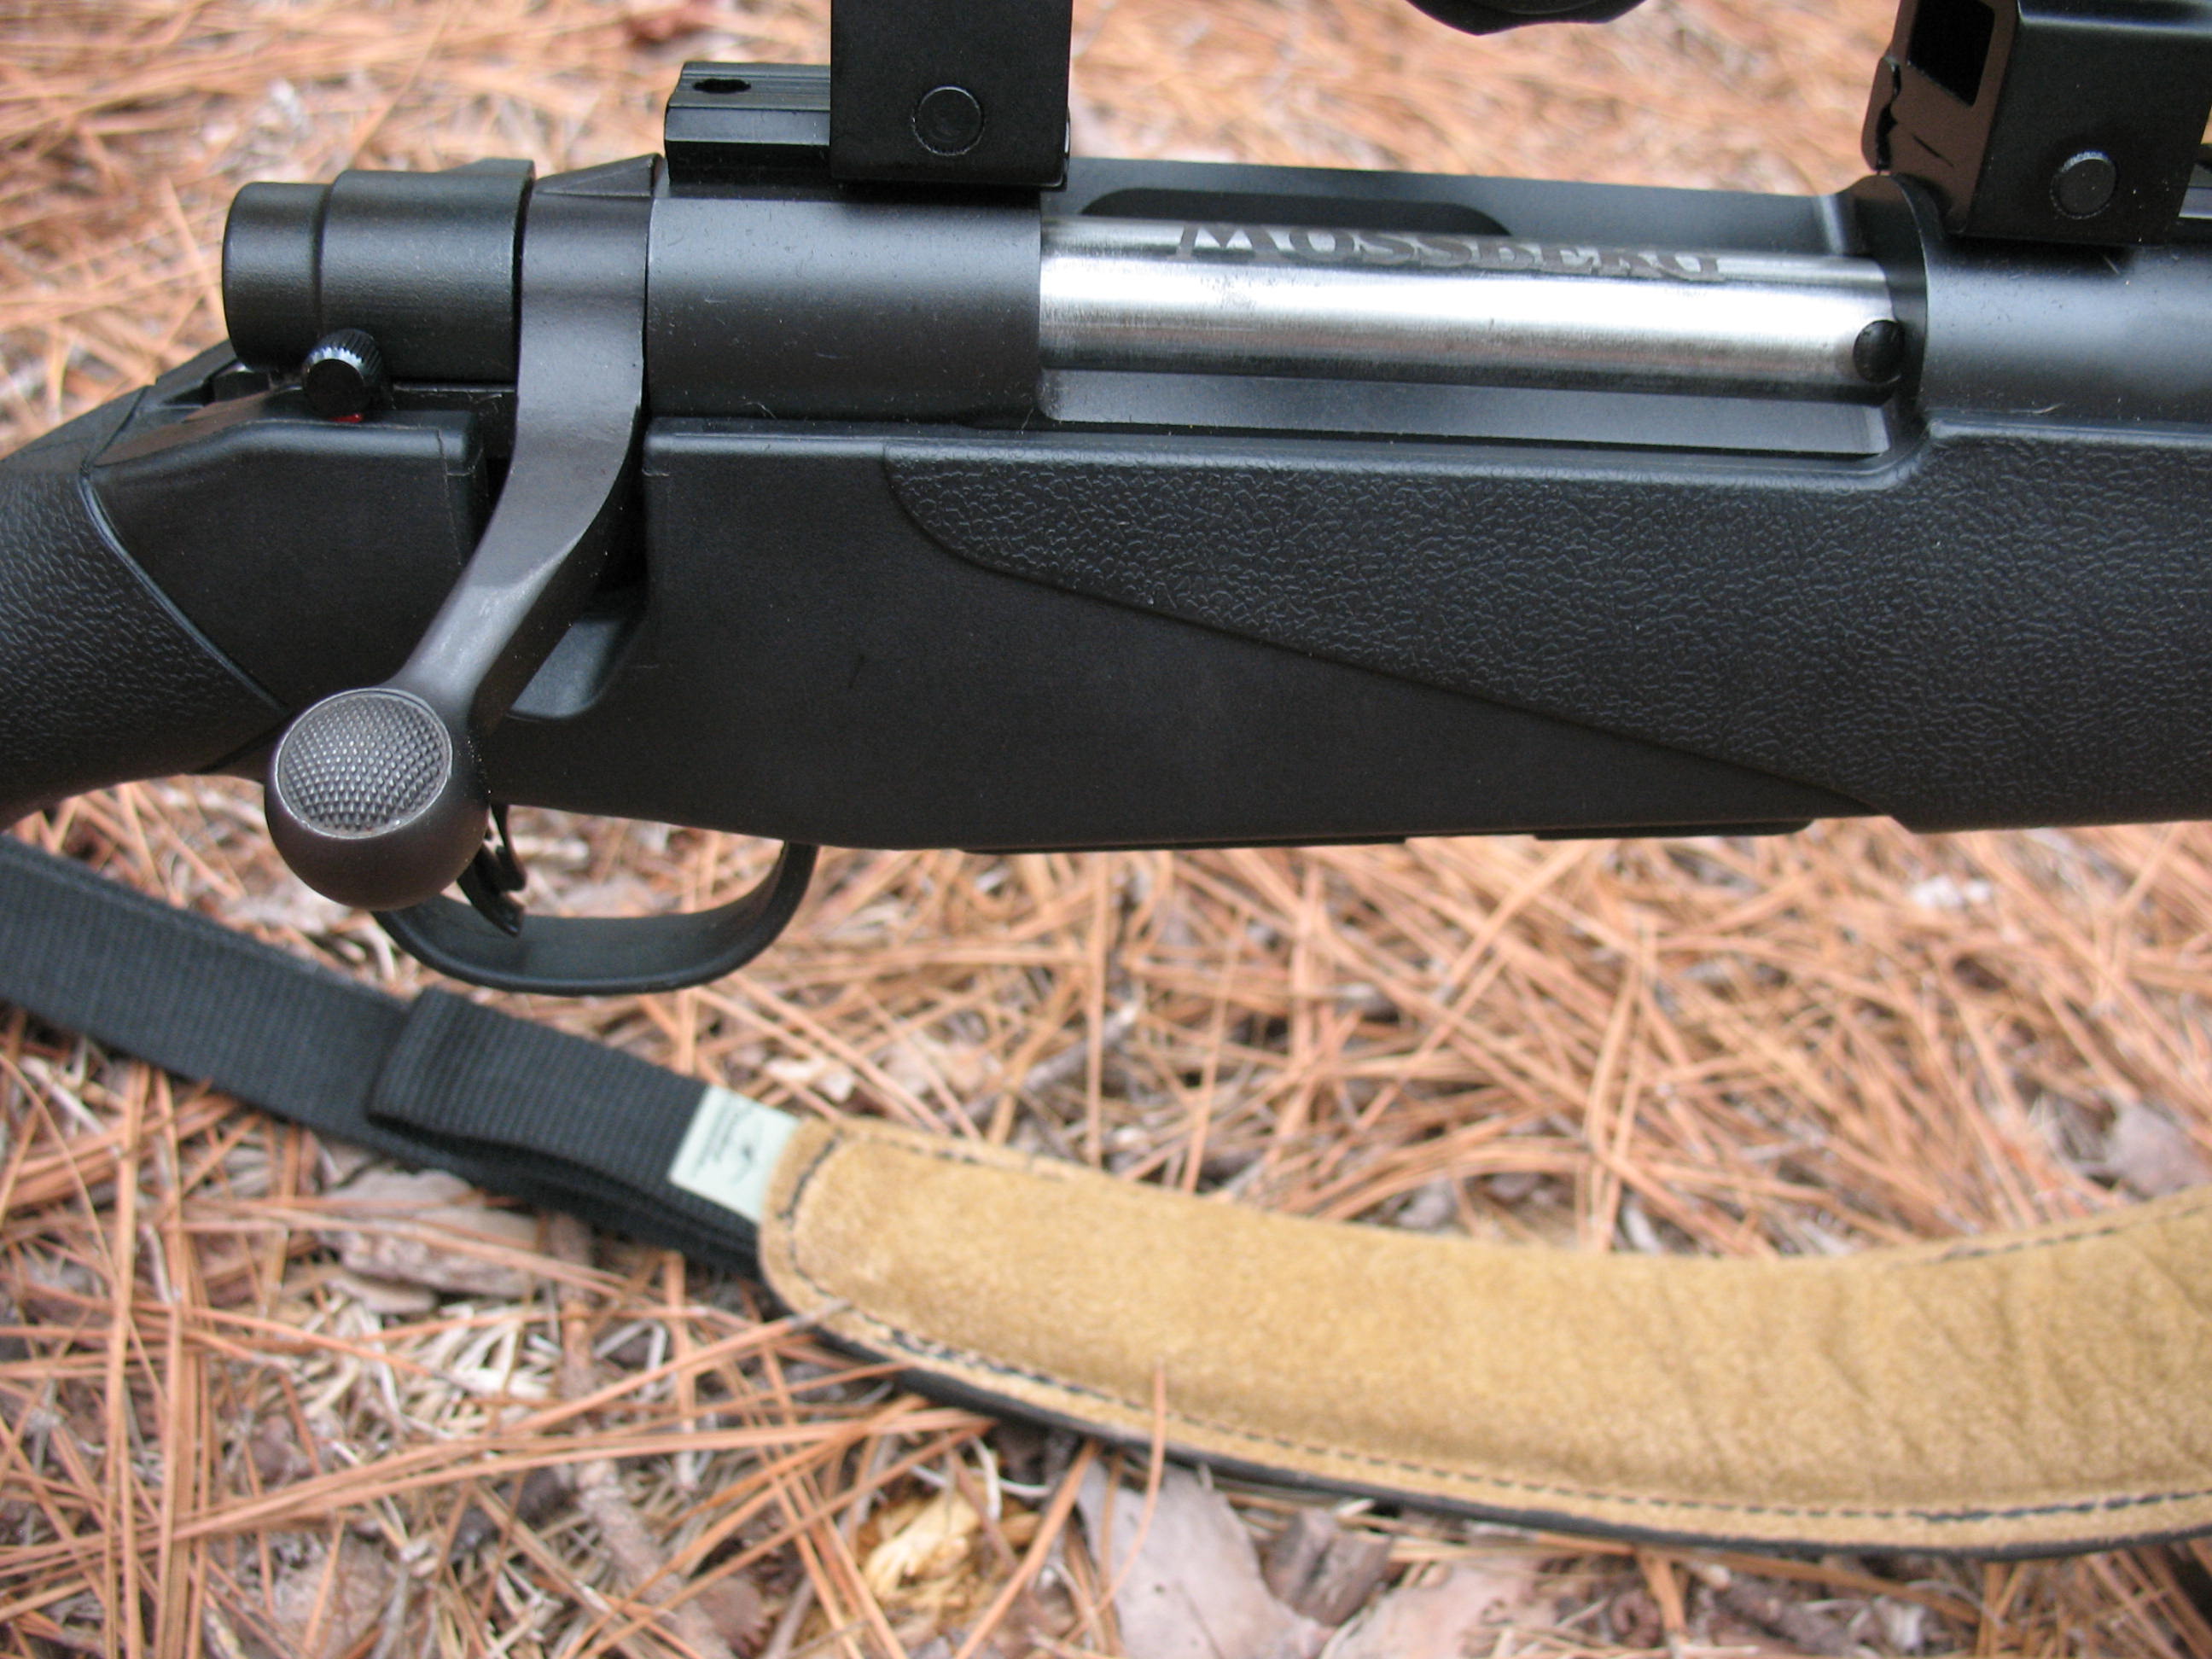

A small, push-down button located to the left rear of the bolt allows for bolt extraction, which makes it easy to examine and clean the bore. 

The thumb lever safety is located just behind the bolt handle when the bolt is closed. The safety is crisp and firm so that you will know if it is engaged.

My 4 x 4 already had the scope mounted. It is not a high quality scope. The brand name is CP (never heard of it) and it is made in China. That being said, it seems to be a decent enough scope, only time and use will tell for sure. 
One feature that I like about the scope is that it has attached, flip up lens covers. I have a hard time keeping up with the removable lens covers that are connected with an elastic string. 
I fired a few rounds on the range to make sure that the scope was sighted in correctly. I had to adjust it just a little, probably due to my glasses which seem to make me group a little low and to the left of where other people shoot with the same weapon. Grouping was good and the bolt cycled smoothly.
Trigger pull was smooth and crisp; not to long or short. 
The trigger pull is adjustable. If you want to adjust the trigger pull you will need to use a 5/32” Allen wrench to remove the two bolts that are located just to the front and rear of the magazine well. This allows you to lift the barrel and trigger assembly clear of the stock.

The trigger pull adjustment screw is located on the front of the trigger assembly. 
The trigger pull felt fine to me, so I left it where it was.
I added a padded sling and an adjustable bi-pod to my rifle and I am good to go.
 I am happy with this rifle. It is no work of art, but it is a good, solid, functional firearm. It will put meat in the freezer.
I like to make and eat whole wheat bread, but whole wheat flour does not store well. I have been buying whole wheat flour, a bag at a time, and using it to make my whole wheat bread; and then I have been keeping white flour in my food storage. The problem is that I don’t ever use the white flour, and it doesn’t keep for very long either (about a year). The other day I had about 30 pounds of white flour come up for removal, meaning that I had to dump it in my compost bed. This did not make me happy. It is just too wasteful.
So, I decided that I would go the route of storing hard red wheat and grinding my own whole wheat flour using a hand operated grain mill. Hard red wheat can be purchased in nitrogen packed barrels that hold about 45 pounds of wheat and have a storage life of around 30 years if left unopened.
I am not one to jump into anything without doing a little research and experimentation, so I decided to buy a bag of hard red wheat at the local health food store (25 pounds for $12.10) and a medium grade grain mill to test the process out. I went on-line and looked at several grain mills and read the reviews. I didn’t want to buy a piece of junk, but I also wasn’t ready to invest a bunch of money in a mill only to find that I wouldn’t use it. I decided that the Victorio Back to Basics Grain Mill looked like a good middle of the road mill that I could use to test out the process without a huge investment. The Back to Basics mill retails for anywhere from $65 to $80 dollars. Always one to look for a good deal, I went on E-bay to see if I could find one there. There was one, new in the box, up for bid, and I ended up getting it for $28.00 plus shipping.
When the mill arrived I removed it from the box, washed it off and assembled it. Assembly was pretty straight forward and simple. 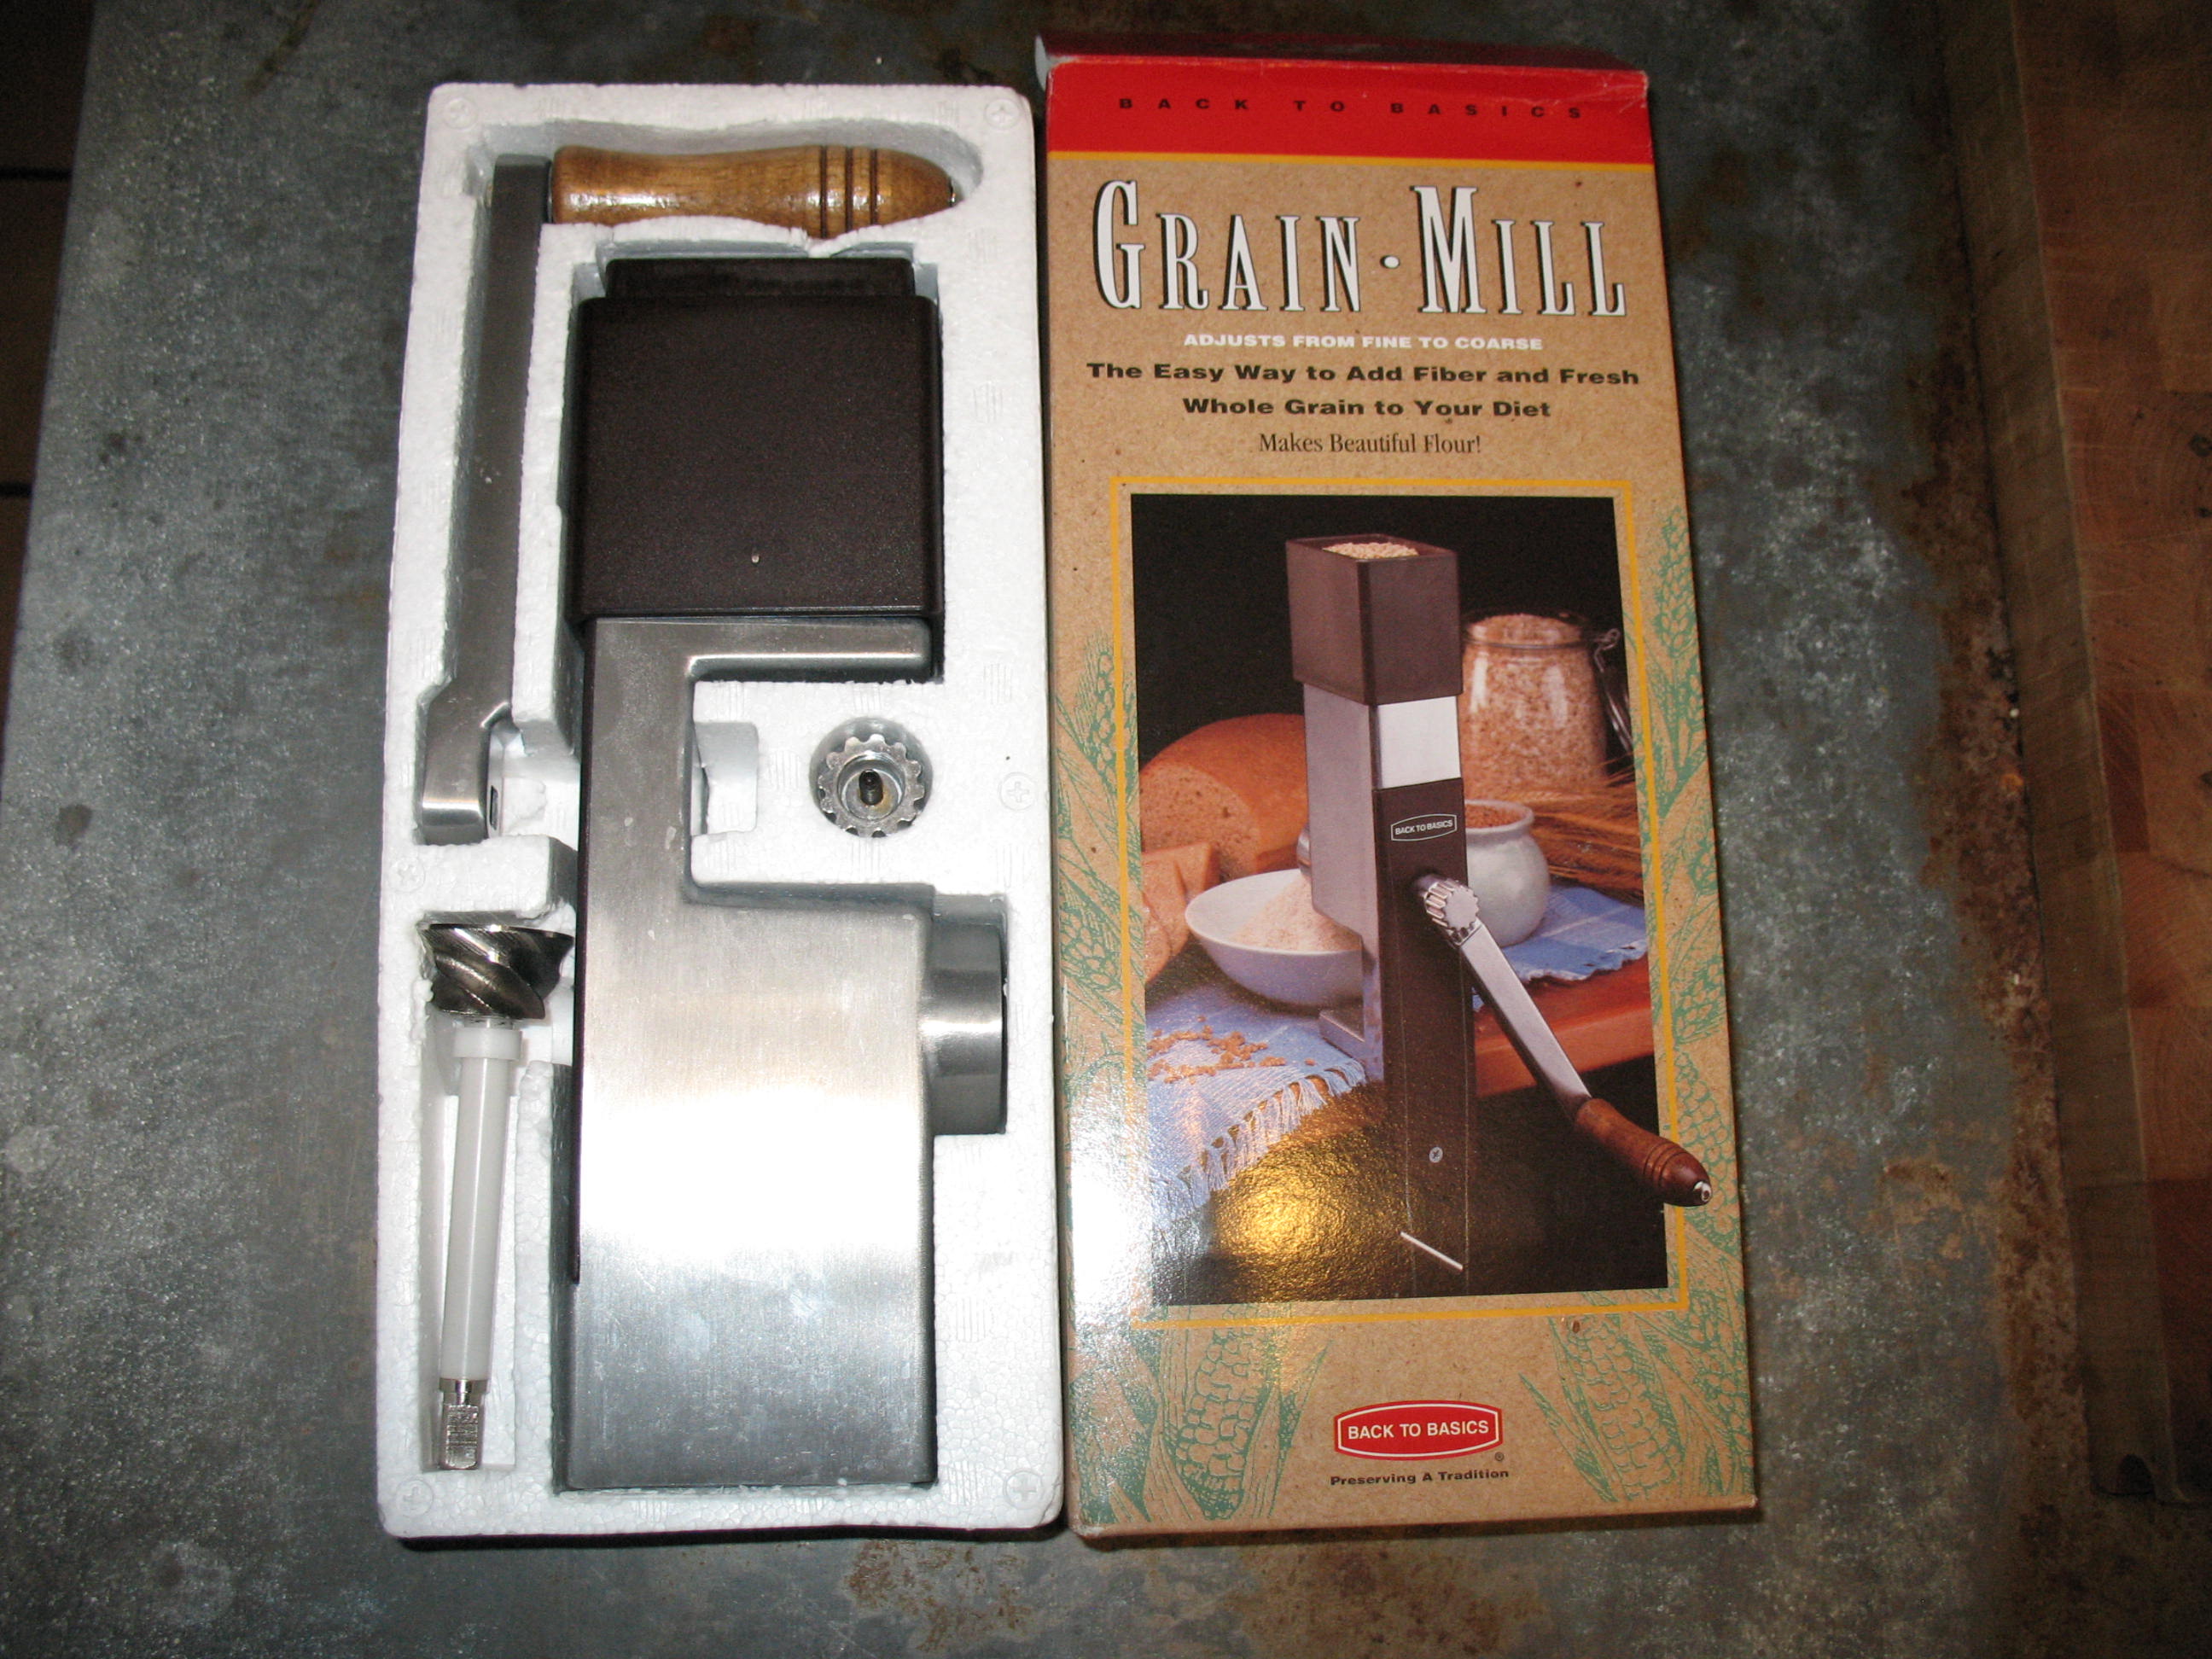
Insert the rod with the grinding burs through the hole in the body of the mill. 
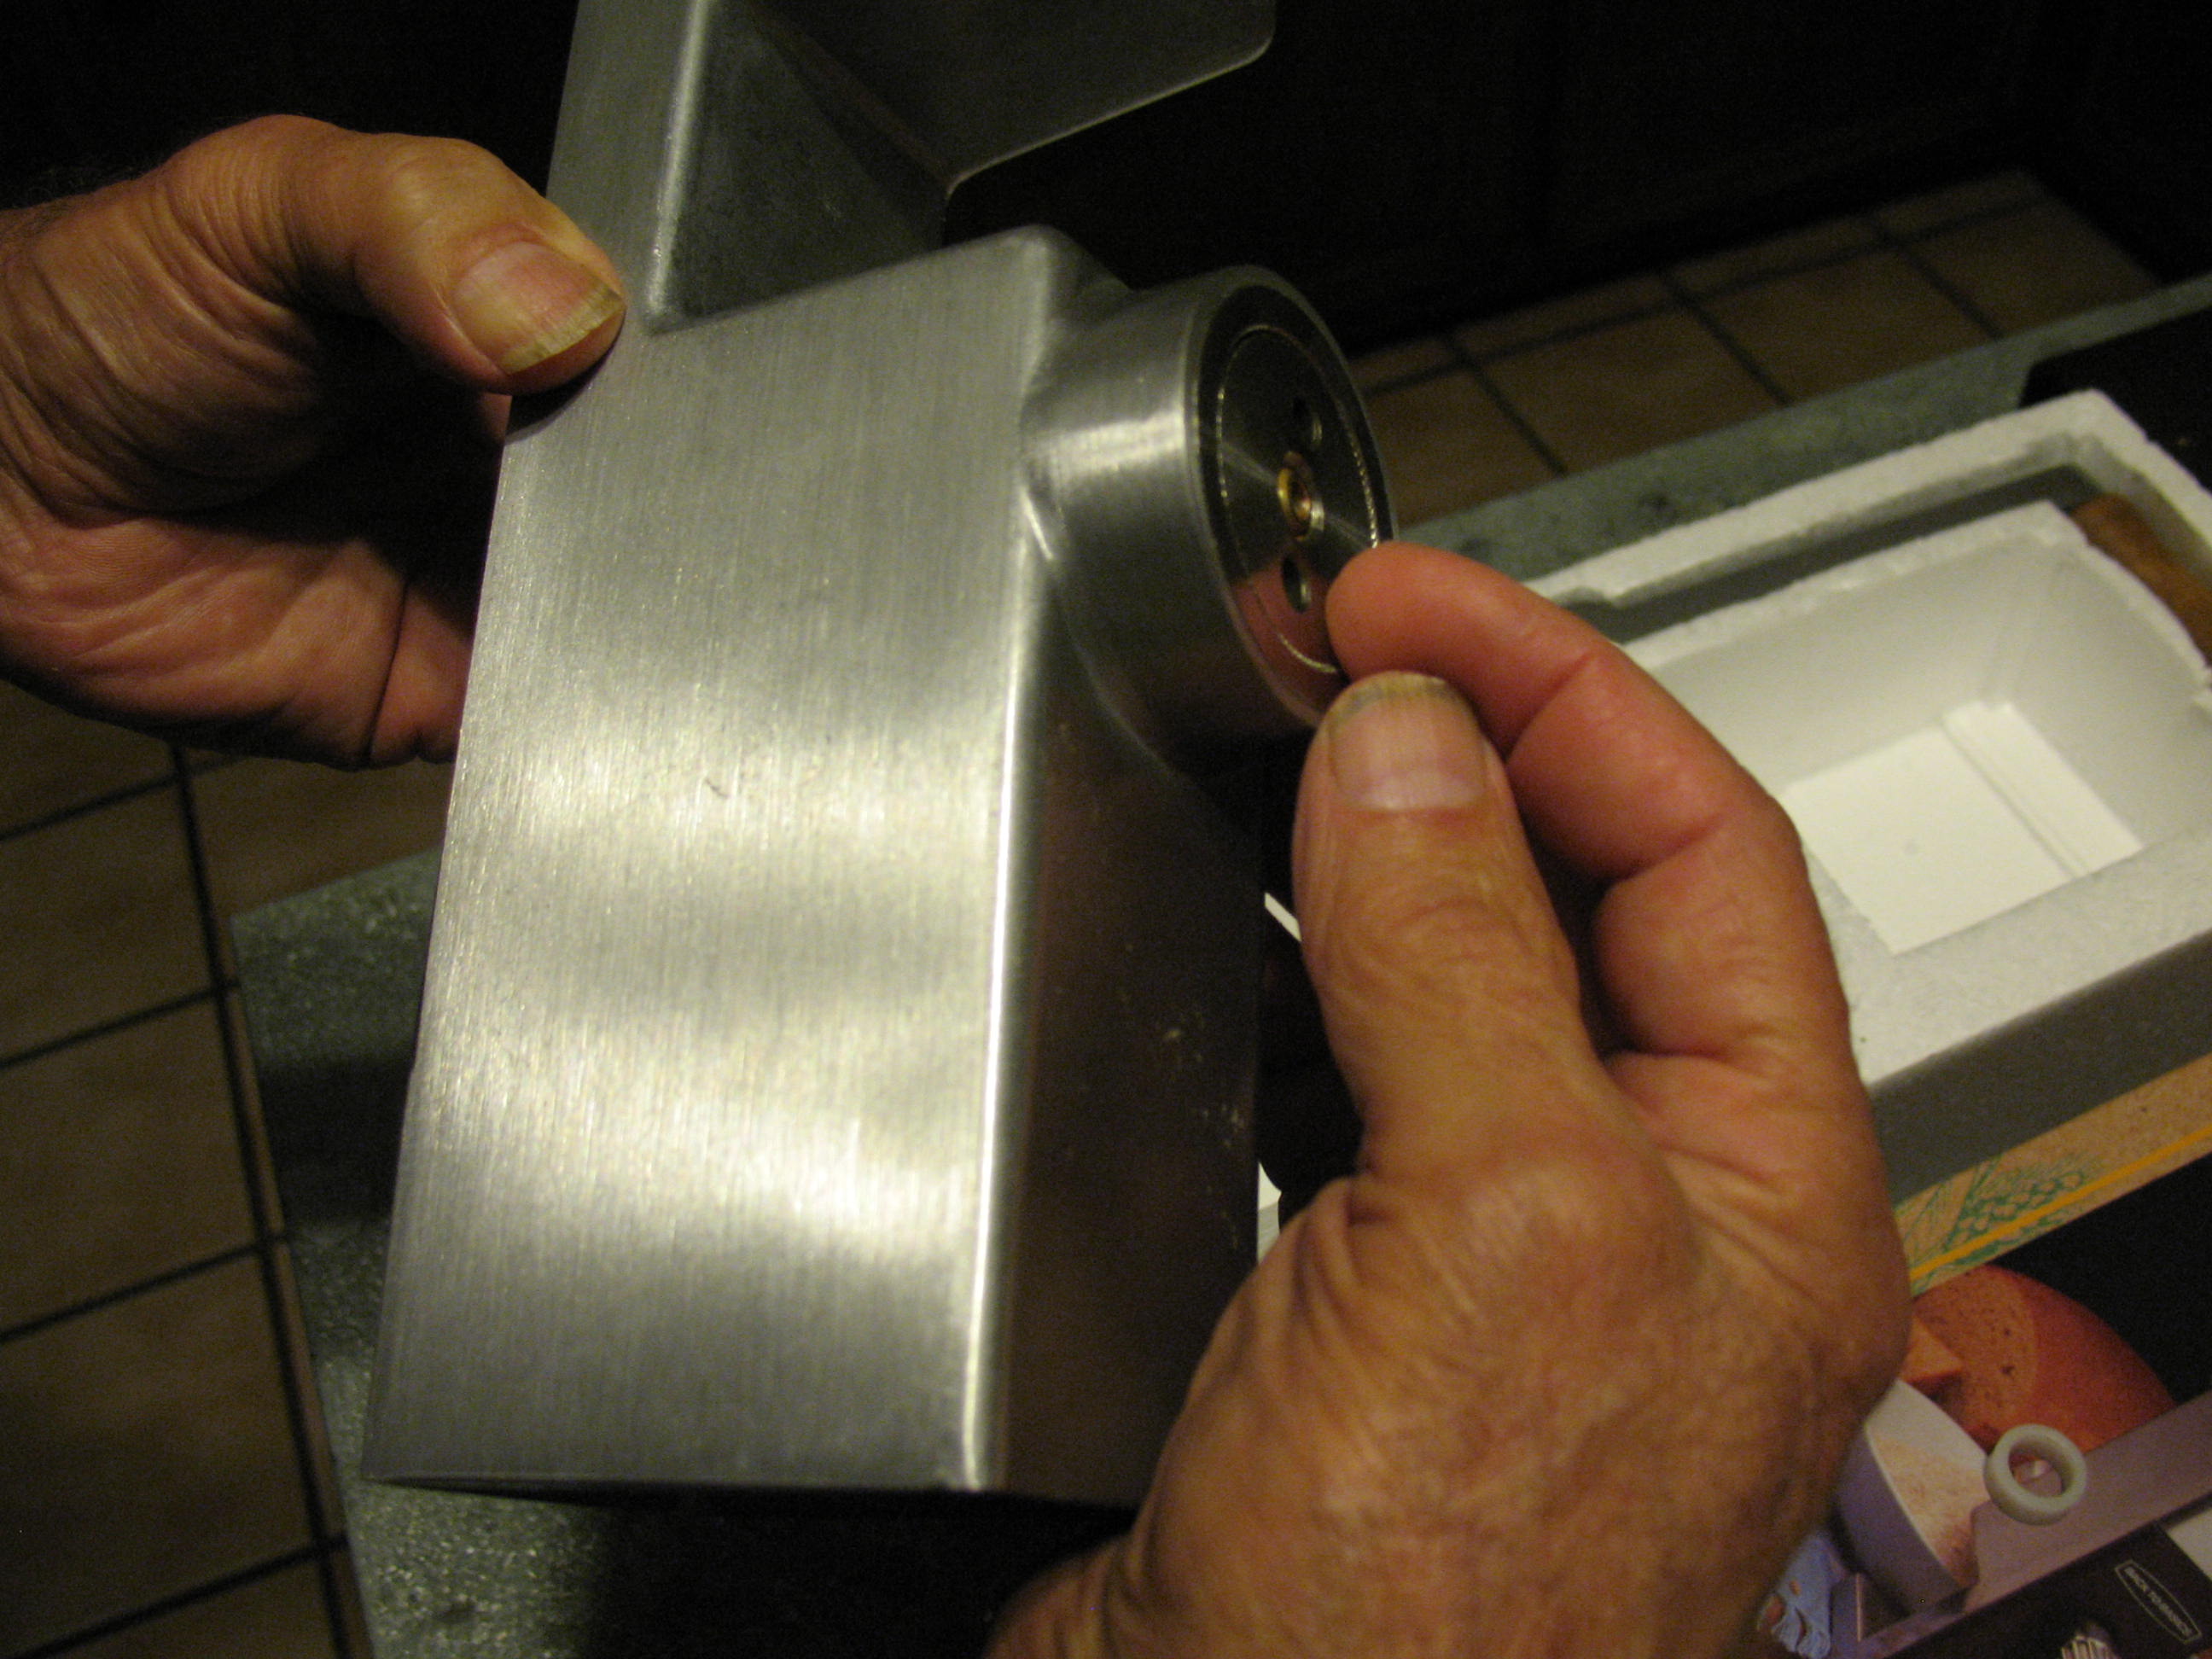
Slide the neoprene washer over the rod. 
Slip the cranking handle onto the end of the rod. 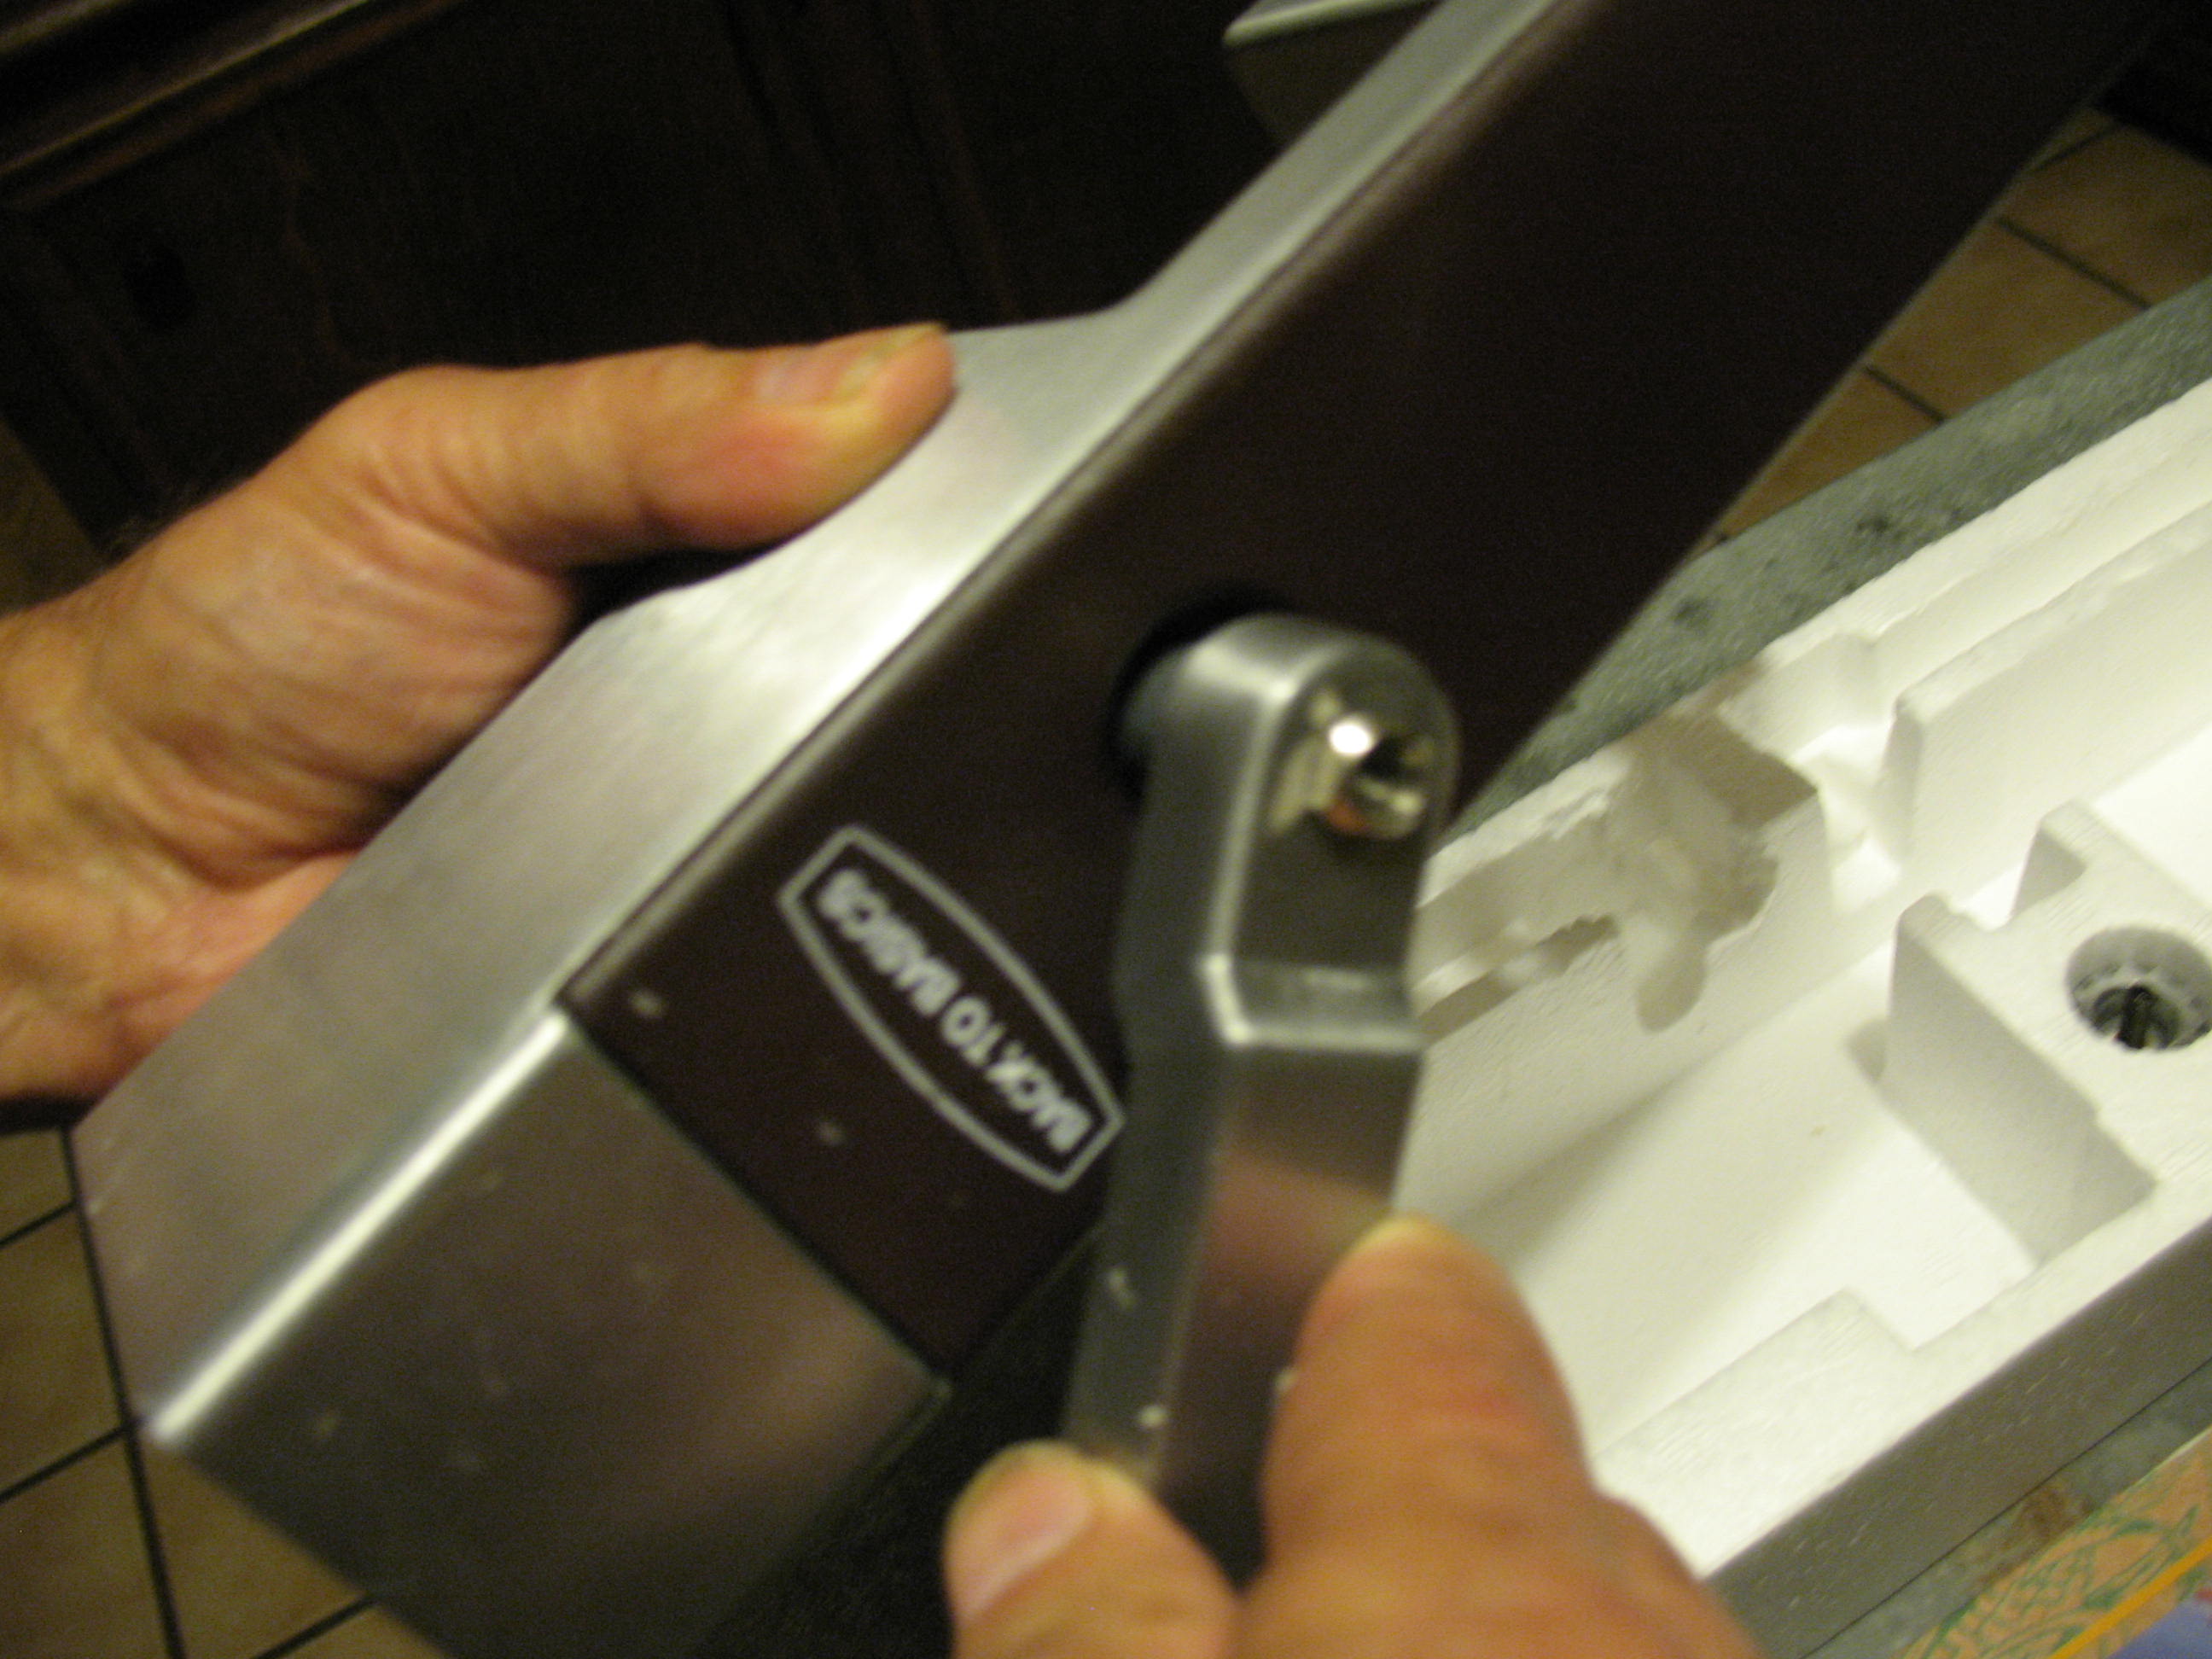
Insert and snug down the screw that holds the crank on. 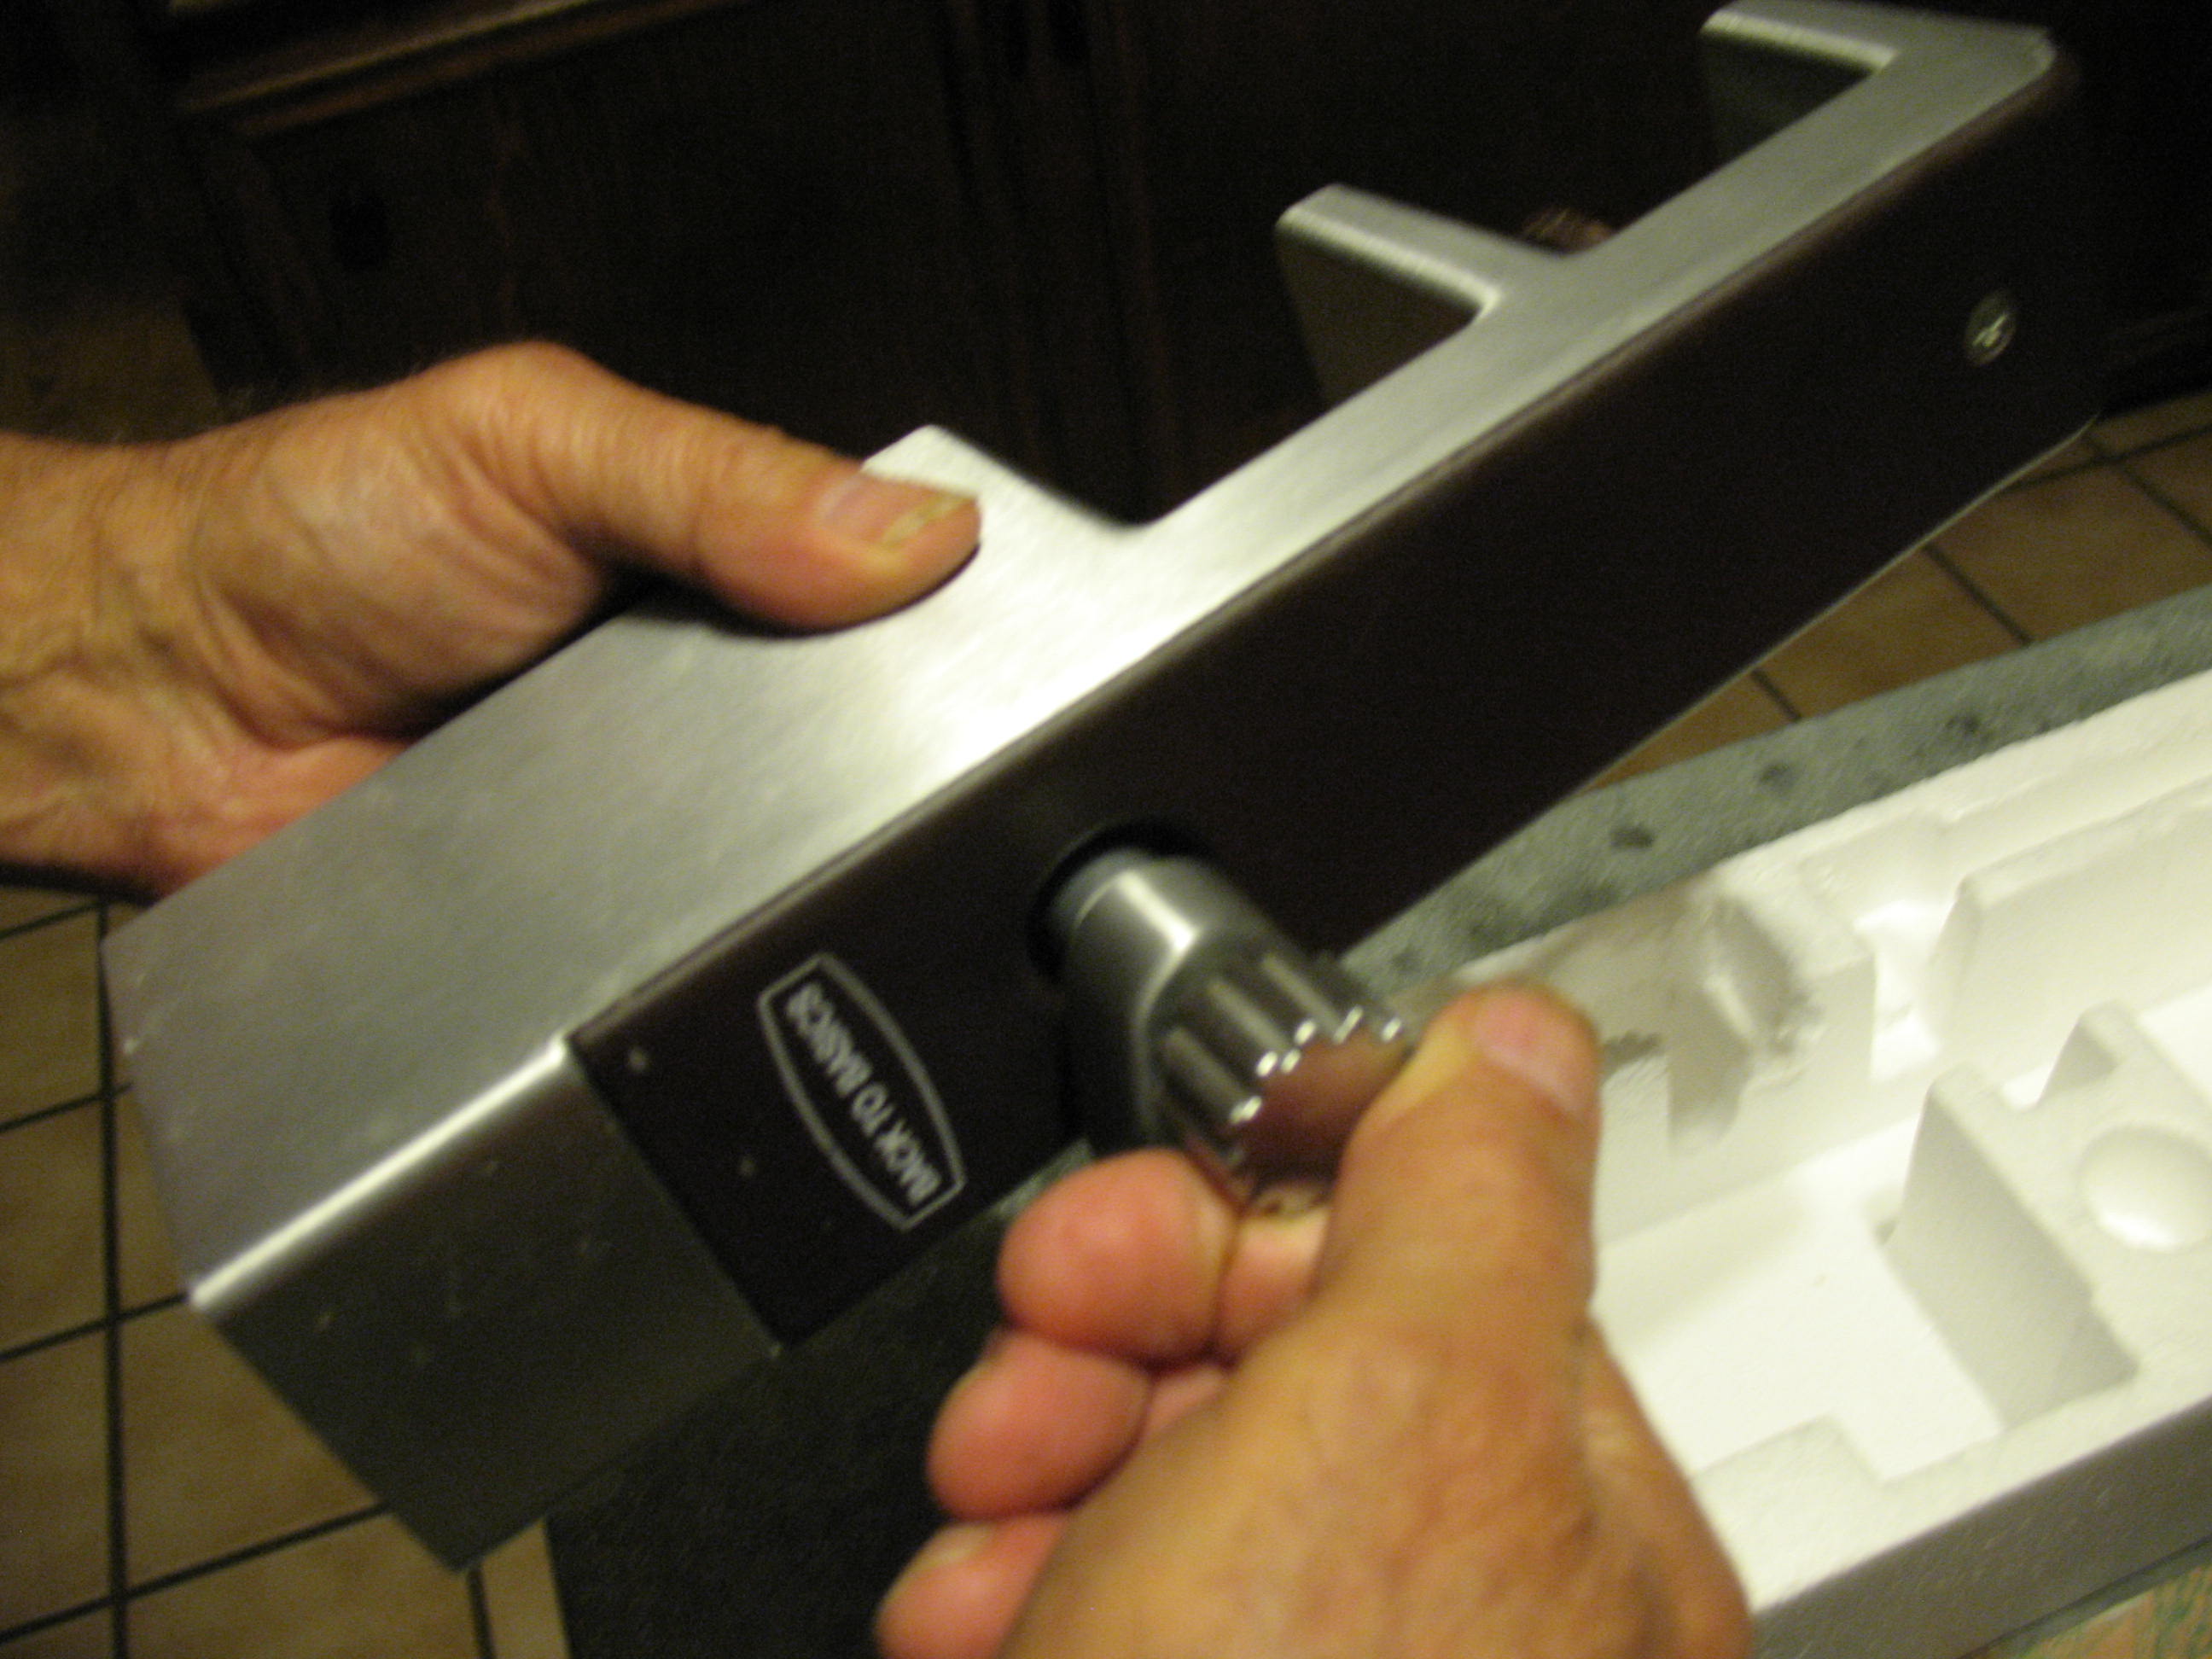
Attach the mill to the edge of the counter. 

And, finally, place the hopper on top of the mill.

The first thing that I noticed is that the burs of the mill sit fairly low, so you will have to use a shallow bowl to catch the flour. After I had a bowl in place I decided to test the capacity of the hopper. It holds about two cups of hard red wheat. I wanted to measure the amount of flour produced and the time it takes to grind the flour, so I decided to put only one cup of wheat into the hopper for my experiment. 
I loaded the hopper with one cup of wheat and started grinding. The crank was fairly easy to turn, and the flour started spilling out into the bowl. I set a fairly slow but steady pace with the crank, turning it one revolution every two seconds. I felt that this was a pace that I could keep up for an extended period of time. At this pace it took me almost exactly seven minutes to grind one cup of wheat. That one cup of wheat produced just a little over one-and-a-half cups of flour. Since my bread recipe calls for four cups of flour per loaf, I figure that it will take about twenty minutes of grinding per loaf. 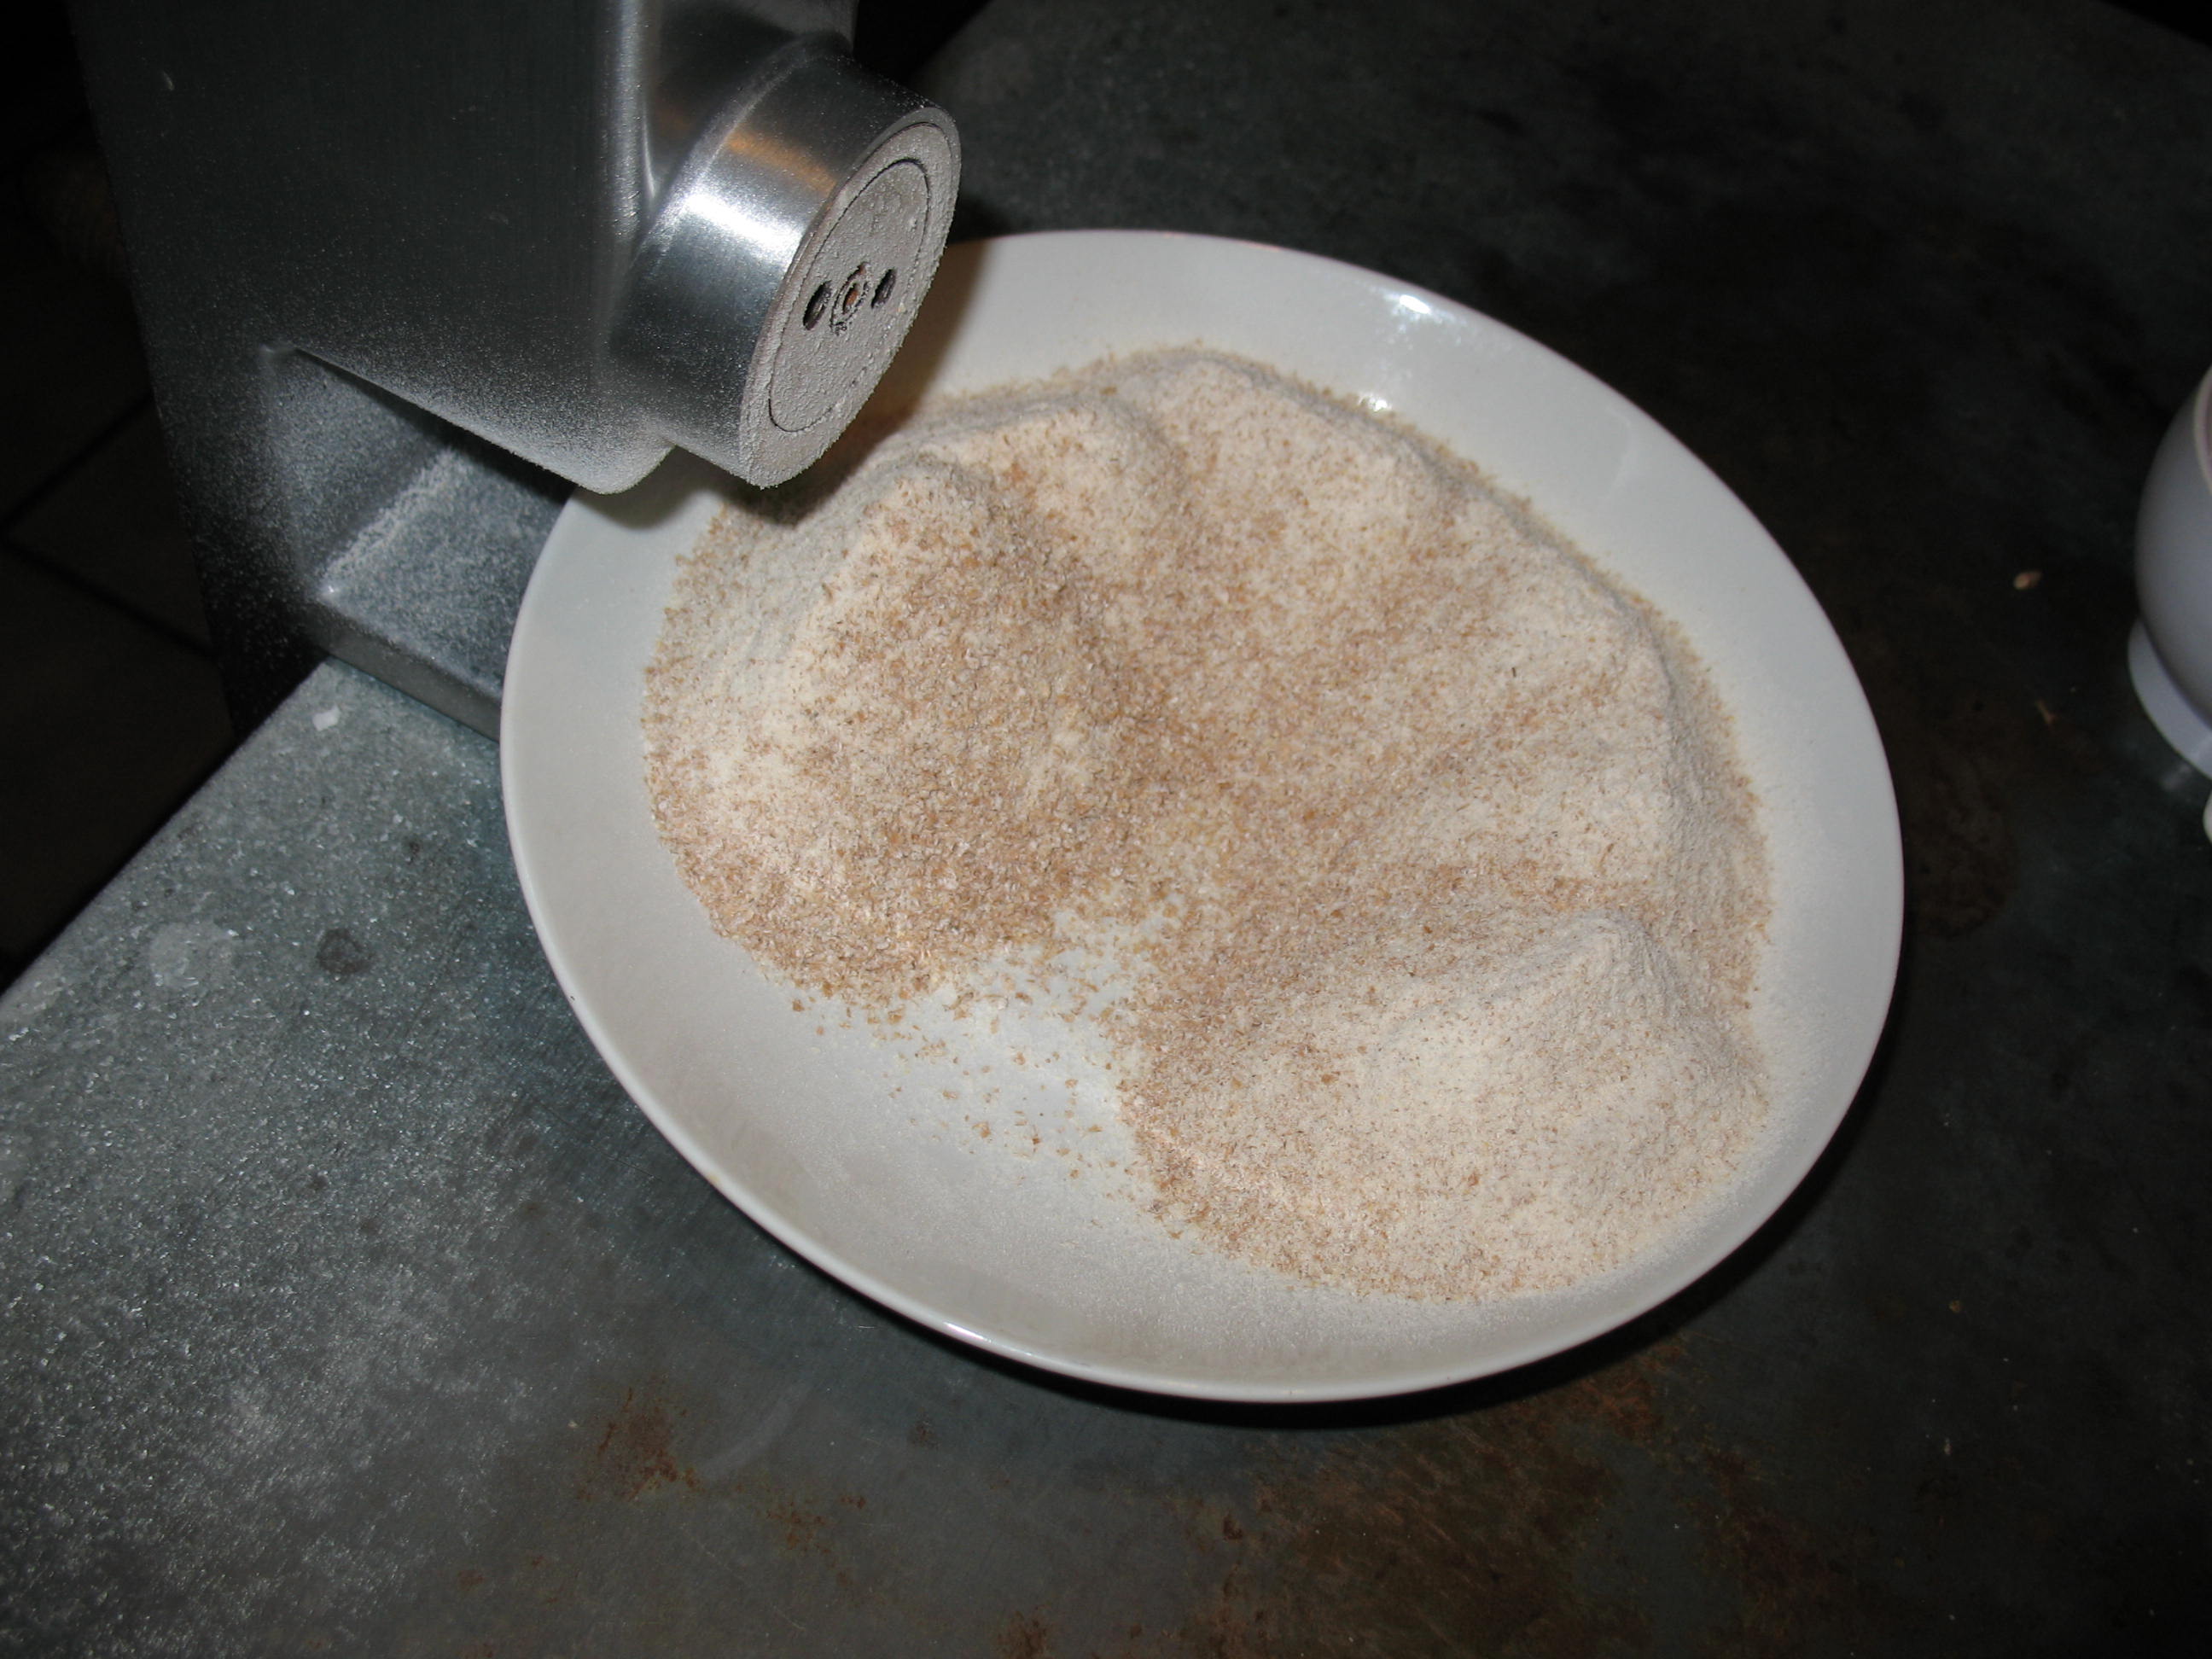
I noticed that the flour is a little more coarse than what comes from the store, so I ran a cup through the mill a second time. It didn’t seem to make much difference. I went ahead and ground up enough flour to bake a loaf of bread and cooked it using my usual recipe. It turned out very well. Click here for my bread recipe. 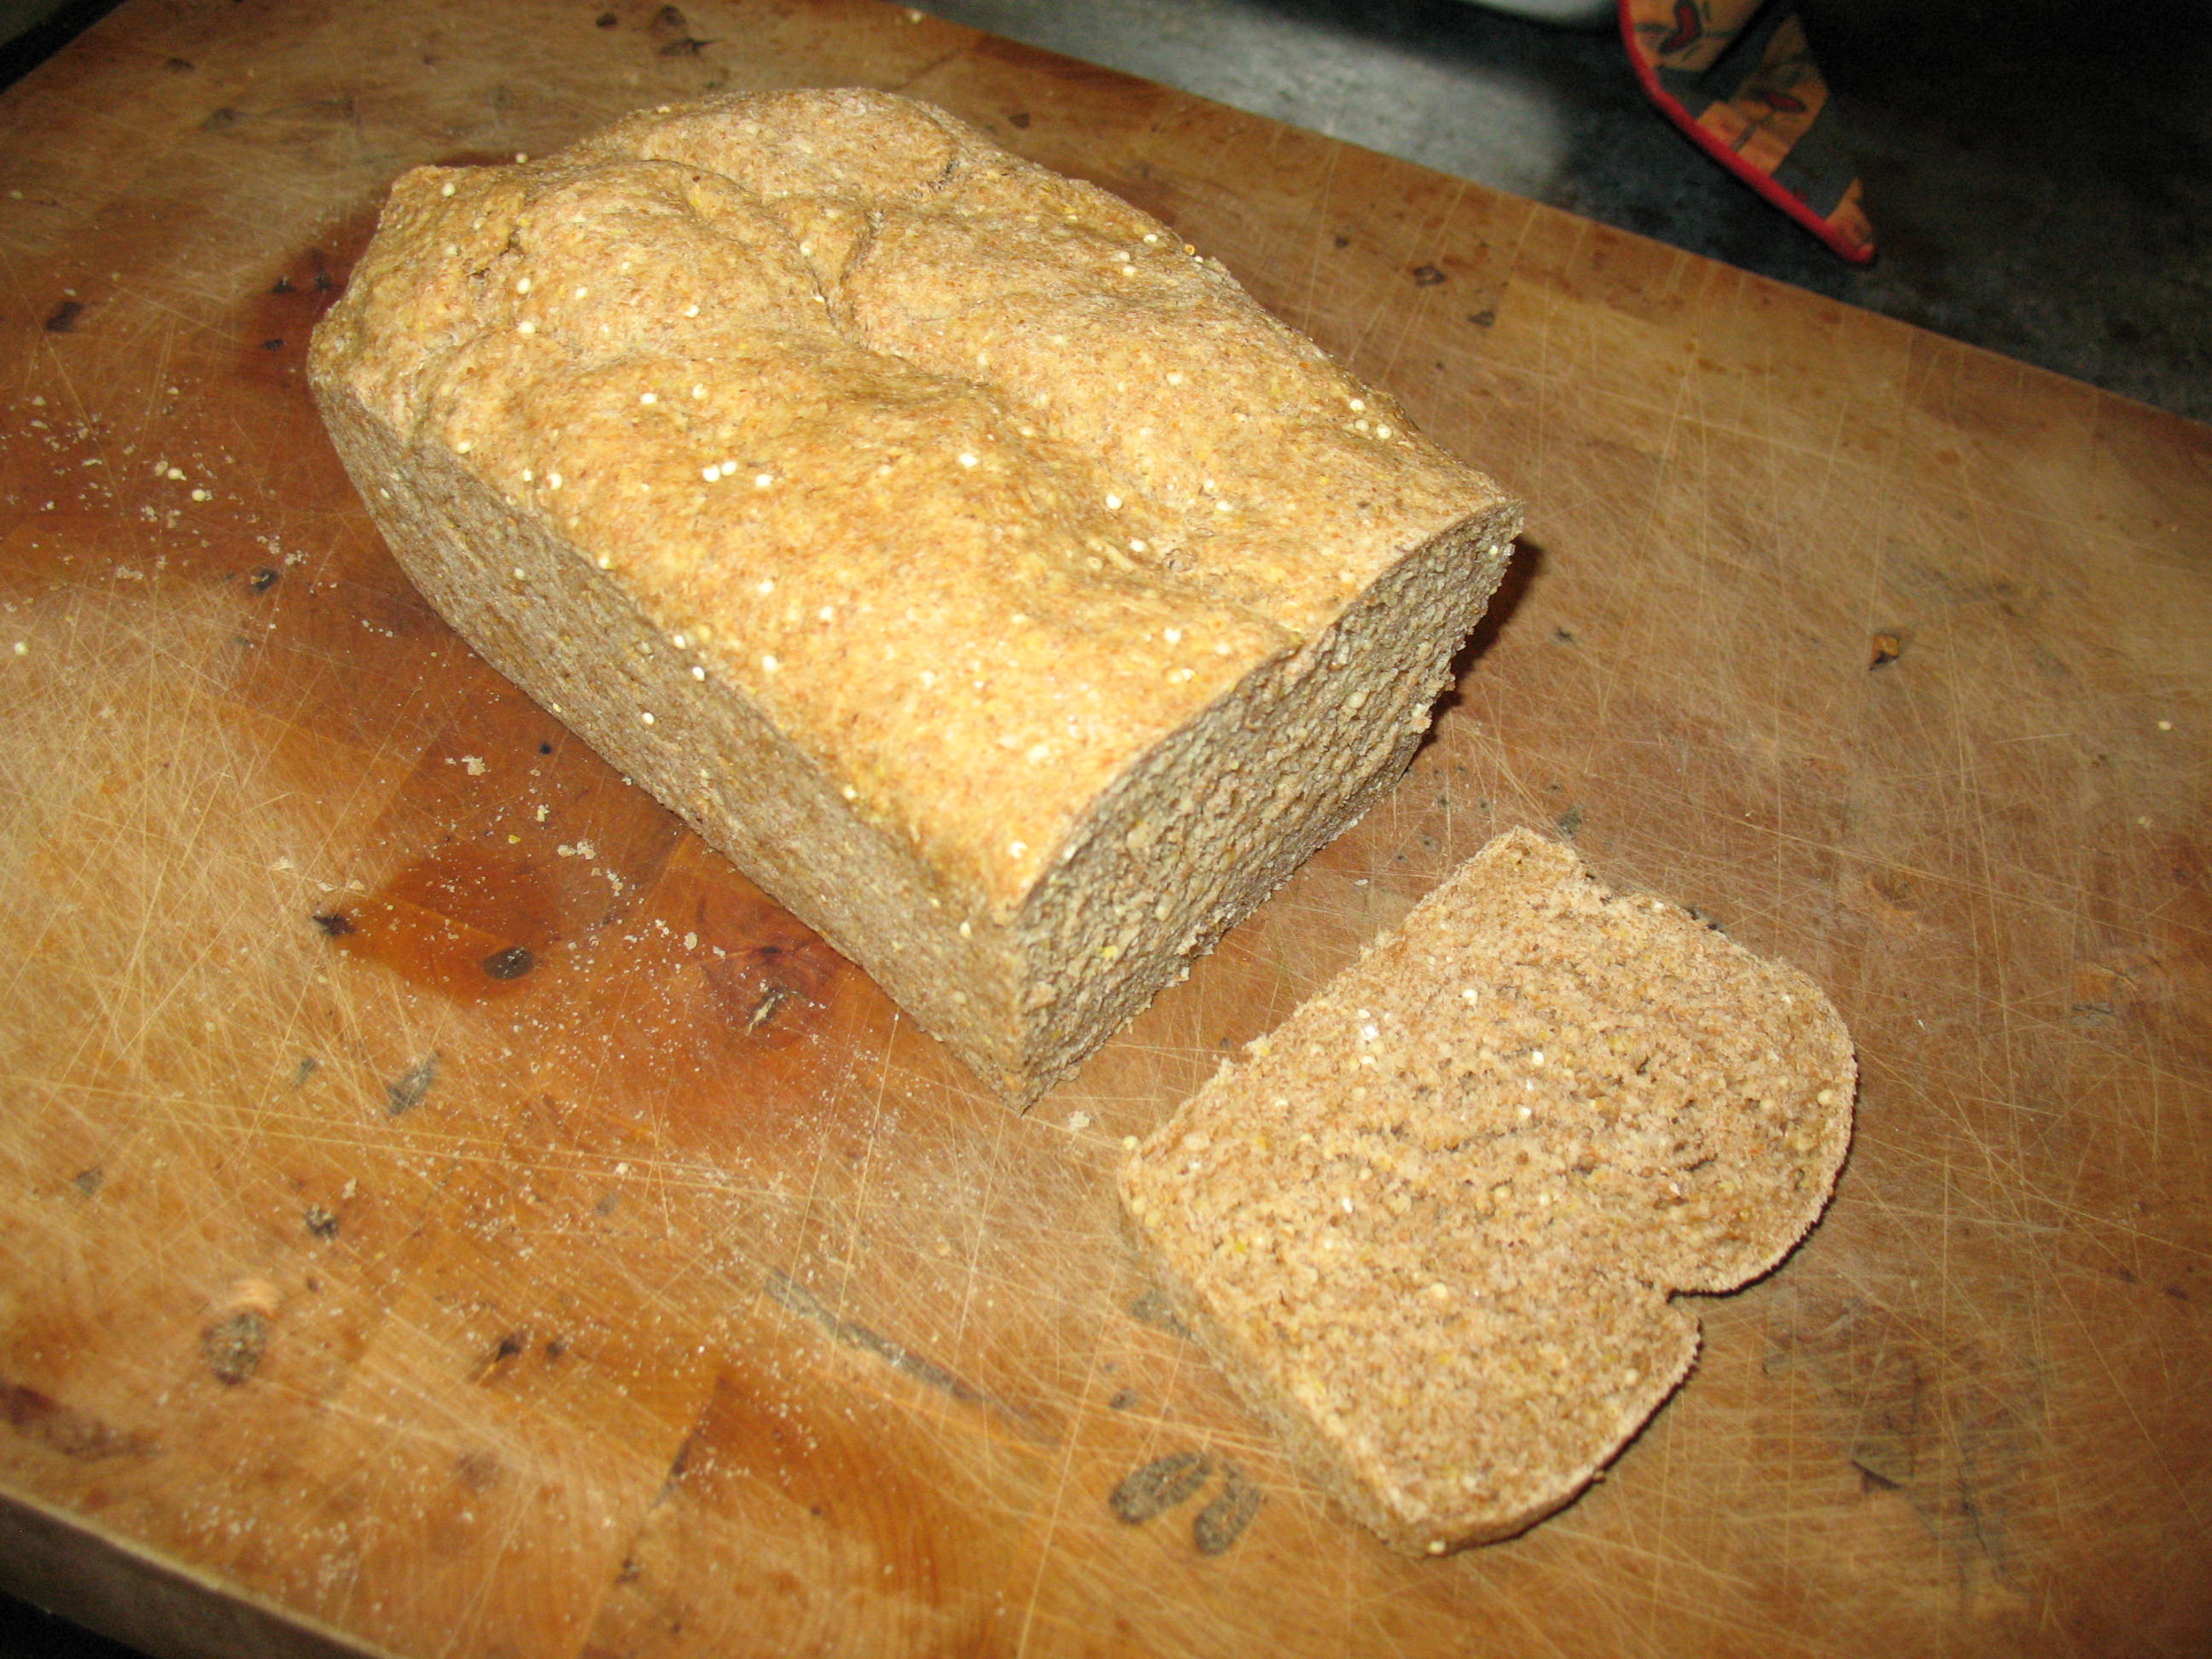
My over all impression of the Back to Basics Mill is that it is a good middle of the road grain mill. It is well made and operates easily. It is the perfect mill for hobbyists who like to bake the occasional loaf of bread, make home-made tortillas, etc. I do not think that it has the capacity, speed, or durability that you would look for in a mill that you plan to use on a regular basis for year after year.
I enjoyed grinding my own flour to bake with, so I will pursue the idea of storing hard red wheat. In the mean time I will be looking for a more suitable grain mill. I have read good things about the Country Living Grain Mill and that may be my next purchase; but at $429.00 I may have to save my pennies for a while. I particularly like the idea that the Country Living Mill can be attached to a bicycle so that you can grind by pedaling. I’ll let you know more about it when I get one.
I live in the country in East Texas, and like most of the country folks around here I enjoy shooting. City people don’t get the fact that shooting is an enjoyable pass-time for us country cousins. If you live in the city you probably play golf or tennis or something like that for recreation. In the country we shoot. 
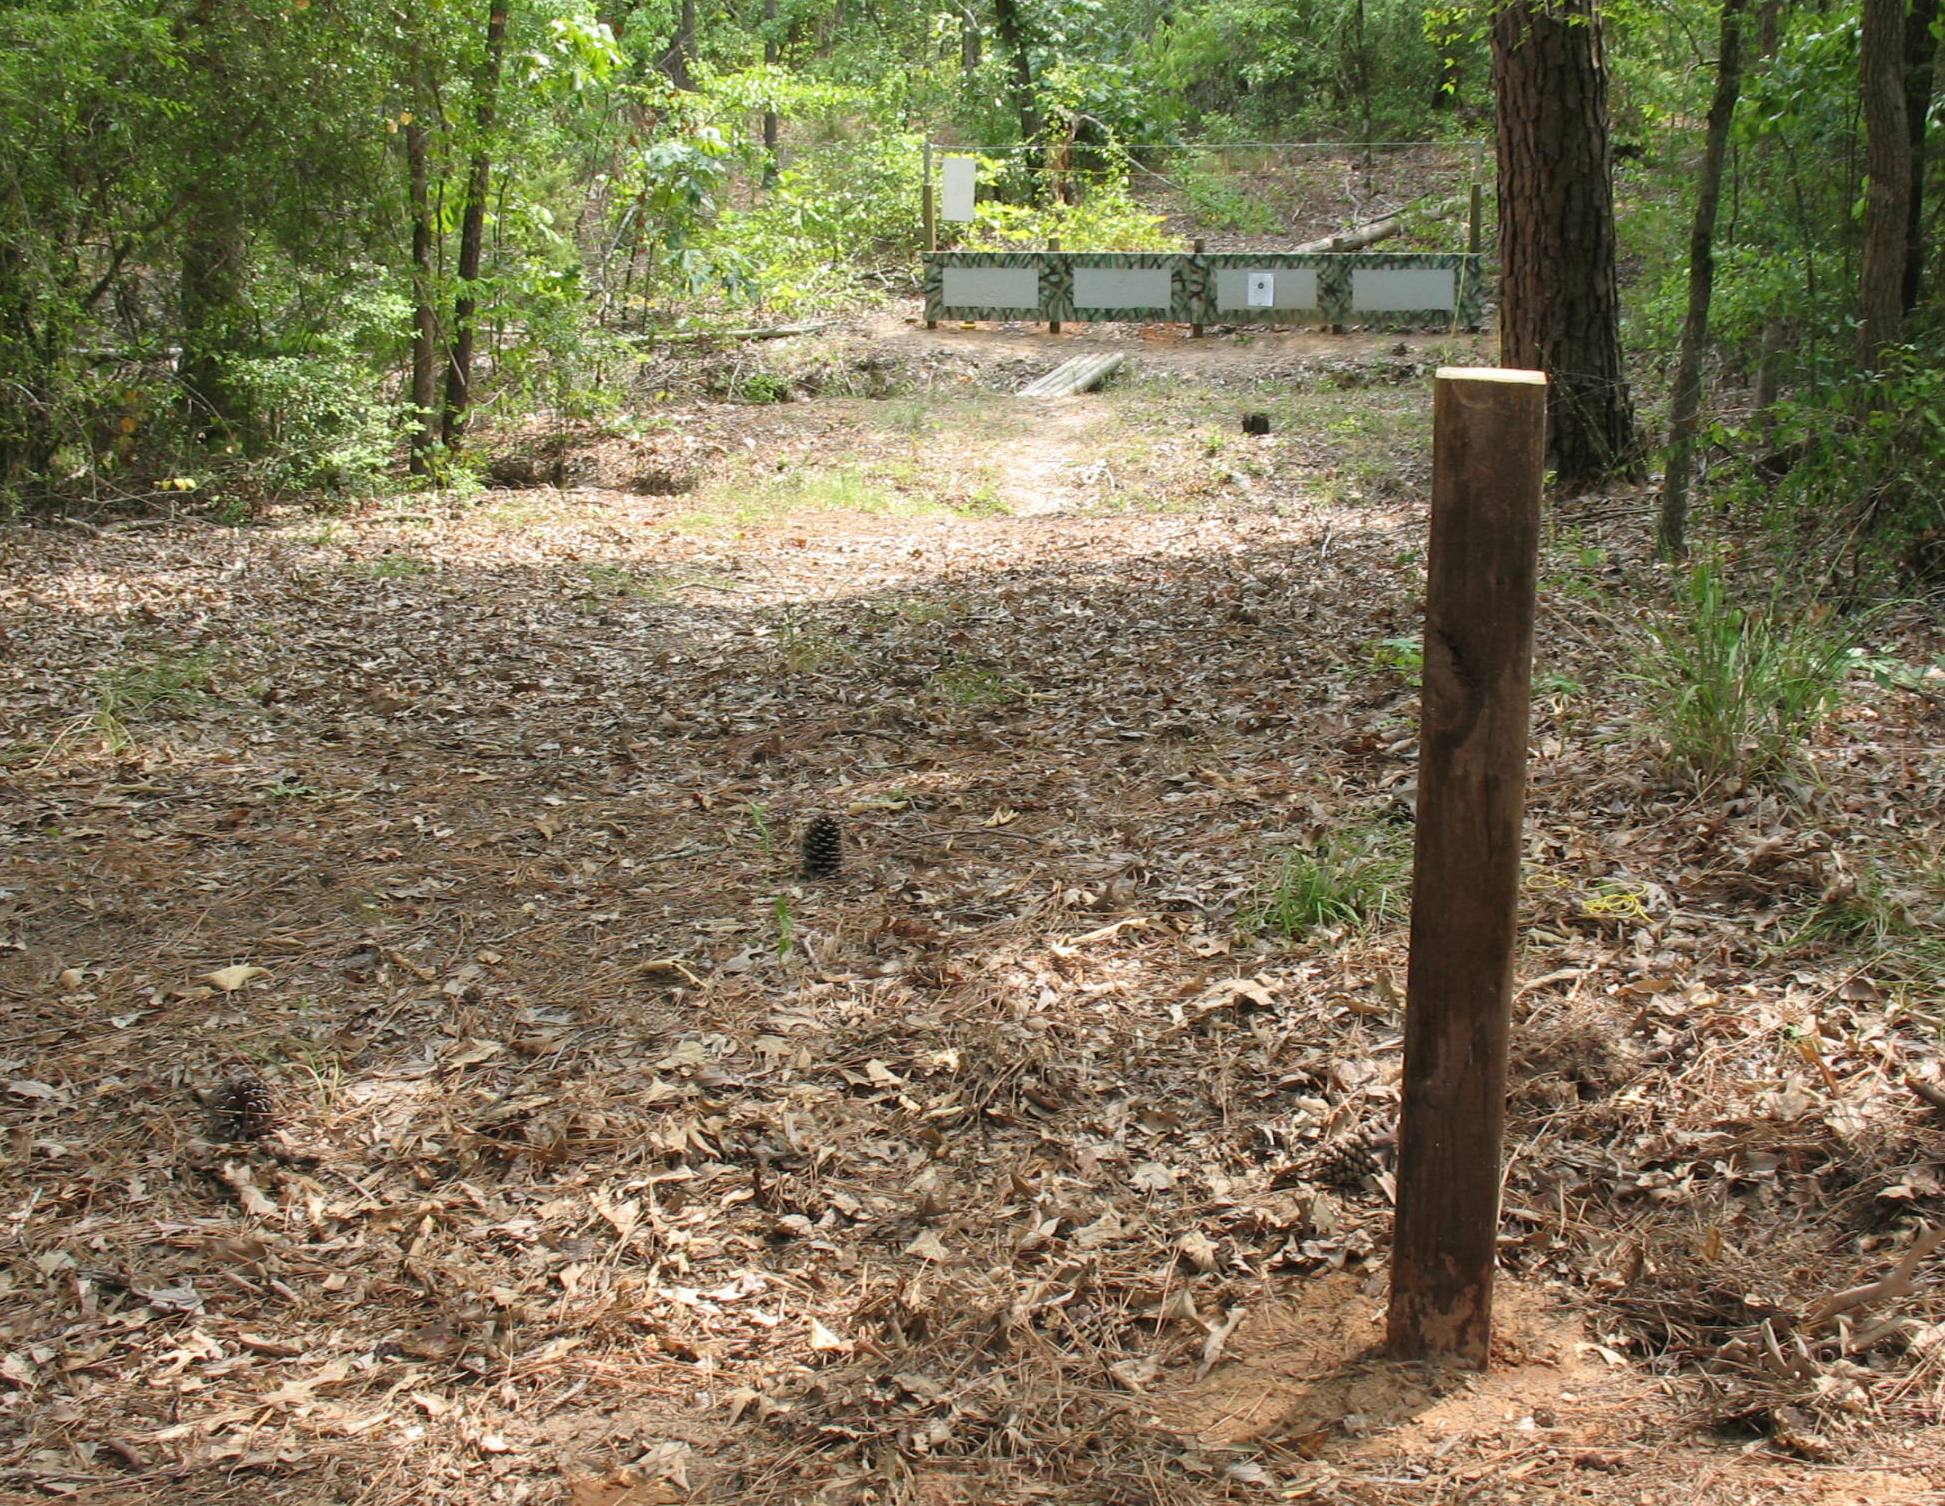
So since most people around here shoot, most have a designated place where they can do it safely. Some people have a creek bank or hill that they shoot into, and some have actual shooting ranges. I have shot on some really fancy ones but mine is just a small shooting range on my farm. It’s a fifty yard range with target boards for about eight targets. It’s functional, but nothing fancy. I recently had to rebuild the target boards, so I decided that I wanted to add a new element to the range; a moving target. Now you can get as fancy as you want on something like this, but the one I built is pretty simple, and I’m going to share my plans with you. My moving target is hand operated, so it takes one person to move the target while another person shoots. I don’t think I spent over twenty dollars to build it.
Here is an overview of how my moving target works. Basically it’s just a target board that moves on pulleys along a steel cable that is suspended above my stationary target boards. The moving target is attached to a continuous loop of string that makes it possible to move the target board from one side of the range to the other and back again. You can move it fast or move it slow. You can stop it suddenly, then back it up a ways, then move it forward again. In other words, its motion can be as erratic and unpredictable as you want to make it. It is way fun to shoot at.
So here’s the step-by-step of how build it:
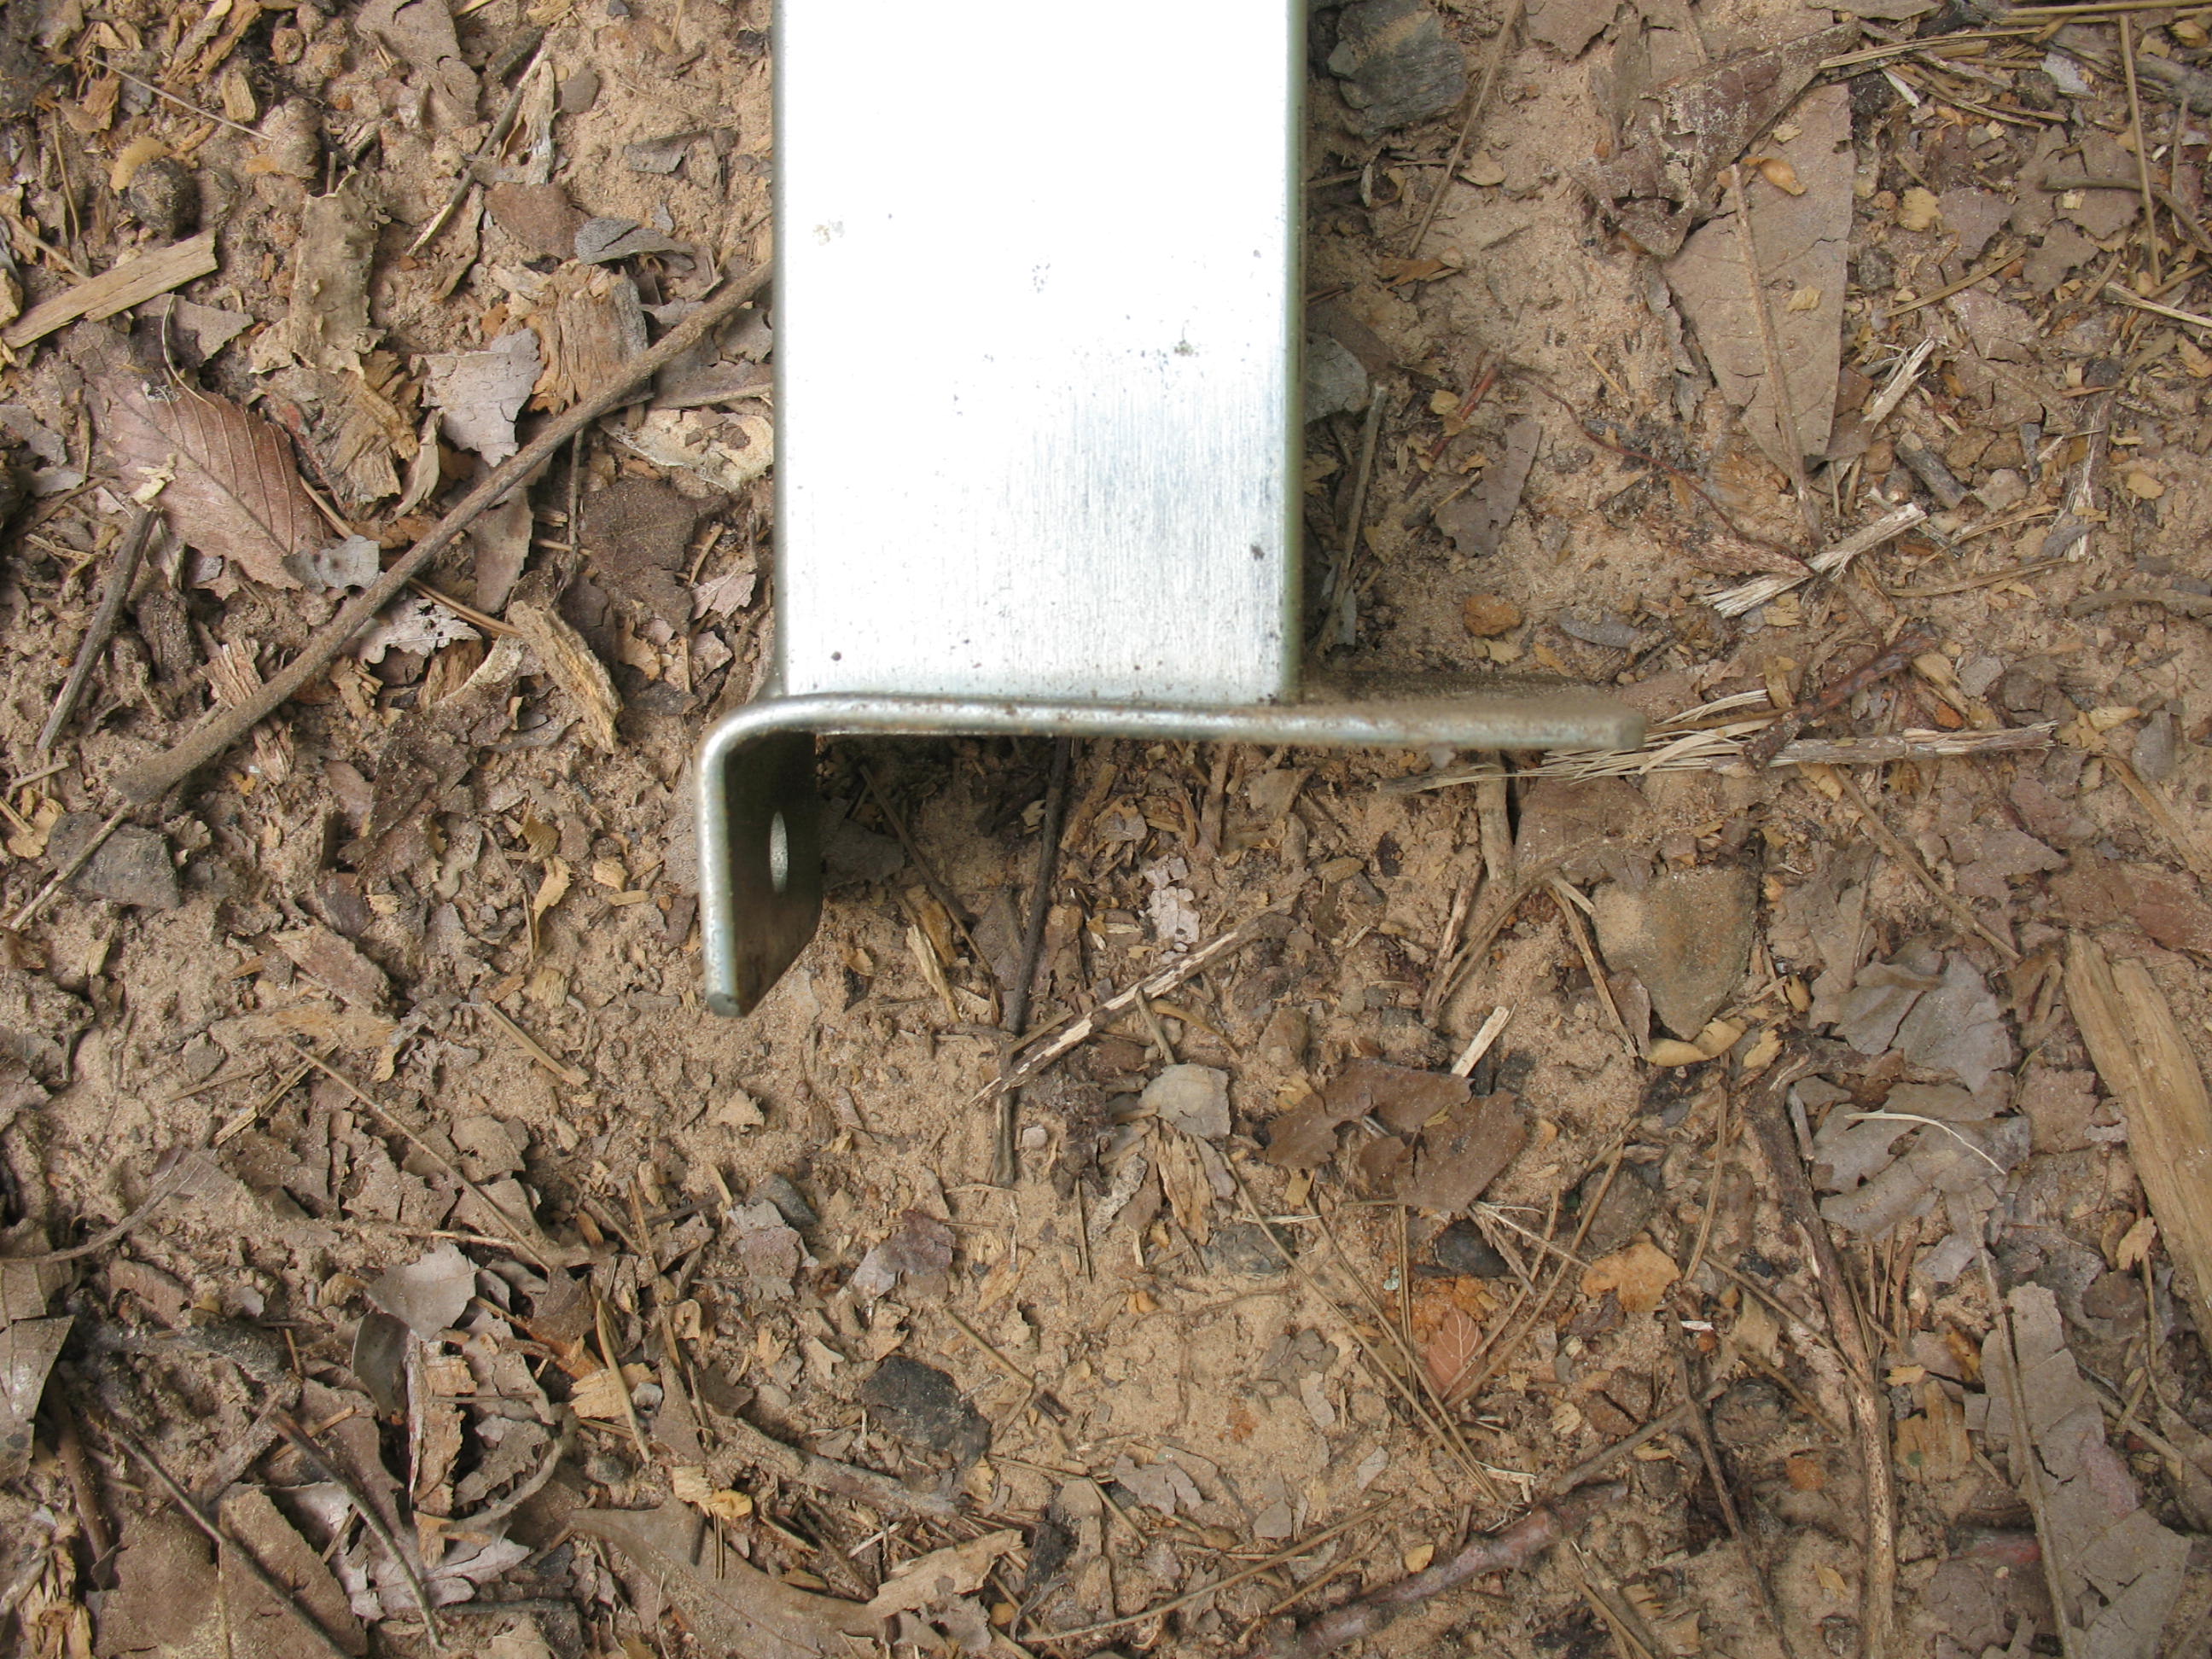
First you need some uprights to hold the steel cable. If I had planned this ahead of time I could have just left the end posts on my stationary target board tall enough to hang the moving target. I didn’t plan ahead so I had to add some uprights to the existing posts. I used some old steel tubing that already had brackets welded to the bottom, but you could use anything that is rigid and will stand up straight. I took the two pieces of steel tubing and bent one side of the bottom brackets at a 90 degree angle so that I could use lag screws to attach the up-rights to the wooden post that already had in place. I also drilled a hole through the tubing, about an inch down from the top, so that I could attach an eye-bolt to each one. I then screwed the two up-rights to the tops of the existing posts on my stationary target board. The up-rights are sixteen feet apart. 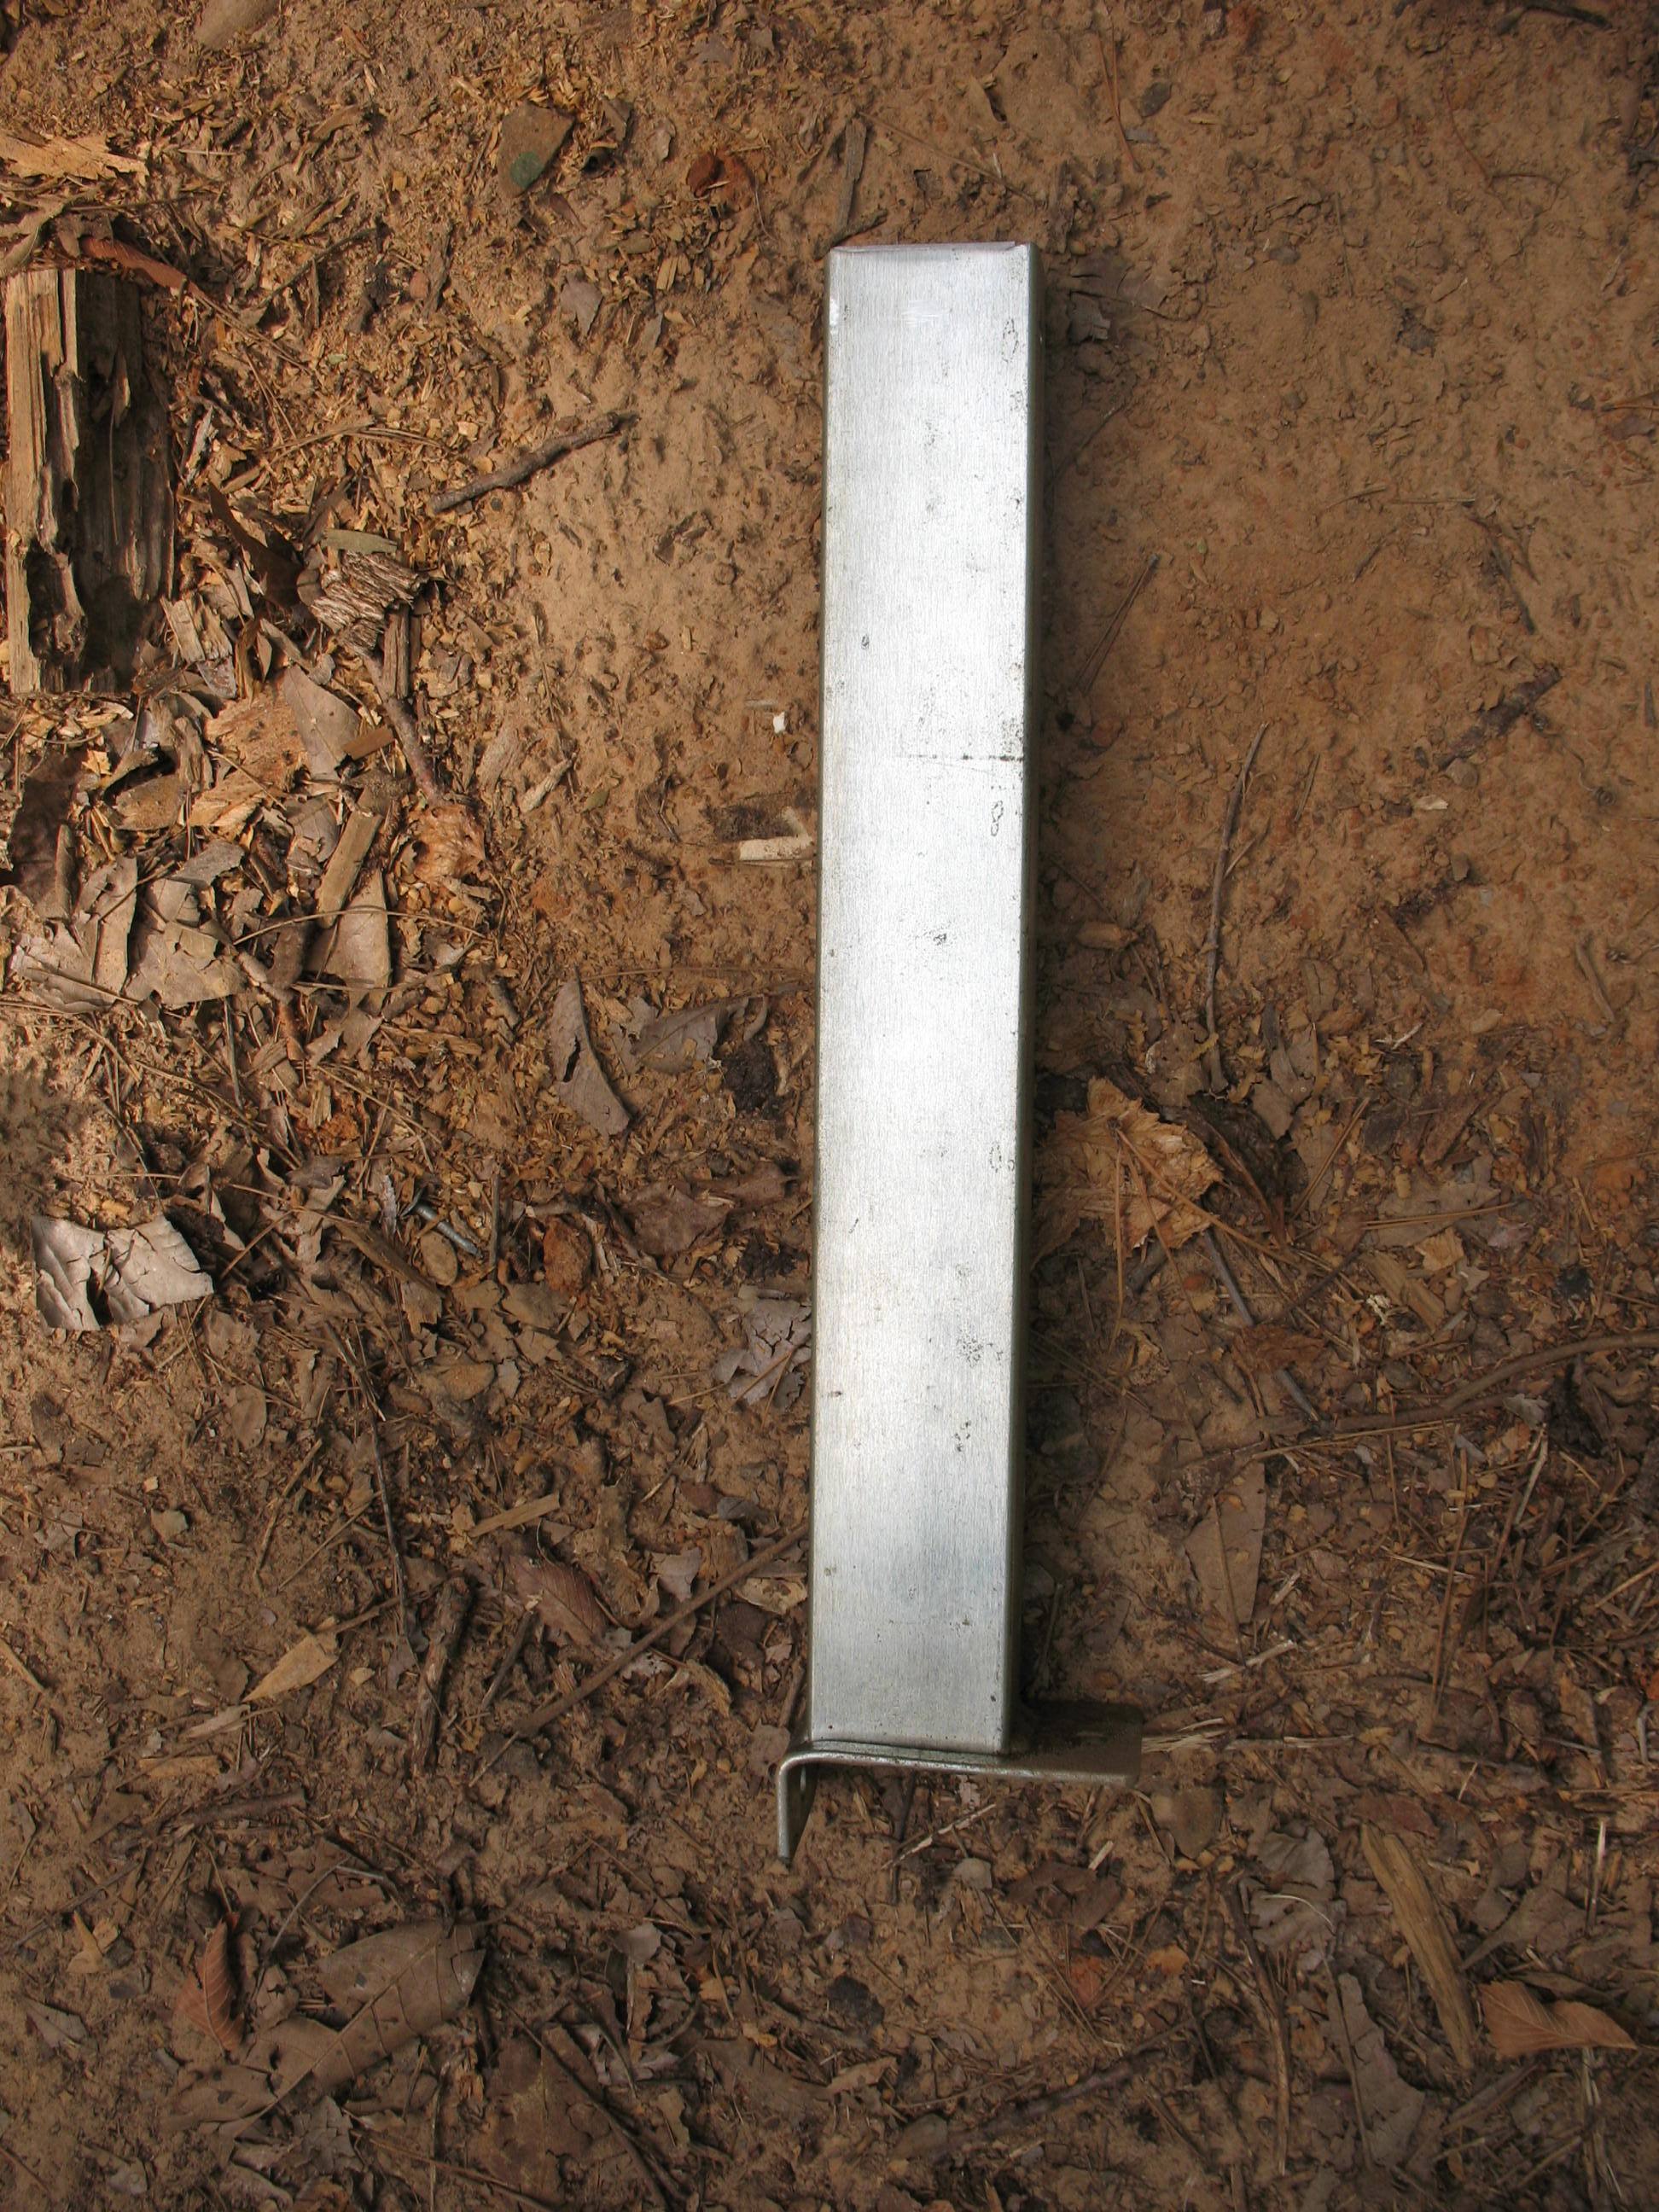


Next I attached a 3/16th inch steel cable through one of the eye-bolts using some cable clamps.
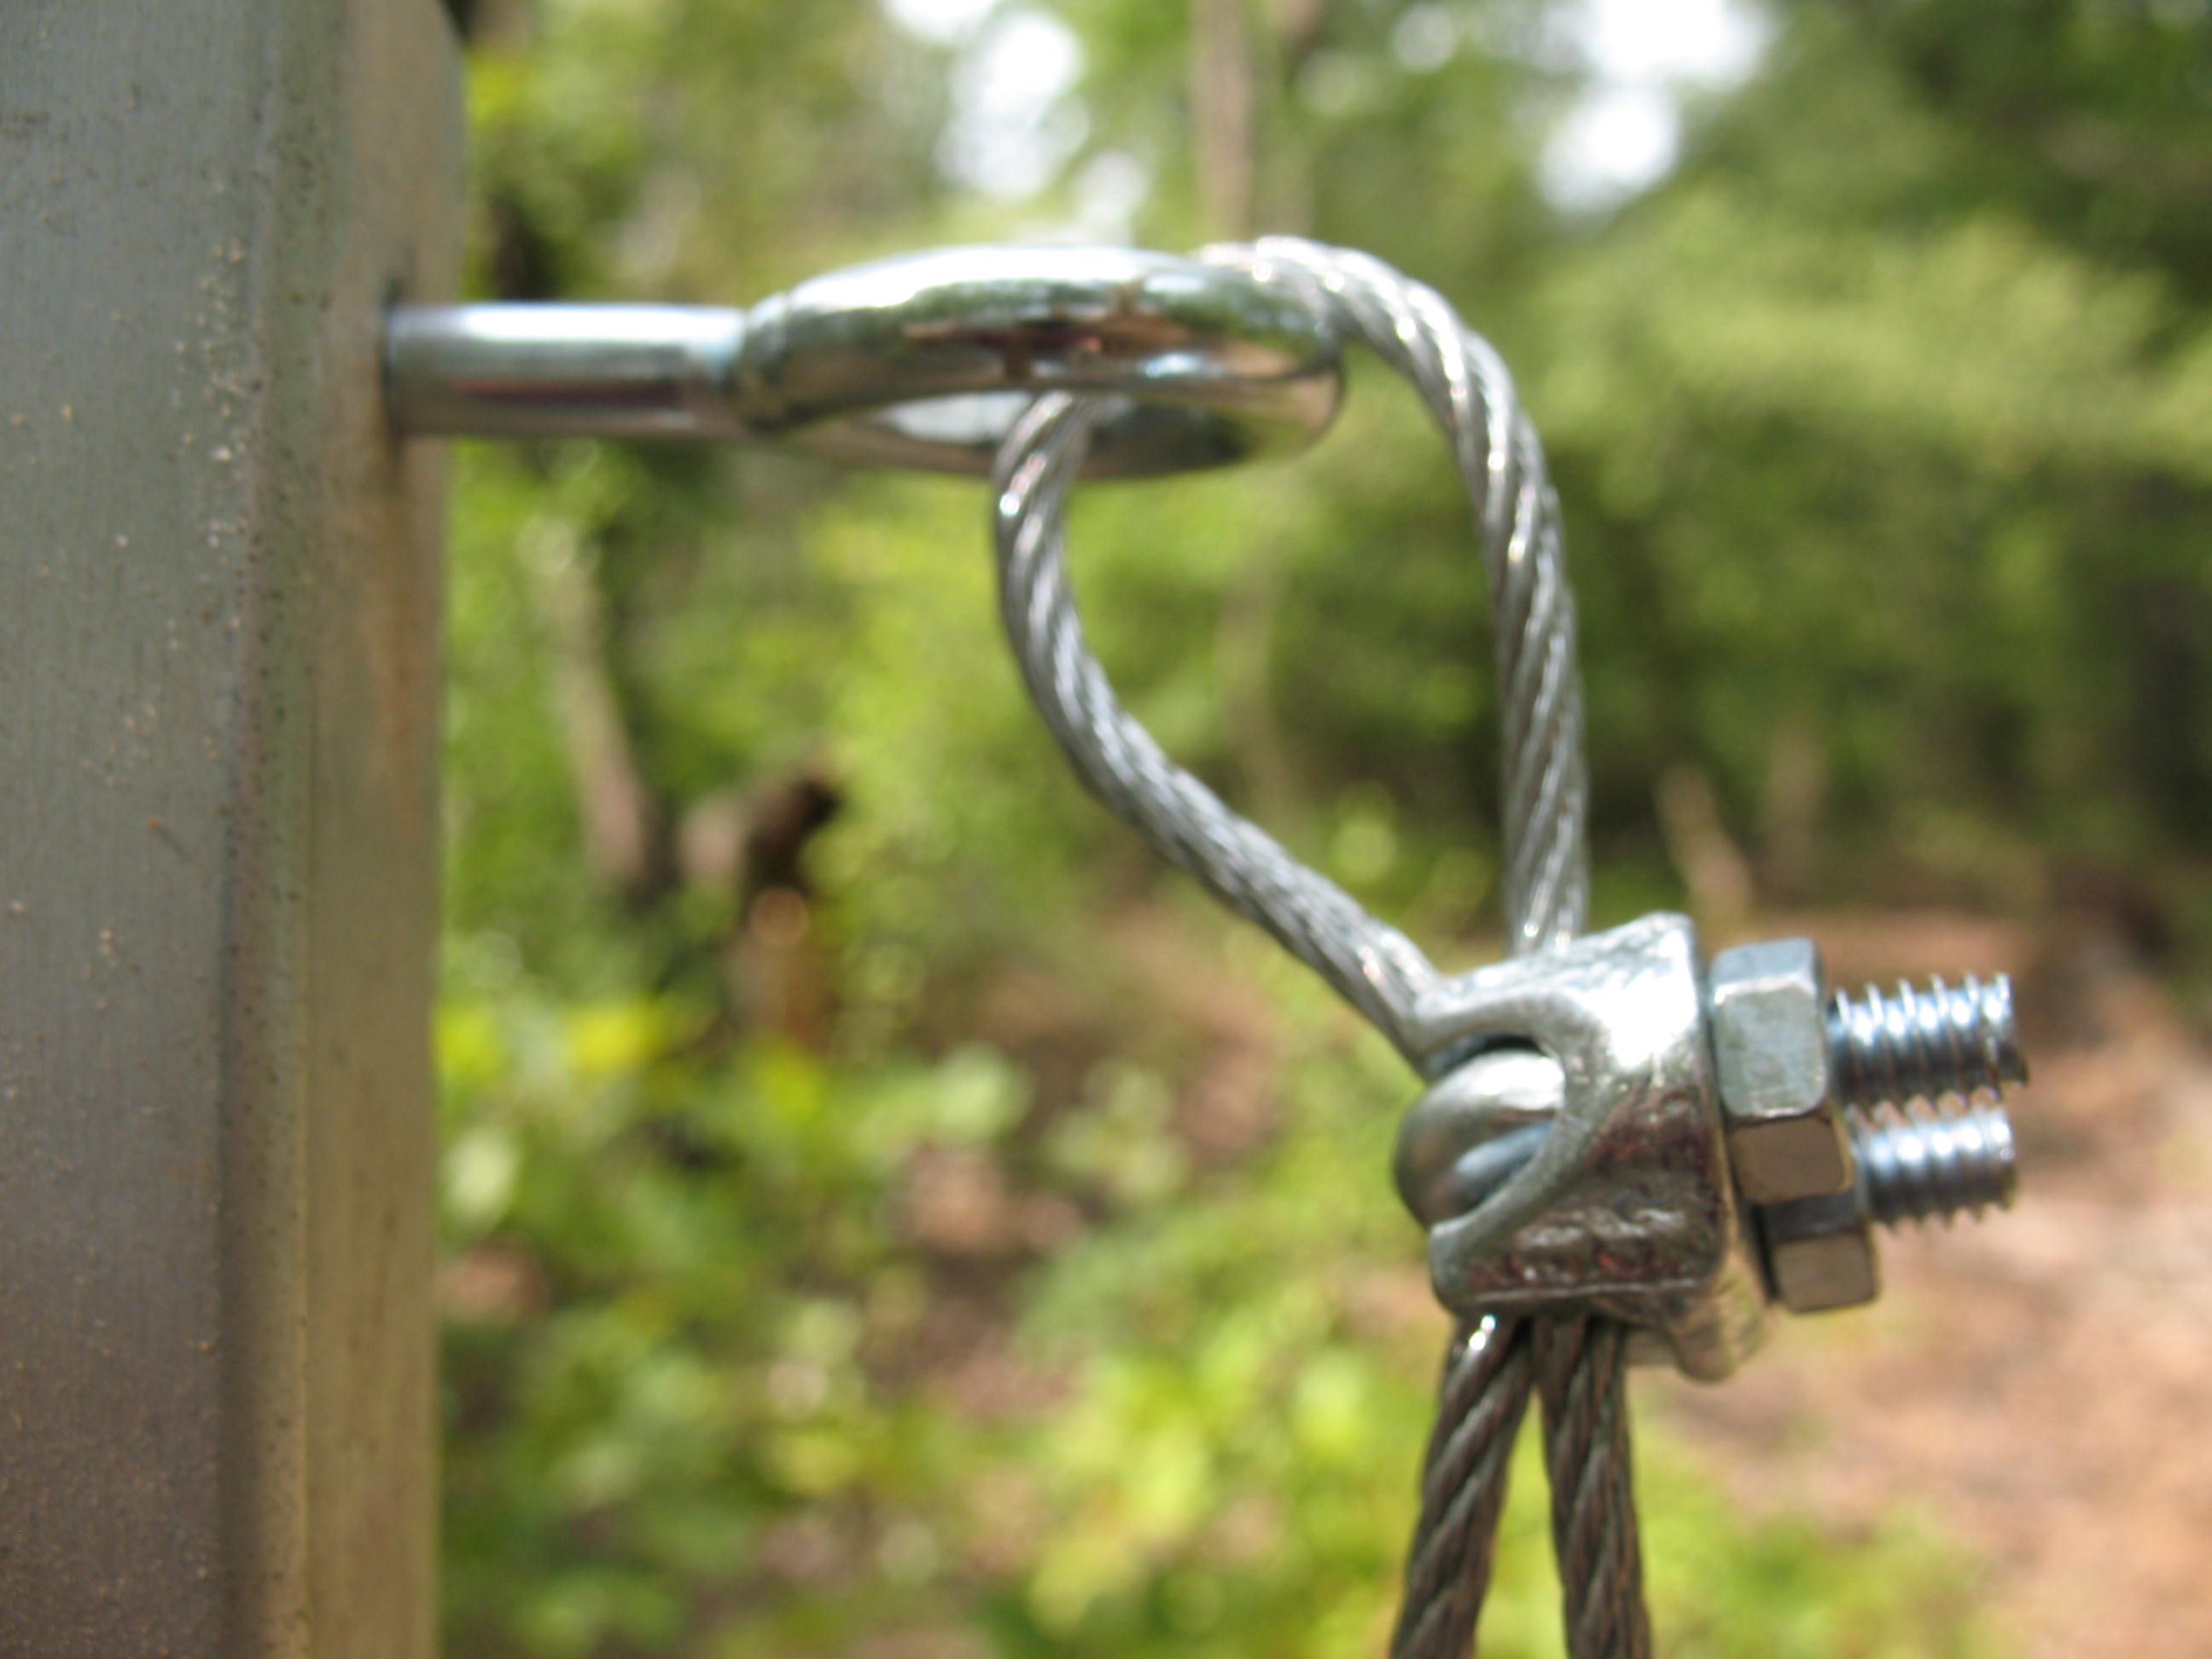
Before attaching the other end of the cable, I slipped a couple of small pulleys onto the cable.

I then pulled the cable as taunt as I could by hand, and attached it to the other eye-bolt with a cable clamp. I left plenty of thread on the eye-bolts so that I could tighten the nuts down with a socket wrench and get the cable really taunt.

With the cable now in place, I went back to the pulleys and clipped a snap connector to each of them.

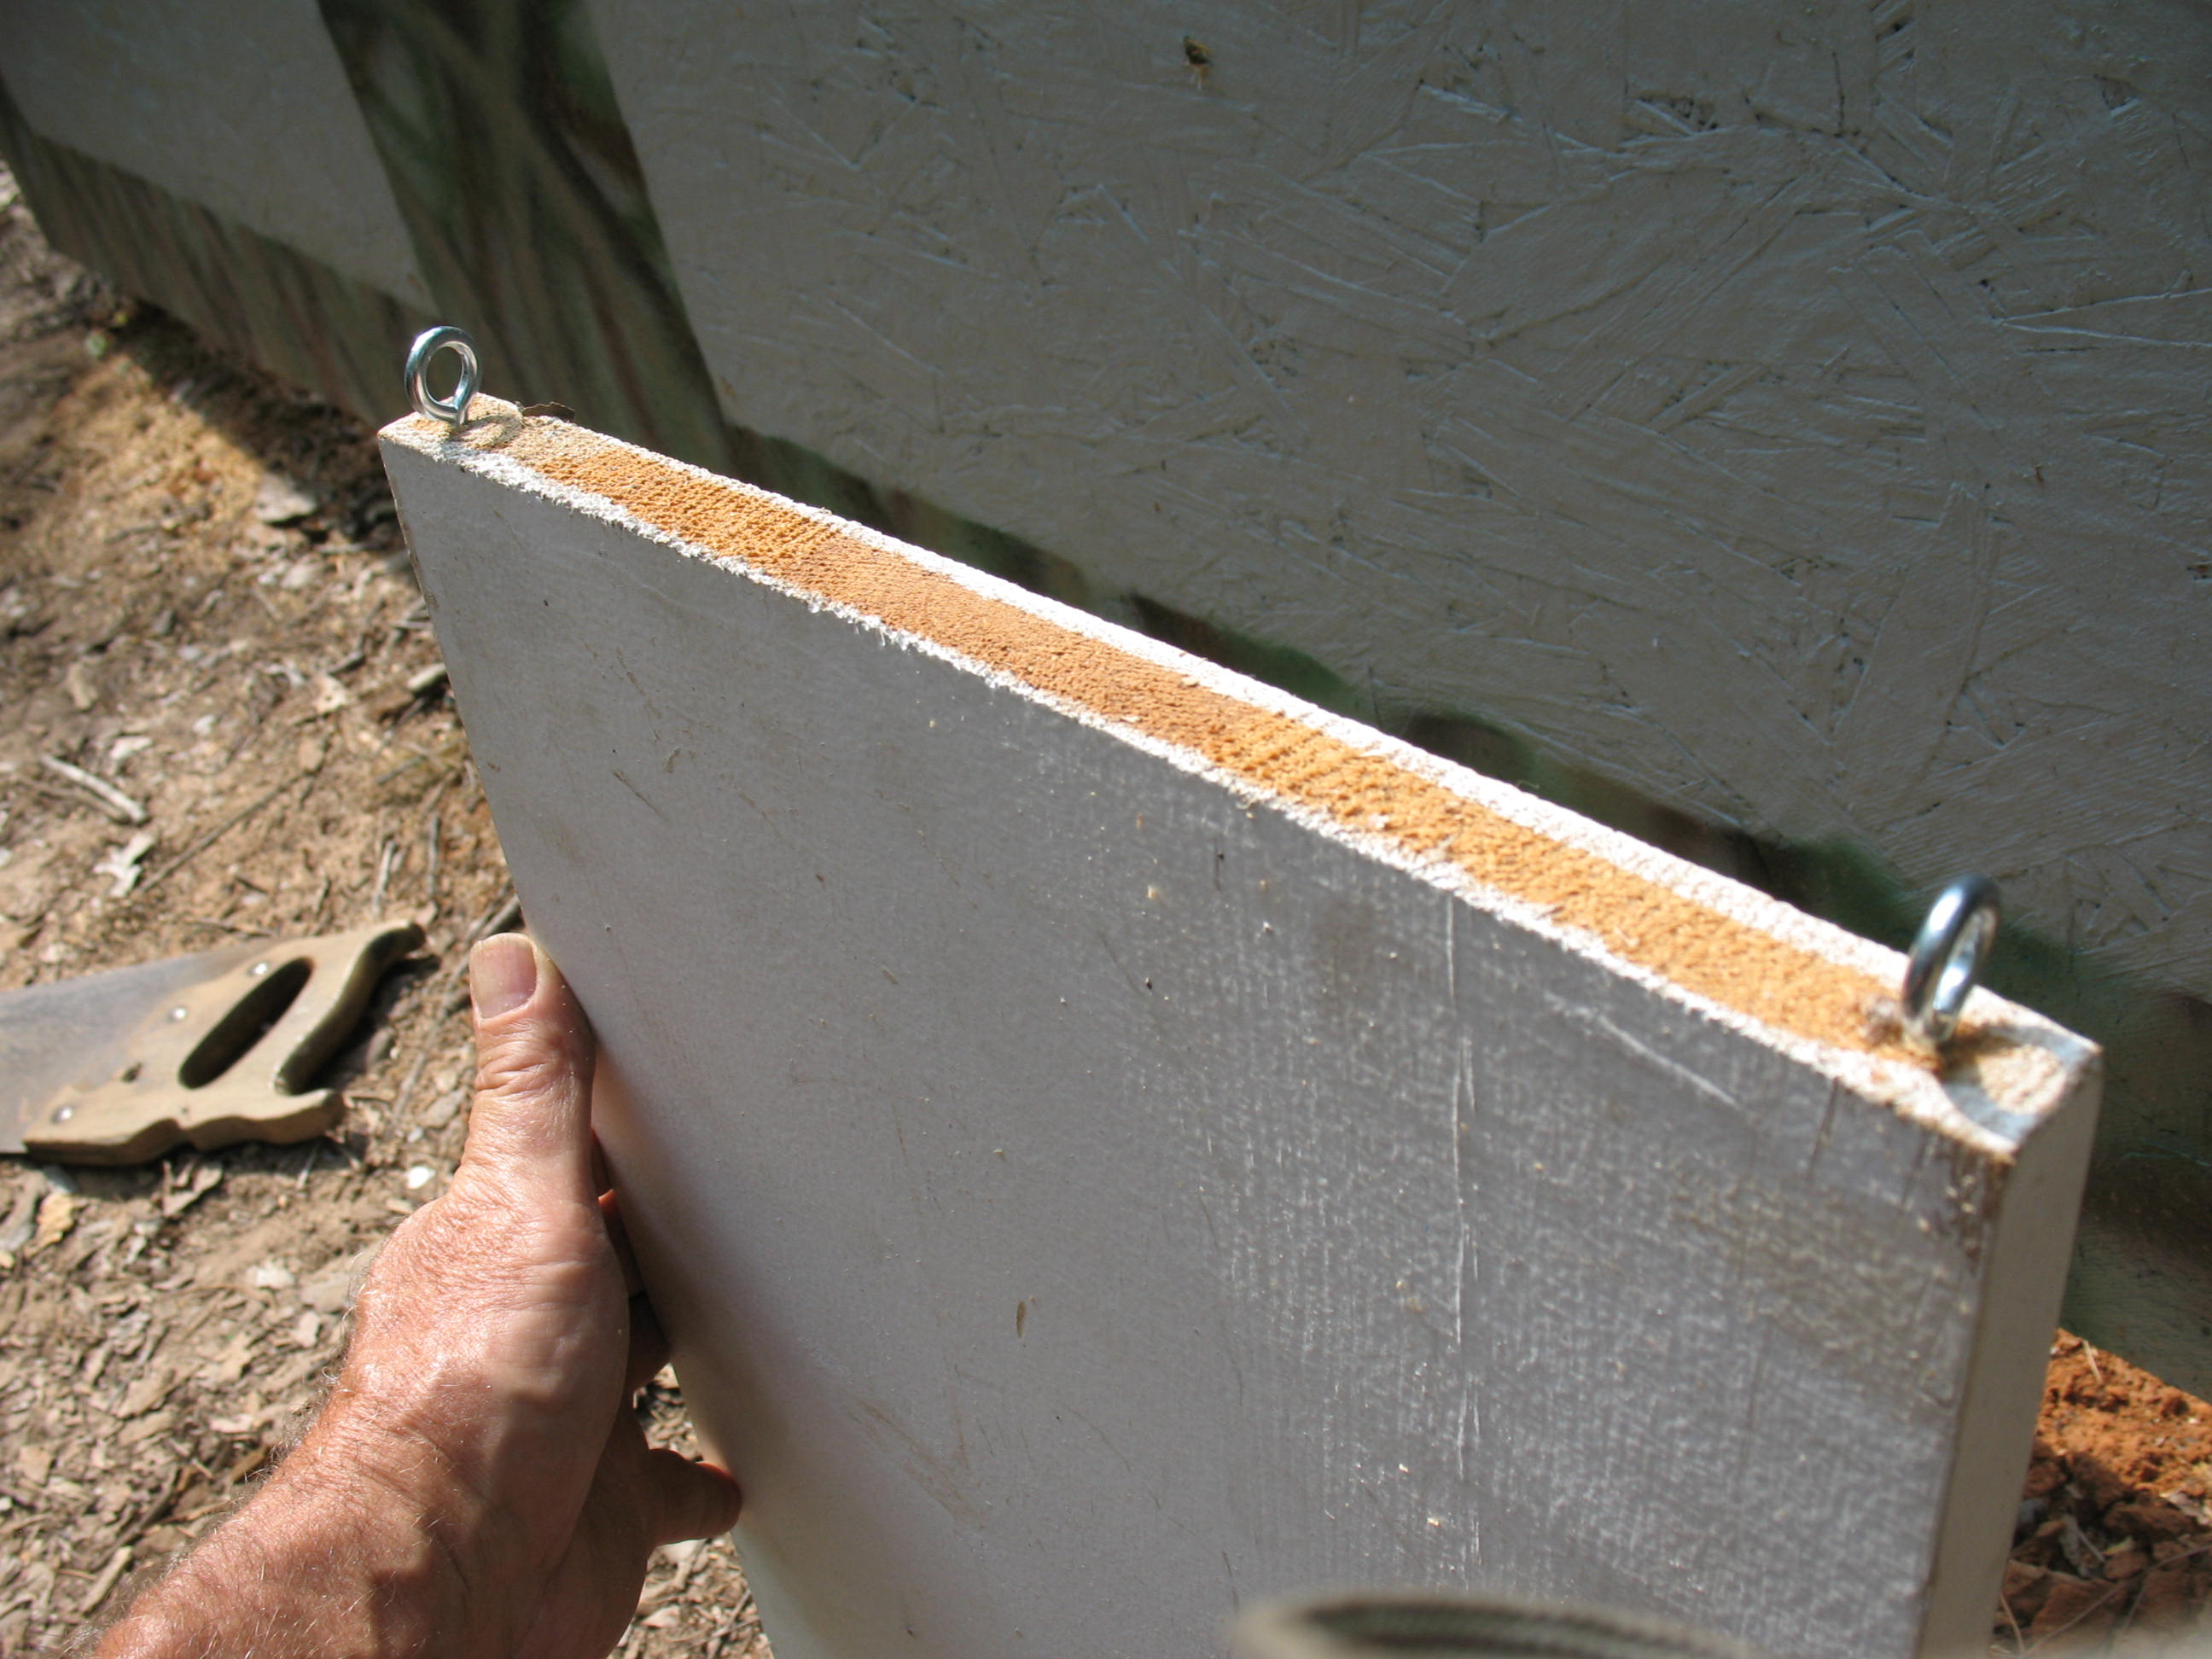
I cut my moving target board out of some old one-by-twelve inch shelving and put a couple of eye-screws in the top.
Now I can hang the target board onto the pulleys.

Now I attached an eye screw to each side of the target board so that I could tie my string to each side: and two eye-screws to the back of the target board to act as string guides for the moving string.
I attached an eye-screw to each up-right to act as string guides.

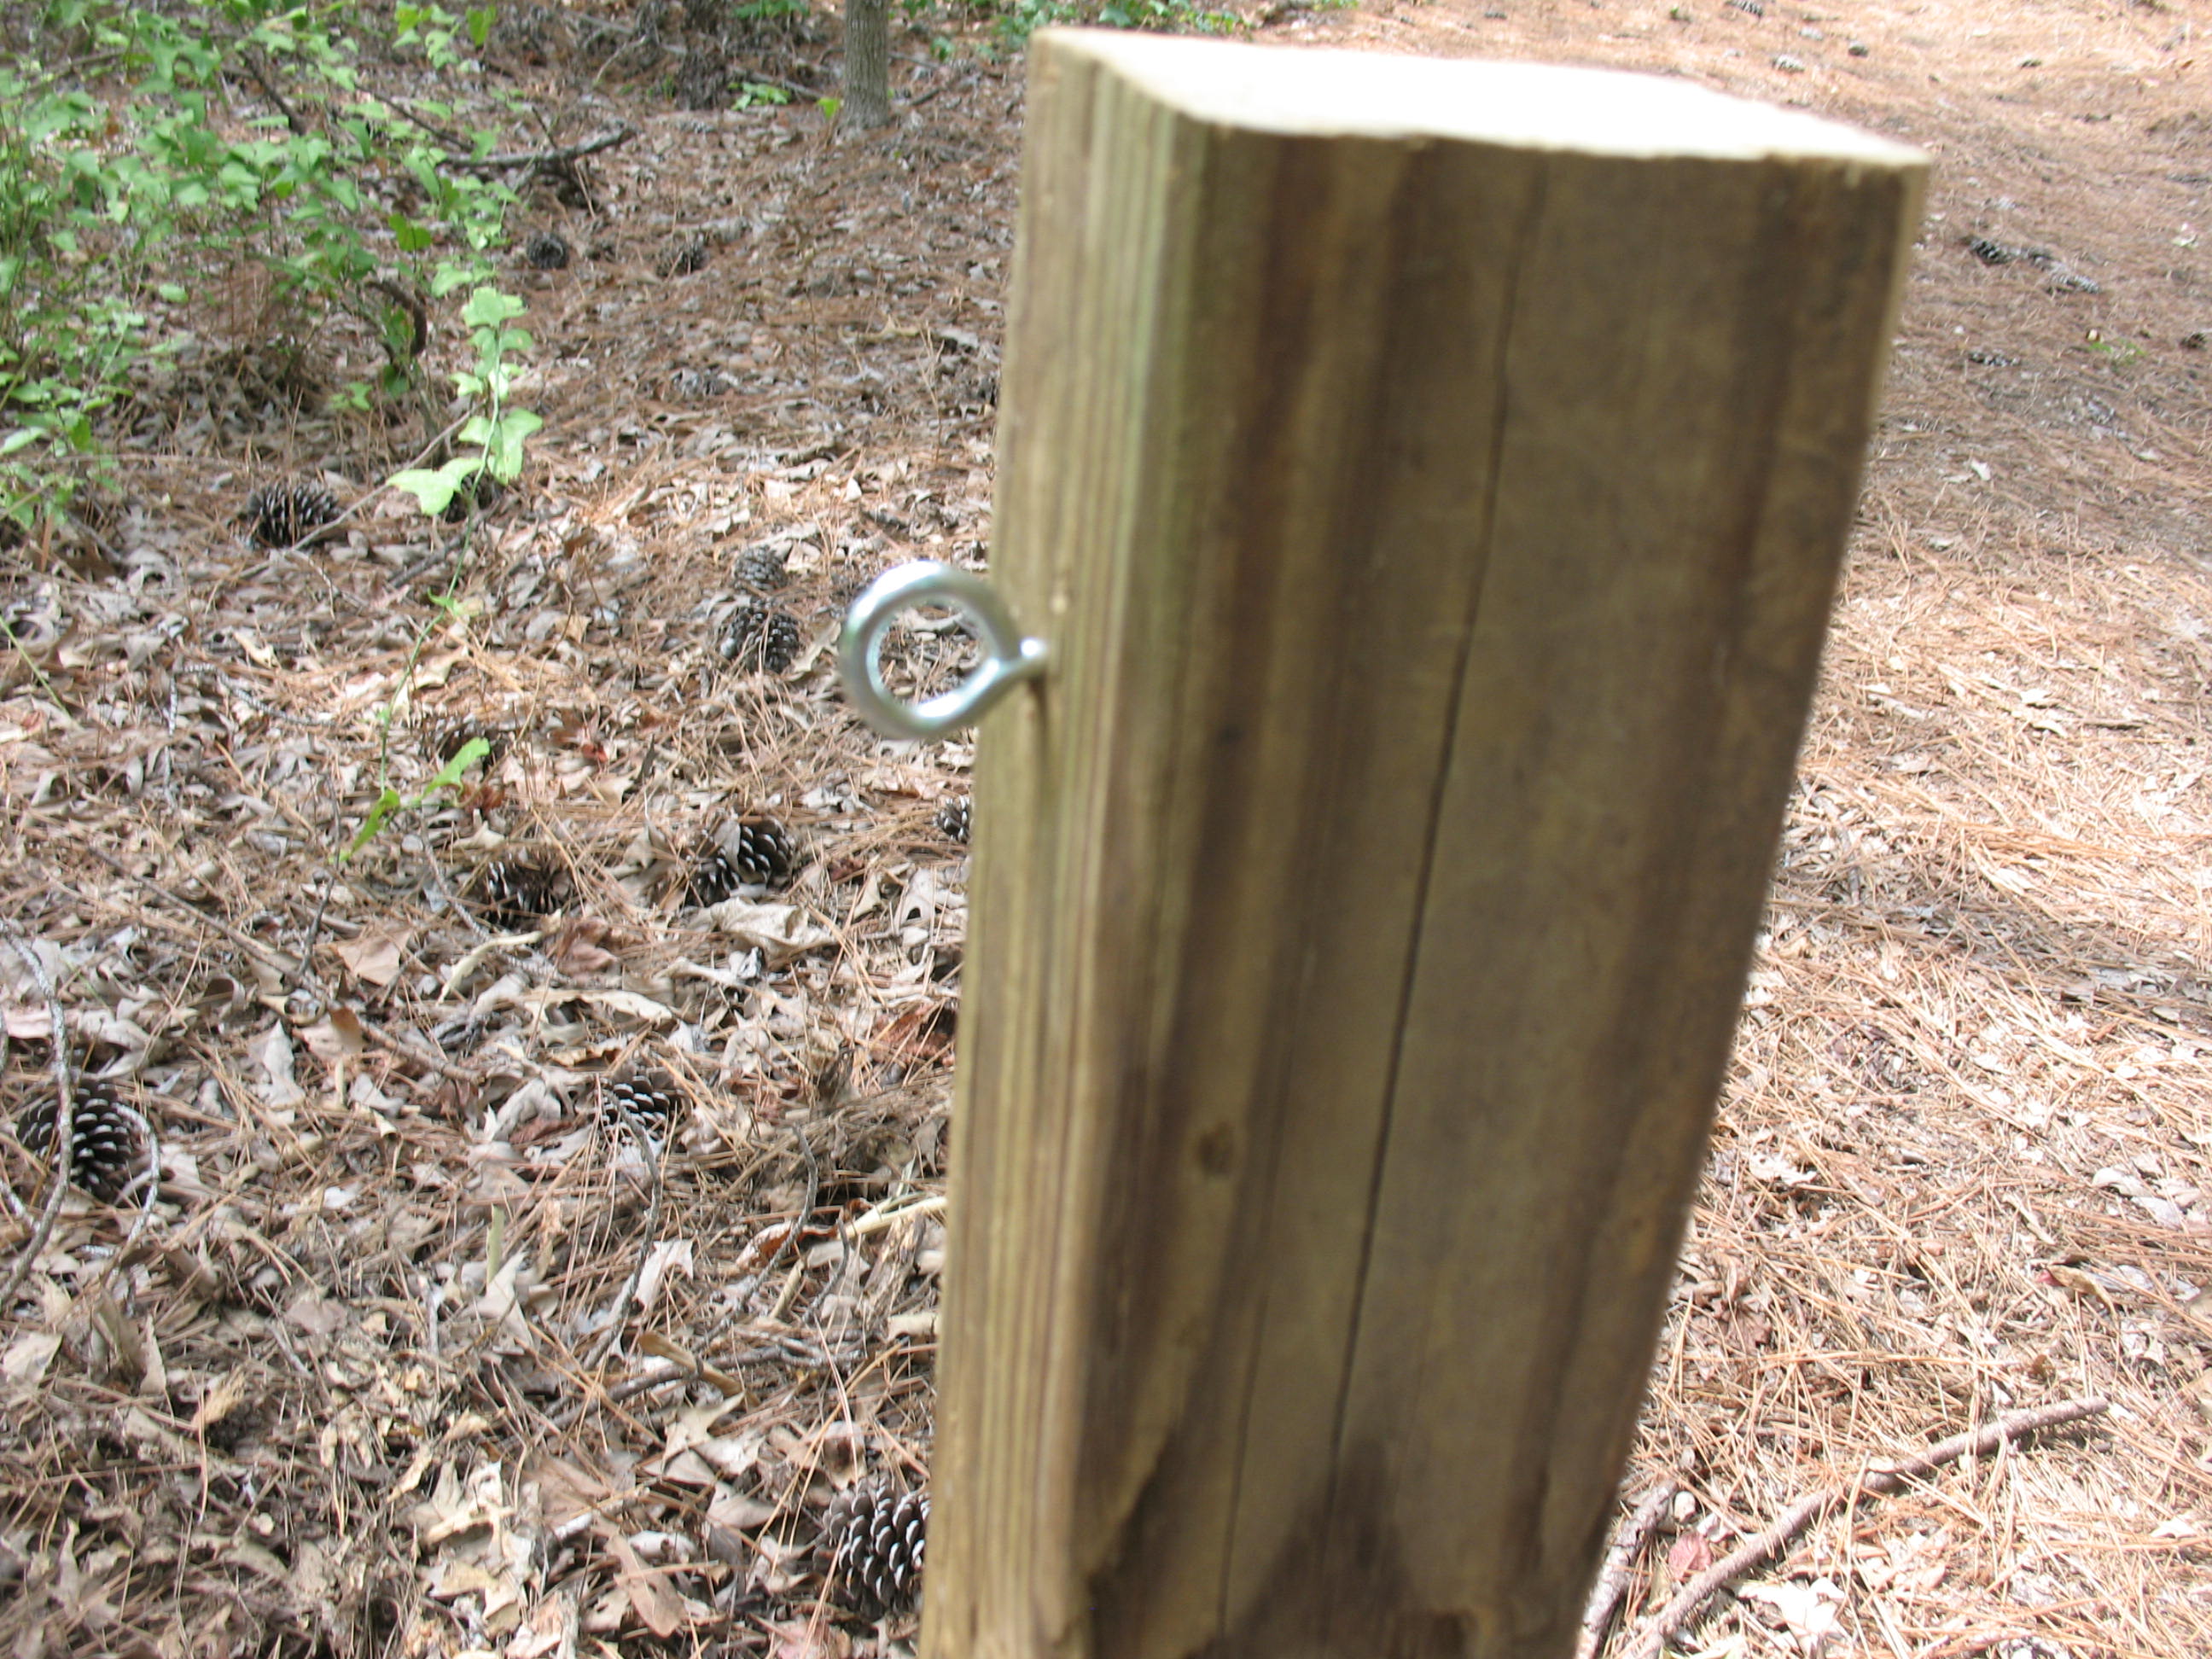
Finally, I set a 4”x 4” treated post into the ground up at the firing line so that it is about even with the right end of the stationary target board. I put an eye-screw into this post to act as a string guide. The post was about five feet tall and I put about two feet of that into the ground so that the post would be good and solid.
Now I had to attach the nylon string that makes the whole thing work. This looks kind of complicated from the instructions, but it’s not really. I’ve added a drawing at the end of the directions to give you a better idea of how the string is rigged. I started out with the target board moved all of the way to the left end of the steel cable as you are facing the target board, so these directions are written using that scenario.
First, run the end of the string through the eye-screw on the left side of the target board then drop the roll of string on the ground so that it will un-spool as you pull the string through the various eye-screws. You won’t actually tie the ends of the string to the target board until you have finished running it through all of the eye-screws.

Now run the string through the eye-screw of the left up-right.

Next start the string toward the other up-right, running the string through the two eye-screws on the back of the target board.

Now run the string through the eye-screw on the right up-right.

Pull the end of the string all the way up to the firing line and run it through the eye-screw on the 4” x 4” post.

Now pull the string back down to the right up-right and go back through the same eye-screw.

Finally, pull the string over to the moving target board and tie it securely to the eye-screw on the right side of the moving target board.

You can now pull the string tight on left side of the moving target board, cut the string off, and tie it securely to the eye-screw that you started this whole trip on.

Here’s that drawing I promised you. This is how the string would look if you were up above, looking down at the target range.
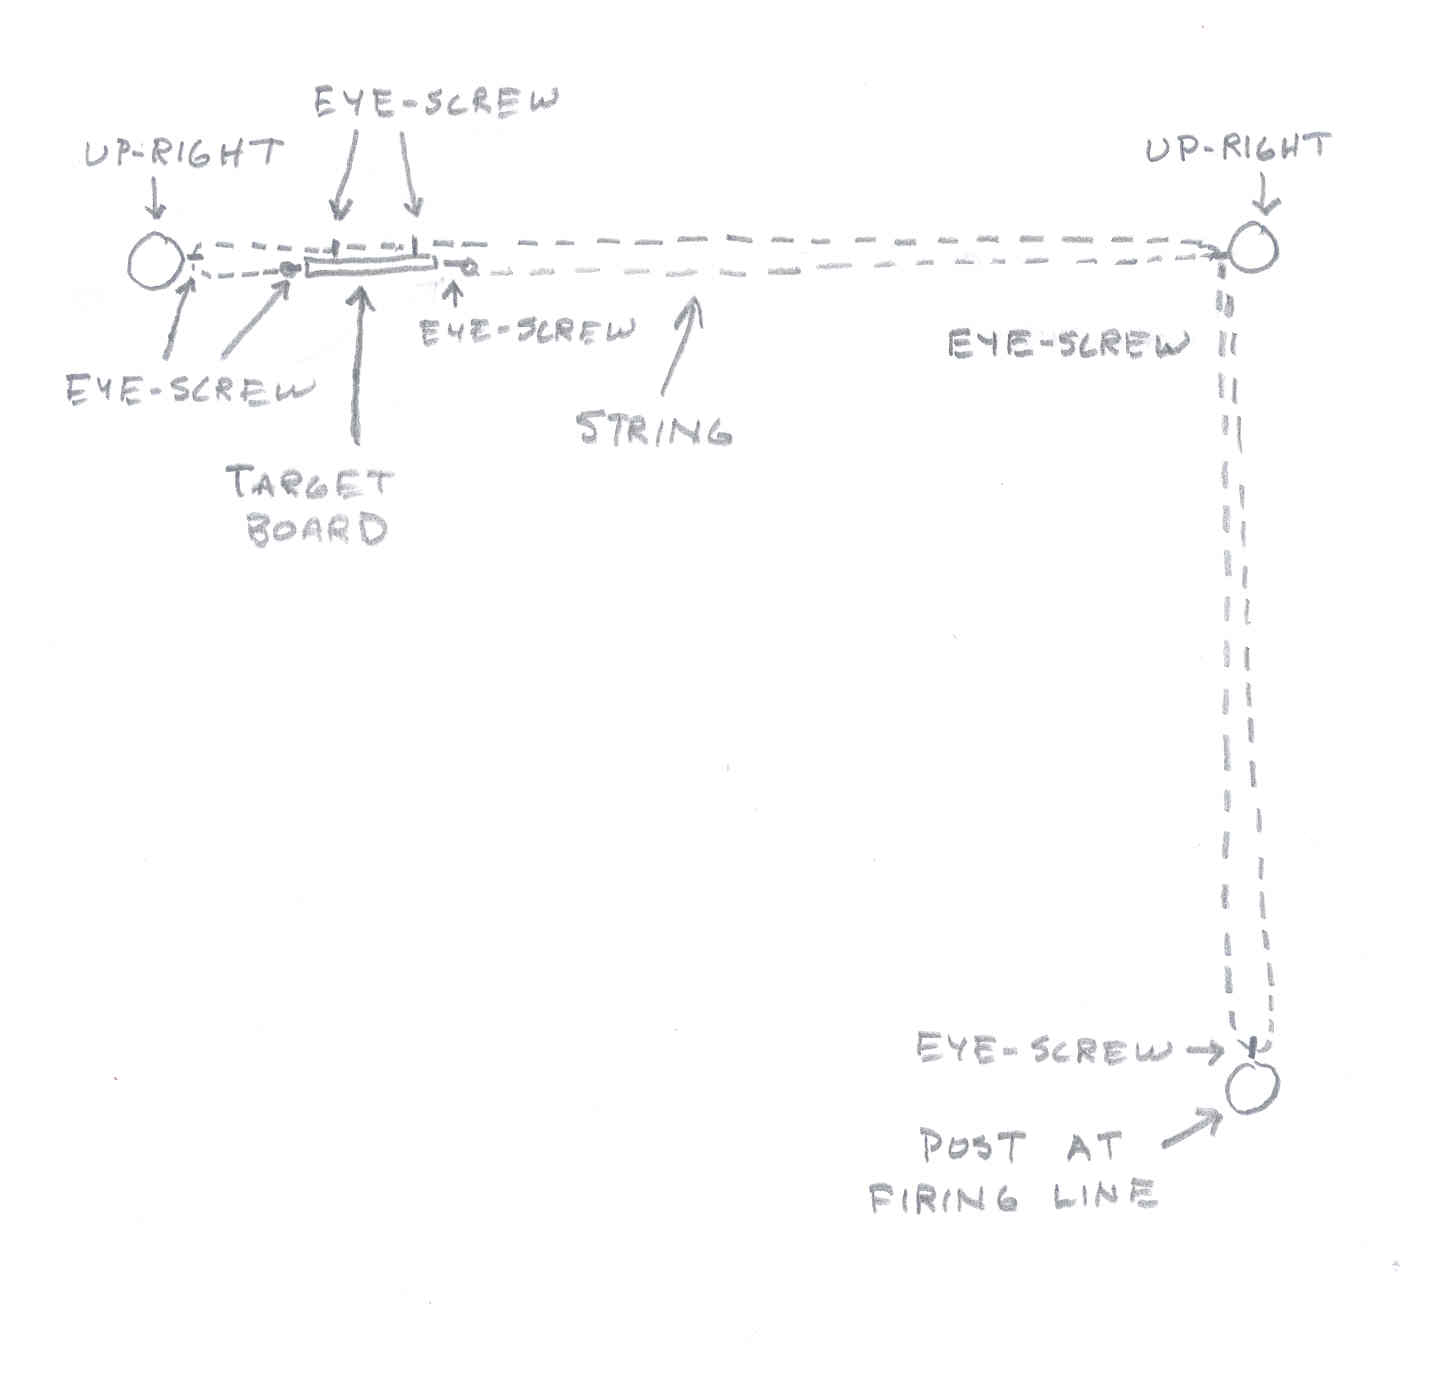
You are now finished. You have a long continuous loop of string with the moving target board tied into it. You can go back up to the firing line and test it out by pulling first on one string and then on the other. If you did it all correctly the target should move from side to side on the cable.

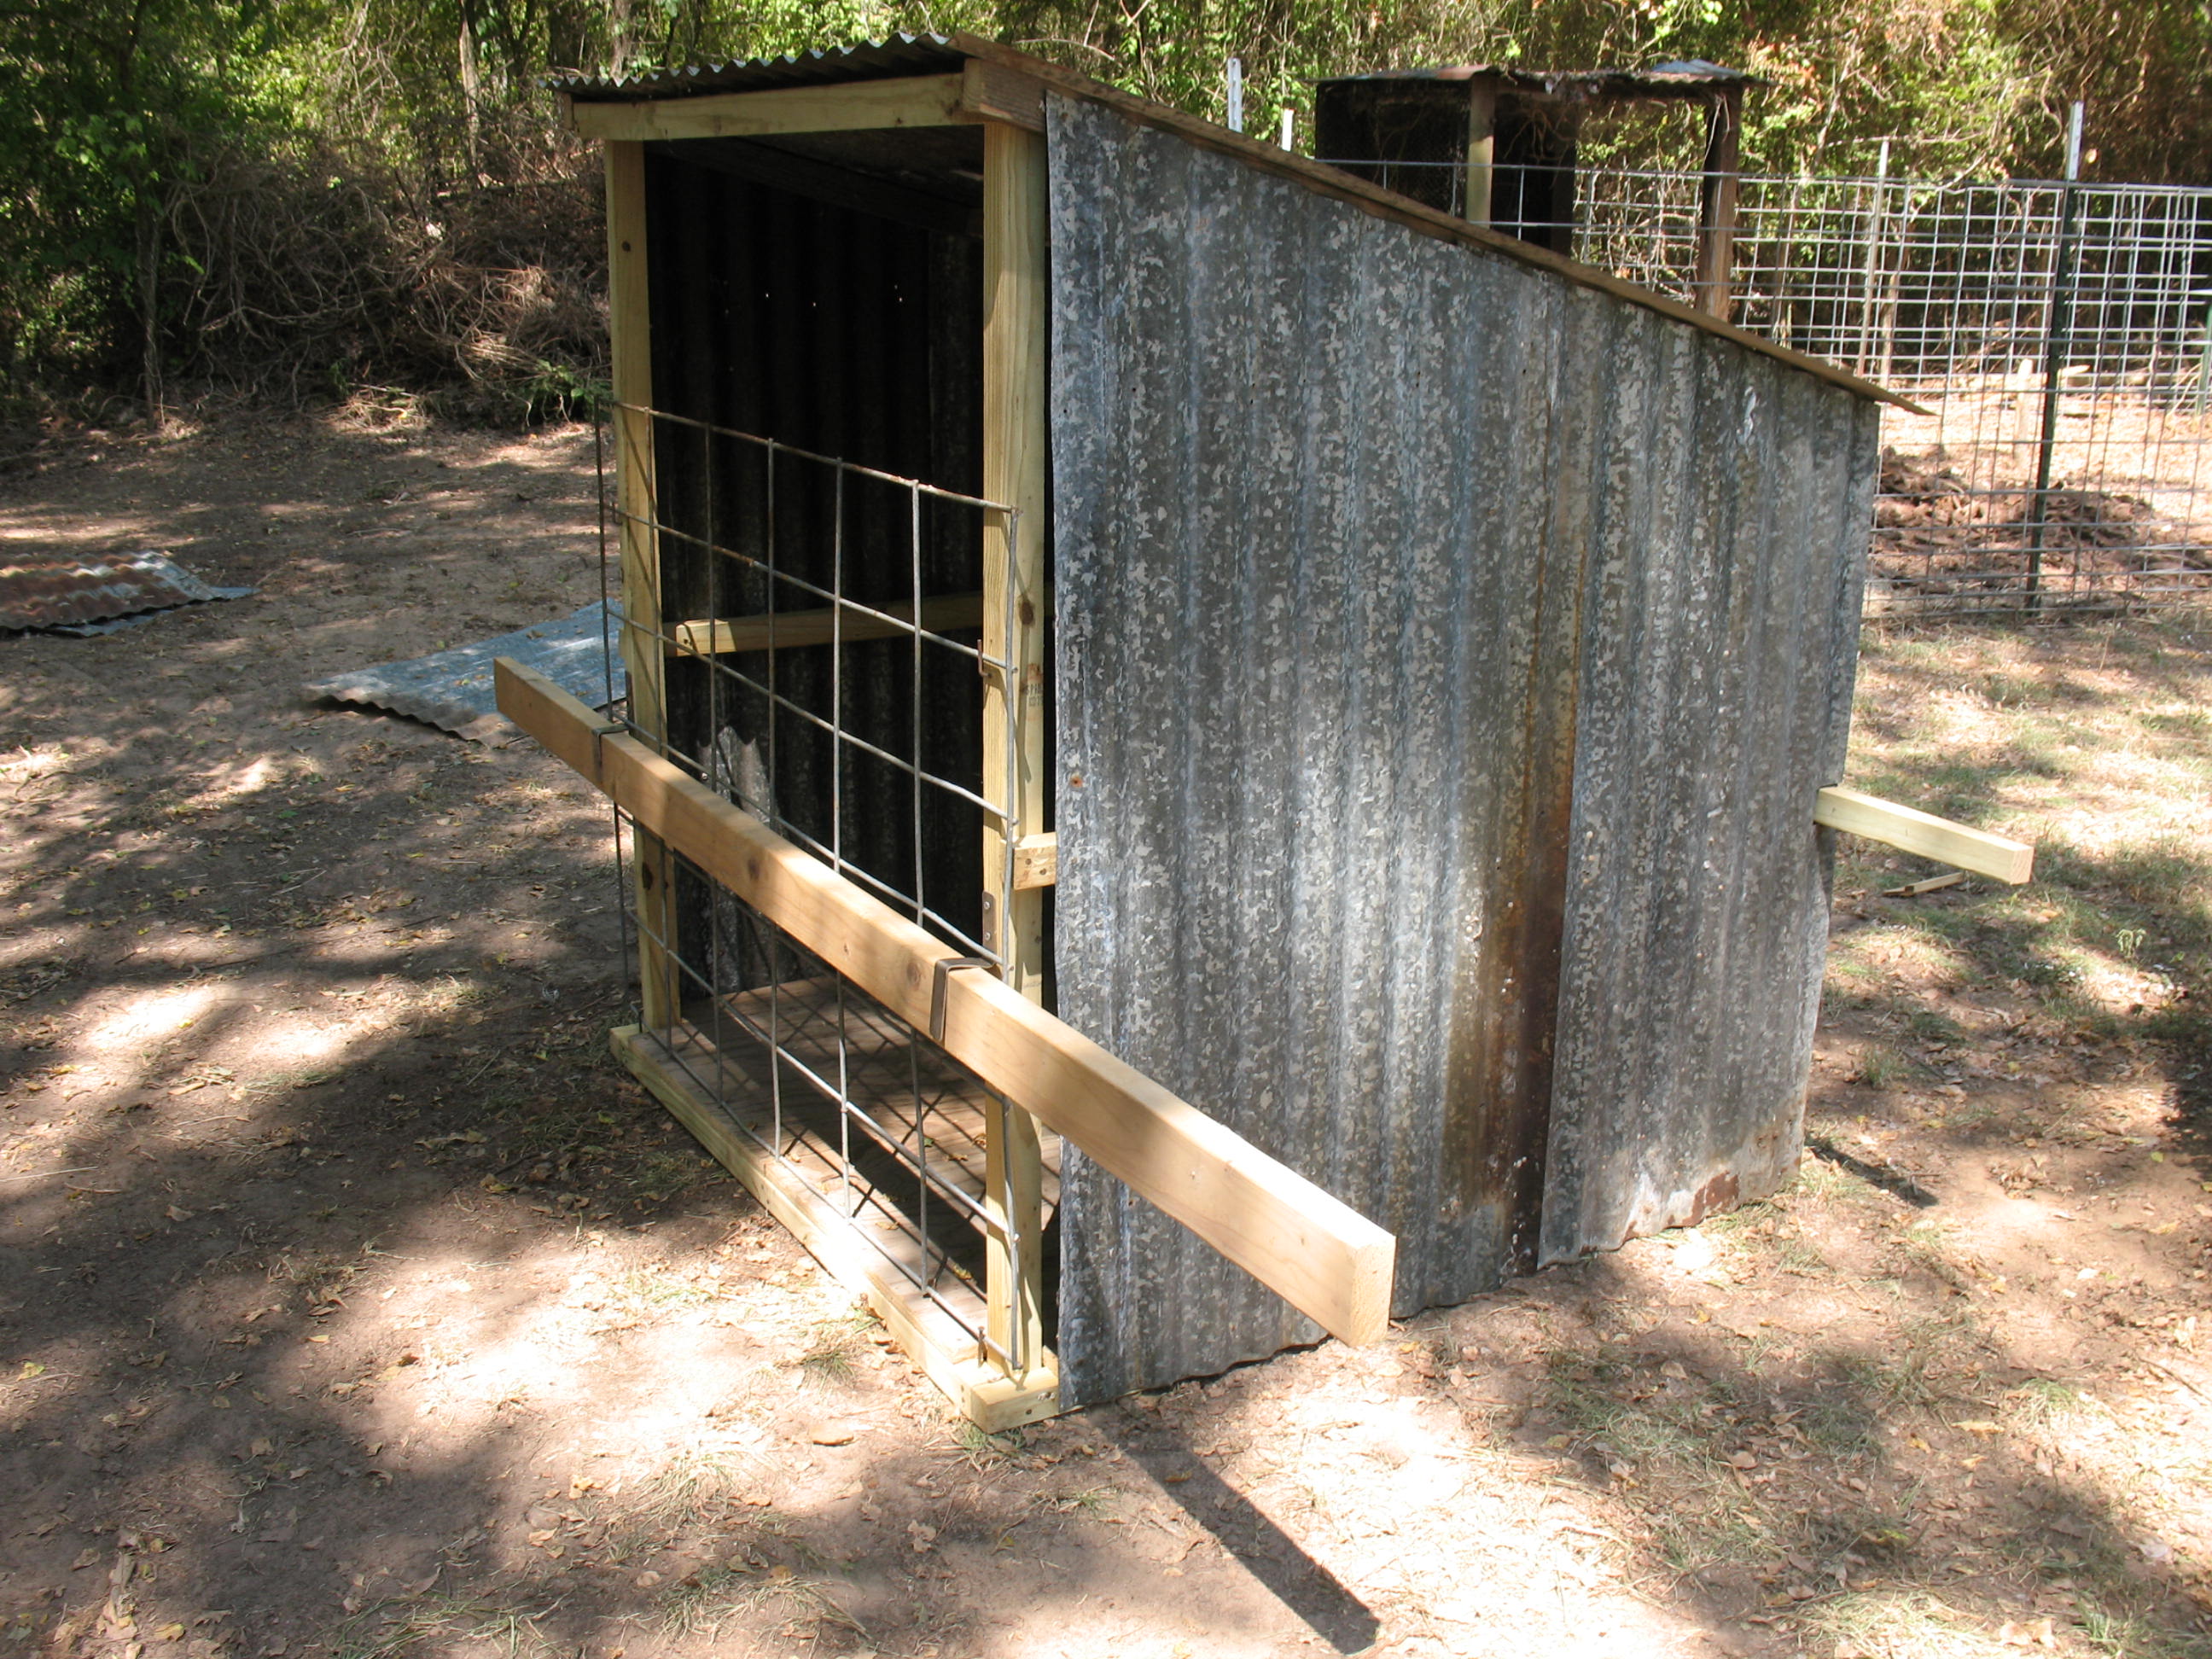
Since I move my goat pen from location to location around the farm, I wanted to build a fairly light-weight shed that I could move along with the pen. As with most of my projects I recycled a lot of the materials for this shed from stuff that I had lying around. I did have to buy four treated 2 by 4’s eight feet long, but the rest of the materials are recycled. I decided to make the shed four feet by four feet square and about four feet tall. This is how I built the shed.
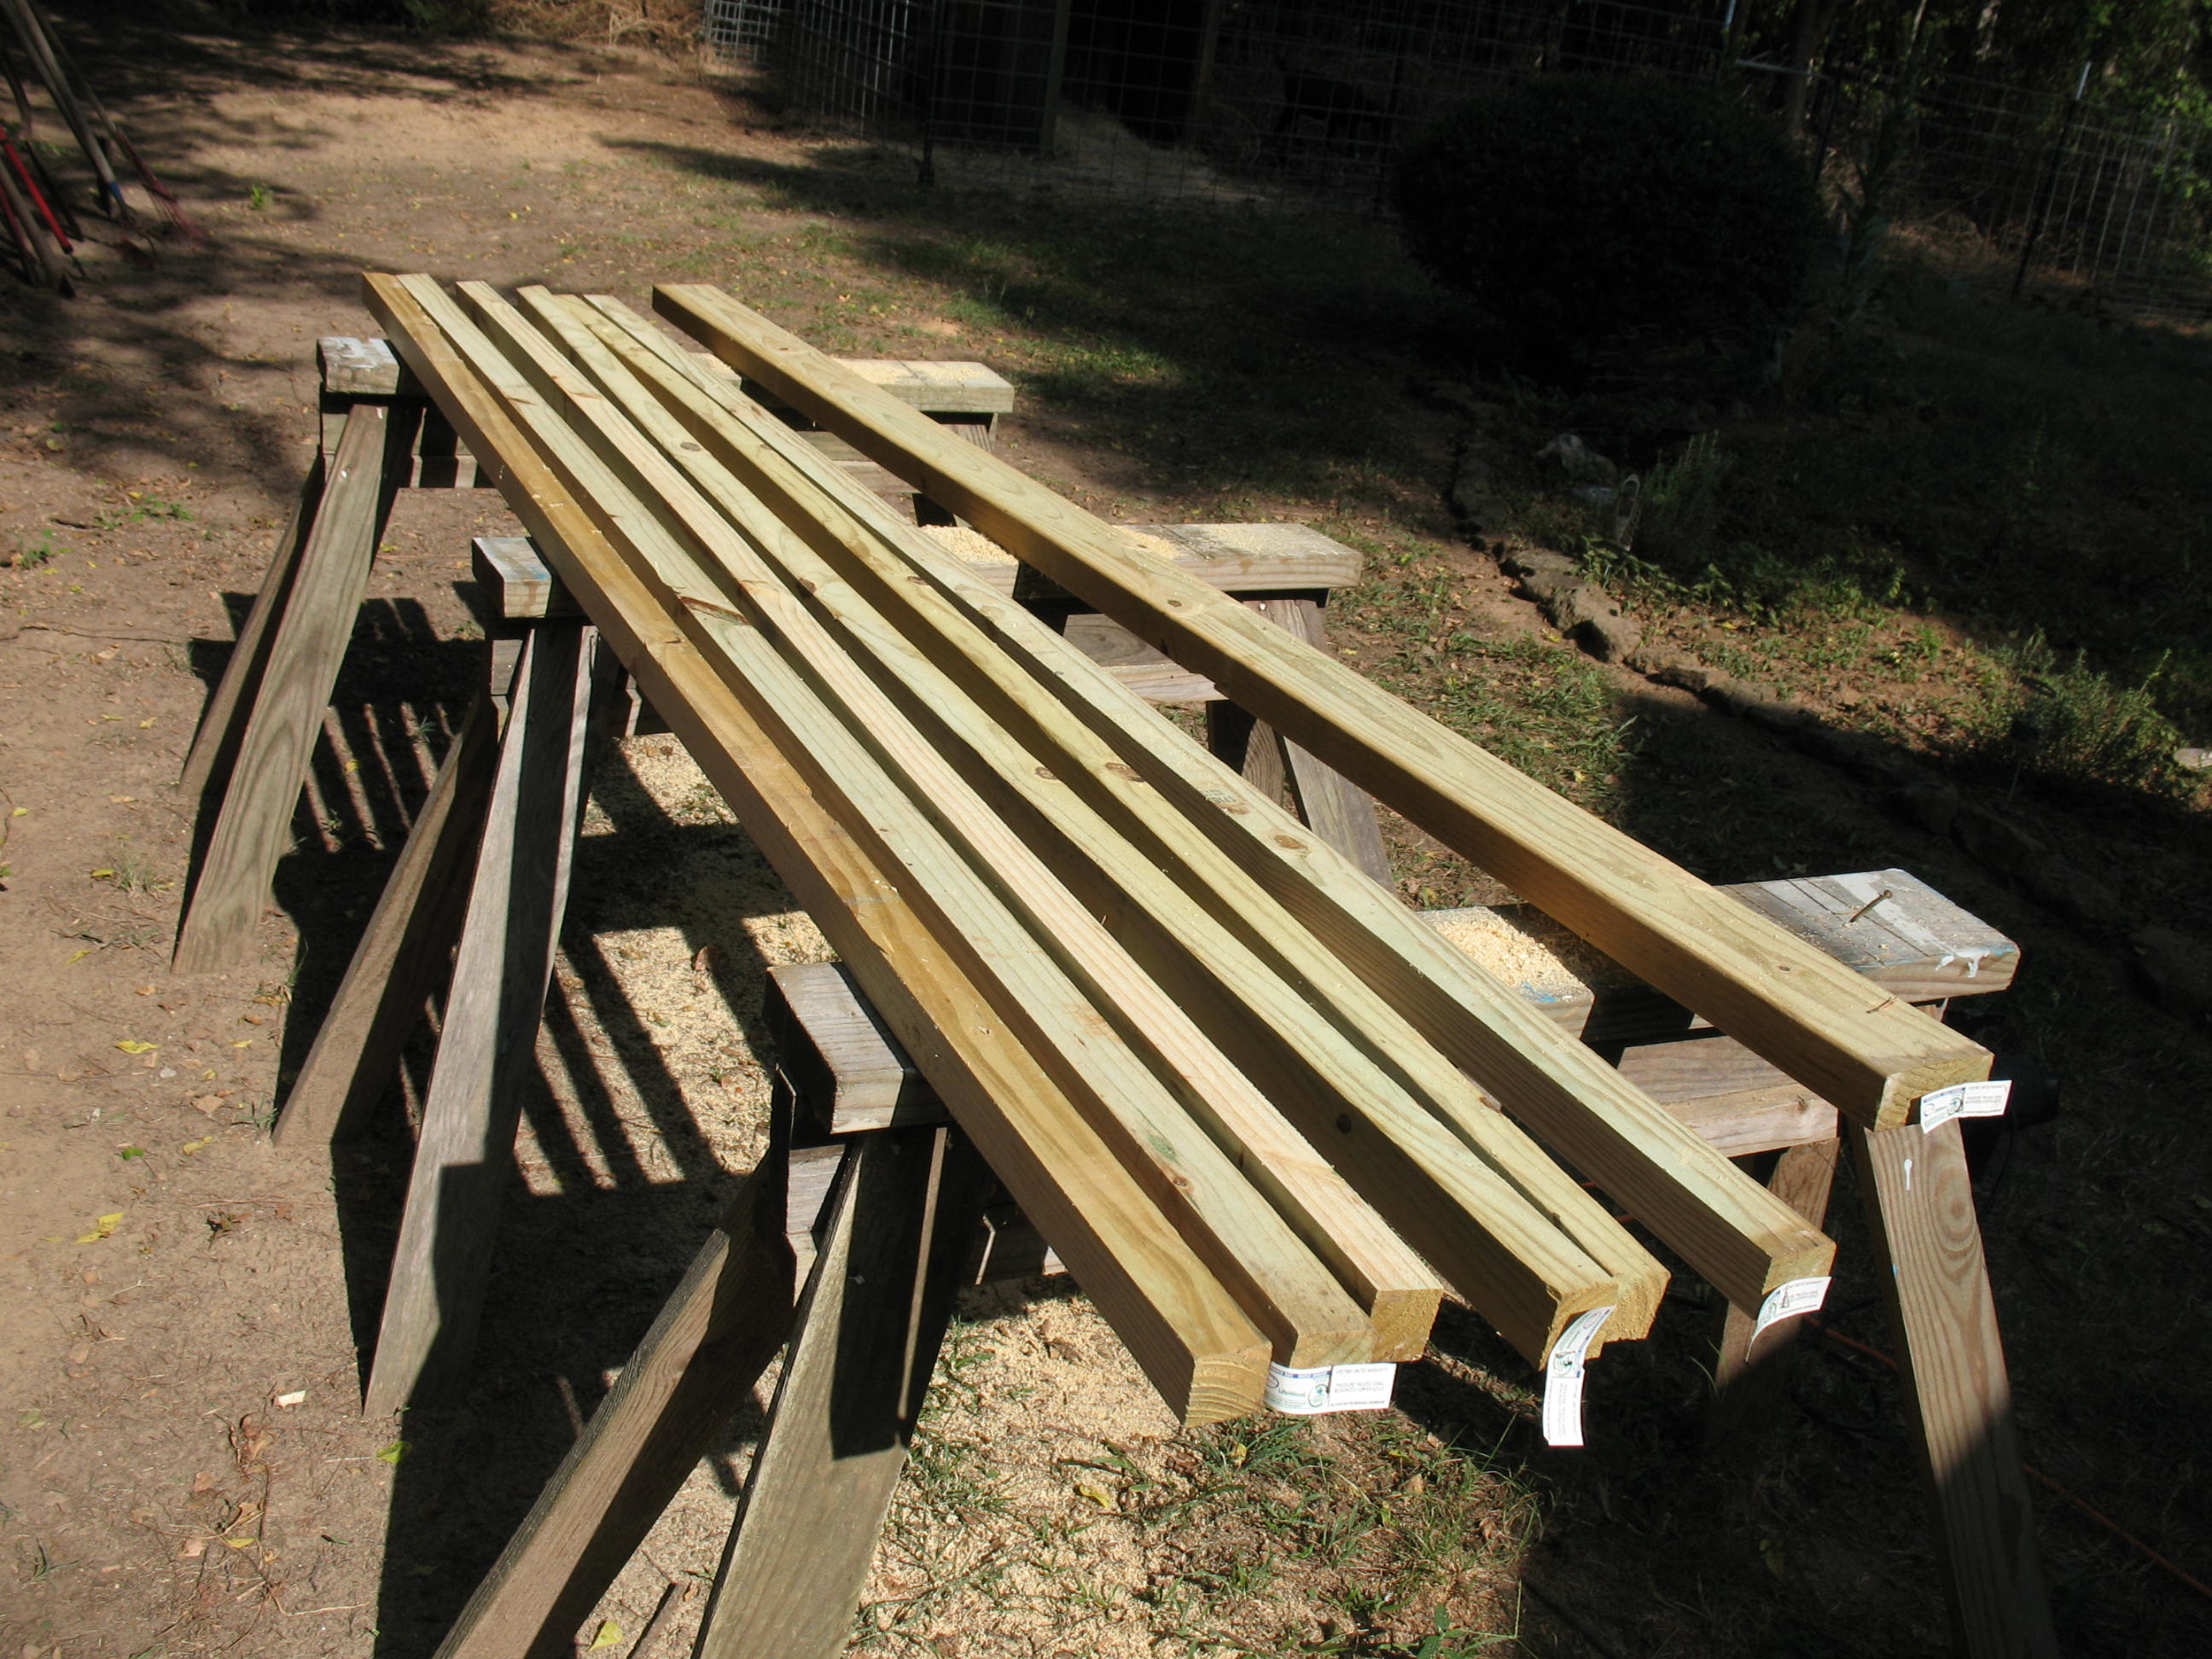
First I took my newly purchased 2 X 4’s along with a couple of recycled ones and ripped them in half so that the finished lumber was 1 ½” by 1 ¾” by eight feet long.
Then I cut out and nailed together the two sides of the shed. The front of the shed is 4’ 6” tall and the back is 3’6” tall. The base is 48” and the angled piece for the roof is 50” long. The cross brace is 45”. Note that the uprights are set in 1 ½” so that after the sides are joined together the shed will be 48” square.

Next I cut several pieces of lumber to join the two sides together. The front and back pieces on the floor are 45” long. The front to back brace on the floor is 45” long. All three cross pieces on the roof are 45” long. The cross brace on the back of the shed is 6’ long. This will allow a foot to stick out on each side of the back. These will be handles that make it possible to lift and carry the finished shed.

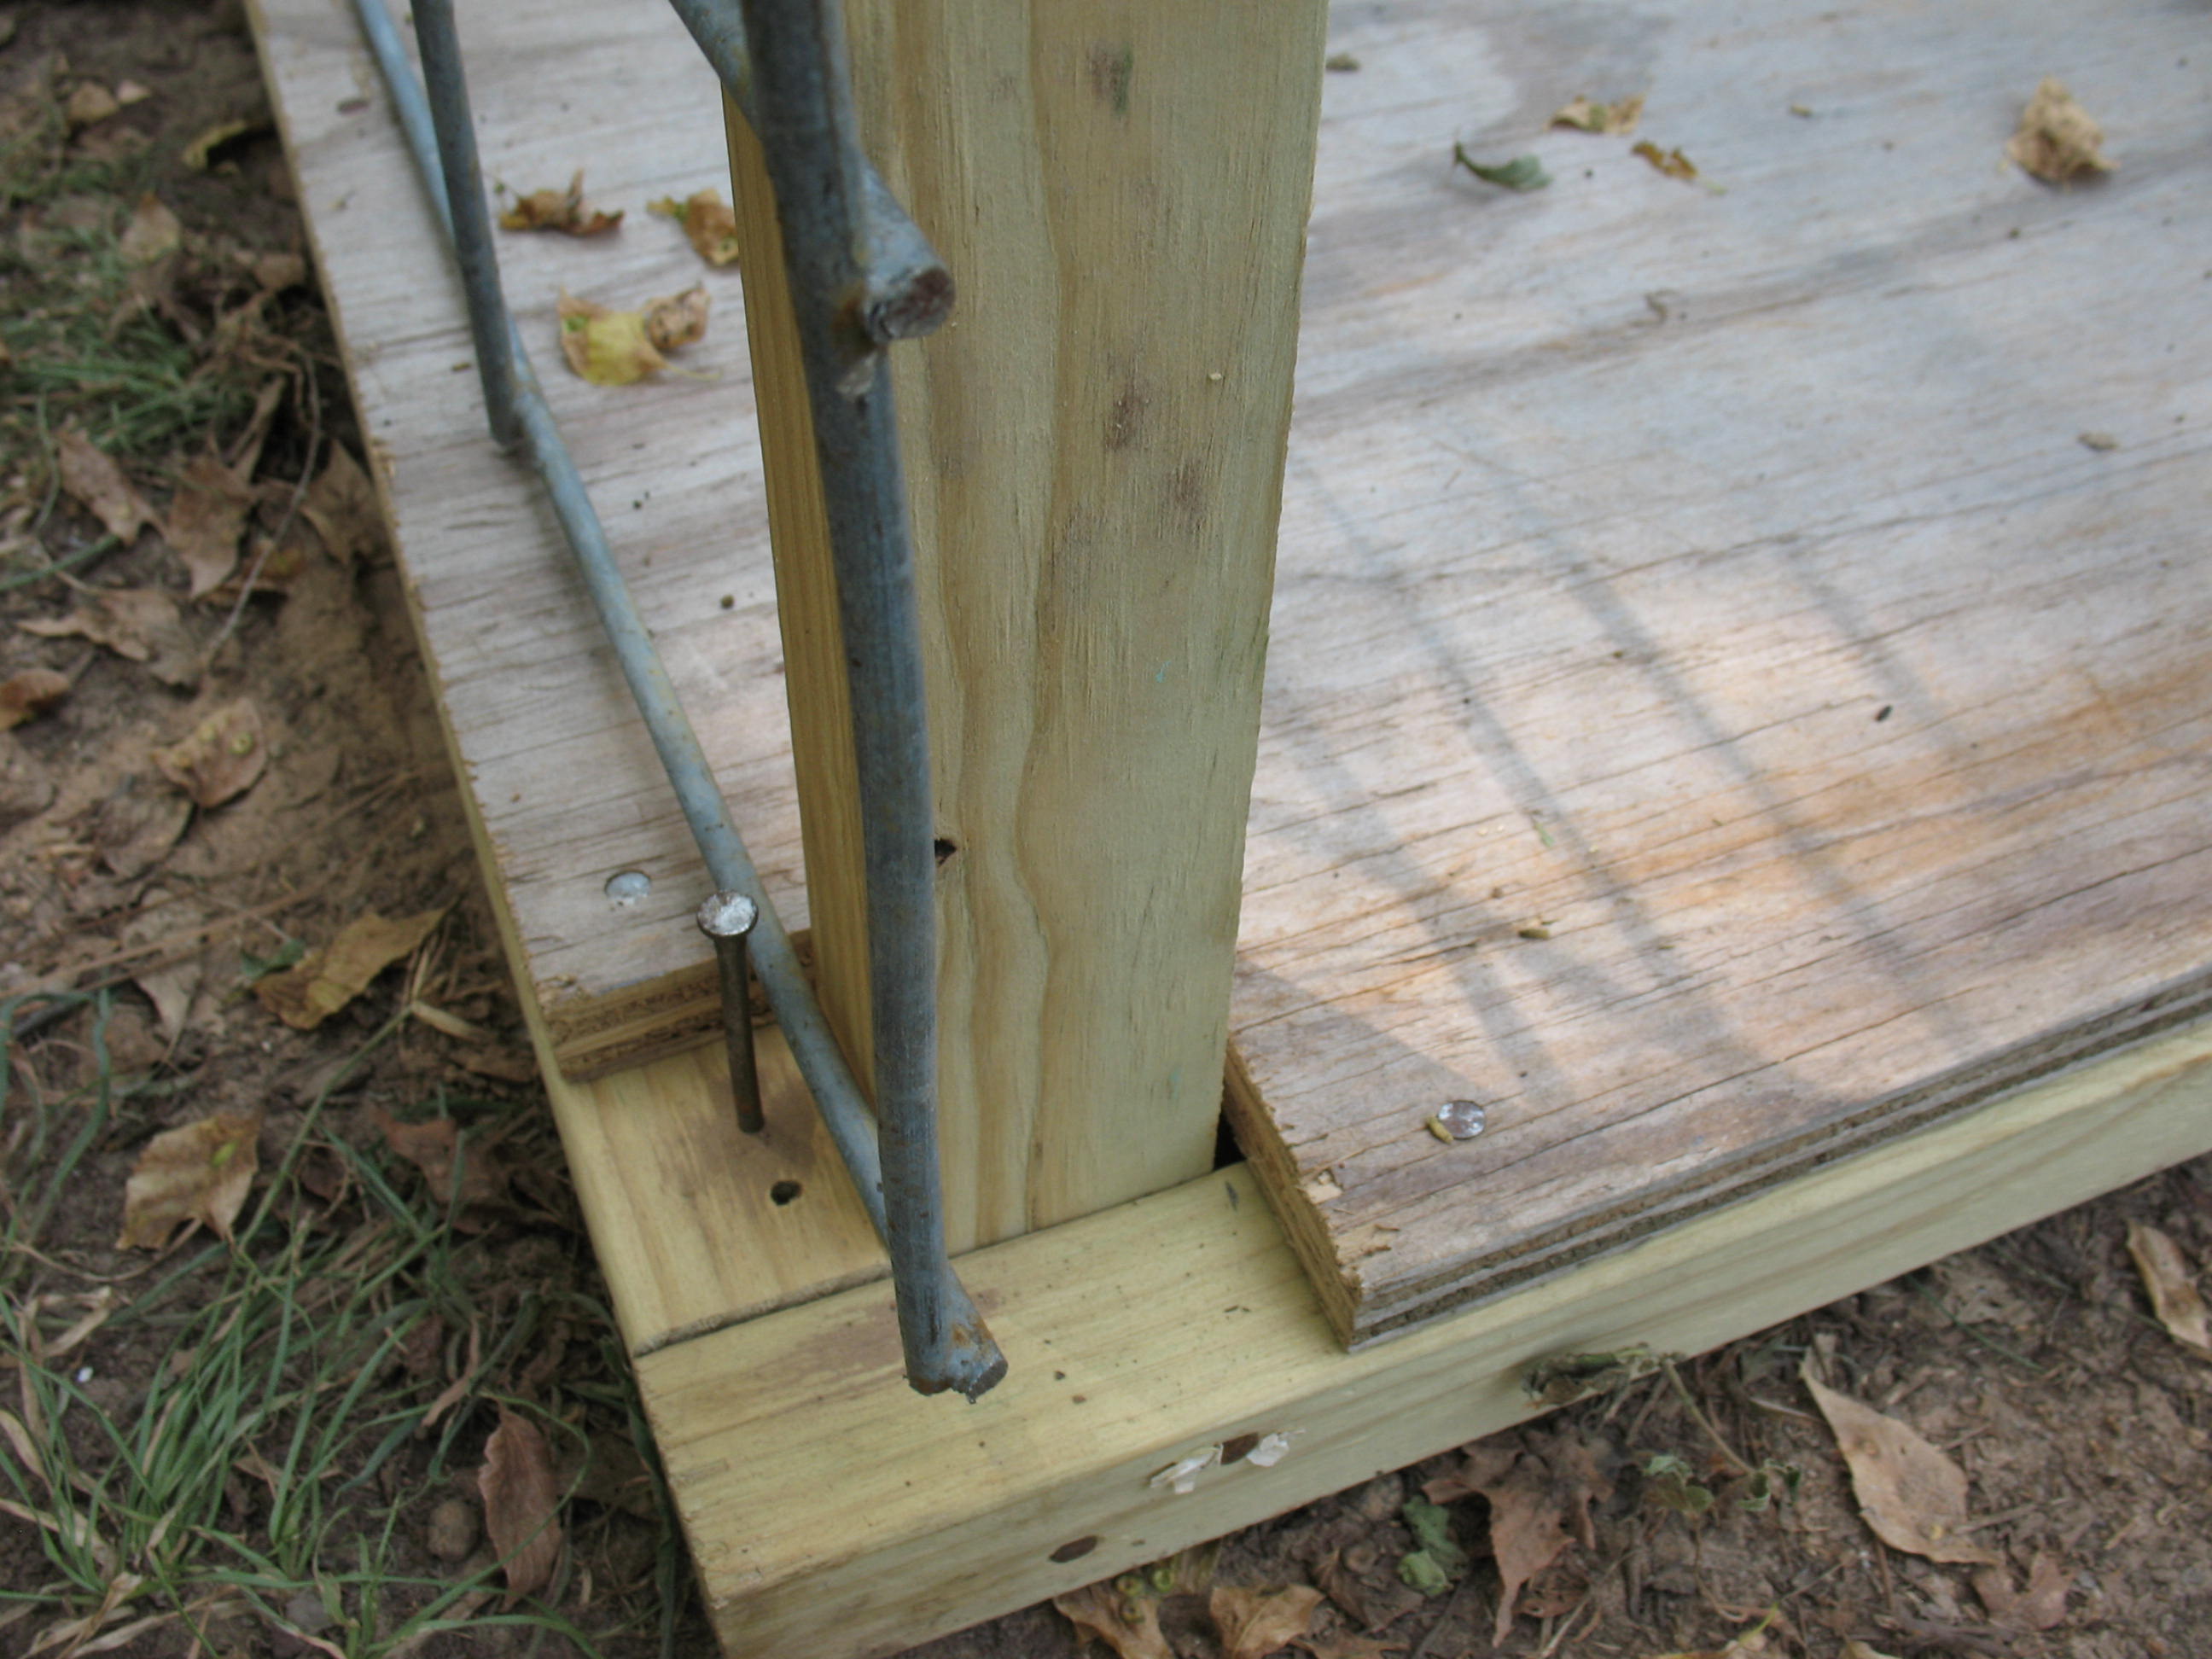
For the floor I used some old ¾” treated plywood that I had lying around. The corners of the plywood have to be notched to fit around the uprights at the corners of the shed.

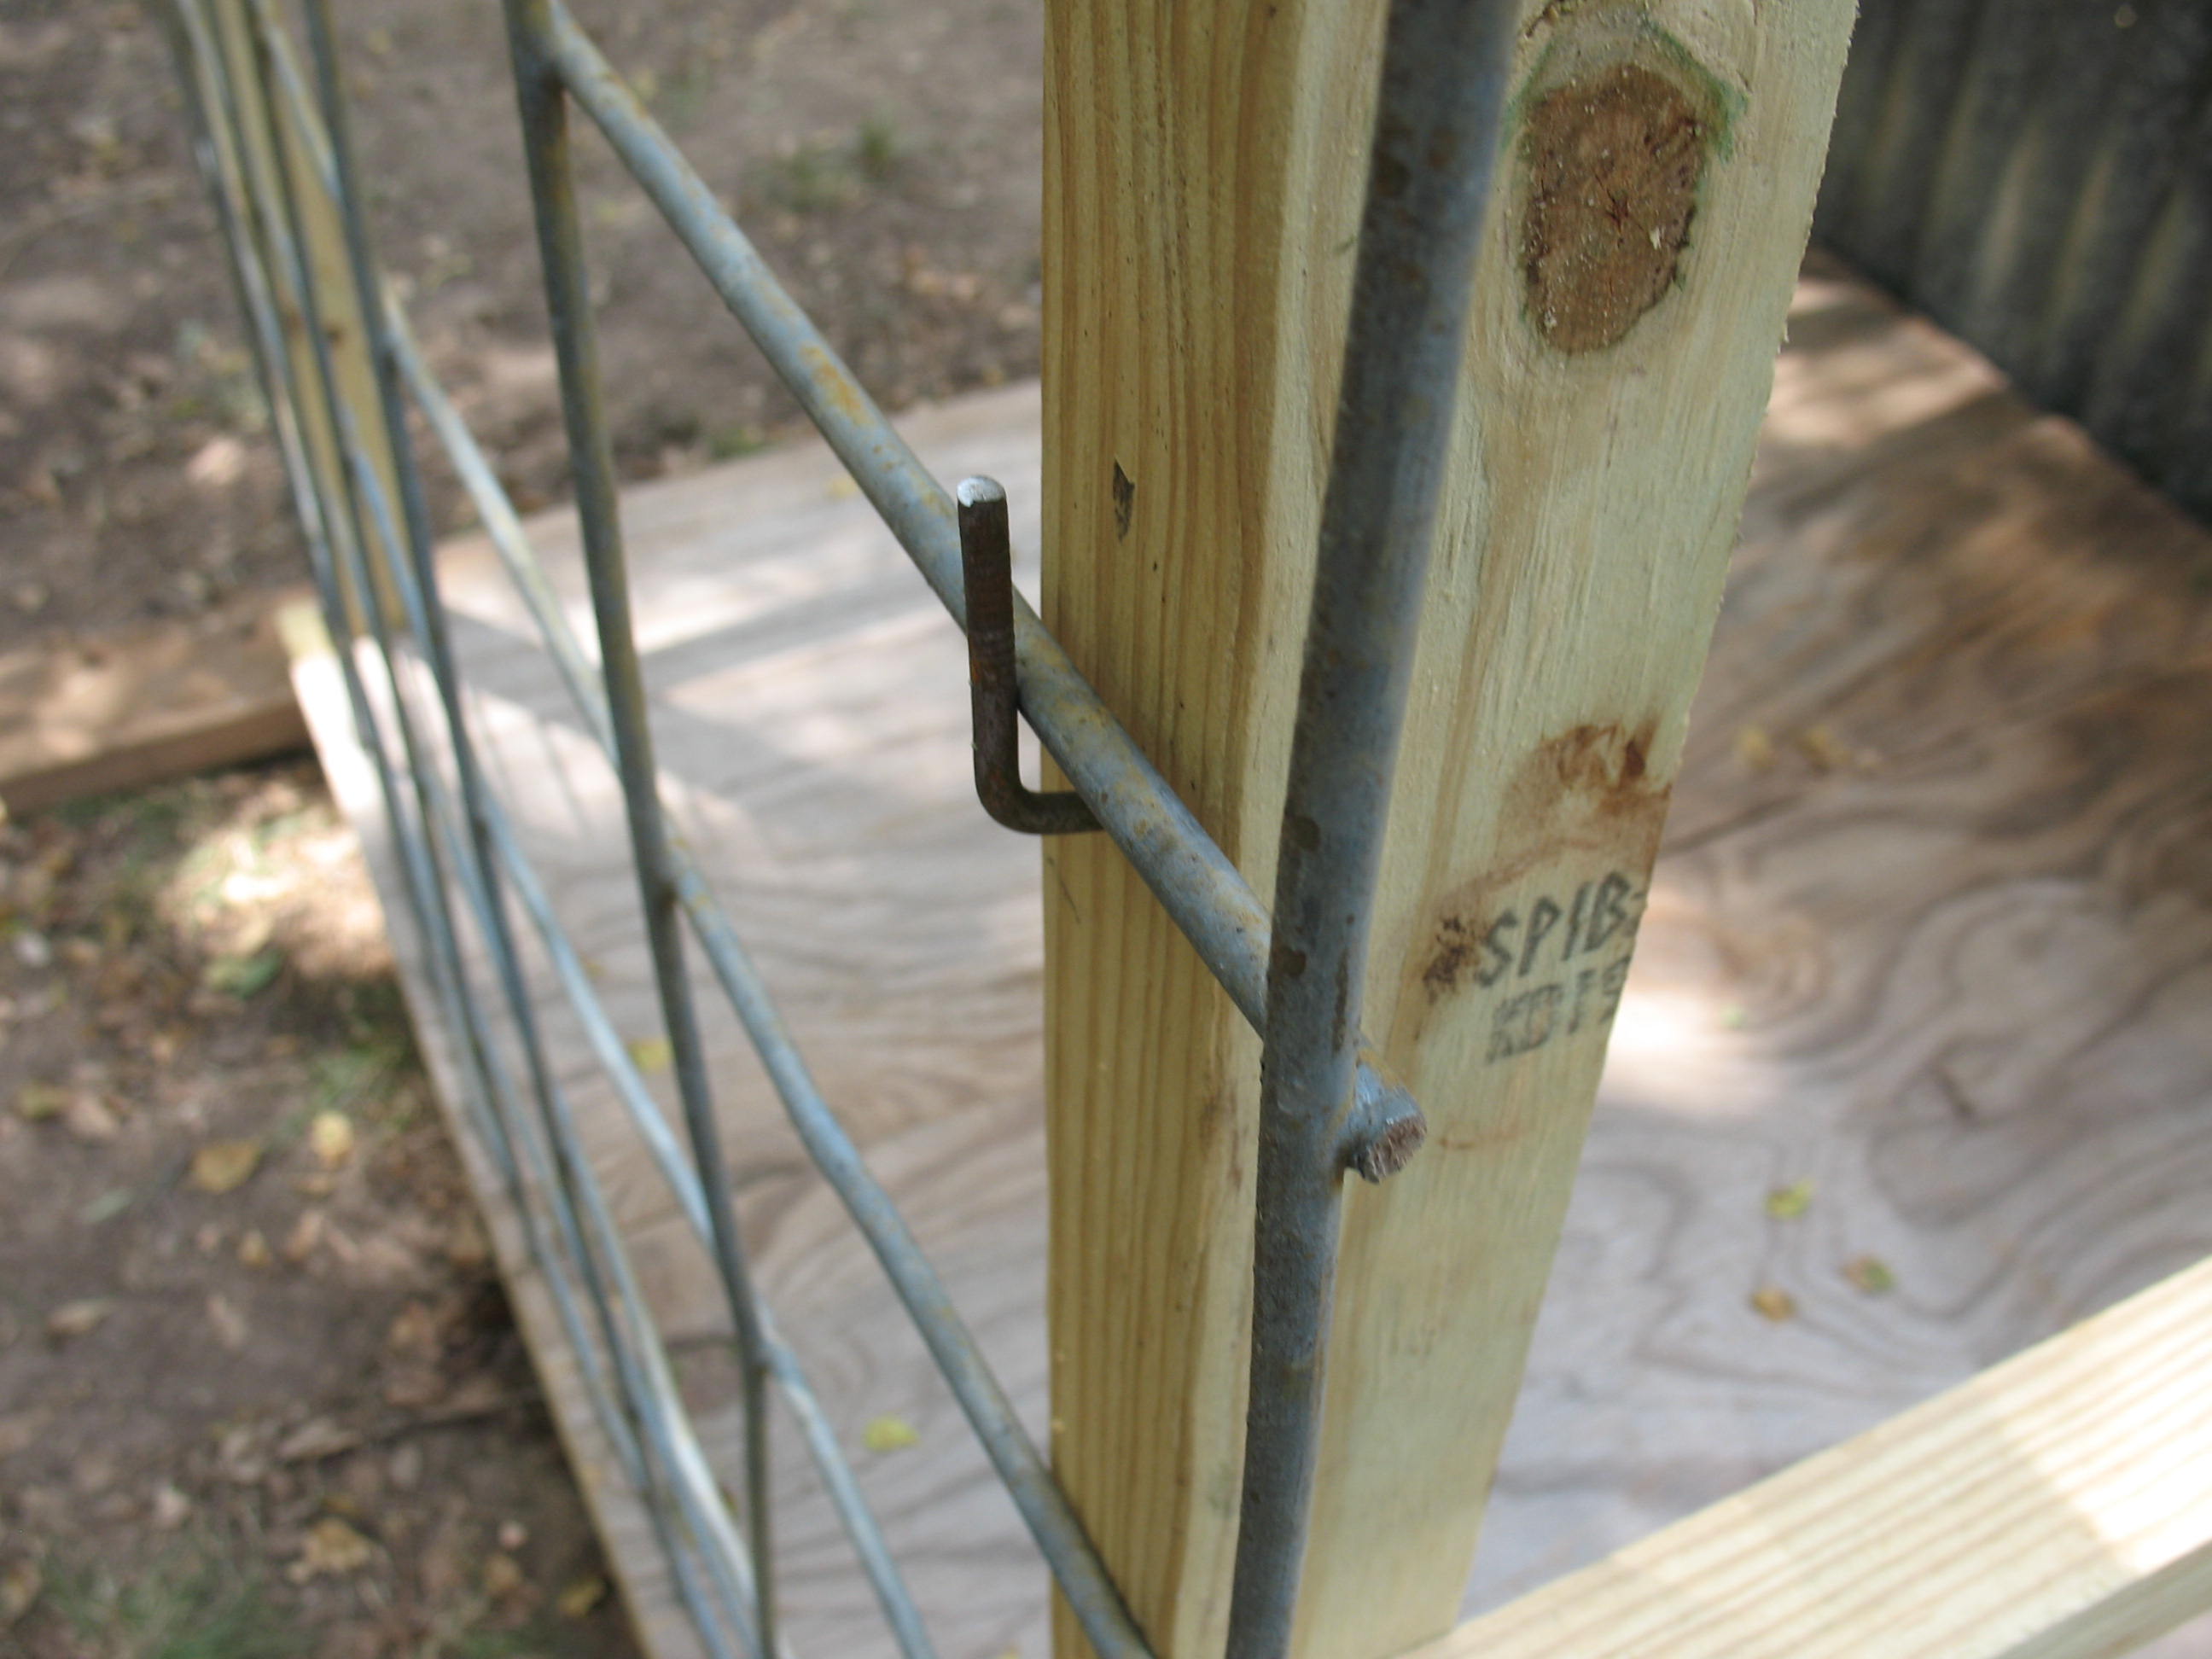
I wanted to make the shed so that I could keep the goats inside of it while transporting them, so I cut a piece out of an old stock panel to make a fence across the front of the shed. This fence is four feet wide and three feet tall.

I used two bent nails and two straight nails to make a simple closure system that the stock panel can be slipped into.

Recycled roofing metal was used to cover the three sides and the top of the shed.

The last thing I did was make a couple of brackets out of some old flat iron stock that I had in the shop. I mounted the brackets on the front uprights of the shed so that I can slip a 2 X 4 into them and make a carrying handle on the front.
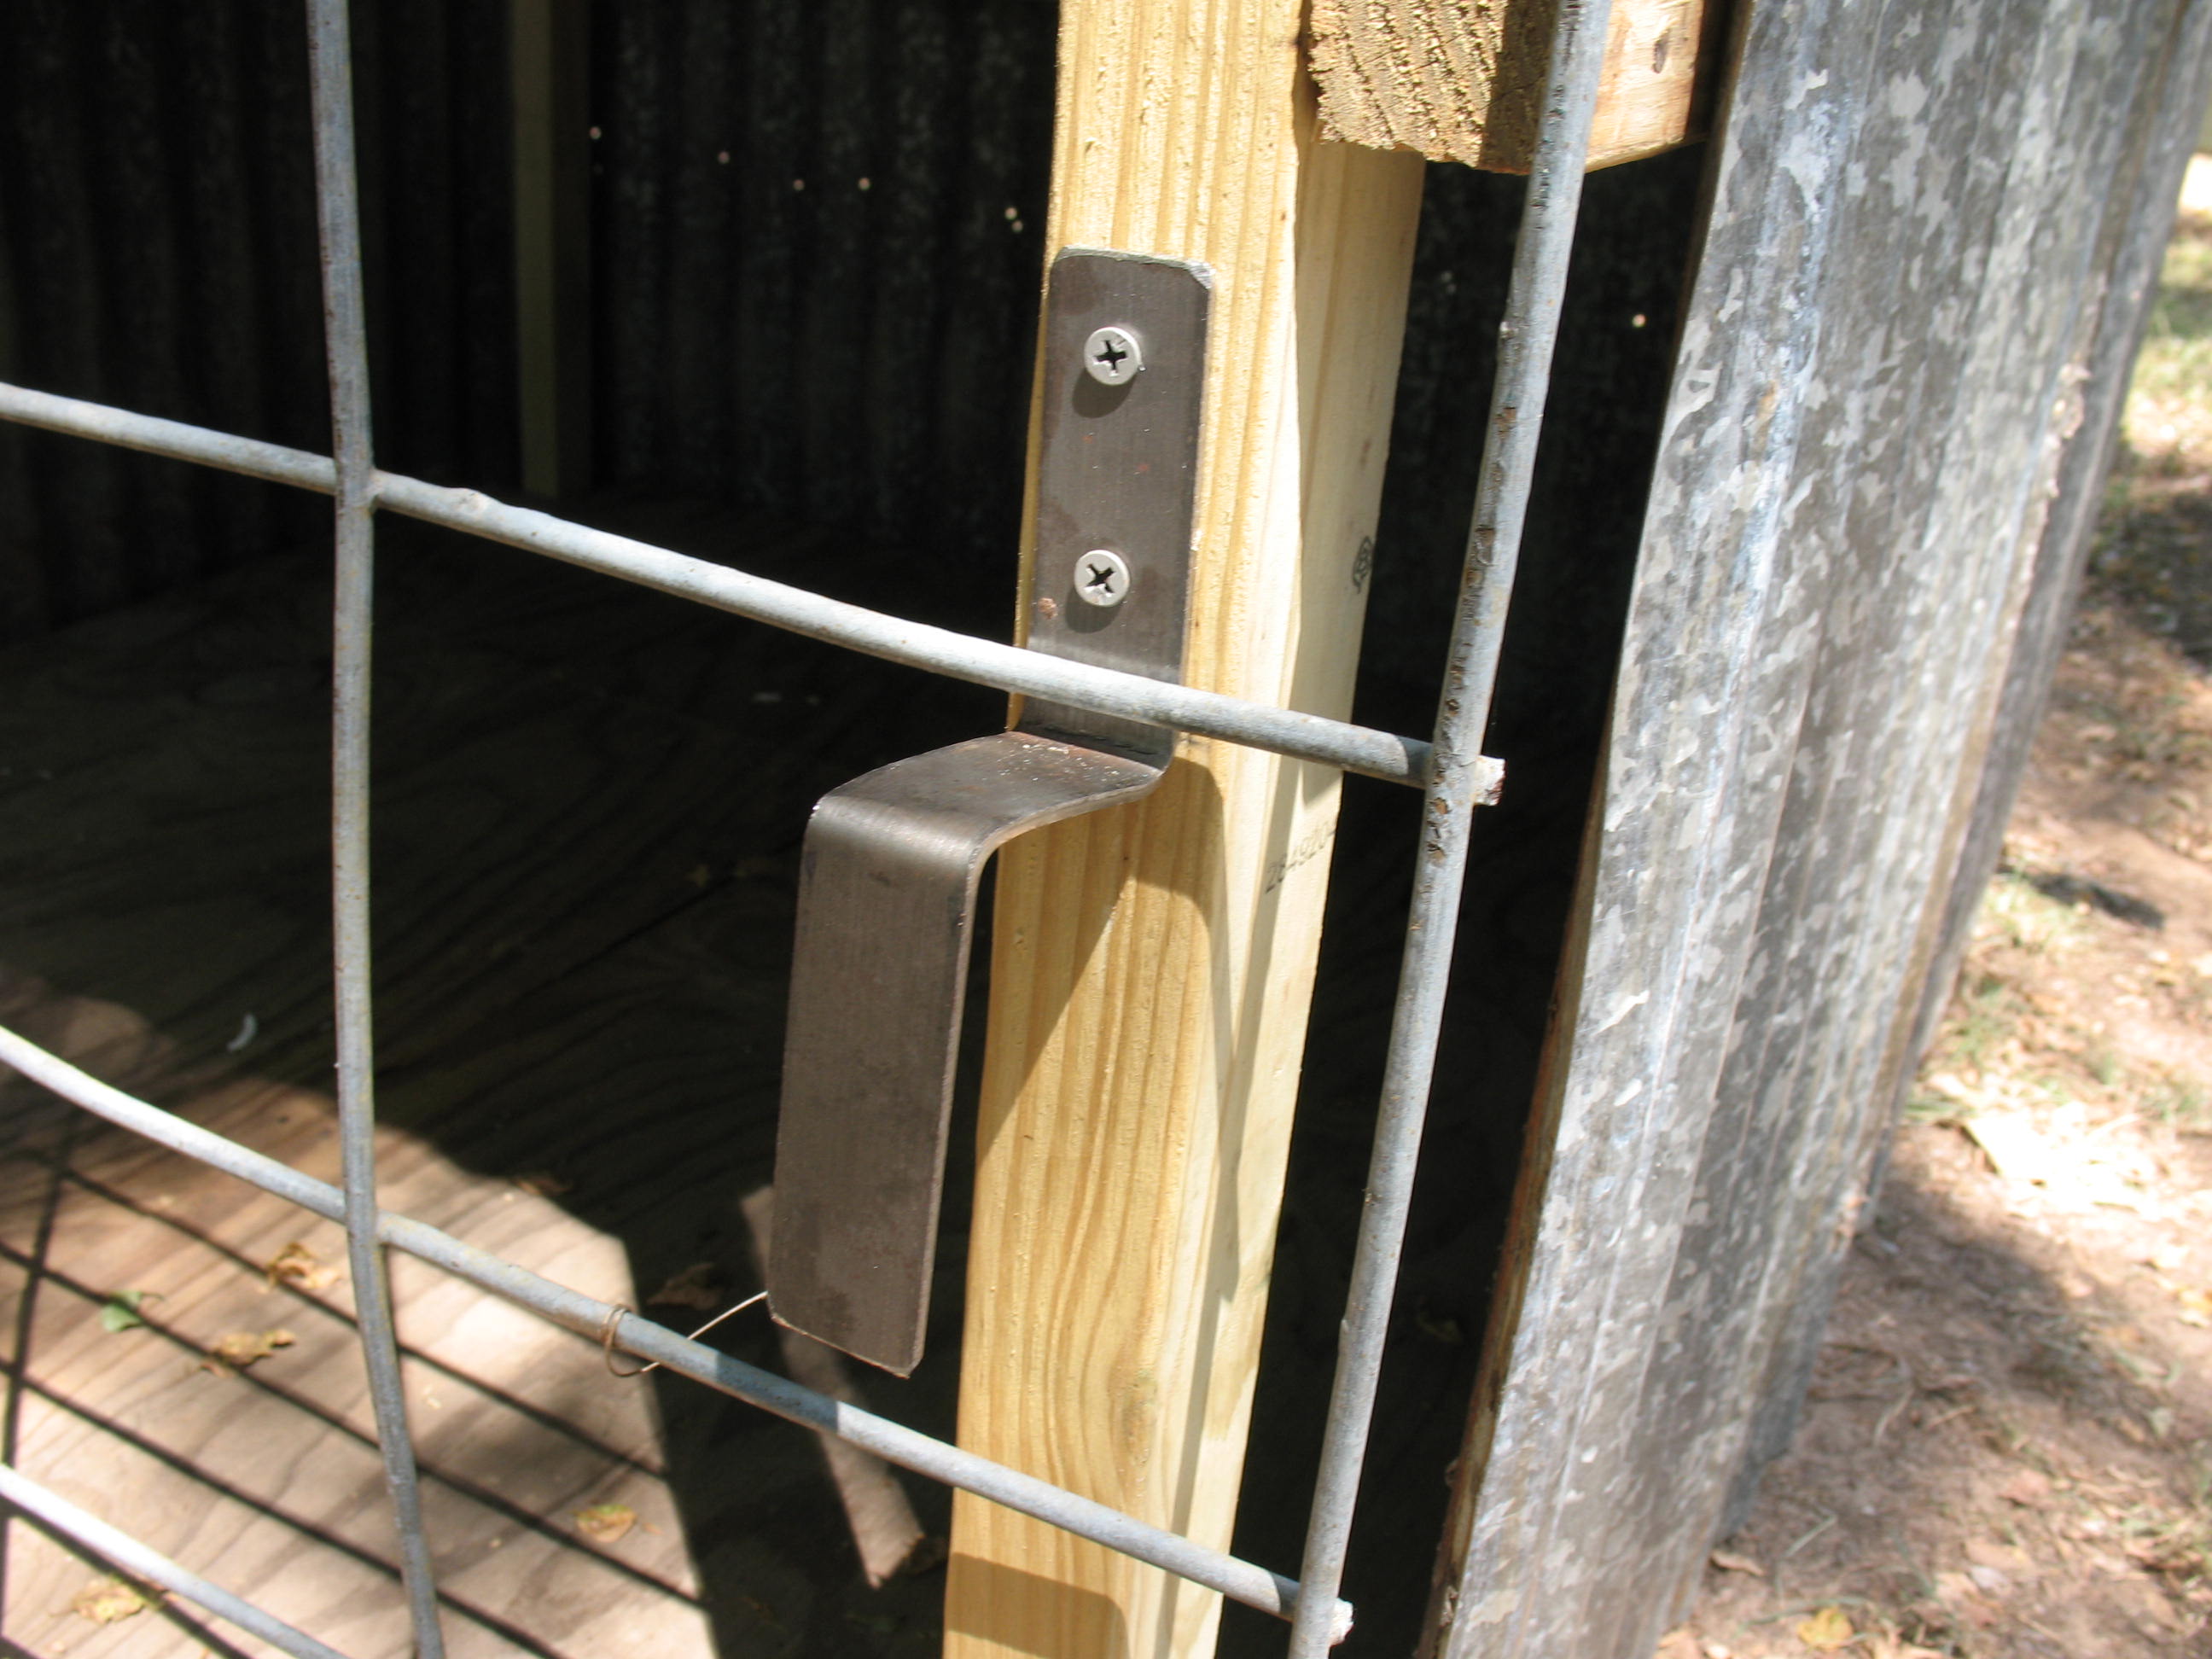
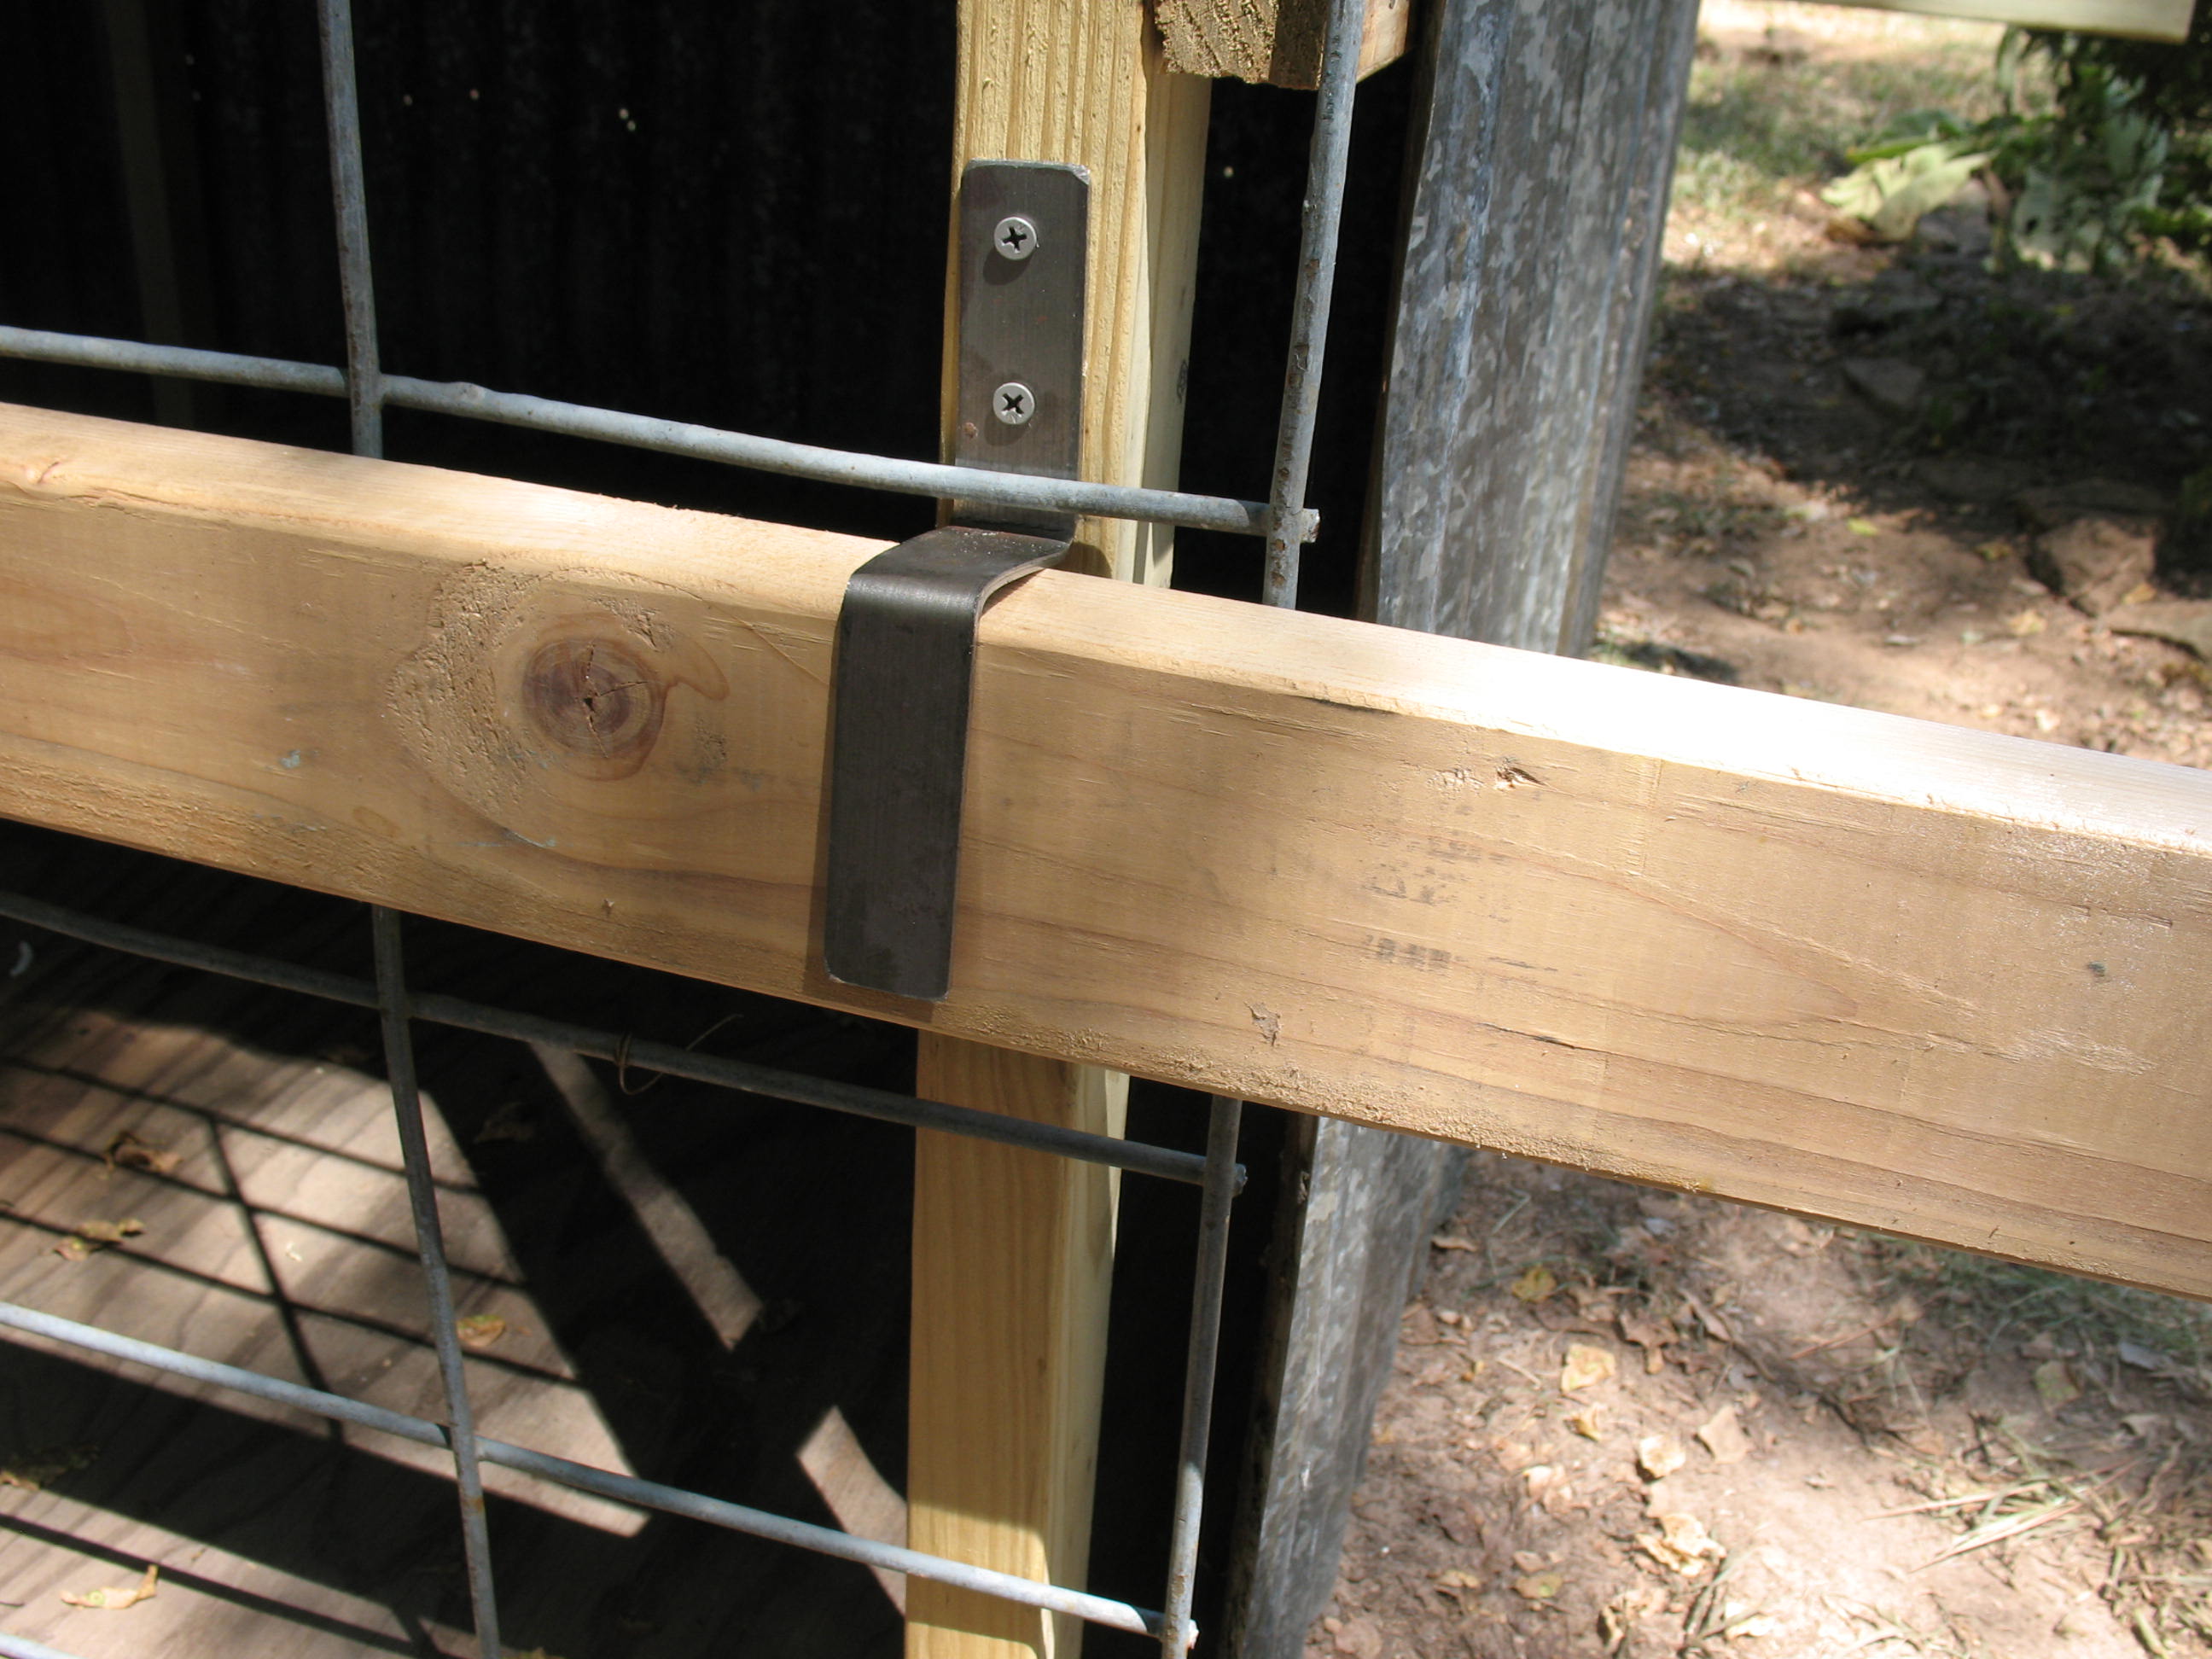
 The finished shed is light enough for two people to lift and carry, but because of the distance between the front and back handles it is much easier for four people to carry. When we don’t have any help around, my wife and I just lift it up onto the kid’s old Radio Flyer wagon a roll it to where we want.
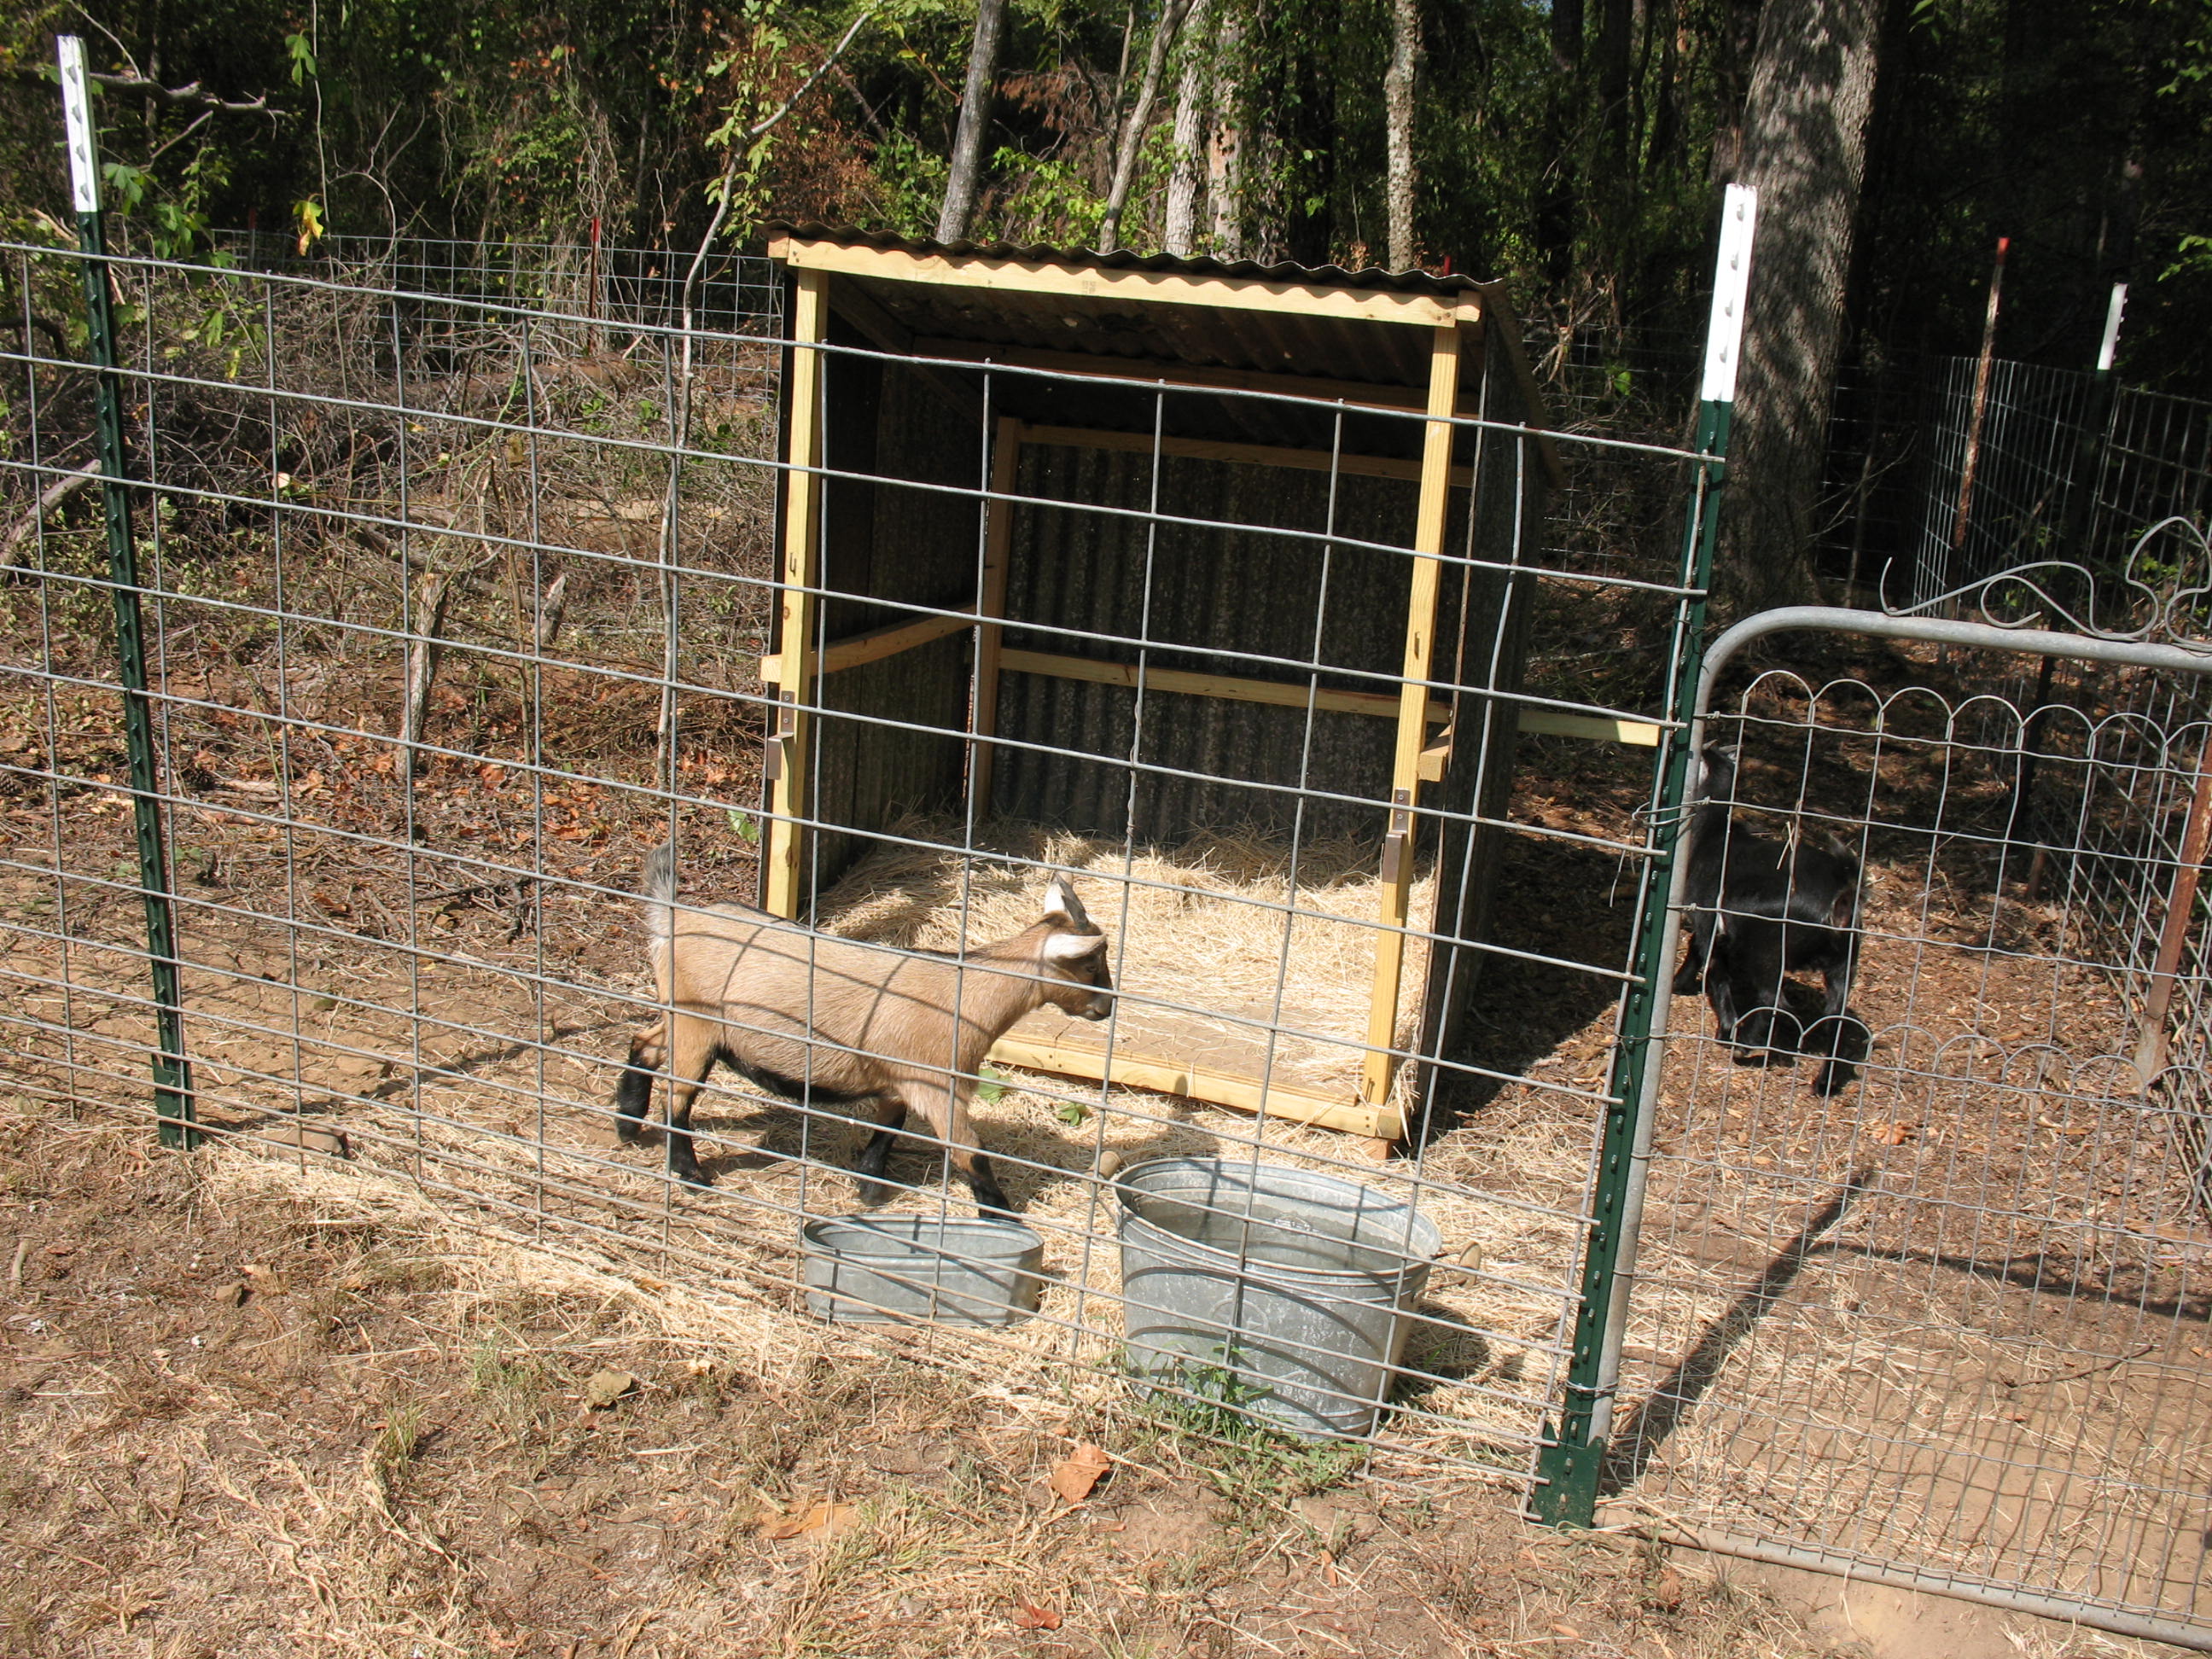
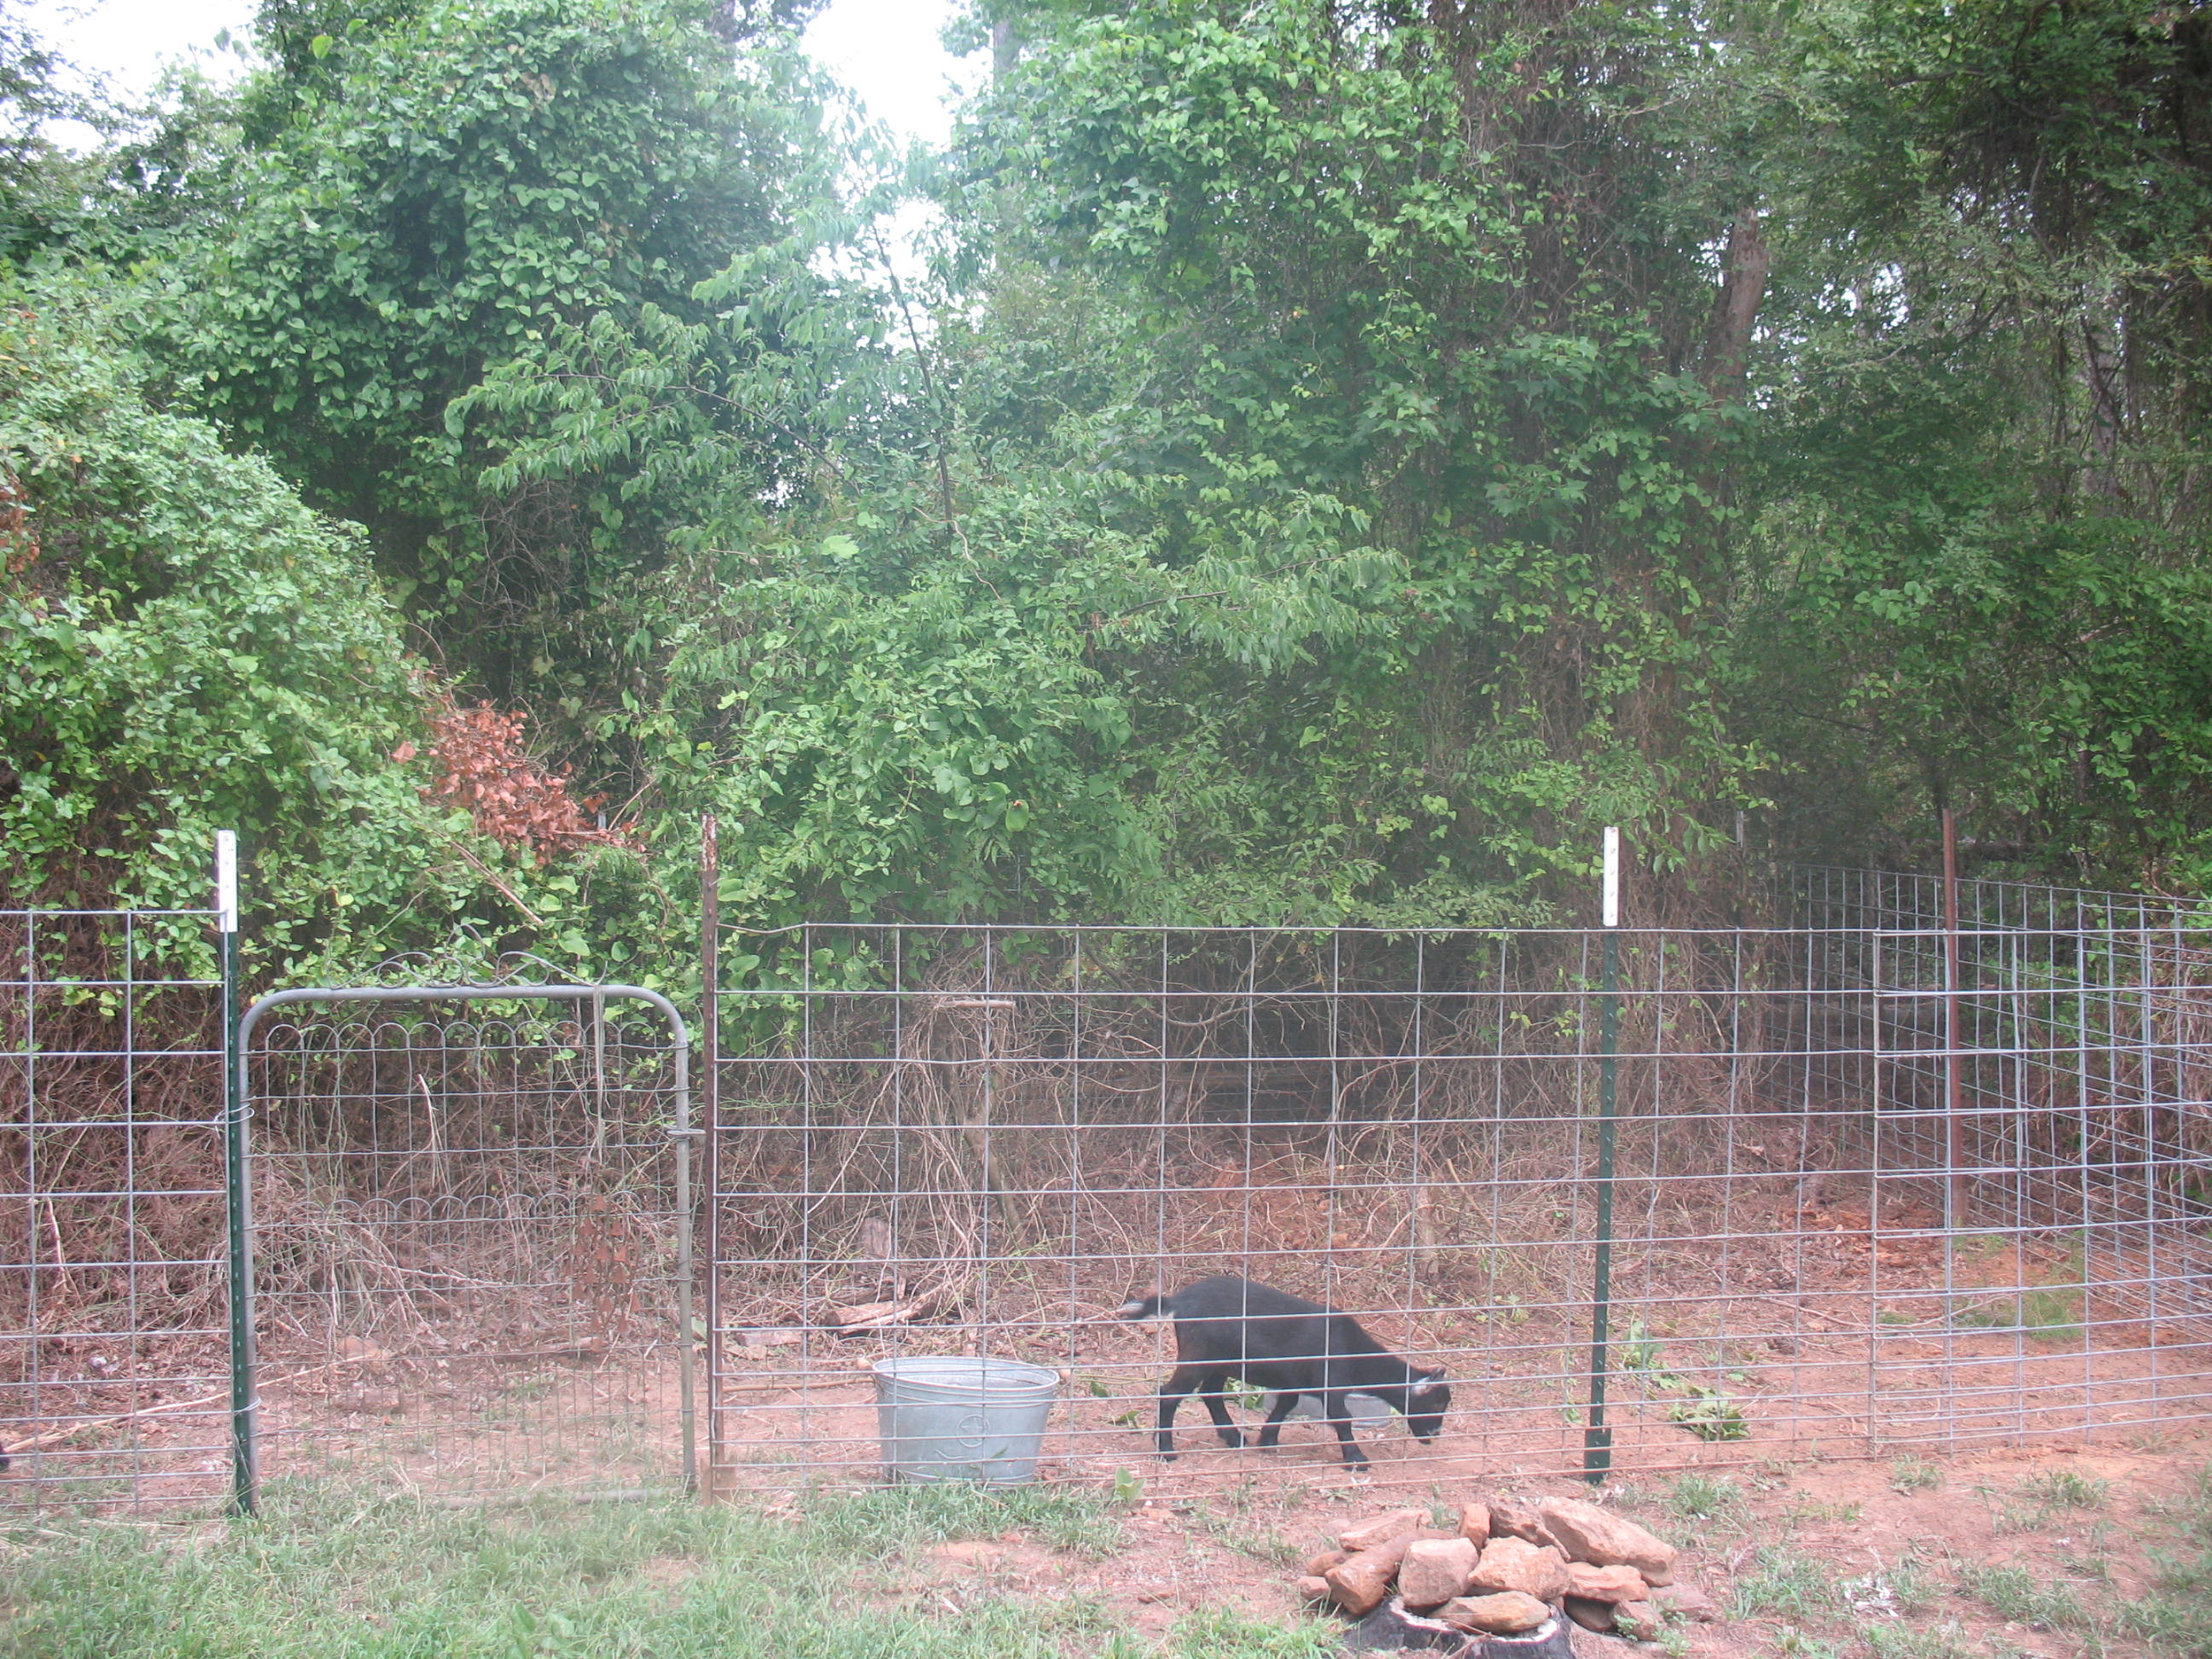
A couple of summers ago we had a rash of wild-fires in East Texas and it inspired me to start clearing a wider area around my farm house. The woods here are thick. Not only are there trees, large and small; but there are honeysuckle vines, grape vines, and green briar vines growing over everything. It’s a formidable clearing job. I recently enlisted the help of two pygmy nanny goats that I bought from a friend of mine. Joy and Abbey are small little things, maybe 18 inches at the shoulder and they don’t weigh over 40 pounds each, but boy can they eat. They are the best brush clearers that you’ve ever seen.

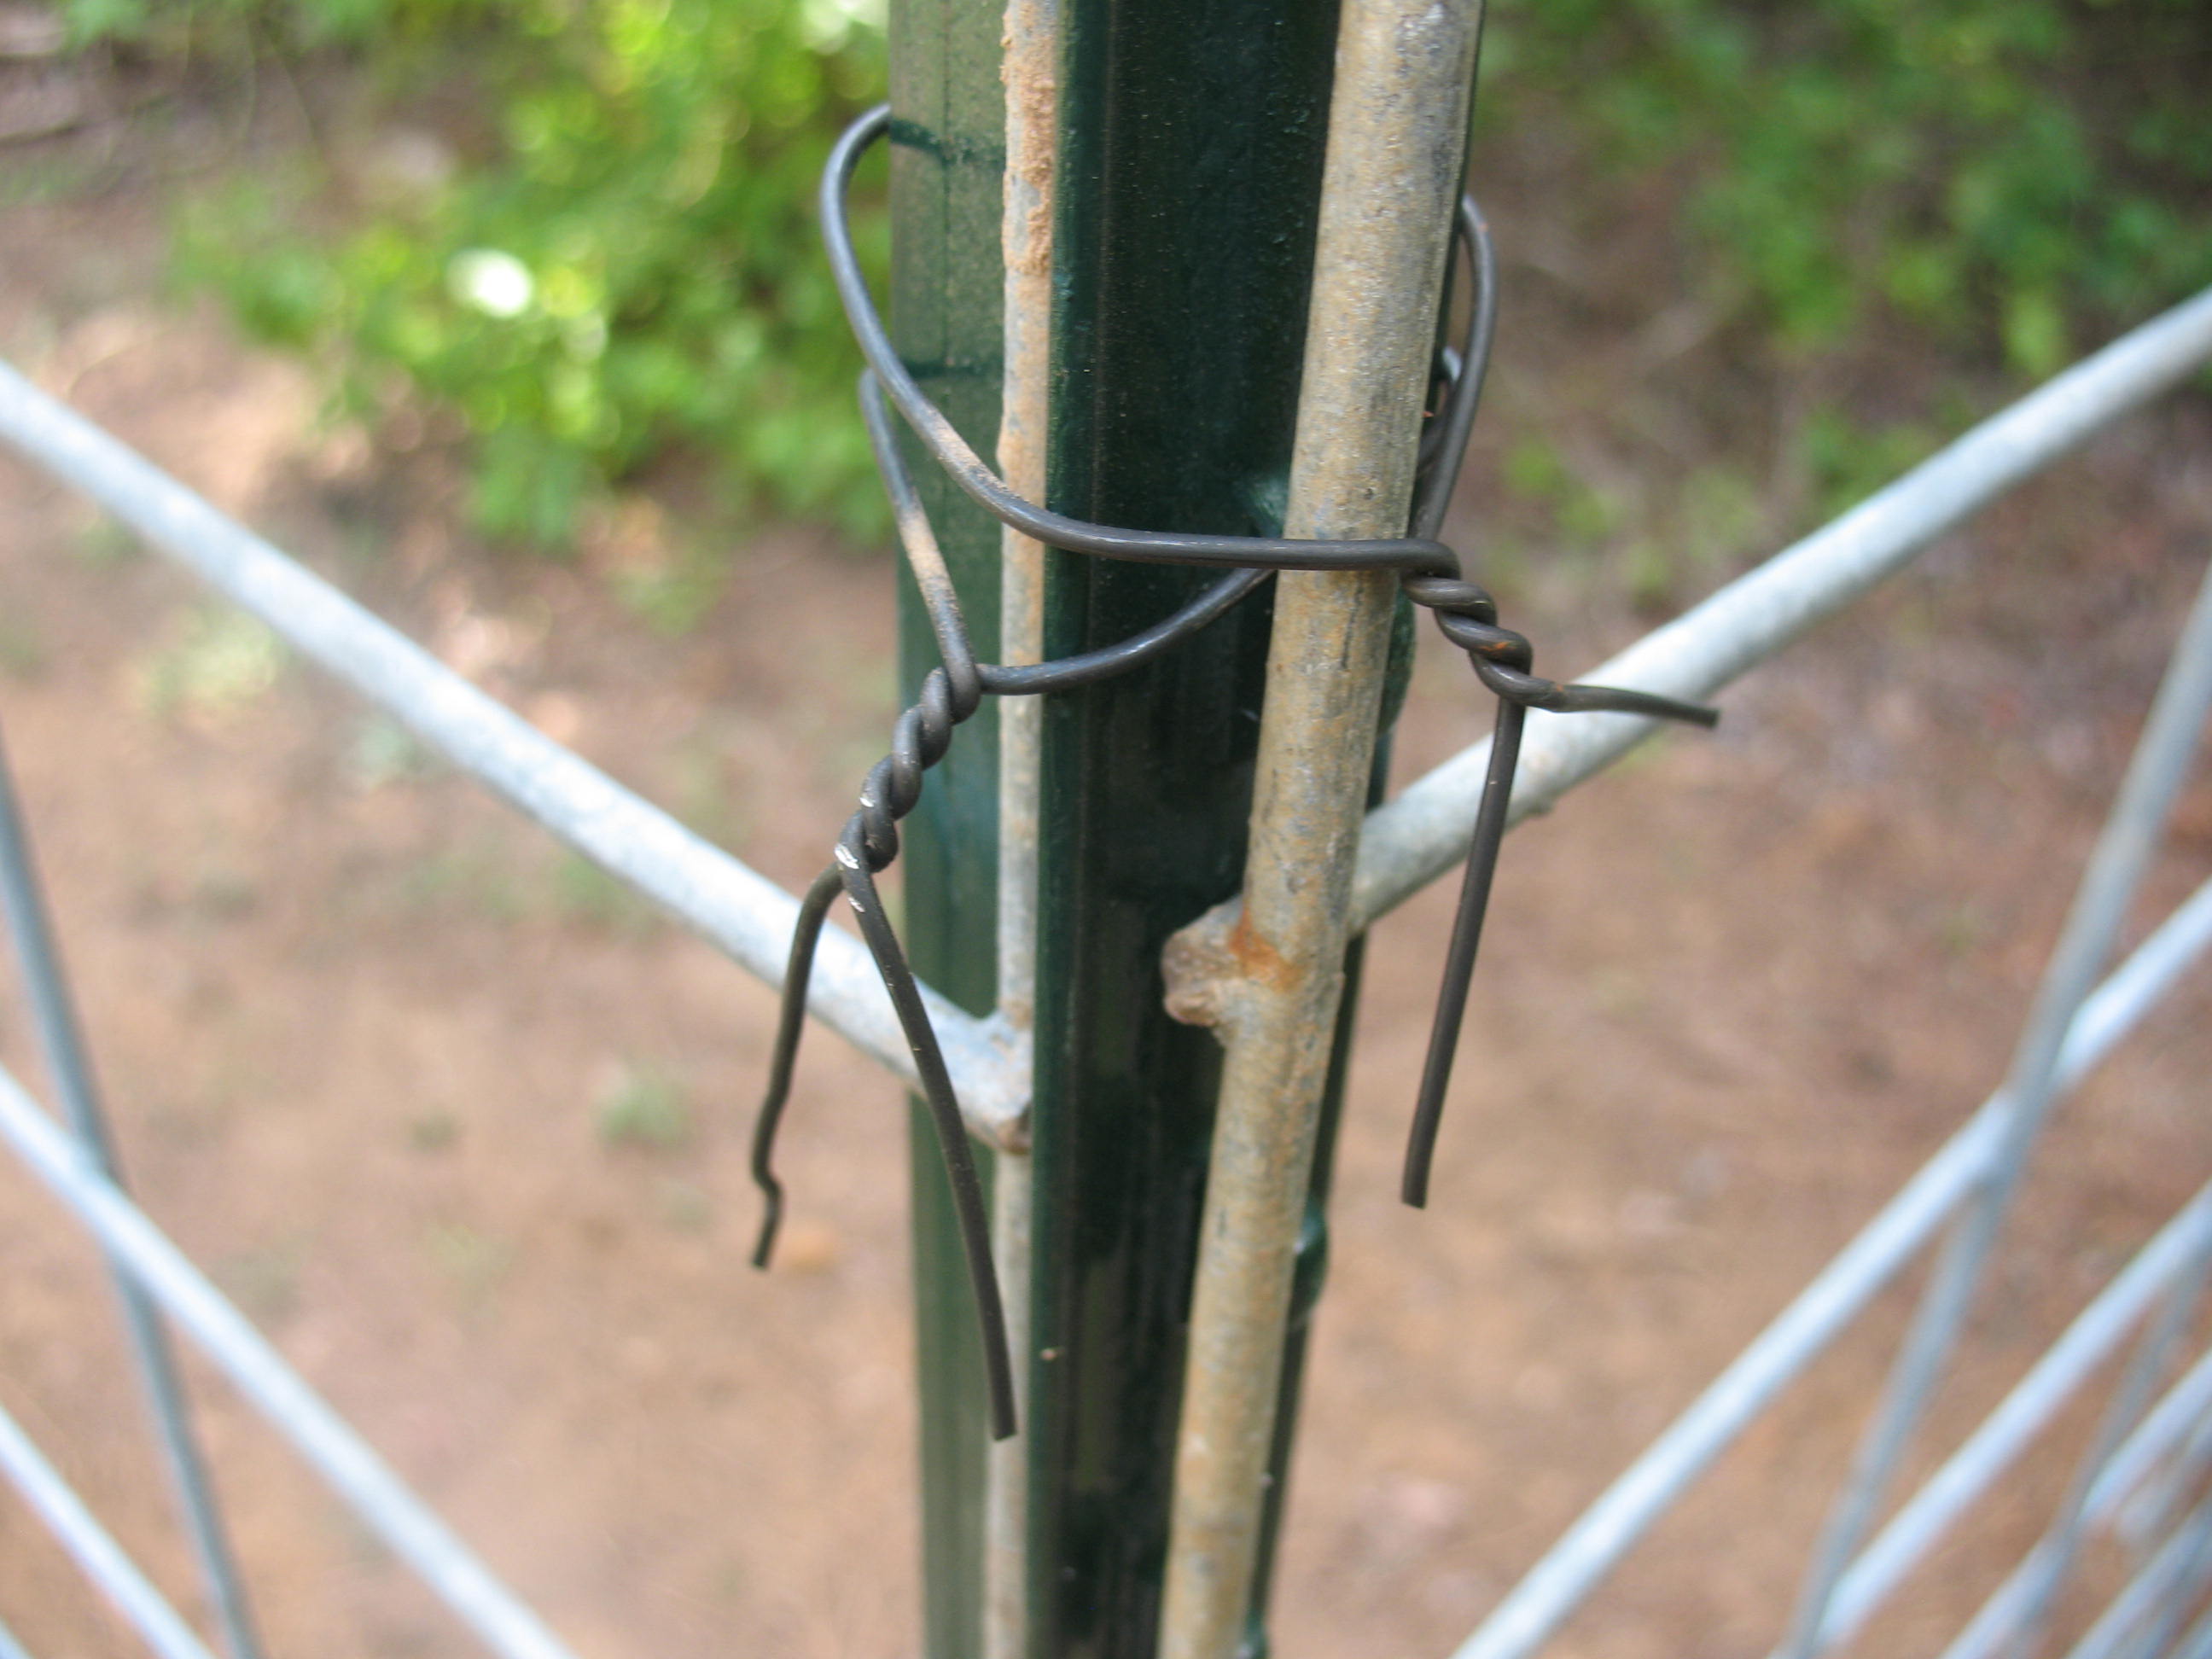
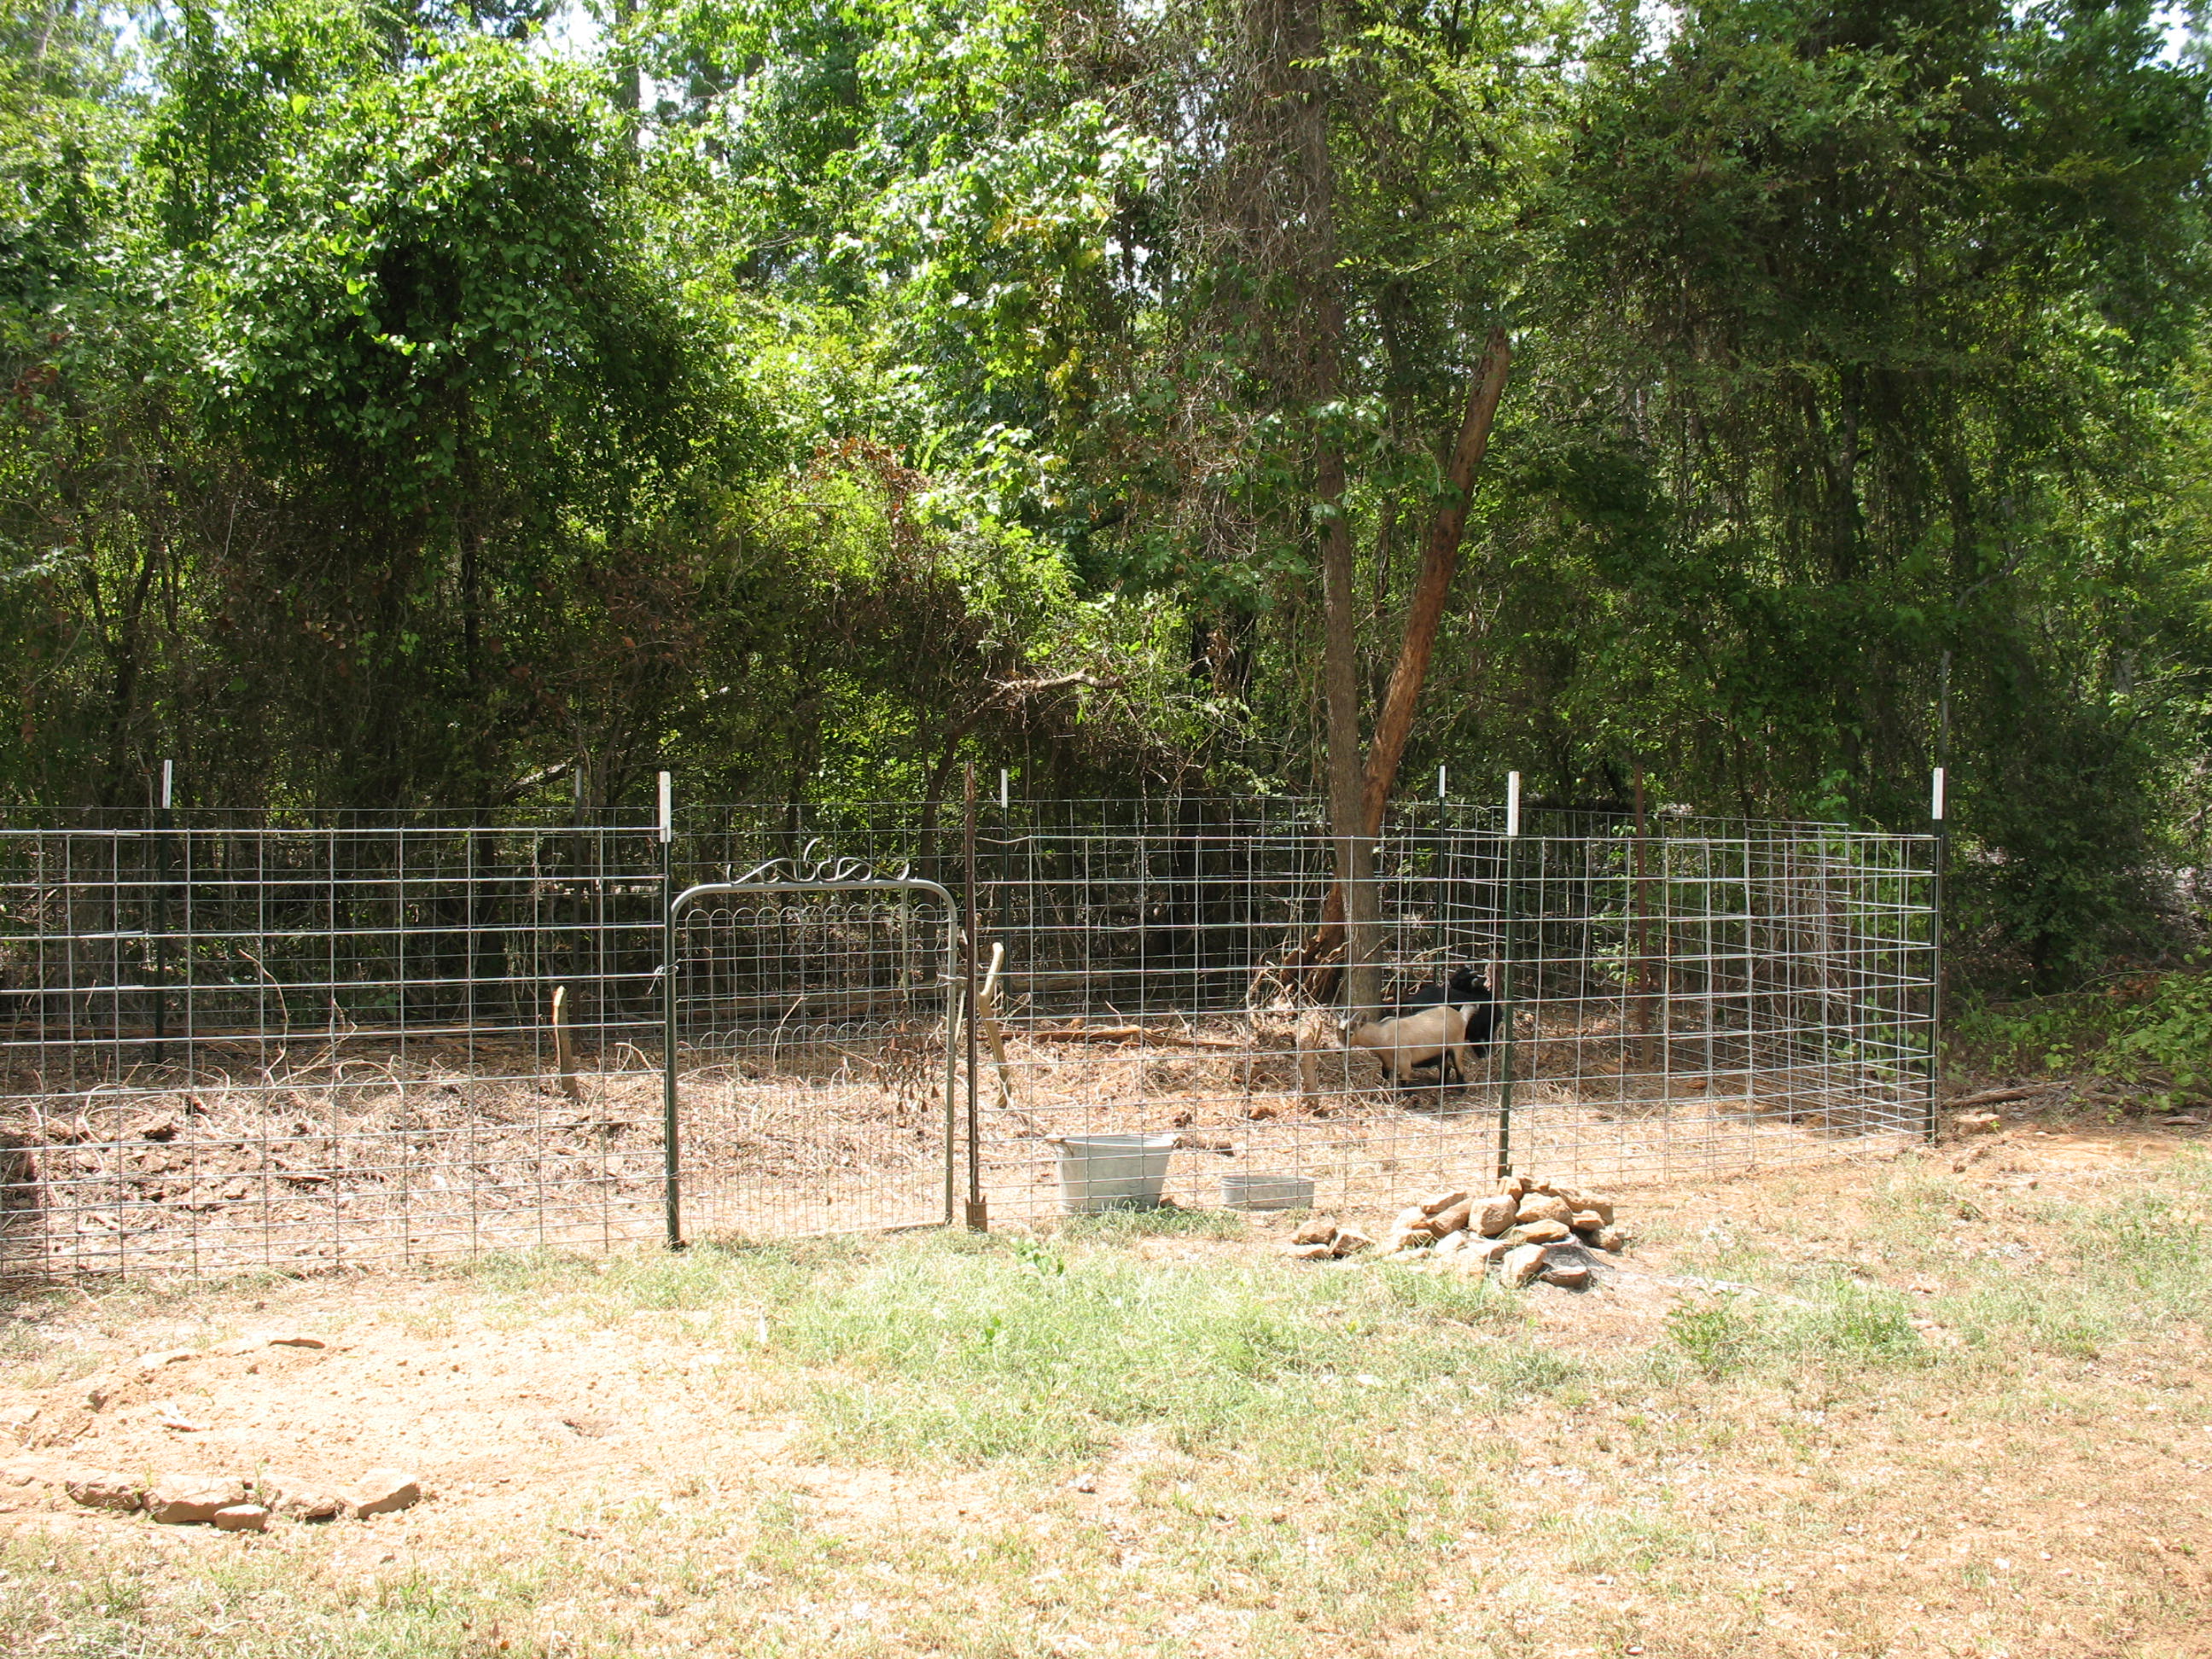
Of course I needed to control the area that they clear so I built them a movable pen out of T-posts and cattle panels. The panels are 16 feet long, so I put in T-posts 8 feet apart and wired the panels to them using tie wire like you would use to tie re-bar together. I didn’t drive the T-posts very deep because I will have to pull them up on a regular basis. I made the pen about 16 by 32 feet. I’ve heard that goats are hard to fence in, but I’ve had no problems with them trying to get out. Of course they are nannies, so they are not as aggressive as a billy-goat would be.
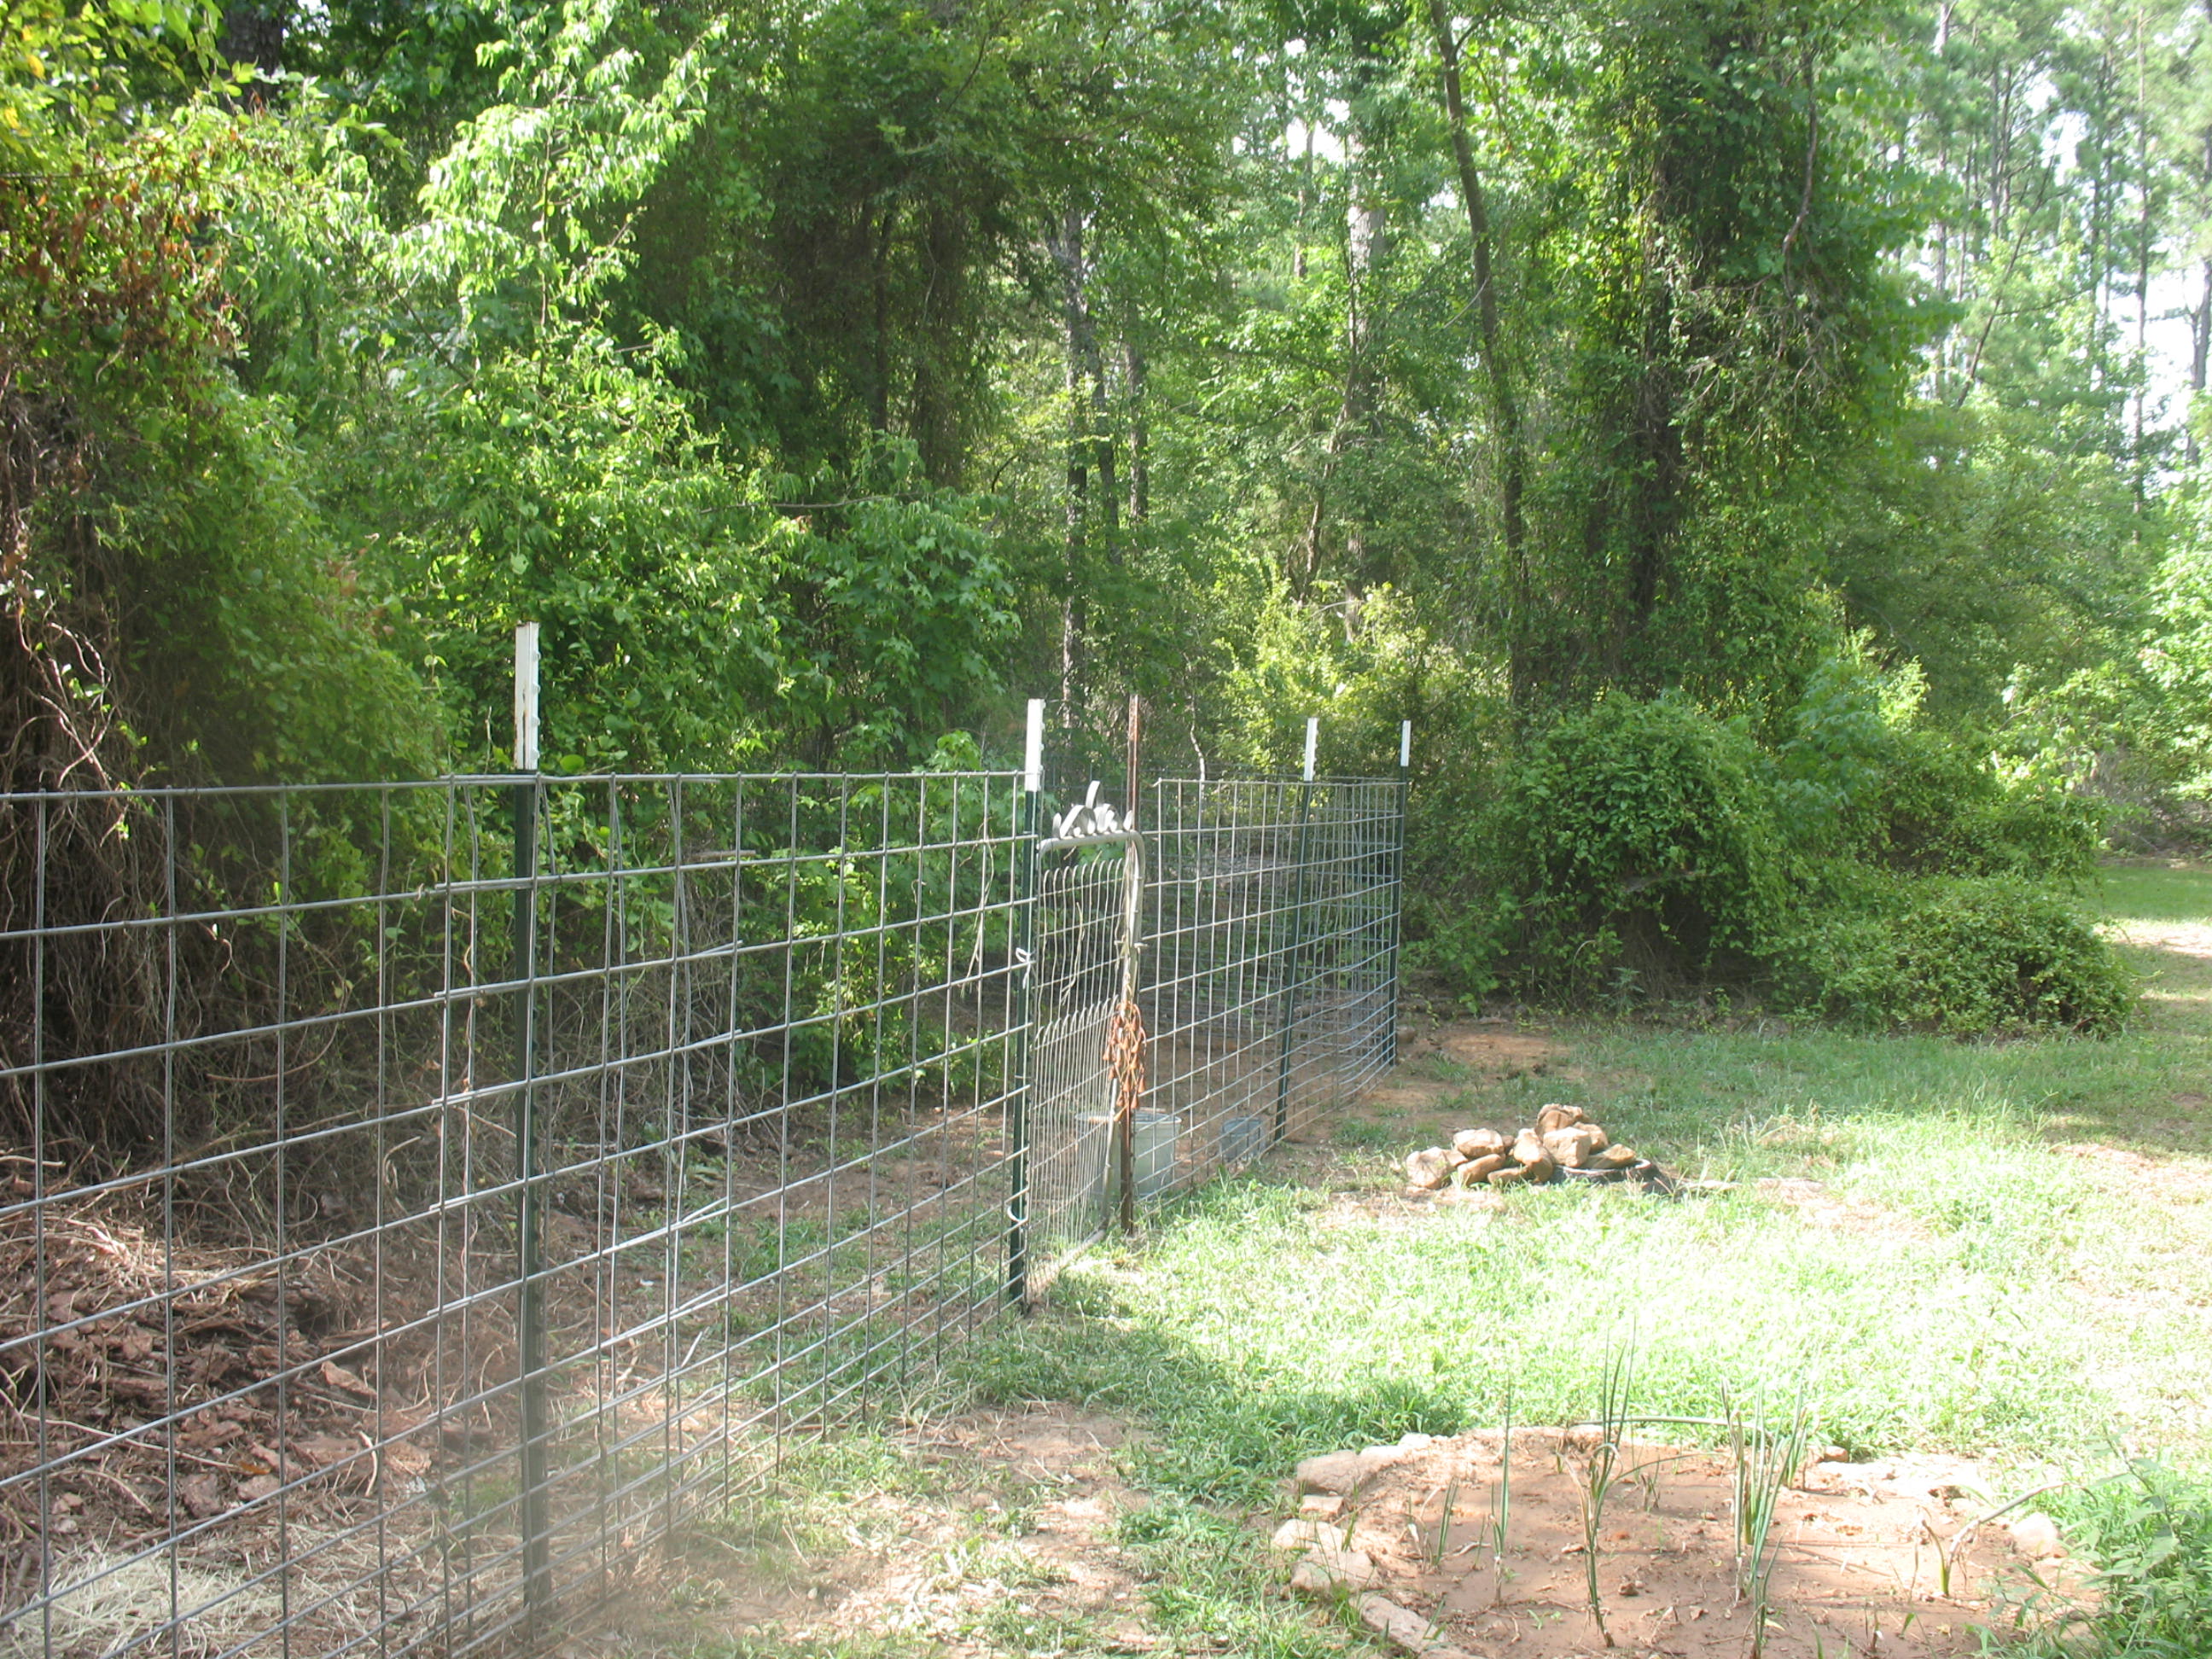
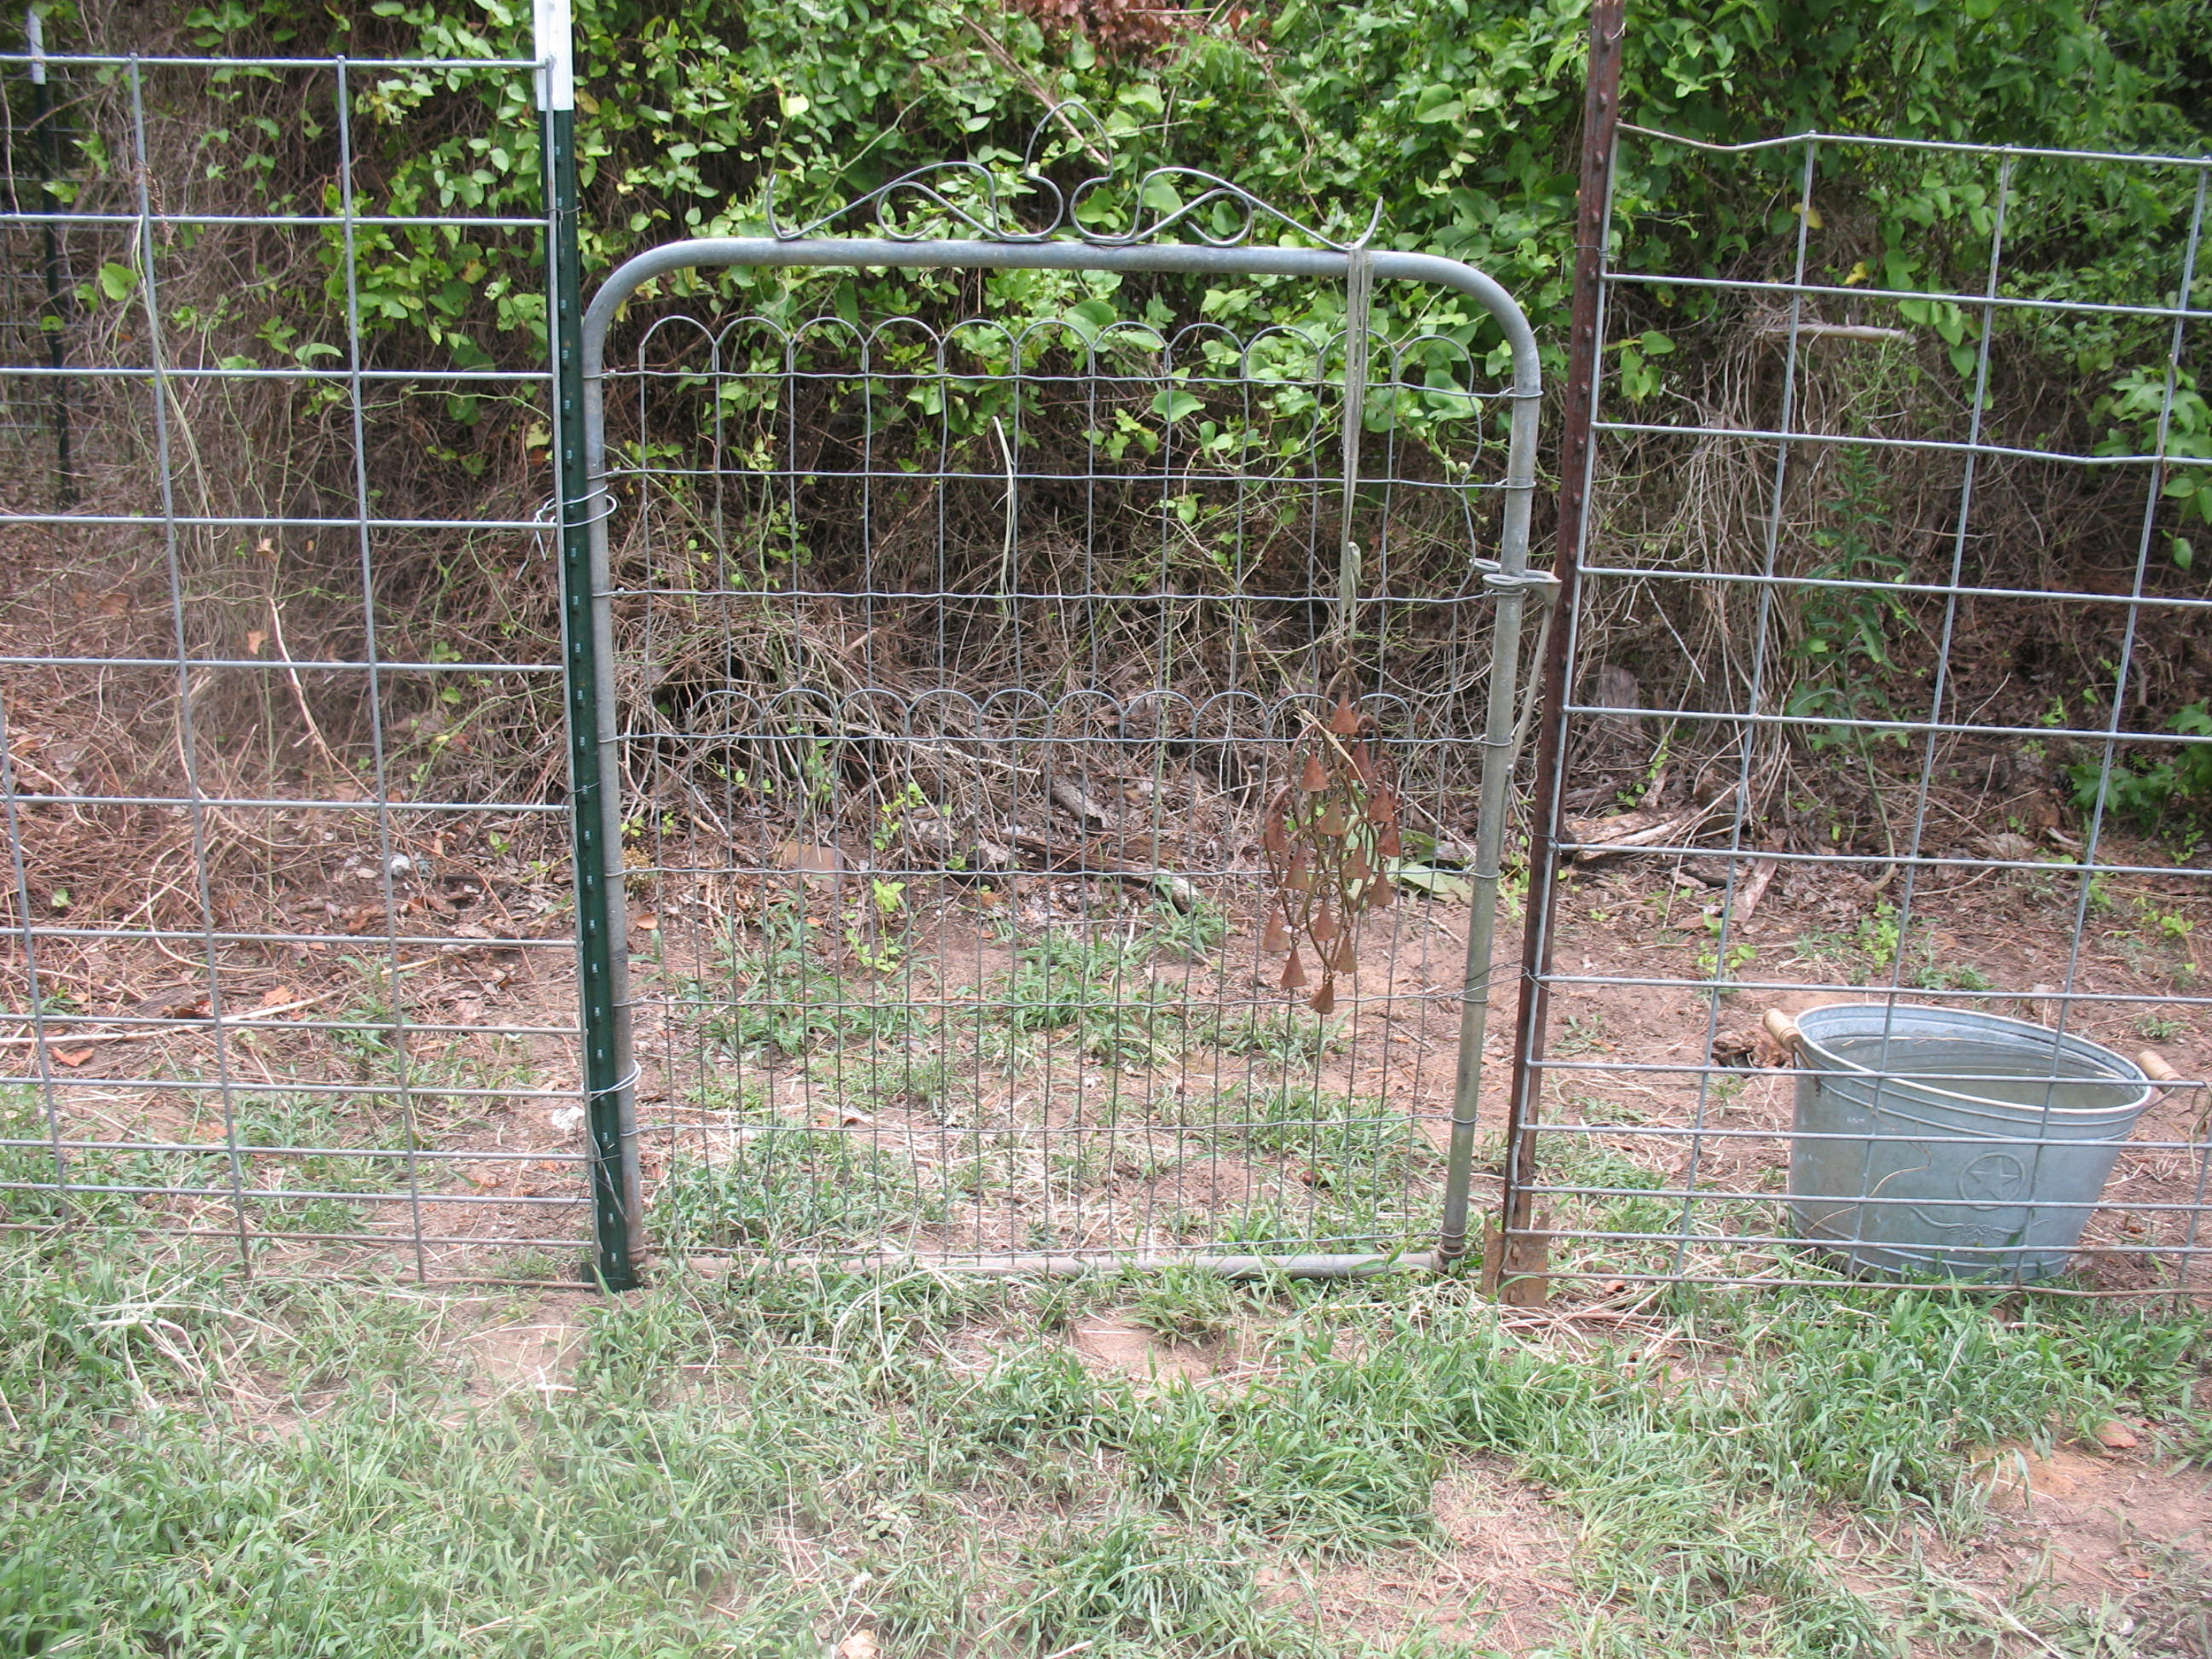
I had an old gate from a chain link fence laying around so I wired it up between two T-posts to give me access to the pen.
The goats went right to work on the brush. The pictures below illustrate the method that I and my goats now use to clear land.
Because the goats are so small they can only munch on the greenery to a height of about 3 feet, so I give them a couple of days to get that part of the job done.
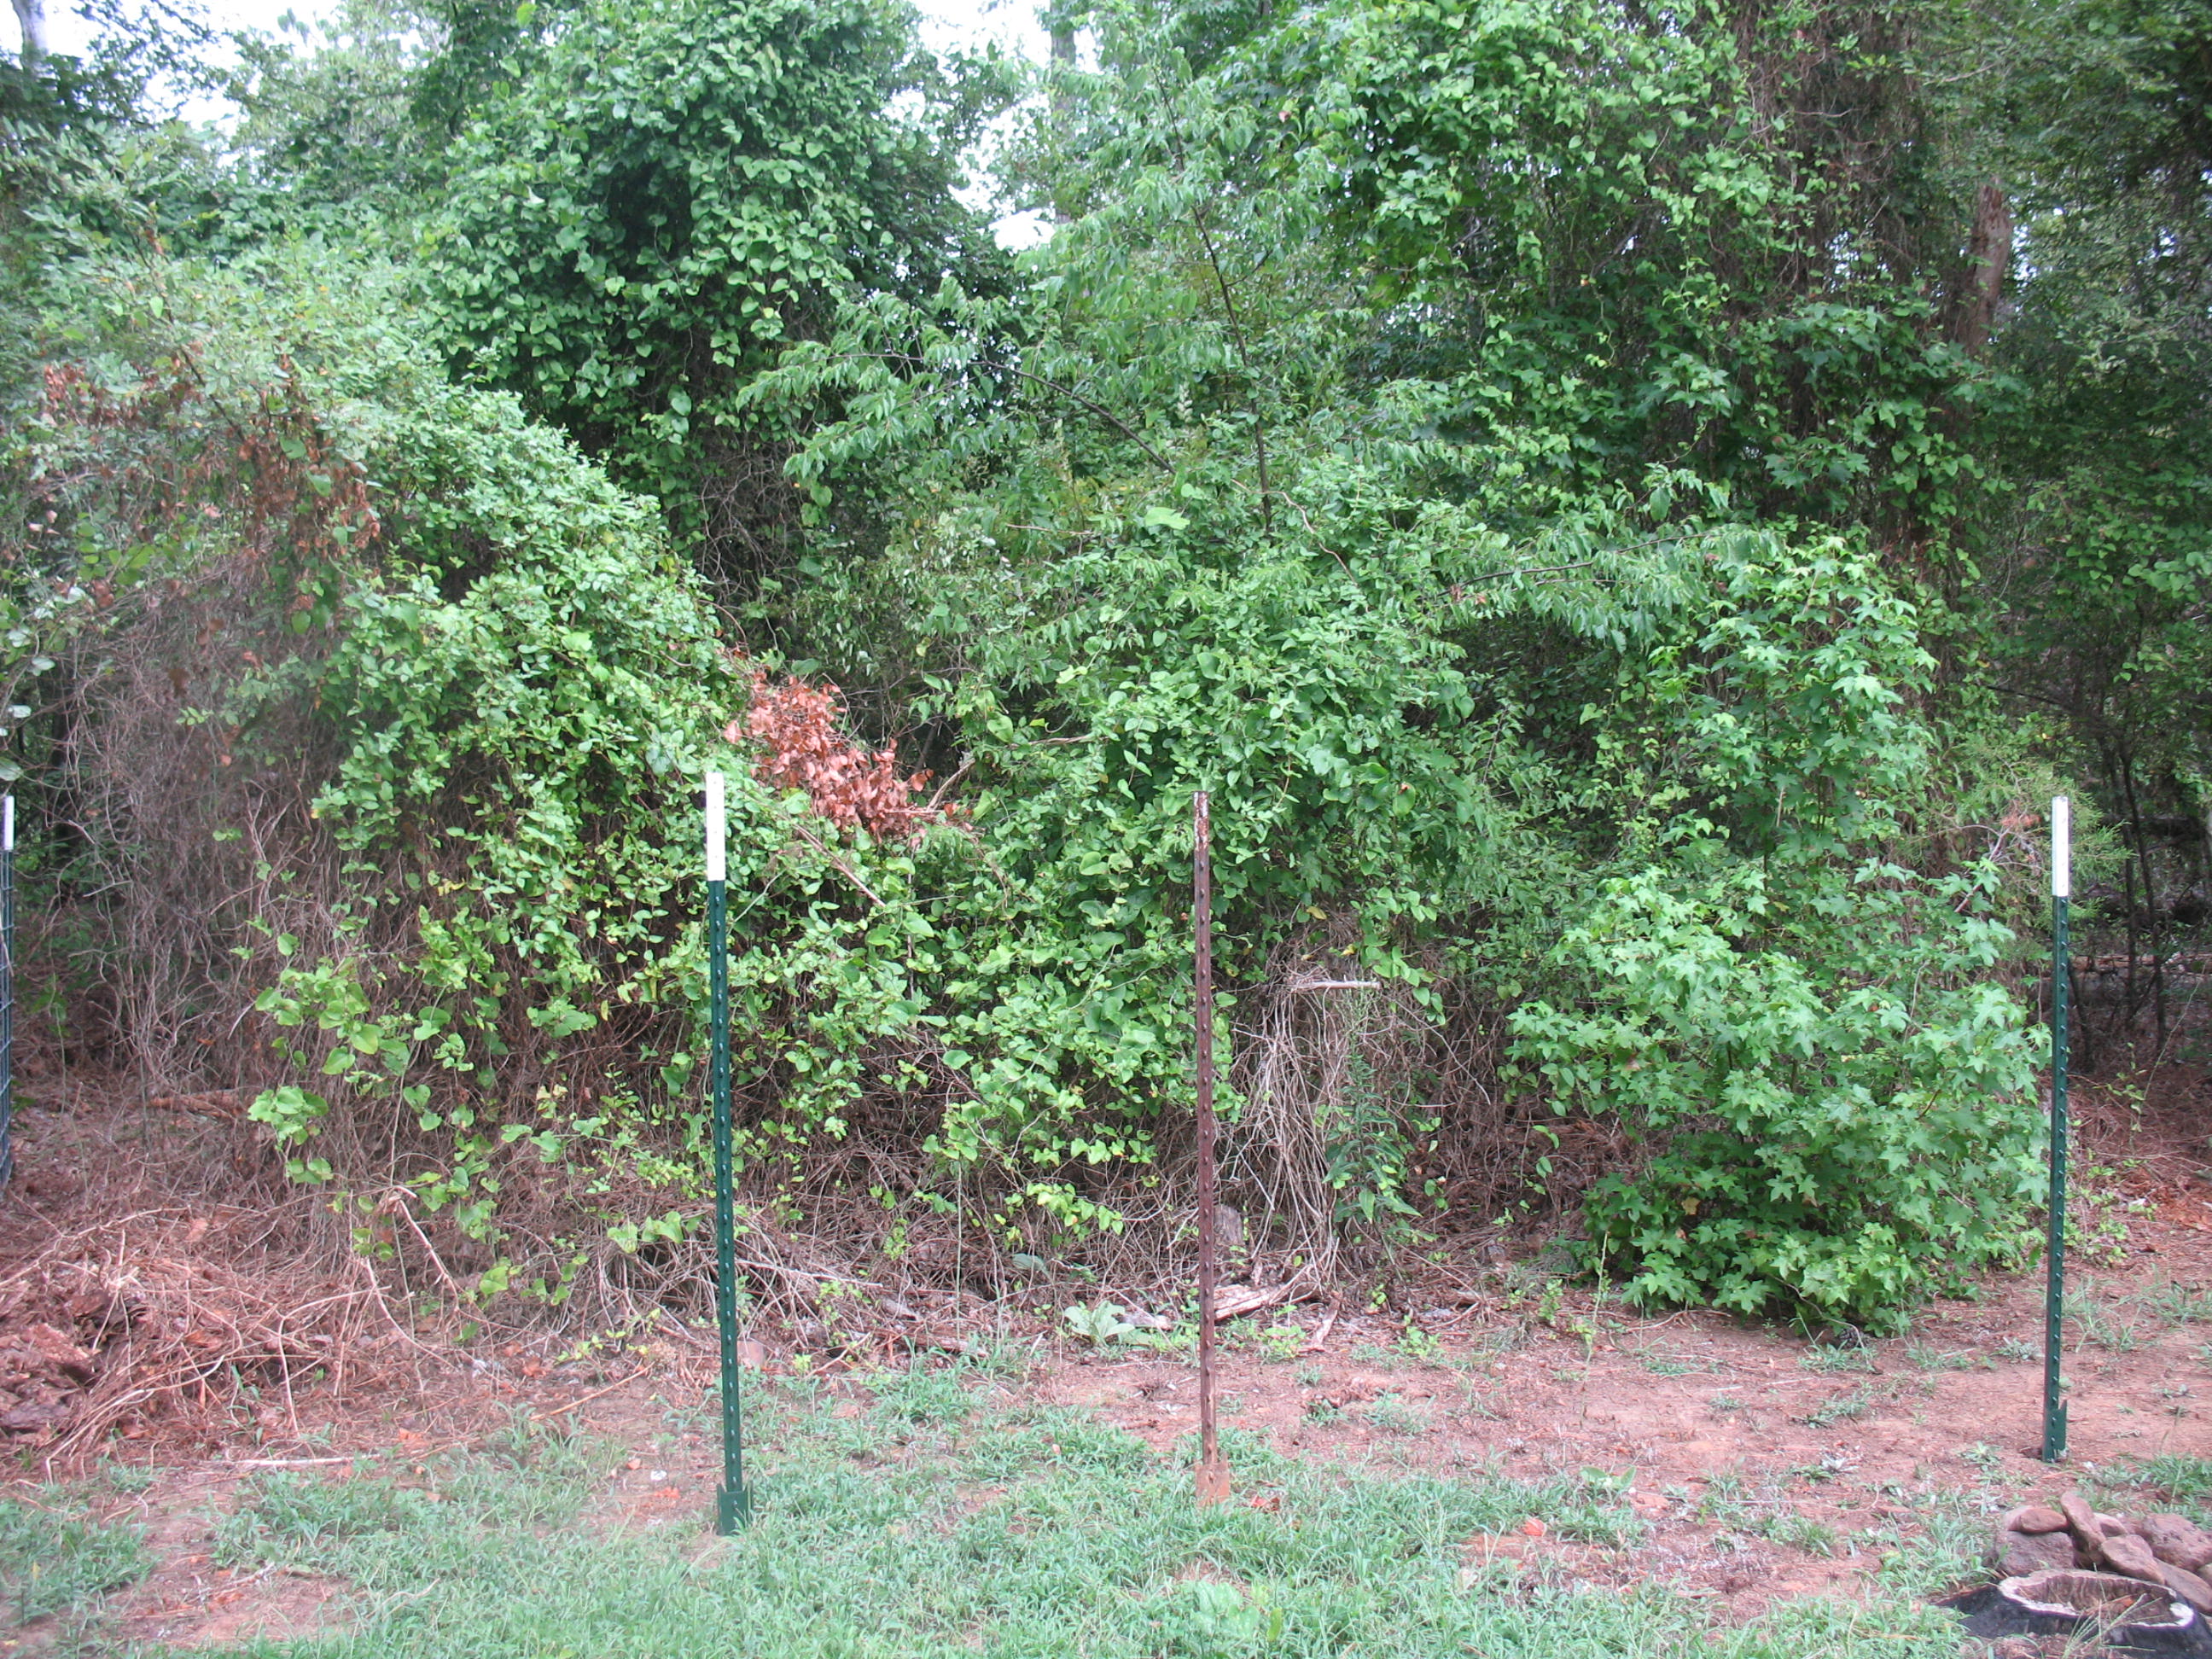
This is what I started out with:
And this is after 2 days of work by my goats:
Next I go in with a pair of loppers and cut down all of the saplings up to about an inch in diameter. For larger trees I trim off all of the branches that I can reach with the long handle loppers, then I sit back for a day or two while the goats clean up all the branches and the vines growing on them.
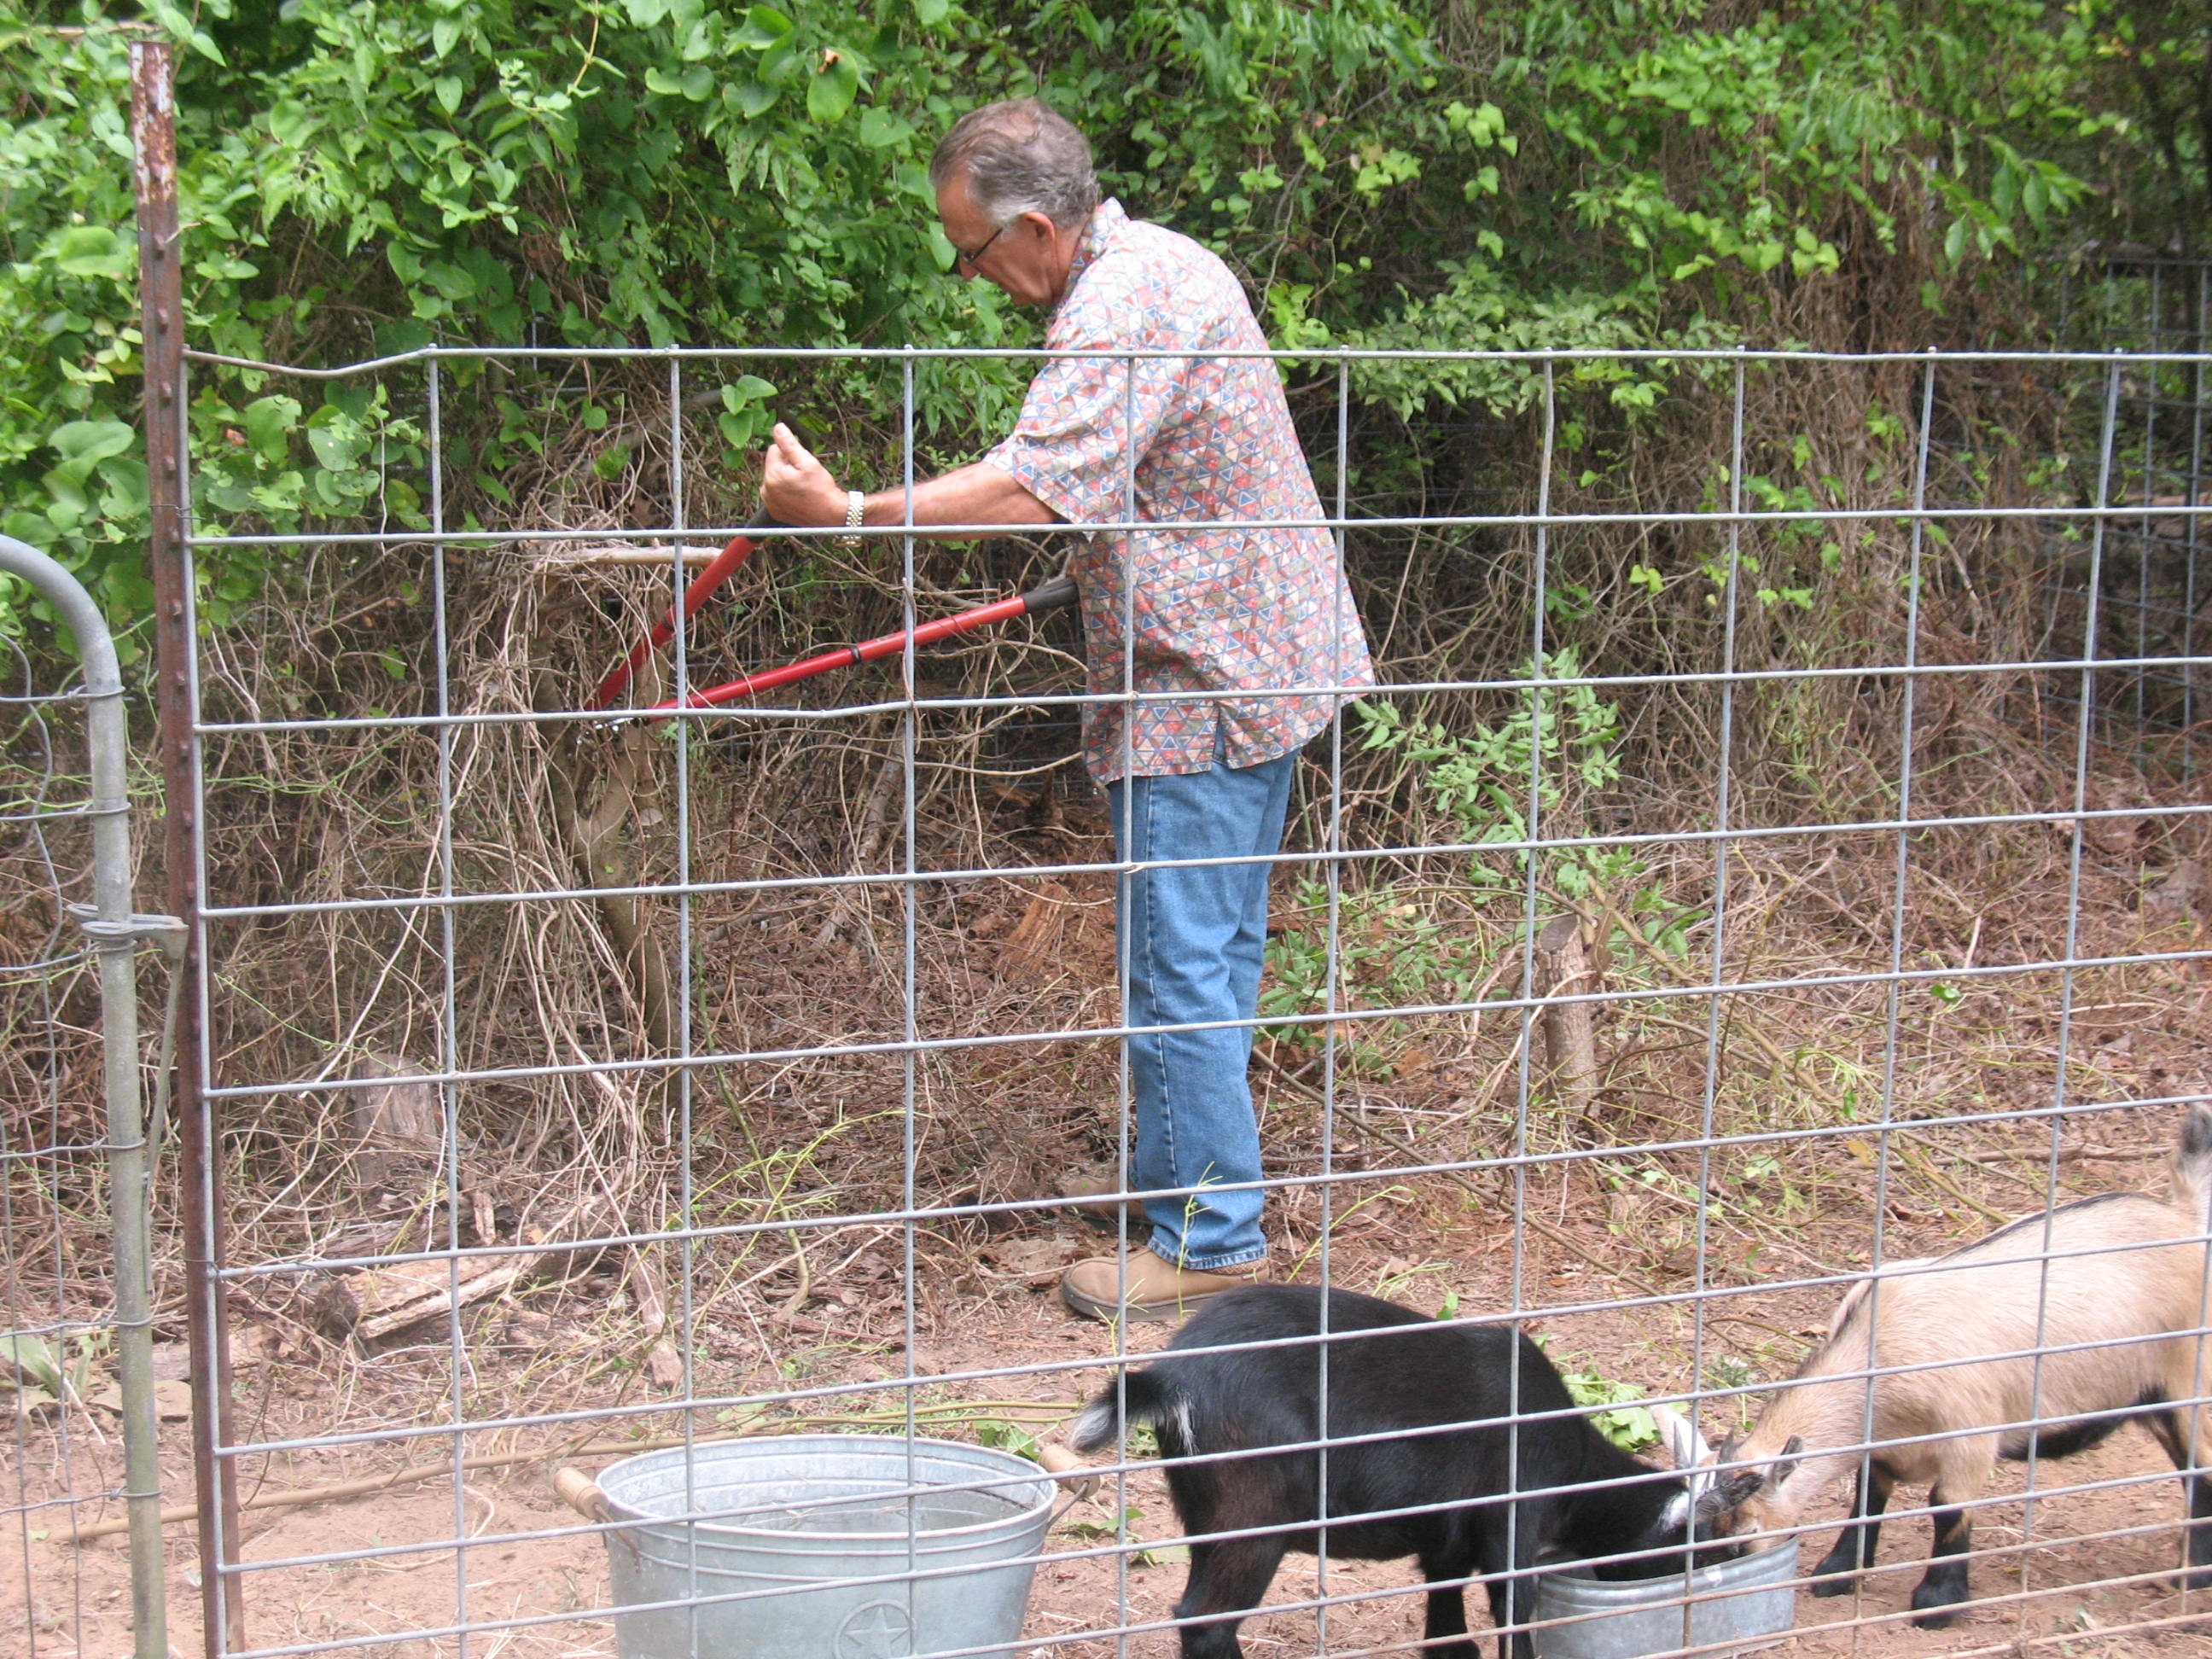
Now I pull down any vines that are growing up into the larger trees. This usually results in a big pile of honeysuckle and green briar which the goats seem to love. This pile of vines keeps the goats fed for a couple of more days.

After a week the goats have done their part of the job and all of the greenery is gone.
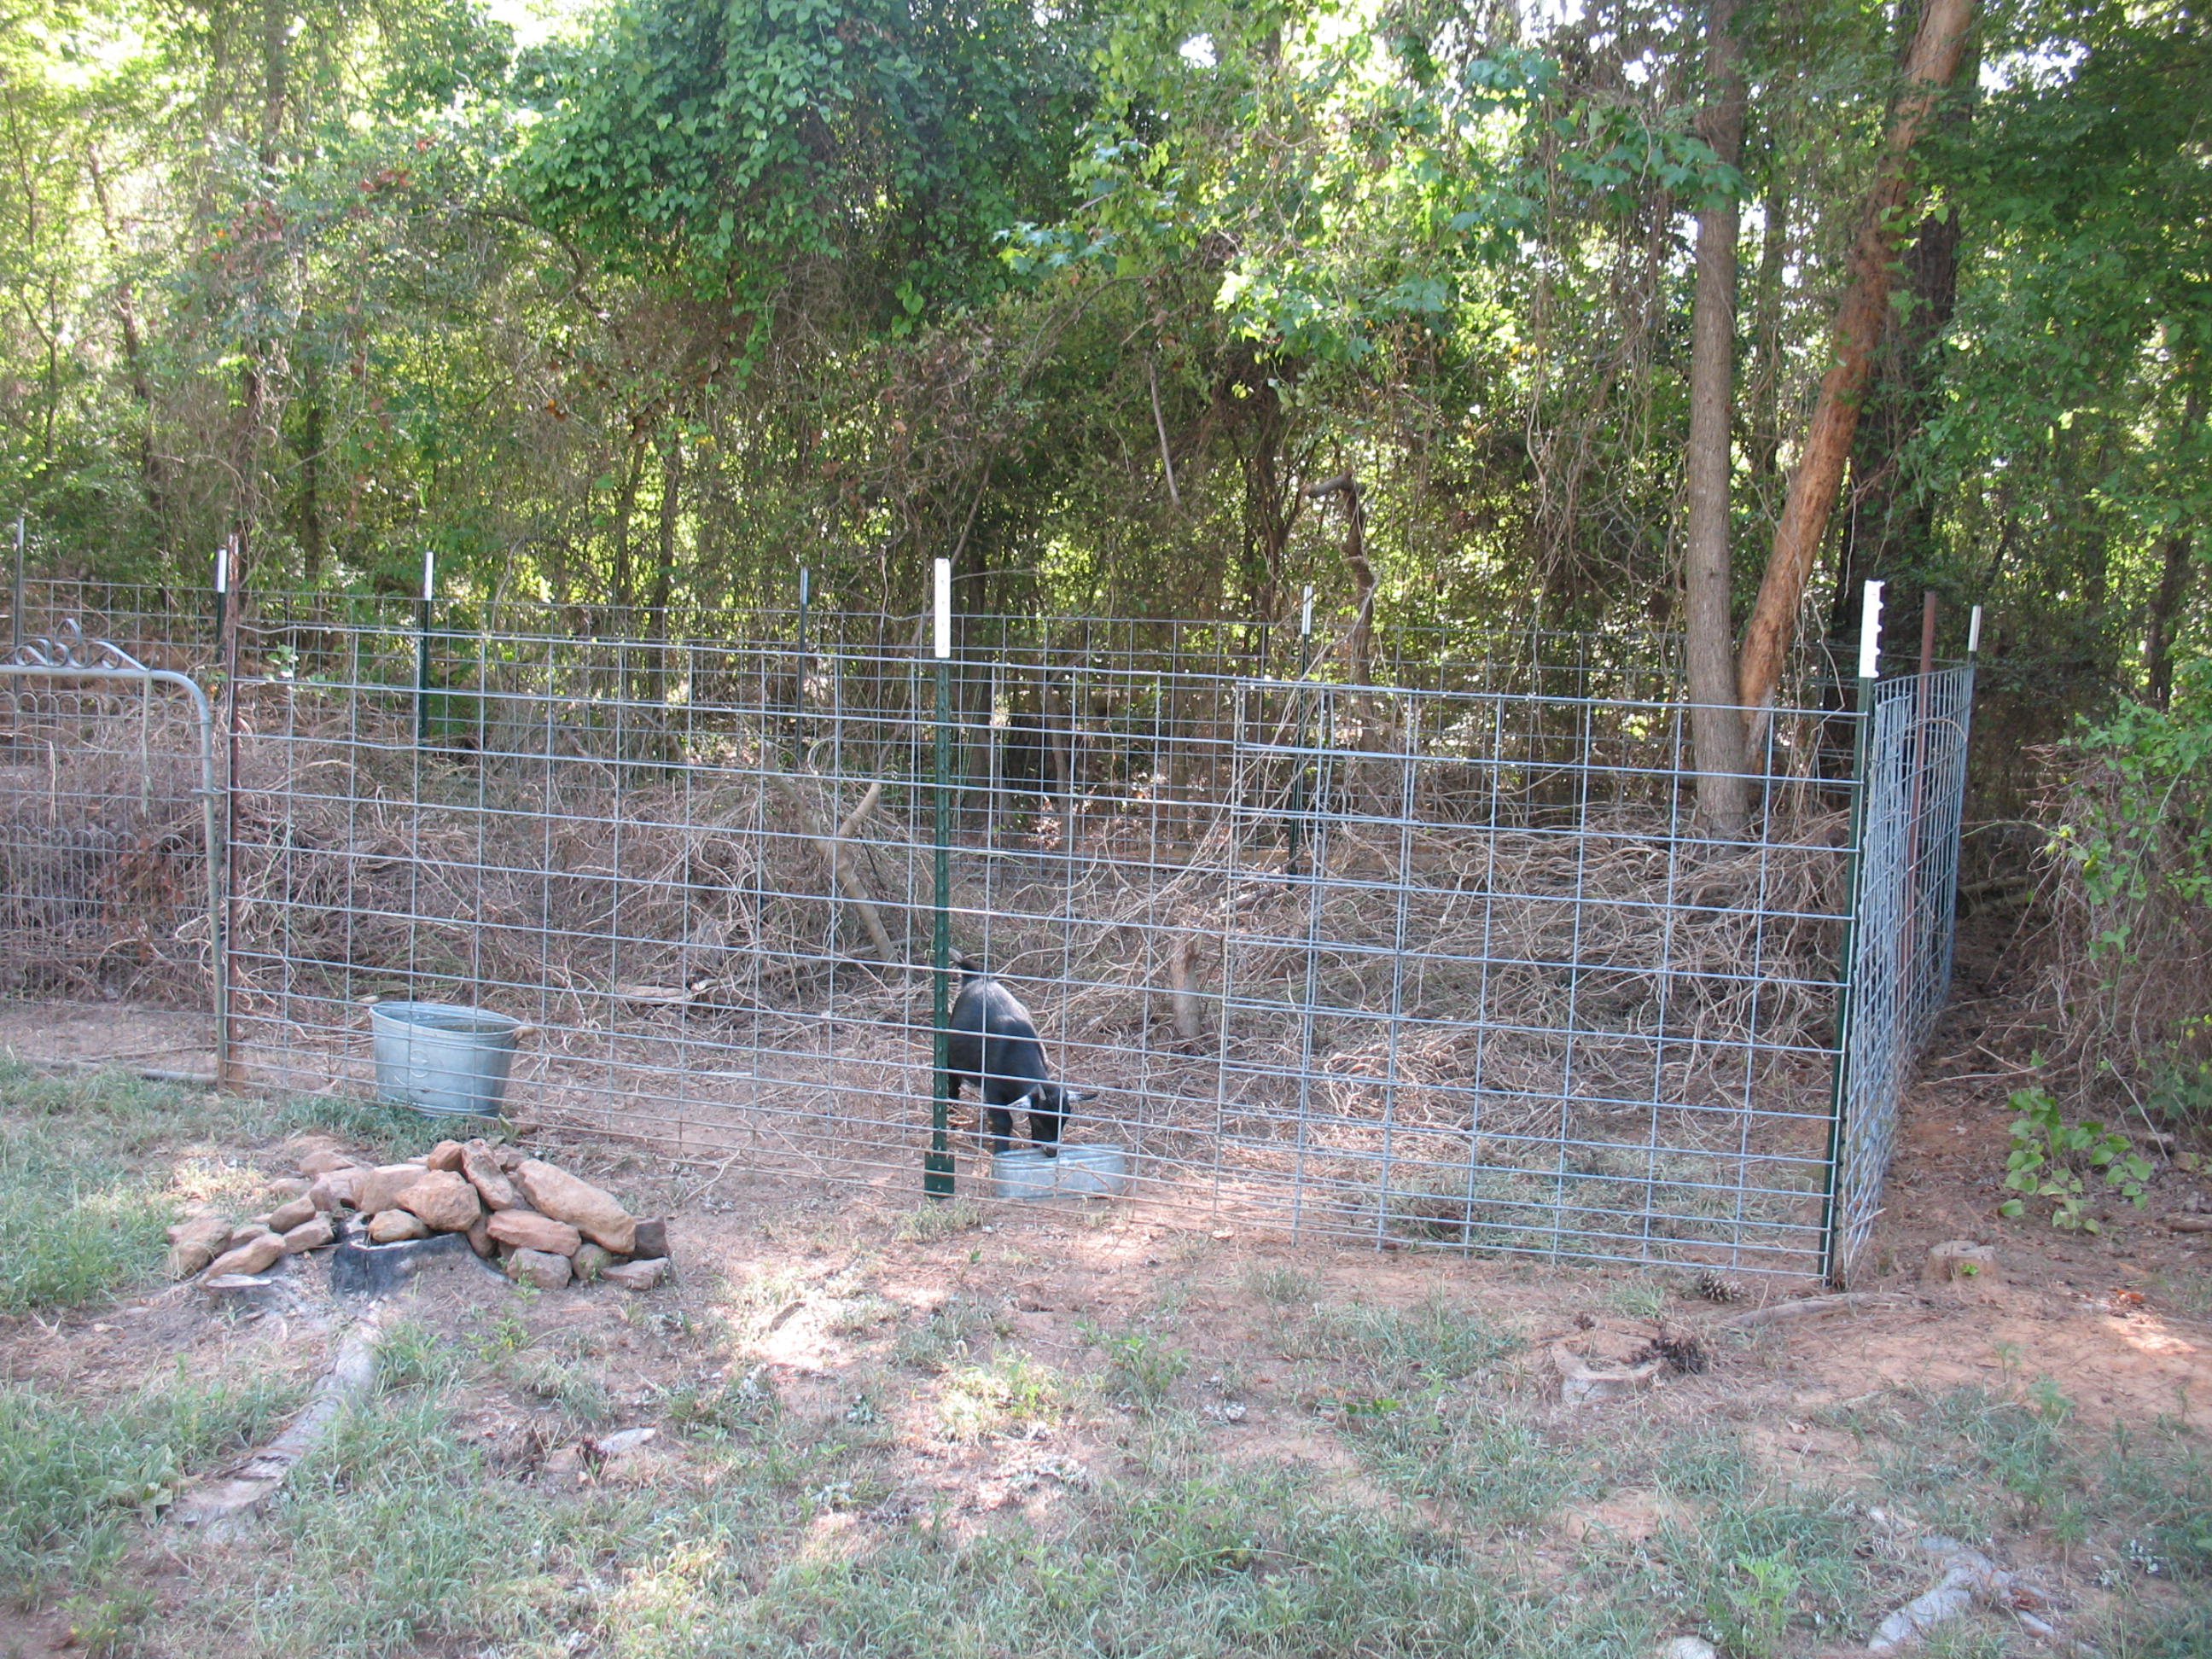
When there’s nothing left in the pen but bare branches and vines I go in with my machete and it’s a couple of hours work to cut up the bare vines and throw them and the branches out into the woods.
It’s now time to move the goats to the next section so that I can go in and rake the ground, throw out any rocks, and use my chainsaw to cut down any stumps or larger trees.
The ground is now clear enough to run my lawnmower over next spring.
In addition to the brush I give each goat 16 ounces of 12% all-stock feed each day and plenty of fresh water. The feed amounts to about $10.00 a month. Pretty cheap wages for these hard working hands.
In my next post I’ll show you how I made a portable shed for my goats to live in.
Survivalists (myself included) tend to be a little bit paranoid about national and world events that occur. We are fairly certain that something, maybe something relatively minor, is going to start a domino of events that will lead to a breakdown in society as we know it. There is often a strong urge when something comes on our radar to secure survival equipment and supplies that we have been intending to procure but that we haven’t got around to yet. This “survivalist panic” can sometimes lead us to make bad decisions, just like things can lead real-estate buyers and stock market investors to make bad decisions.
I’ve been at this a long time and I’ve seen much of it happen before. I had friends in the late 70’s who read Howard Ruff’s book How to Prepare for the Coming Hard Times and jumped on the gold buying wagon. Gold was the perfect investment because it would retain its value no matter what happened to the fiat currency that the government was printing. Gold prices soared. Panic buyers wanted to get in before it was too late. Some people scraped together ever cent that they had, including their savings and retirement, to invest in gold at $600 per ounce US. Boom! The market collapsed. Gold went down and down until it reached a low of about $275 in the year 2000. If they held on to their gold until 2006 they finally broke even for the first time in 26 years. If thy still held onto it until today they have finally doubled their original investment, and it only took 33 years. Consider this, $1000 dollars invested at 4% compound interest would more than triple in 30 years. If my financial adviser couldn’t do better than 4% he would definitely lose my business.
The second thing I want to address is the recent panic buying of ammunition. Yes you need to have some ammo for hunting and yes you need to have some ammo for home defense; but hopefully you have been buying a little along the way. If you have, you probably have all you need. If you haven’t, it will be available again and it will be reasonably priced. Panic buying, fueled by fear of government legislation, has cleaned the shelves and skyrocketed the price of ammo. The legislation is dying, the panic buyers have filled their basements, the supply will increase, the price will go down. It’s all just basic free market economics. Same thing with guns. Does anyone remember the previous time that the price of an AR-15 went over $2000, then went back down to about $800.00? I’m not big on assault weapons for home defense, but if you’re planning on buying one, now is not the time.
Here’s my advice for spending money on survival:
1. Budget an amount that you are going to spend every month.
2. Make a prioritized list of things that you need to buy
3. Buy those things every month and don’t give in to panic buying
Remember, slow and steady wins the race.
If you live in the country you probably have a front gate on your property entrance. A good fence and a good gate is no guarantee against a determined intruder, but most thieves are looking for an easy mark so a fence and a locked gate will act as a deterrent, especially if your home is fairly far from the gate.
Here are a few tips on gate security that I have learned over the years:
1. Attach your gate securely to the swing post. The most common type of gate slips down into eye-bolts or sleeves to support it and allow it to swing freely. The problem with this is that the gate can be lifted out of the supporting hardware fairly easily. You can fix this problem by screwing some long lag bolts in above the gate pins so that the gate can not be lifted out without doing a lot of work to remove the bolts. If you want to make the bolts even harder to remove you can grind the heads round so that a wrench will not fit on them. 
2. Use a very heavy chain to secure the gate. Chains come in all sizes and all chains can be cut, but some are harder to cut than others. A heavy chain will defy most all of the commonly available bolt cutters. A hardened chain is even better.
3. Buy a good quality combination lock. You will lose or forget the key eventually, so get a combination lock. For about $30.00 US you can get a four wheel tumbler lock that you can set the combination on. This is handy to have because if you are expecting a delivery or having a group of people over; you can set a new combination, give this combination to the person or persons that will be coming over, then change the combination back after they are gone. This will help you avoid unexpected return visitors. It’s not a bad idea to change the combination once or twice a year anyway.

4. Never leave your lock set to (or near) the combination. Some people will turn just one wheel of a lock when they close it. They think that this will save them time when they next open the lock. Thieves know of this habit and will turn one wheel on the lock, one number at a time, reset to the original numbers and then try the next wheel. This only takes a few minutes and if it doesn’t work, they will likely move on to easier prey. A determined intruder can keep trying and keep trying different combinations of numbers to open the lock, but if the wheels are all turned to random numbers it will take them up to 9999 tries to get the right numbers. Even if you are leaving your gate open, scramble the combination. It only takes a potential intruder seconds to stop at an open gate and take note of the numbers that are exposed on the lock. They can come back later, and if you didn’t scramble the combination, they have easy access.
5. Don’t leave your gate open. Some people only close and lock their gates when they are not home. To a thief this is like putting a sign out that says “I’m not here. Come on in and help yourself.”
6. Always leave your lock hanging in the same position. Another tell-tale about whether you are home or not is the position of your lock. Some people leave their lock handing on the outside of the gate when they are leaving and leave it hanging on the inside of the gate when they are home. Again, an astute thief will notice these kinds of things.
7. Some people buy a home security system sign and place it by their gate. I have mixed feelings about this one. If your house is not visible from the road, this sign is an advertisement that there is a house here and that you have something worth stealing. Without the sign, a passerby doesn’t know if there is a house behind the gate of if you’re just locking up your cows. I would suggest no sign if your house isn’t visible, and a sign if you’re house is visible.
8. Install an intruder warning system between your gate and your house. You can purchase an inexpensive, battery operated intruder alert system for around $50 US. This system uses a light beam to detect motion and triggers a warning beeper in your house. This will let you know if someone has breached your gate and is headed for your house. When you are installing this system make sure that you have it set high enough so that your dog won’t set it off when they walk down the driveway. Also make sure that no bushes or limbs will be blown back and forth in front of the beam.
9. Install a motion activated game camera. If worse comes to worst and someone does break in, a motion activated game camera will record the event and, hopefully, lead to the apprehension of the intruder. Position your camera where it is not easy to spot, and make sure that it will record the license plate of any vehicle that enters your gate.
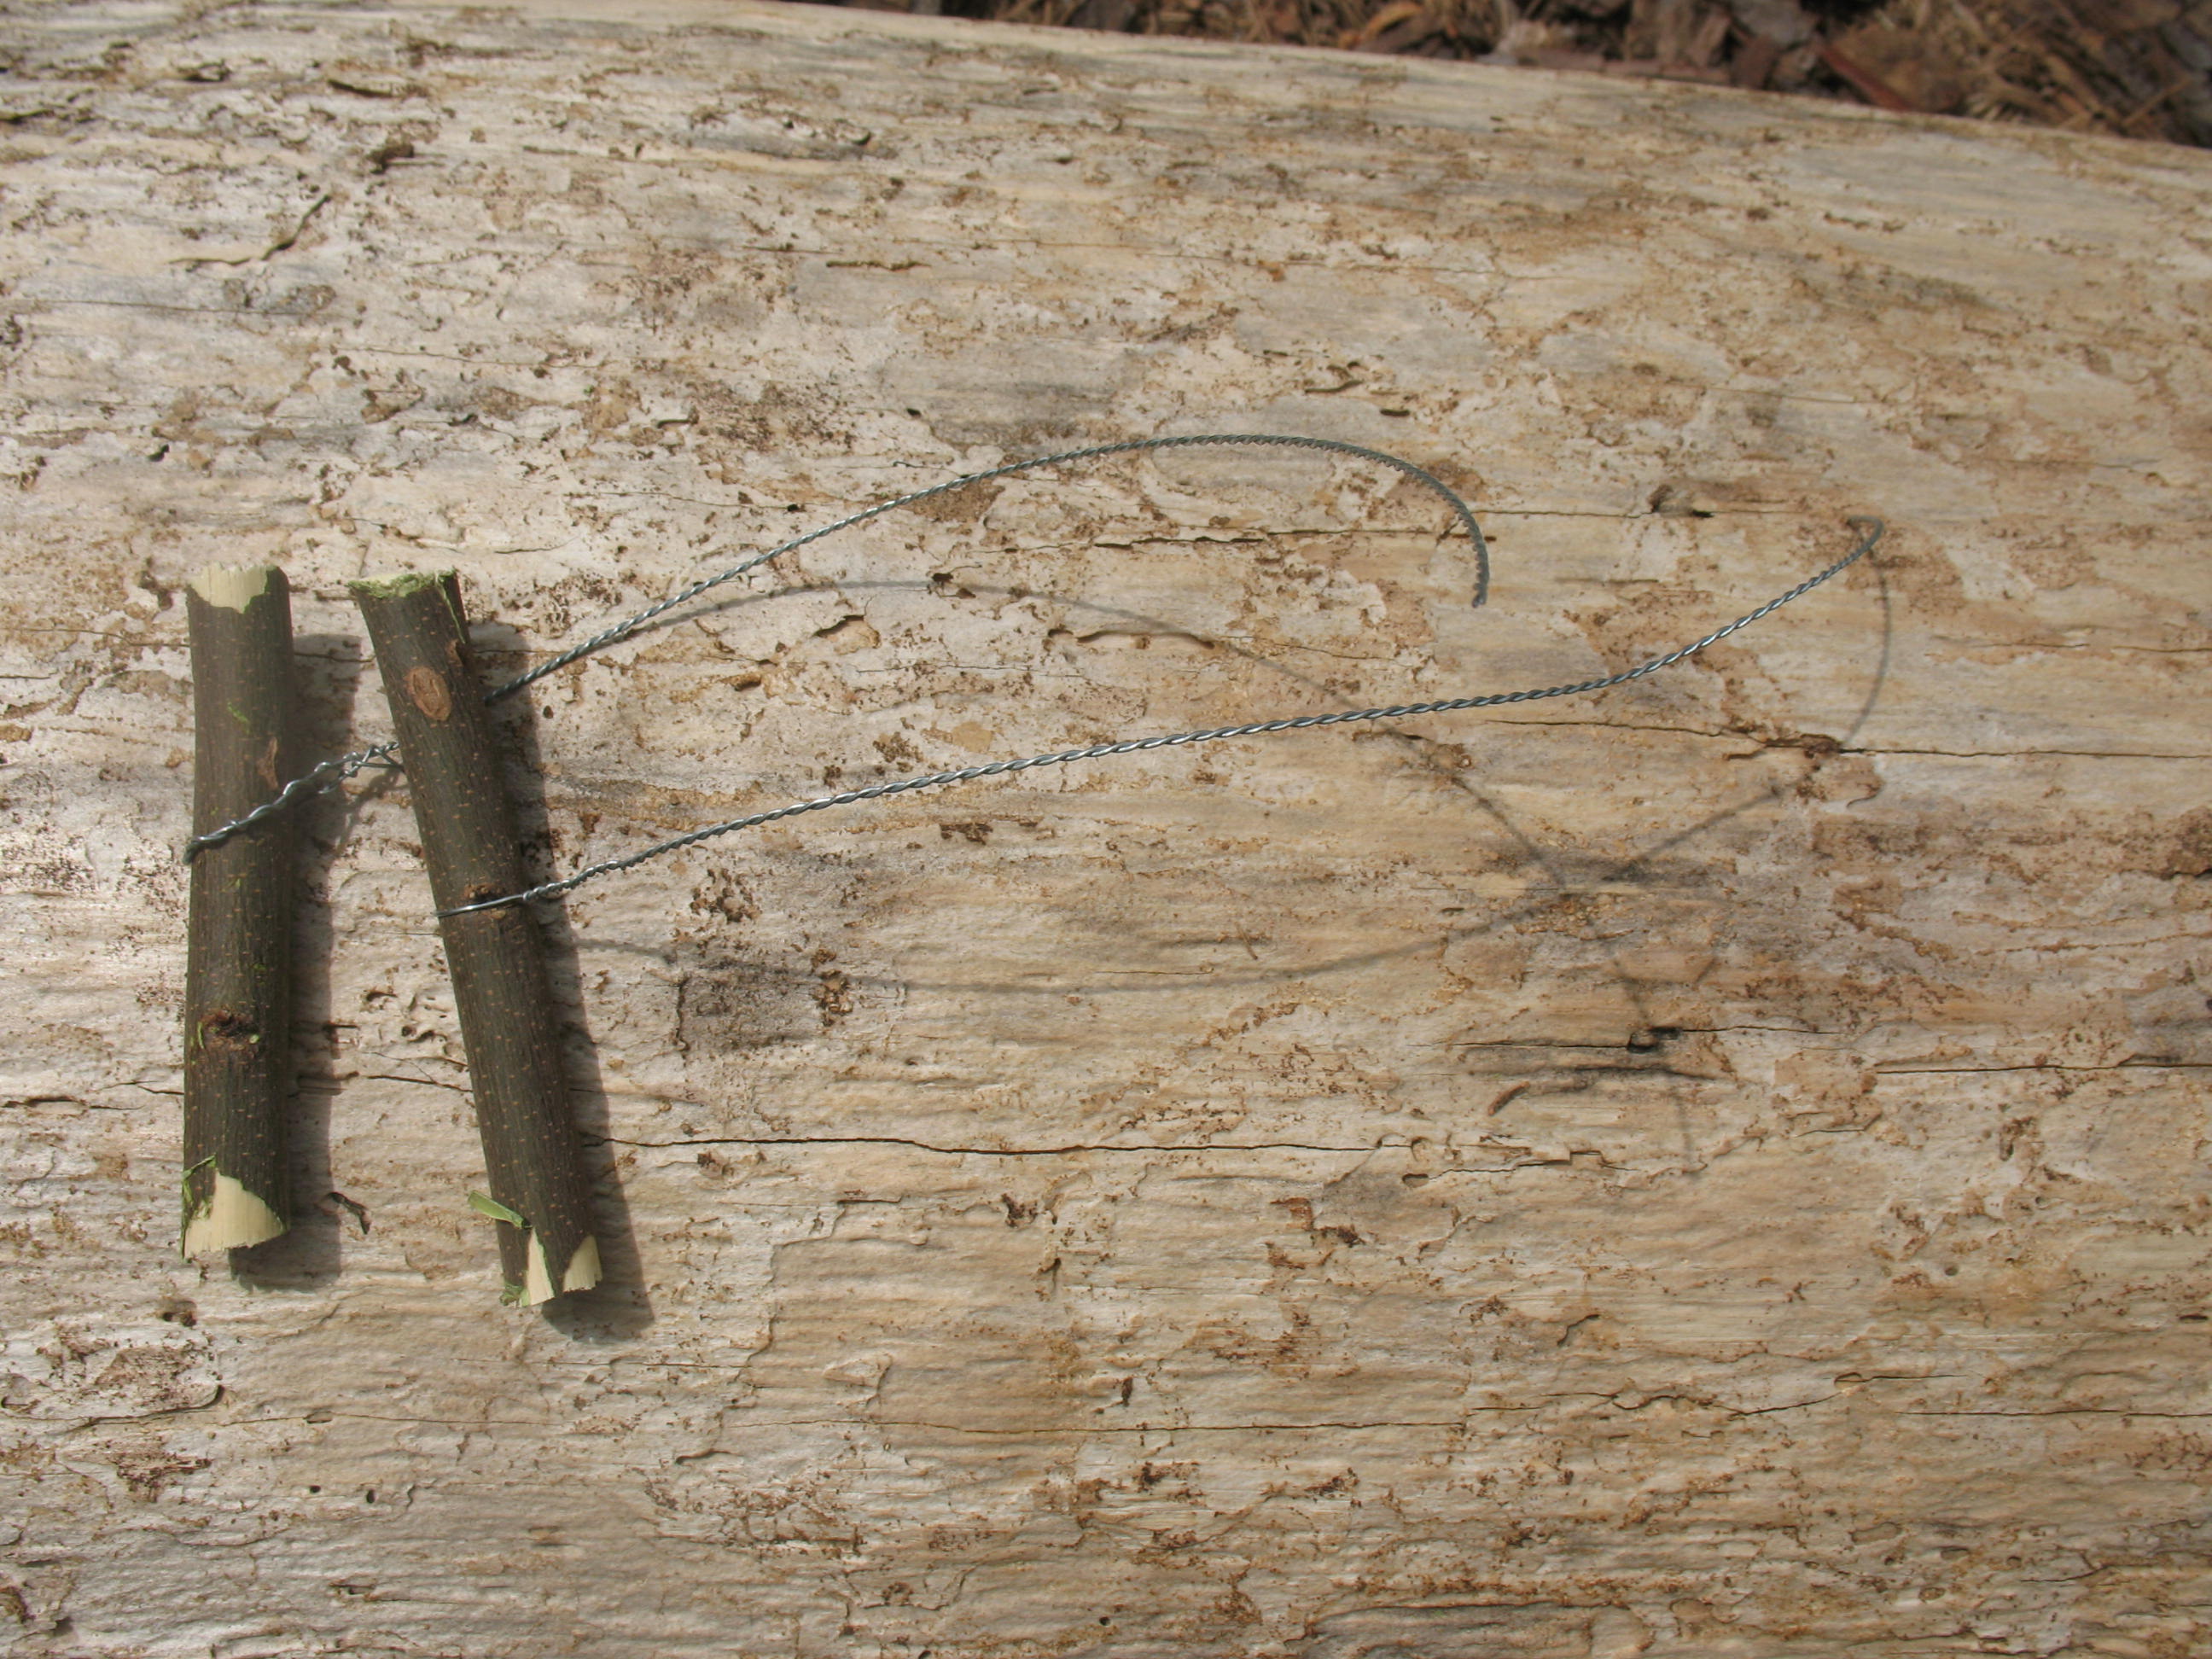
This post is a perfect example of why it’s so important to try out wilderness survival skills in the comfort of your own back yard rather than wait until you’re in a life and death situation to find out that something doesn’t work. I recently watched a survival show in which one of the participants showed how you could take a piece of snare wire and twist it into a wire saw to use in a survival situation. Seemed like a great idea, and I thought it had a pretty good likelihood of working. I have, after all, seen a plumber use a piece of nylon twine to cut PVC pipe, and this seems like kind of the same idea. So, I did an internet search on how to do this and I only found one short video on the subject and, even though it did kind of work, I can’t say that the results looked all that impressive. Strange, I thought, usually when a skill this awesome presents itself there will be a lot of posts, discussions, and videos about it. Well maybe this truly is a new skill, I thought. I’m going to see how it works. So I took a roll of snare wire and a couple of short sticks, and this is what I did: Pictured below: snare wire 
First I cut a piece of wire that was about two and a half times as long as I wanted the finished saw to be. Then I cut a couple of short sticks for the handles. Pictured below: wire and handles 
Next I twisted the ends of the wire together to make a loop. Pictured below: wire ends joined into loop 
I then took my sticks and stuck them up into opposite ends of the loop. Pictured below: sticks inside of wire loop

After a bit of twisting I had a nice tightly wrapped wire saw blade with a wooden handle on each end. Pictured below: finished saw

I took my new wire saw and went to work on a green sapling that was about two inches in diameter. At first it seemed to bite right in, but as soon as I got past the bark it felt like the blade was just rubbing back and forth rather than cutting in. After about five minutes of sawing, I had cut about three sixteenths of an inch deep. At this point the wire broke right in the middle. It was very warm to the touch. A lot of friction; not much cutting. Pictured below: top,cut in sapling made by improvised wire saw; bottom, broken saw
I thought maybe I had picked a particularly tough tree, so I got out my store bought wire saw and went to work. In about eight minutes I had cut through the sapling. Pictured below: top, store bought wire saw; bottom, cut sapling 

Maybe somebody out there can tell me how to do this. I’d love to hear from you, but pleased don’t offer advise unless you have done it yourself. There’s to much false information on the internet because somebody reads how somebody else did something, assumes that it works, and then passes it on as gospel. I try to never post anything about a survival skill that I haven’t done or experienced myself and this article is a good example of how that turns out sometimes. So, until I can make this work myself, I am not recommending that you rely on it as something that you can use in a survival situation. My recommendation is to carry a pocket knife or a multi-tool with a saw blade, and use your snare wire for setting traps.
A saw can be a really handy thing to have in the woods. You can use a hatchet and a knife for a lot of stuff, but there are some things that a saw just does better. There are many different kinds of survival type saws ranging from the very small to the fairly large. I always, repeat, always have a saw with me. In the woods, at work, at the grocery store; I have a saw with me. Now you may thing that I look like a real wingnut carrying a saw everywhere, but the fact is it’s not even noticeable. You see, I’m talking about the saw blade on my Swiss Army Knife. It’s small, but it is so very, very useful. I use my saw to cut arrow shafts, I use it to cut bamboo for bundle bows, I use it to cut the nocks in arrow shafts, I use it cut out bone needles and fish hooks, and many other things. Here are a few of the different kinds of survival saws that are available today:
Pocket Saws
As mentioned above there are several different kinds of small saws that can be carried in you pocket at all times. Several models of the Swiss Army Knife, and similar type knives, have a saw blade attached that is very useful for small jobs. Many multi-tools have saw blades. Be aware that the quality and functionality of these blades vary widely. The Swiss Army knife, for example, has a good quality blade made of good steel. The blade also functions smoothly without binding up in the cut. I have a less expensive copy of a Swiss knife that does not work well at all. The steel is good enough but the spine of the blade is wider than the cutting edge. This causes the blade to bind after you have cut a little way through a limb. I would suggest that you spend the extra money and get the real thing. Multi-tool saw blades also vary widely in quality. I have a Leatherman that works quite well, but I have seen others that are not so good. Pictured below: Swiss Army Knife and Leatherman Multi-Tool 
Wire Saws
I keep a little wire saw in my survival kit. A wire saw is basically a piece of flexible, heavy gauge wire that has serrations in it. The wire has a metal ring attached to each end where you can grip the ends and saw back and forth with the wire. I have cut down some fairly good sized trees with a wire saw, maybe eight inches in diameter. I have also had wire saws break while in use, so I wouldn’t say they are intended for any kind of regular or long-term use. One thing I can tell you from experience is to not try and use a wire saw by sticking you fingers through the rings. This is very tough on the fingers. the best way to use a wire saw is to get a couple of sticks that will fit through the rings and then grip the sticks. Much easier on the fingers. Pictured below: wire saw 
Folding Saws
Folding saws work very well but they are not convenient to carry. They generally need to be carried in a belt holster or inside of a pack. They are also relatively heavy compared to the saws mentioned above. The only time I carry a folding saw is when I know I will need it for a specific task. For example, if I am going out into the woods to cut some saplings or to work on one of my trails, I’ll carry my folding saw. Otherwise it stays in my truck. Pictured below: folding saw 
Belt Saws
There are several different types of non-folding saws that can be carried in a sheath on your belt. I don’t personally own one of these because it’s not something that I would carry. It might work for you if you use a saw a lot. Pictured below: belt saw
Survival Saws as a Component of Another Tool
Some sheath knives and machetes have saw teeth cut into their spines. If a sheath knife or a machete is something that you carry anyway, why not make it multi-purpose by having a saw blade on it. The Southern Forest that I live in becomes very dense in the summer; almost like a tropical jungle. In the summer I always carry a machete when I’m in the woods. I used a file to cut saw teeth into the spine of my machete so that it can double as a saw. Pictured below: Two views of my machete with homemade saw blade 

I have a couple of little folding shovels that have saw teeth on one side of the blade. I never carry a shovel unless I know specifically that I will need it, so the saws rarely get used. Neither of the ones I have are very good as saws, but then again they are not the highest quality shovels that you can buy. Pictured below: Folding shovel with saw-tooth edge 
In summary, I think that the most practical survival saws are the saw blade on a folding knife or multi-tool, the wire saw, or the saw-tooth back of a sheath knife. Other types of survival saws are functional but not particularly convenient to carry.
As I have stated in a previous post, it is difficult to survive in the wild by only gathering wild plants. Unless you can gather nuts or mature seeds it is hard to come up with enough protein to survive. You will almost certainly have to turn to animal protein to meet your body’s needs.
Hunting, in most instances, is one of the least efficient ways to gather animal protein. If you are hunting, that’s all you can do; and you will probably have only one chance to either succeed or fail. Fishing with a pole in your hand presents the same problem. You must remain totally occupied with this one task, and you will either catch fish or you won’t.
Traps and trotlines offer multiple chances for success at the same time, and they will work for you while you take care of other tasks or even while you sleep. The thing about trapping and trotlining is that they are both a numbers game. If you just set out one trap you might as well go hunting. If you just set out one hook you might as well stand on the bank and fish. The idea is to set out as many hooks and traps as possible so that you can maximize your chances of securing food.
Let’s talk about fishing first. It takes considerable cordage to set out a trotline. If you have fifty feet of para-cord you could cut off ten feet, remove the outer sheath, and have seven, ten foot long pieces of 50lb. test nylon to cut up into drop lines. If you don’t have any fish hooks, you can make fifteen or twenty gorge hooks in a fairly short time. If you don’t have any cordage, then I would abandon the idea of a traditional trotline. It would take hours and hours to twist up enough cordage to make such a line. If you have to make your own cordage, then I would recommend that you go with drop lines. A drop line is just a short piece of cordage with a baited hook and weight. Locate an area where low trees and /or bushes hang out over the water, and tie a drop lines to various branches. This won’t get you out into deep water like a trot line stretched across the river, but it will get hooks into the water. You will have to turn up grubs, earthworms, and other insects or larvae to bait your hooks the first time, but if you make a catch you can use fish entrails for subsequent baiting.
Traps can be time consuming to make, but just one trap does not have much chance of securing food. I think that I would set out fishing lines first, then gather materials to make traps around the fire at night. The figure 4 deadfall and the rolling snare are both pretty easy to make. The real time consumption comes when you are selecting locations for your traps and preparing the sets. I would try and set at least ten good traps, and twenty would be better. The more you set, the better your chance of making a catch. If you set baited traps you will have to forage for the initial bait, but once you catch the first animal you can use entrails for subsequent traps.
