DISCLAIMER: Don’t believe anything I or any body else tells you about edible wild plants. Don’t eat edible wild plants based on what you see in a book or on the inter-net. Get a qualified instructor to show you the plants, and don’t eat them until the instructor shows you how to prepare them, and then eats them him or herself. Be aware that you may be allergic to a plant that someone else can eat without harm. Be sure that any plants that you gather have not been sprayed with pesticides or herbicides. Pictured below: Green Briar Vines
We’ve all had run-ins with Green Briars (Smilax rotundifolia) while walking through the woods. You know, those long waxy green vines with nice sharp thorns on them. They are easy to identify because they are the only vine around here that has both tendrils and thorns. Pictured below: Green Briar leaves 
They root in the ground and grow up into shrubs and trees and create a real tangle of thorns that can really slow you down. Well, even Green Briars have a few useful purposes. Their main useful purpose as far as we are concerned is that they provide an abundant, nutritious, and easily harvested source of food. Check out a briar patch in the spring time and you will see that the vines are putting on new growth.This new growth is a lighter green than the older part of the vine, and it is soft. It hasn’t developed the waxy bark and woody core of the older vines. Pictured below: Green Briar Shoot
These young shoots can be pinched off of the vine, just above the first thorn, and eaten on the spot; or they can be collected and then steamed or boiled. They have a flavor kind of like green beans. If you have a little salt and pepper to add to them they are very tasty. Pictured below: Green Briar Shoots ready to eat raw or cook and eat like green beans.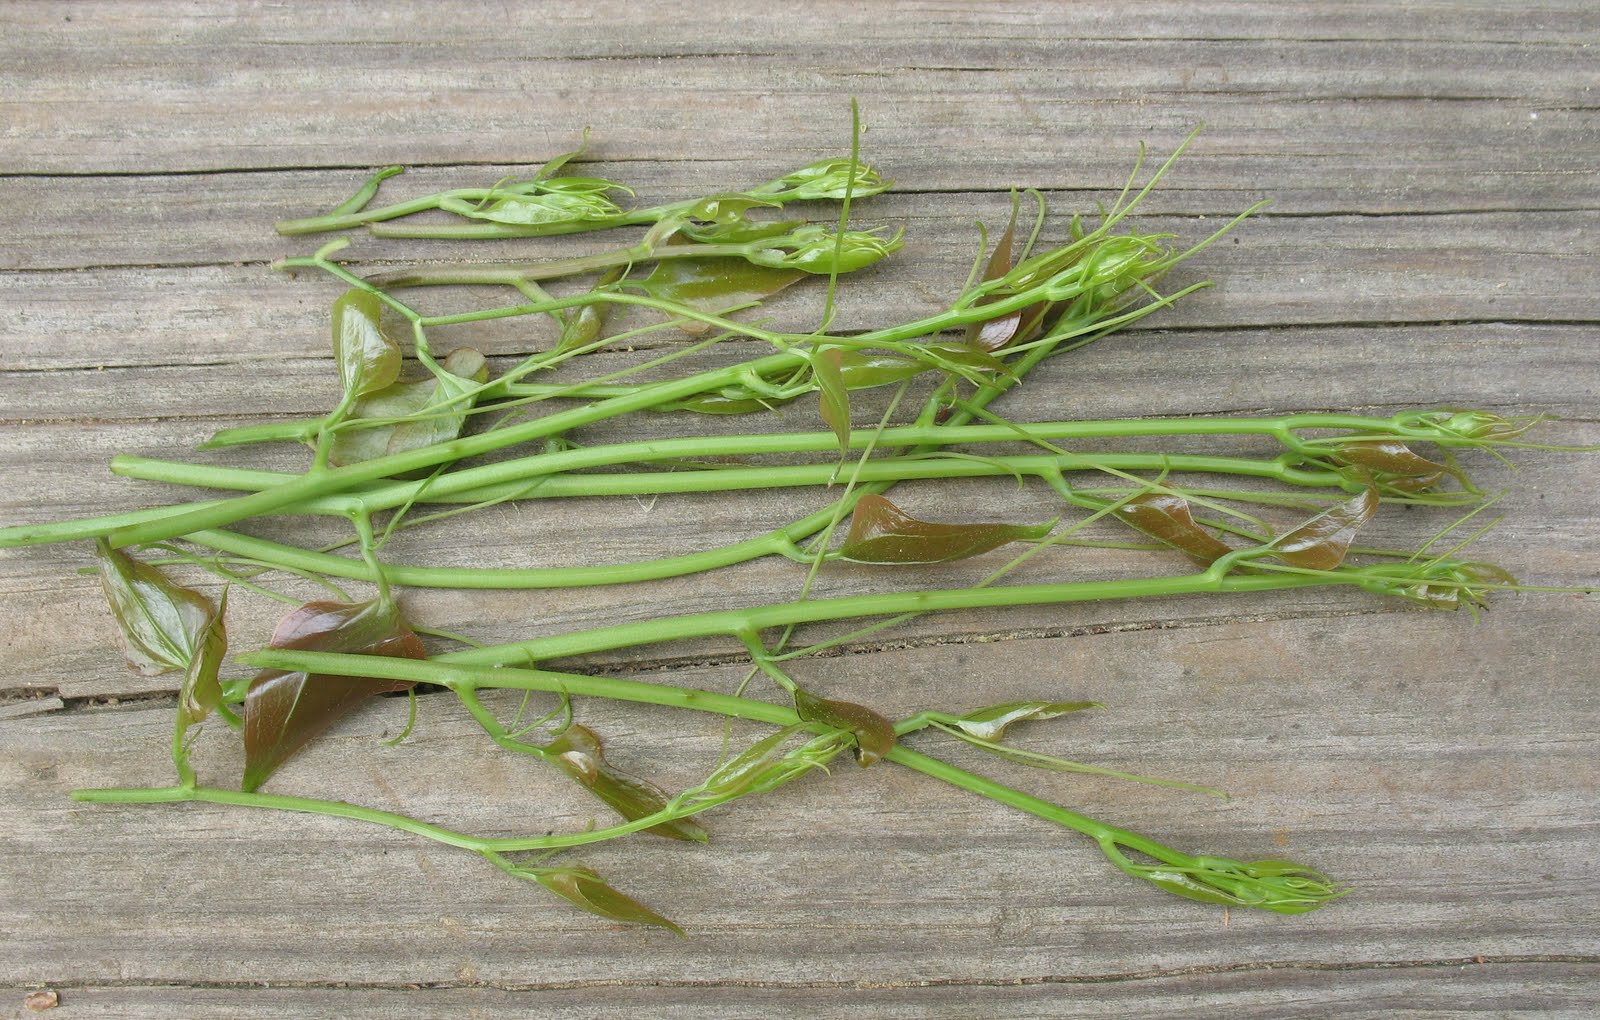
Just don’t take all of the shoots, as rabbits, deer, and other critters love to browse on them. Although the greatest abundance of Green Briar shoots are found in the spring, you can find a few at almost any season other than the dead of winter.
DISCLAIMER: Don’t believe anything I or anybody else tells you about edible wild plants. Don’t eat edible wild plants based on what you see in a book or on the inter-net. Get a qualified instructor to show you the plants, and don’t eat them until the instructor shows you how to prepare them, and then eats them him or herself. Be aware that you may be allergic to a plant that someone else can eat without harm. Be sure that any plants that you gather have not been sprayed with pesticides or herbicides. Pictured below: Bull Thistle
One of the edible plants that appears in the early spring in East Texas is the Bull Thistle (Cirsium vulgare). Bull thistle is not native to North America and is believed to have been introduced from Europe in colonial times. Bull Thistle is pretty easy to recognize. It pops up, seemingly overnight, out of pastures, fields, and other disturbed areas. It has a round, hollow, green, stem that has ridges on the outside kind of like celery. It has spiney leaves. The stem grows up out of a rosette of these spiney leaves. The stem or stalk can grow up to 7 feet tall, but most of the one’s I see are around 3 or 4 feet. The Bull Thistle will have several flowers on it. The flowers are purple and have the classic thistle shape, and are maybe two inches tall. When the plant is mature the flowers open and release a white down. The down is excellent for fletching blowgun darts, but that will be the subject of another post. If you want to collect some thistle flowers for making blow darts, be sure and collect the flowers before they open and then use a short length of string to tie them shut. Otherwise the flowers will open, and you will have a useless bag of loose down. Pictured below: Bull Thistle flower 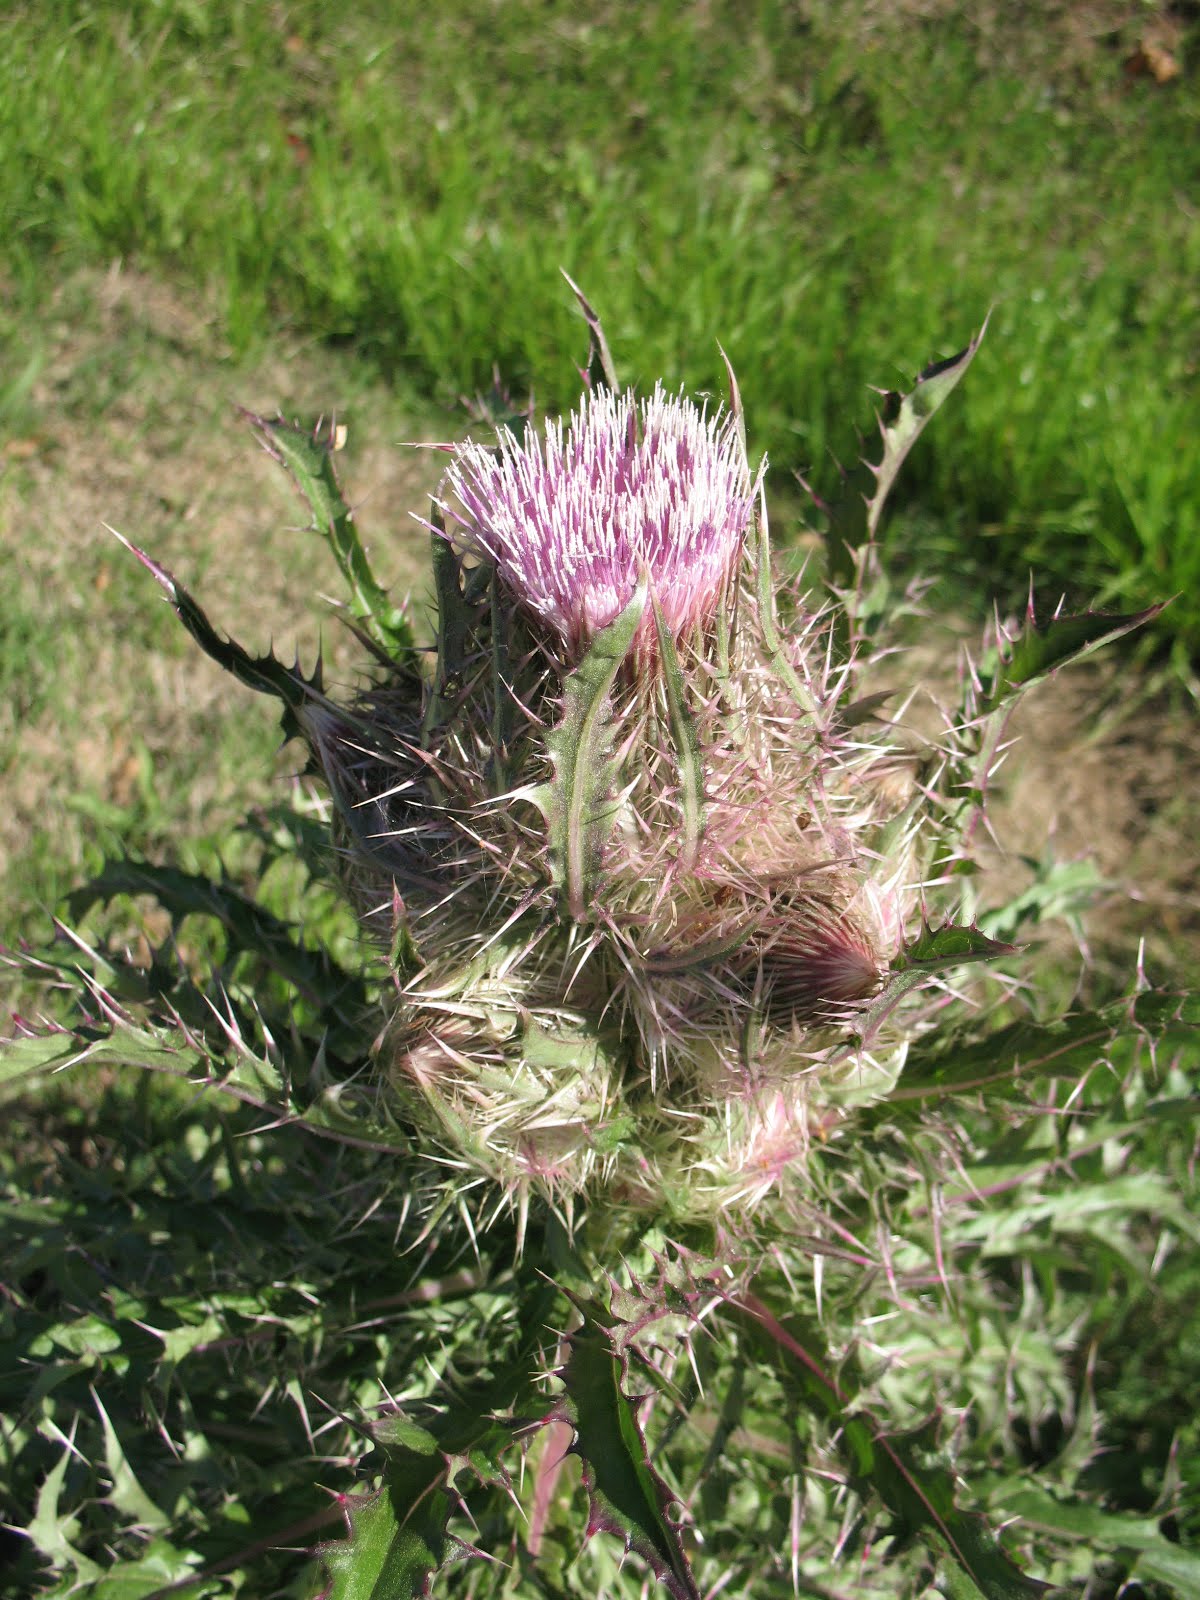
The stalk is the edible part of the Bull thistle. It has a pretty good taste; a little bit like sugar cane, a texture kind of like celery, and maybe just a hint of honeydew melon. You want to collect the stalks while they are still young. They become tough and more bitter as they grow older. To harvest the stalk, cut it off just above the bottom rosette of leaves. Be careful, these things will stick you. Trim off the side leaves and the top of the stalk. Pictured below: Trimed stalk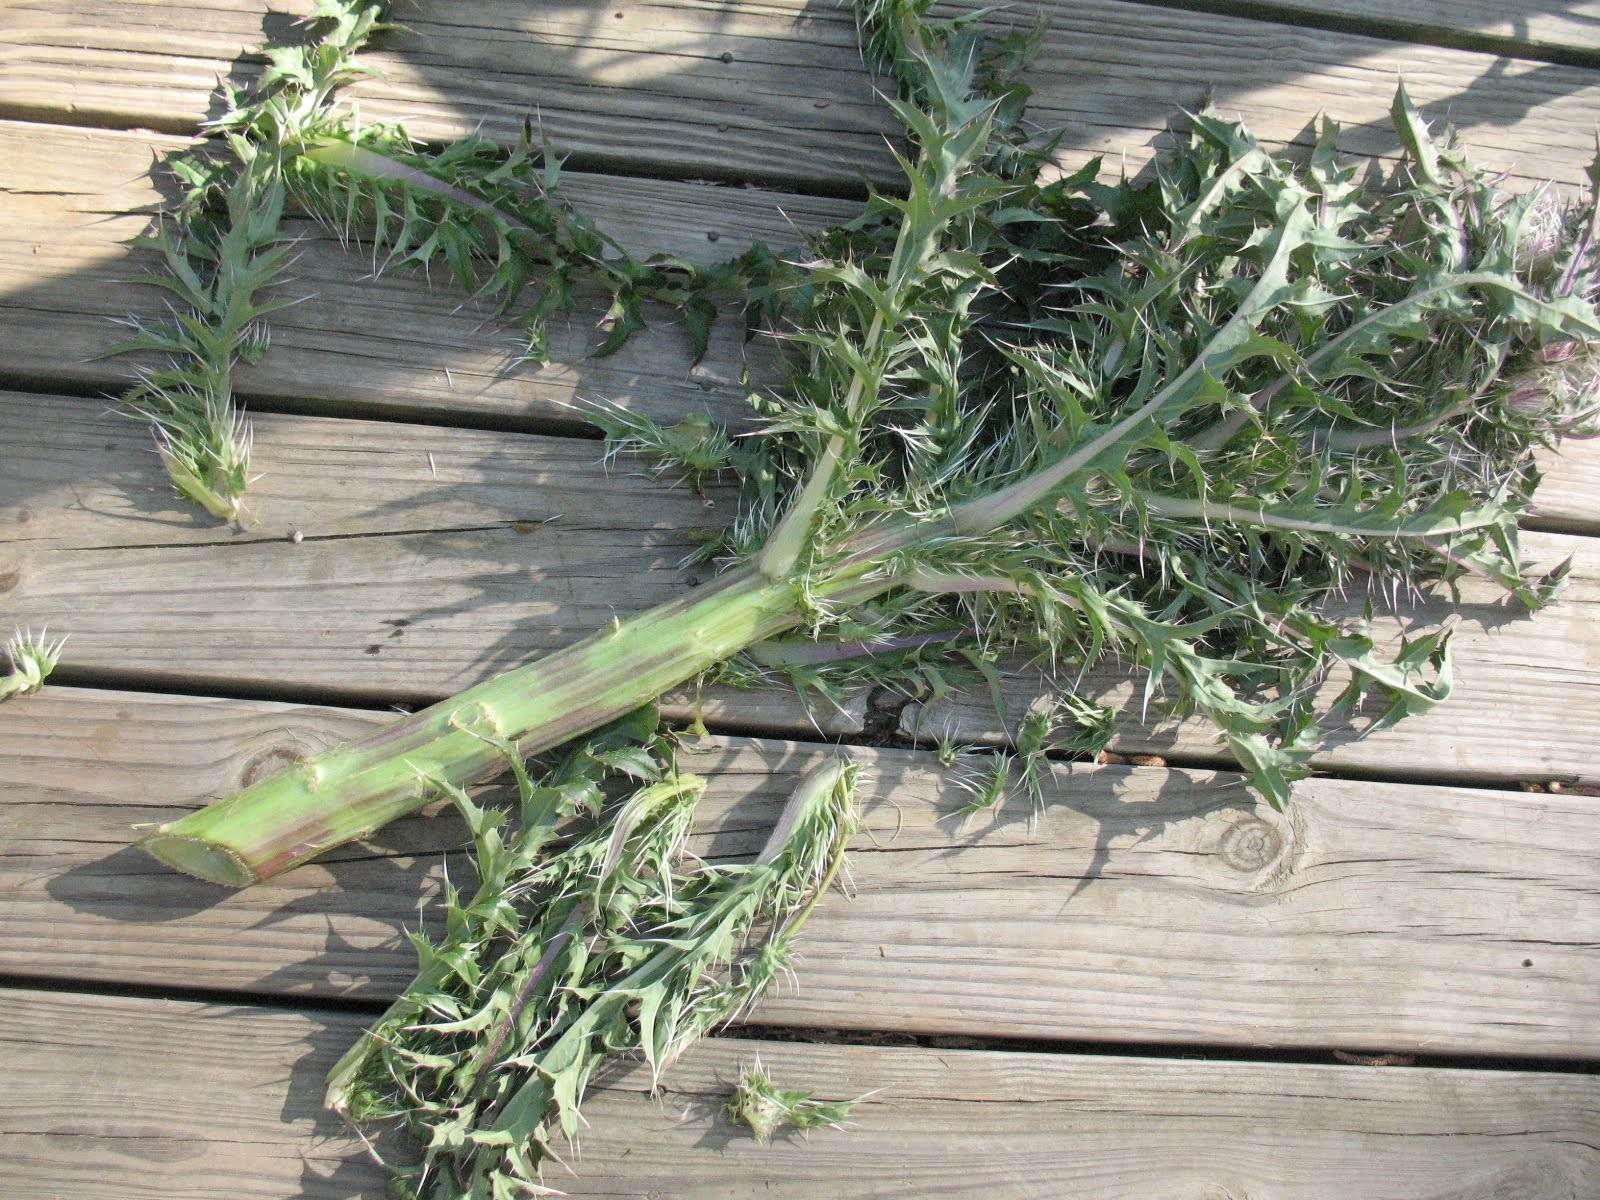
If you turn the stalk up and look at the bottom you will see that there is a dark green outer layer and a light green inner layer to the stalk. The outer layer is very fibrous and needs to be peeled off. Pictured below: End view of Bull Thistle stalk showing outer and inner layers.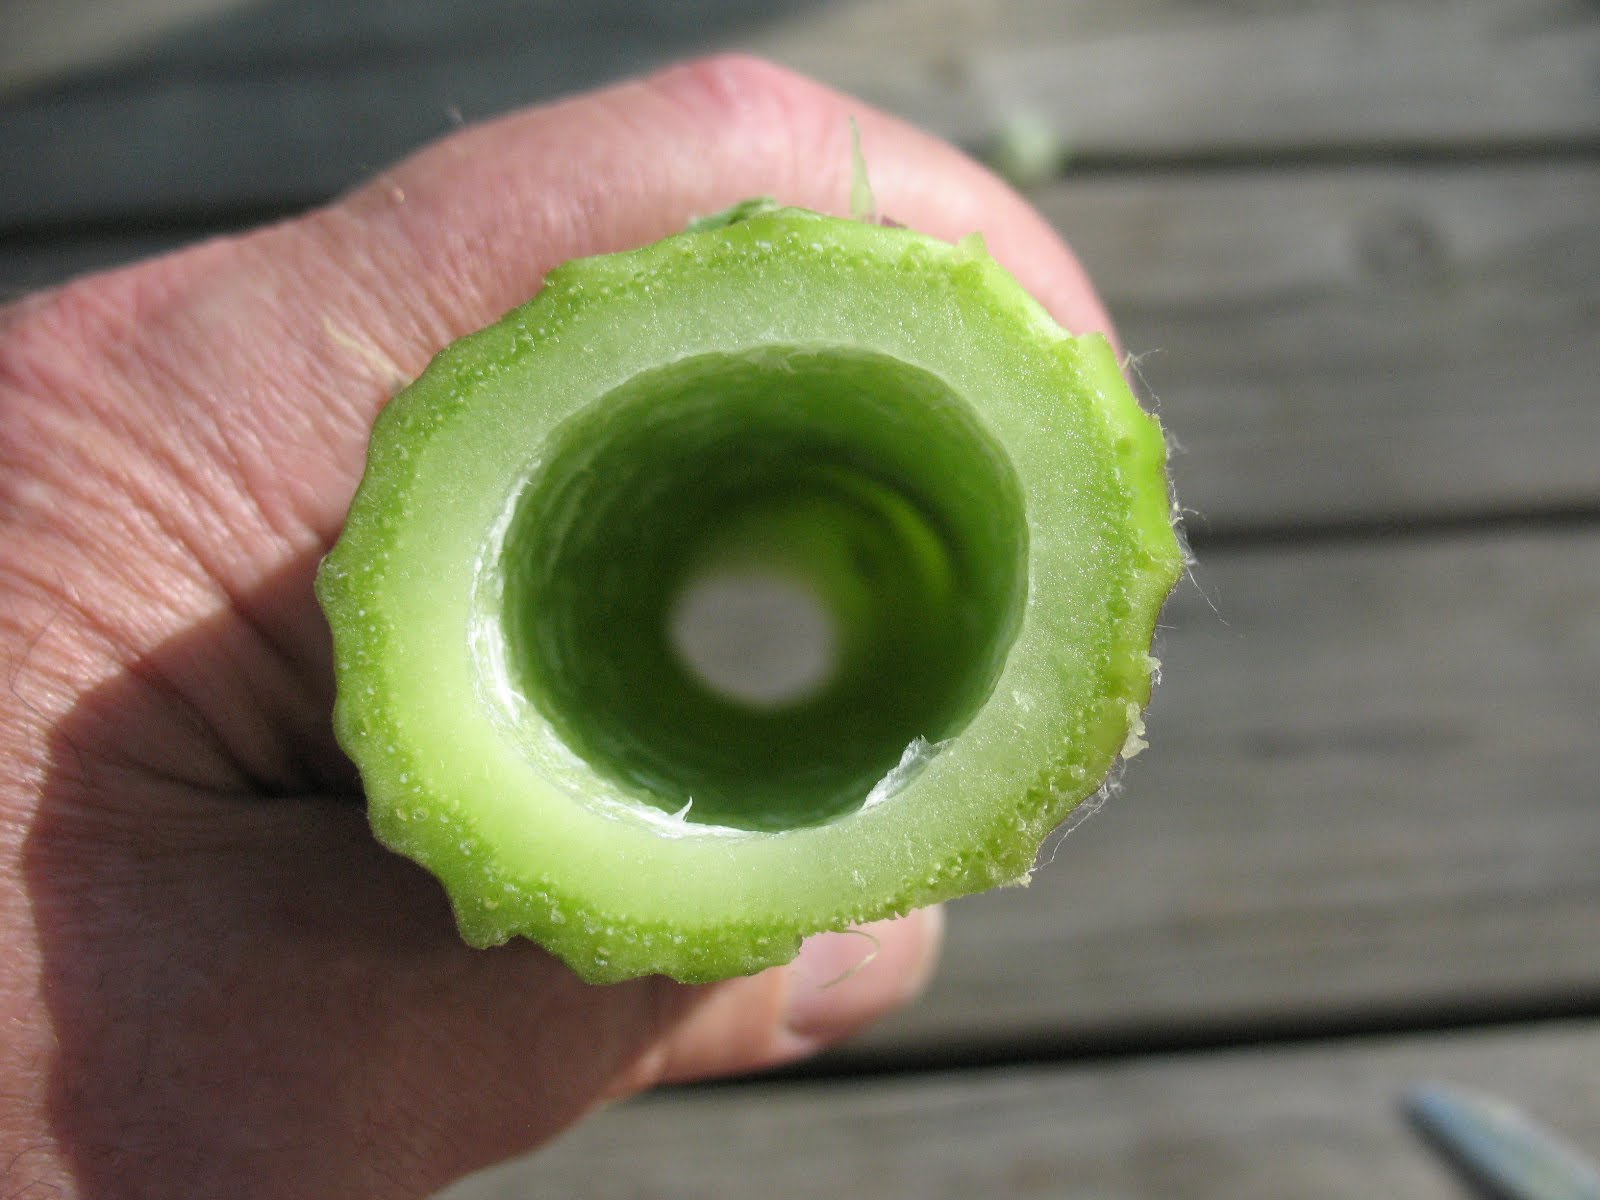
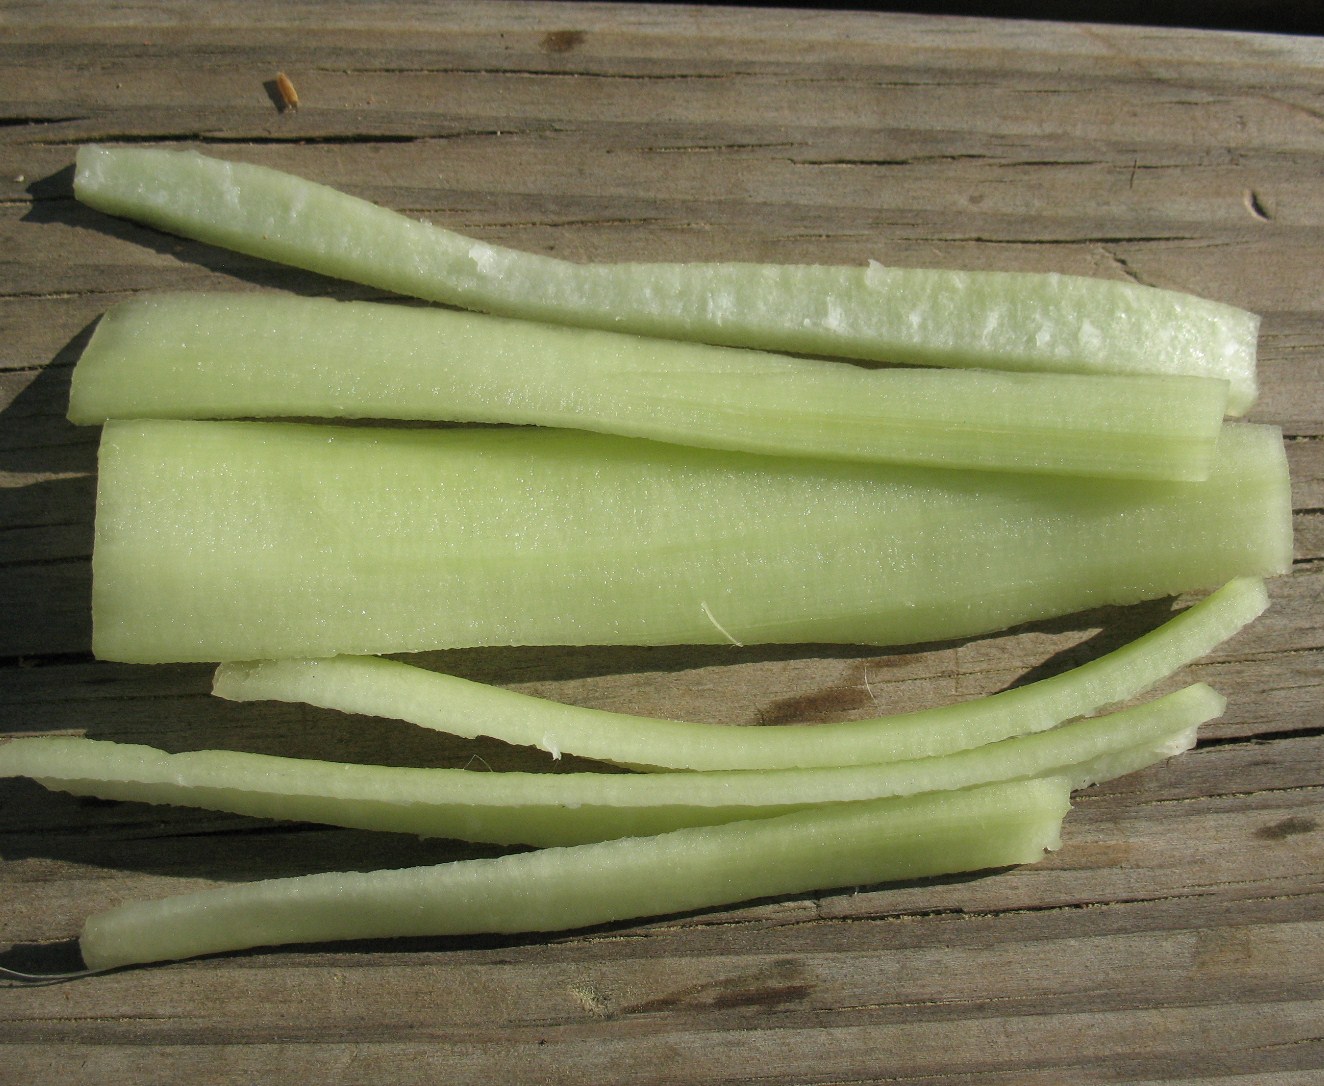
Once the outer layer of stalk has been peeled off, you can cut the stalk into strips, wash it off, and eat it. Pictured below: Bull Thistle stalk with outer layer removed and Bull Thistle stalk cut up and ready to eat.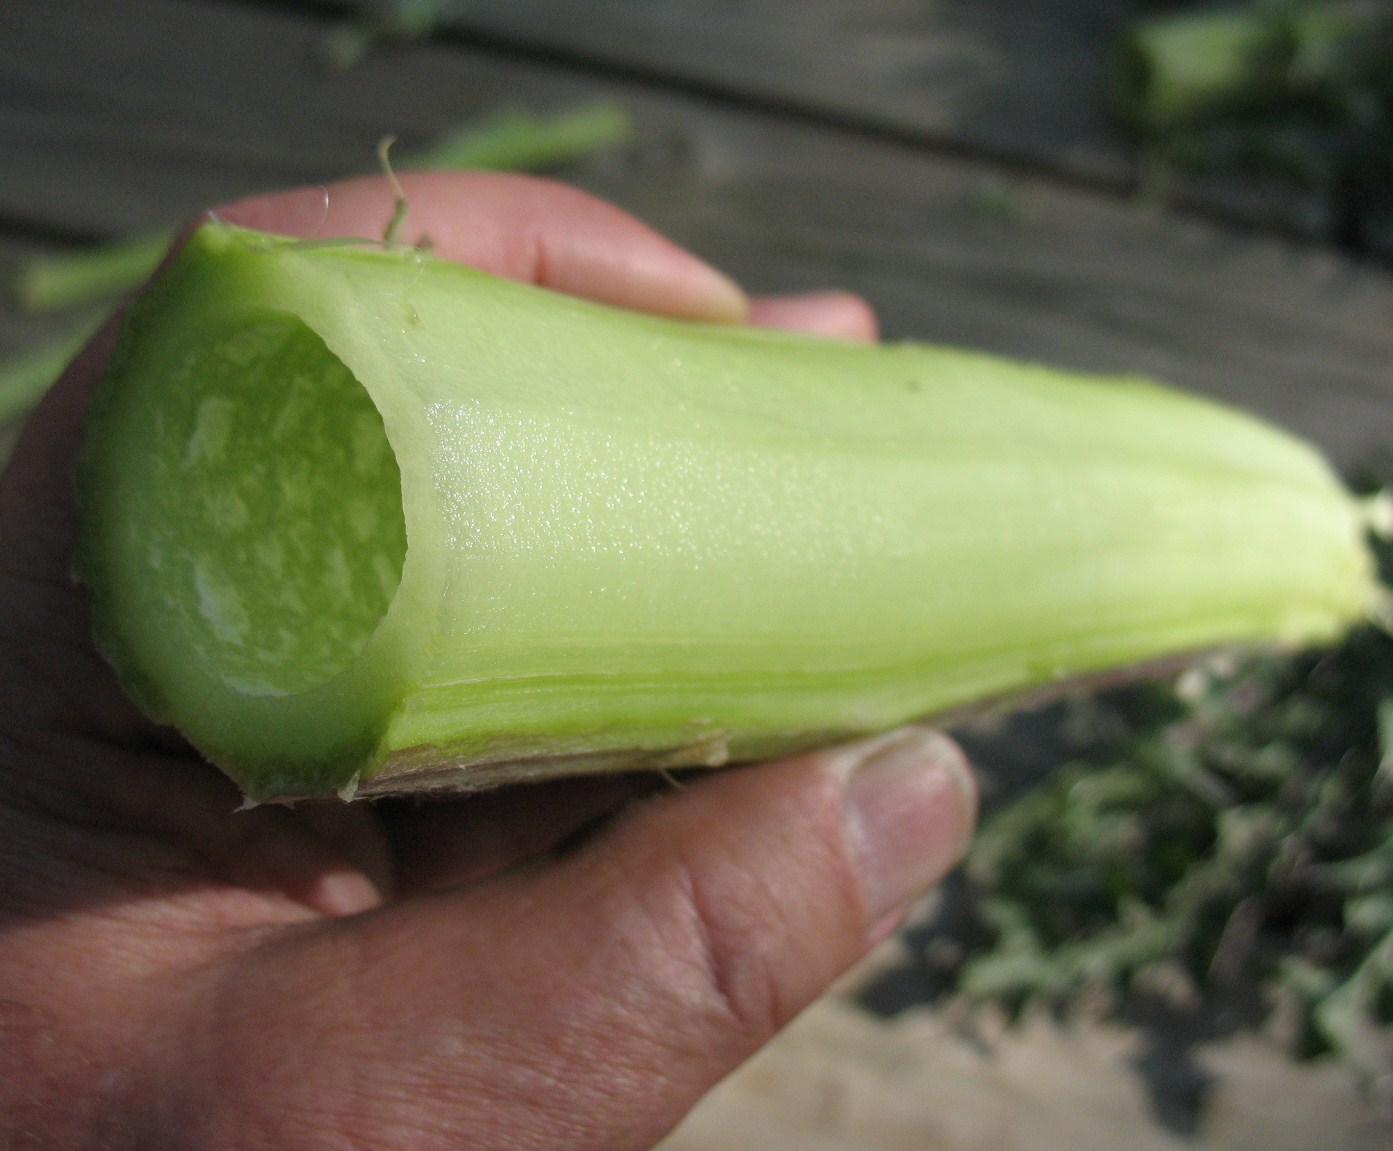
I learned another one of those lessons this winter. I learned that when the weather gets really cold, and if you have any water condensation in your gas lines; your gas regulator can freeze up, and you are out of business as far as getting the old cook stove lit.. We have a gas stove in our kitchen. It runs off of the small 20 pound size bottles; you know, the kind that are on your outdoor grill. Here’s the problem. Our bottles and the gas regulator are above ground, and this winter we had a spell where the temperature got down into the teens. Apparently our regulator froze up, and no matter what I did, the kitchen stove wouldn’t light. I guess I could have disconnected the regulator and brought it inside to thaw out, but this seemed like a lot of hassel, especially in 14 degree weather; so I went out to the shop, dug around on the storage shelves, and came up with my Coleman camp stove and a couple of small bottles of propane. This little two burner stove worked like a champ, and as long as you don’t need to bake something it will take care of any cooking job.

I remember when we lived in Dallas, years ago, I think it was the winter of 1979. There was a really bad ice storm. Tens of thousands of people lost power; a bad deal for people with all electric homes. Then for some reason, which escapes my memory, the above ground gas meters started to explode. So whole areas of town had the gas shut off. Now you had people without electricity or gas, and temperatures in the 20’s. It took less than a day for every camp stove in town to disappear from the shelves. You couldn’t buy one for any price. People who could afford it moved into hotel and motel rooms in parts of town that still had power. After all the rooms were rented, or for people who couldn’t afford a room; it was wrap up in blankets and eat cold beans. Not a pleasant situation. So my point is, don’t wait until the power goes out and then have to fight for a cook stove. Buy yourself a nice, two burner camp stove and ten or twelve mini-bottles of propane now. It doesn’t cost much, and it can sure save you a lot of misery
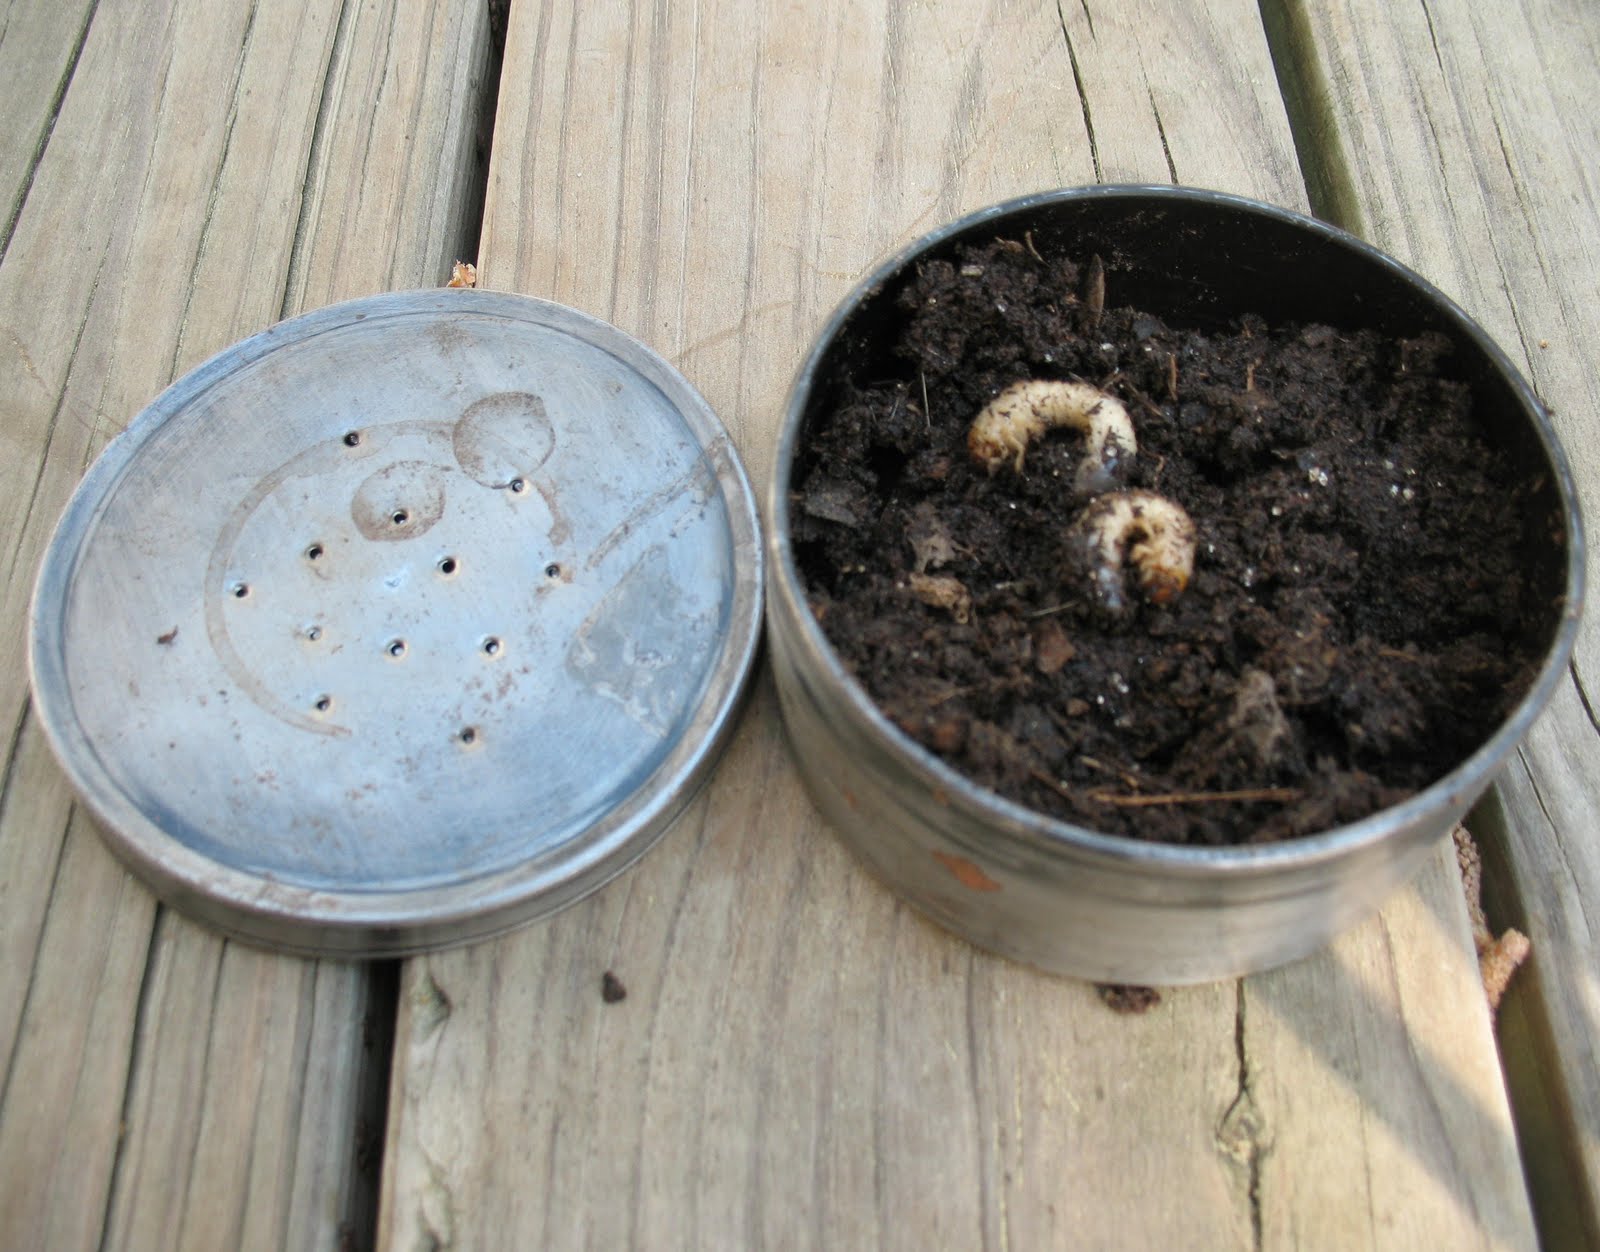
So now we’re down to where the rubber meets the road. Will my primitive fishing gear actually catch fish? Well it’s time to see. First thing I had to do was take my worm can and throw a few grubs from my garden into it. Pictured below: Closed worm can, and open worm can with grubs inside.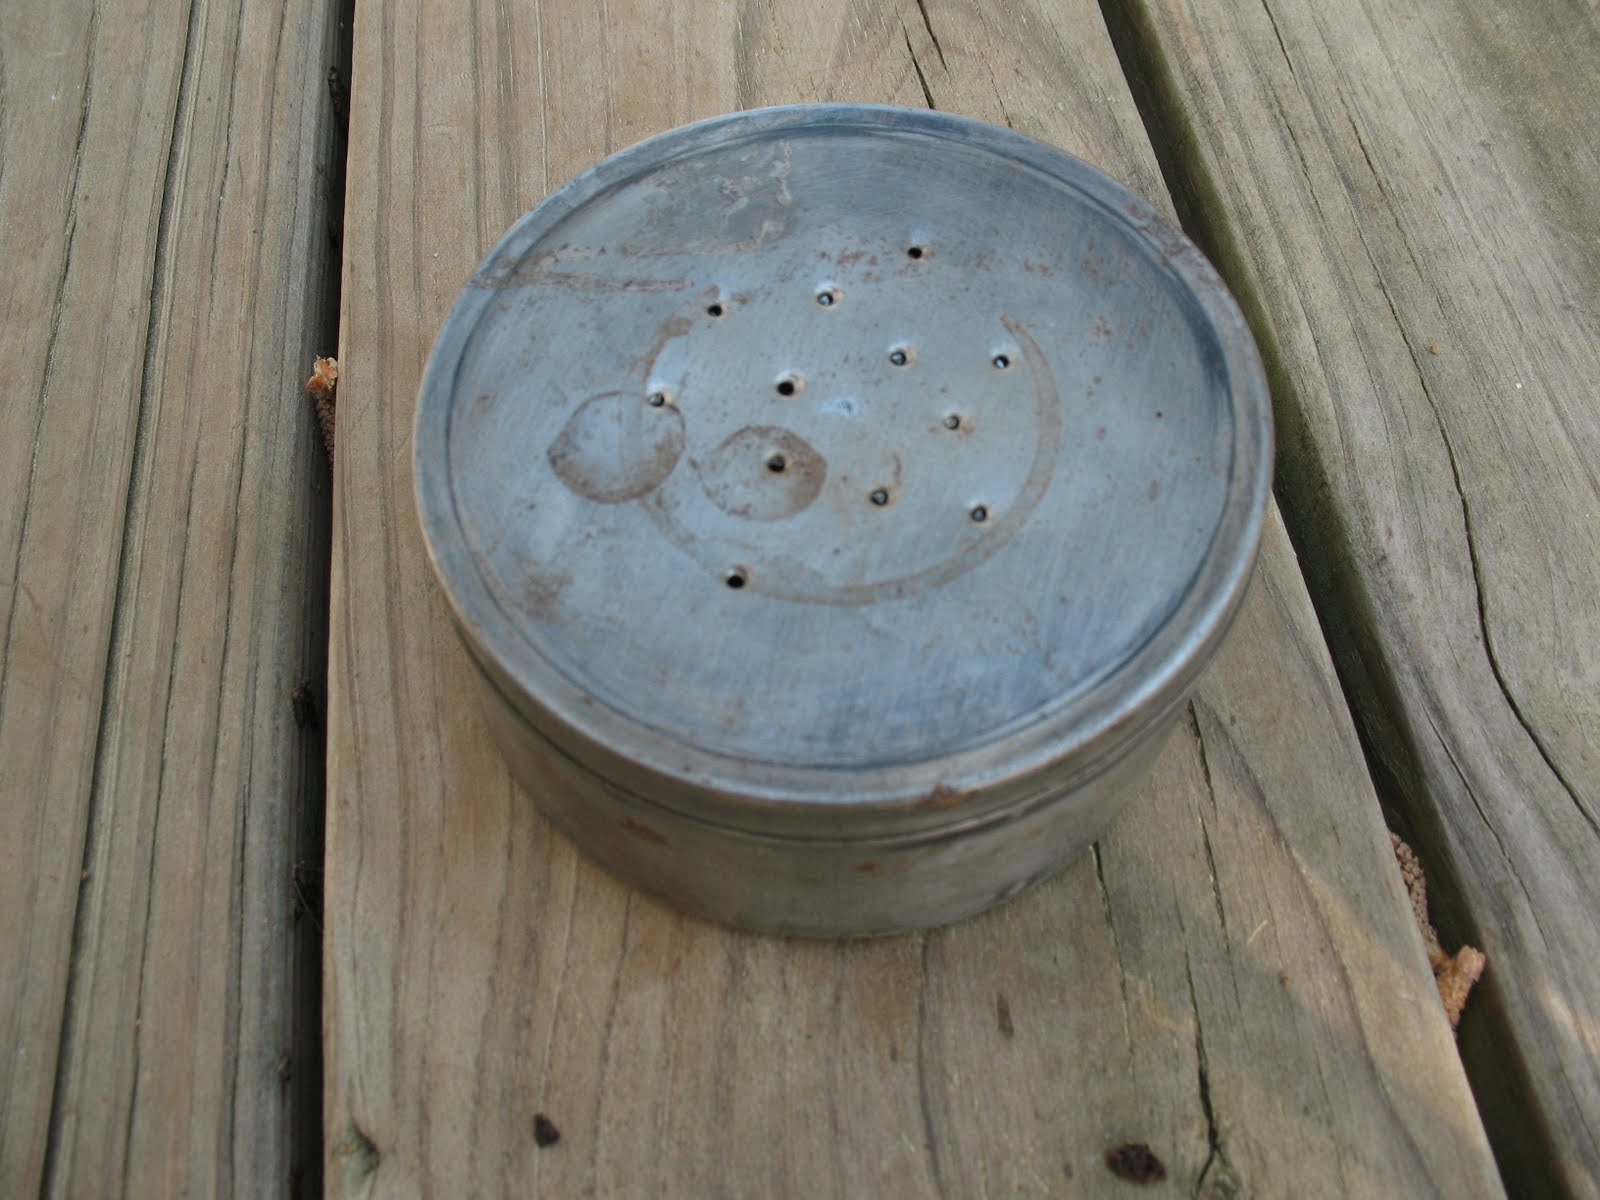
I’ve had this can for so long I don’t even remember what it held originally. I think it might have been saddle soap. I set up my pole with a home-made hook, a split shot weight, and a cork float. I set my cork so that I would be fishing about two feet below the surface. With bait and pole in hand I made my way down to the pond. I threaded a grub onto my home-made hook and tossed my line out into the pond. Pictured below: Grub on hook and line out in water.
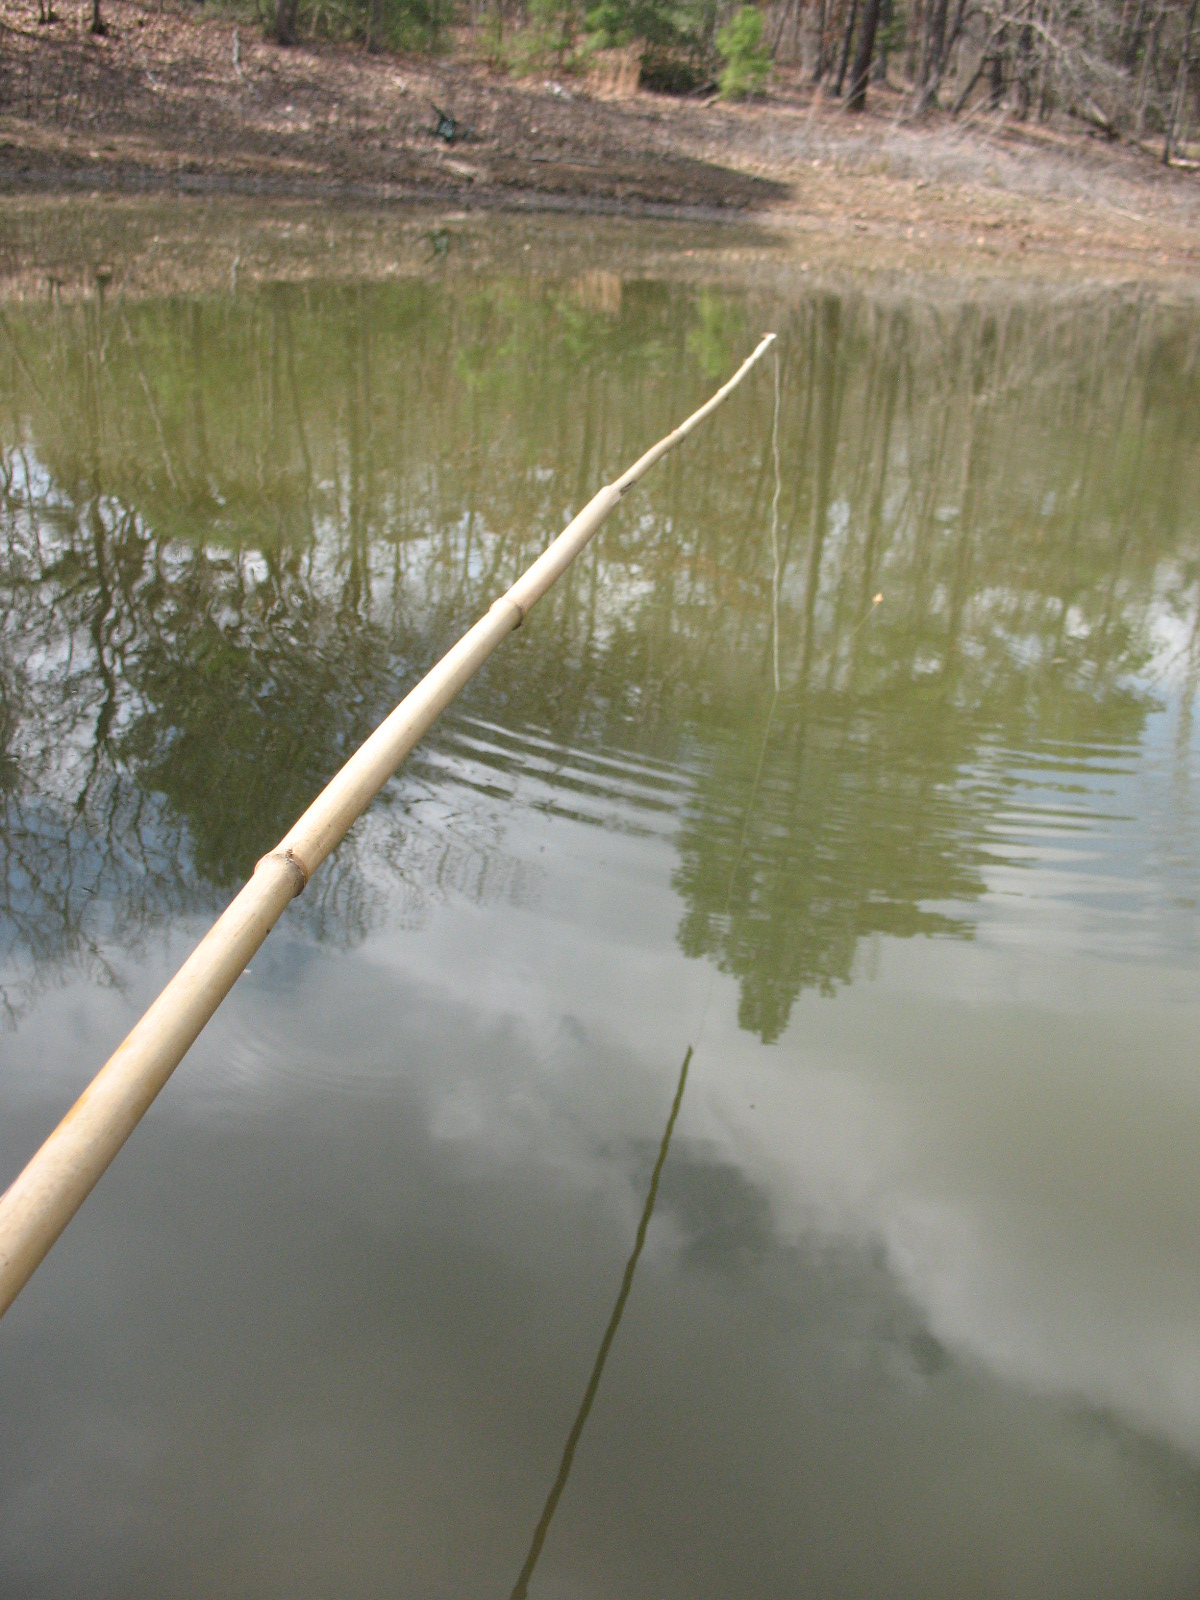
I swear, as God is my witness, that on the first cast; I caught a fish. It wasn’t a mount on the wall kind of fish; just a little pan fish about six inches long.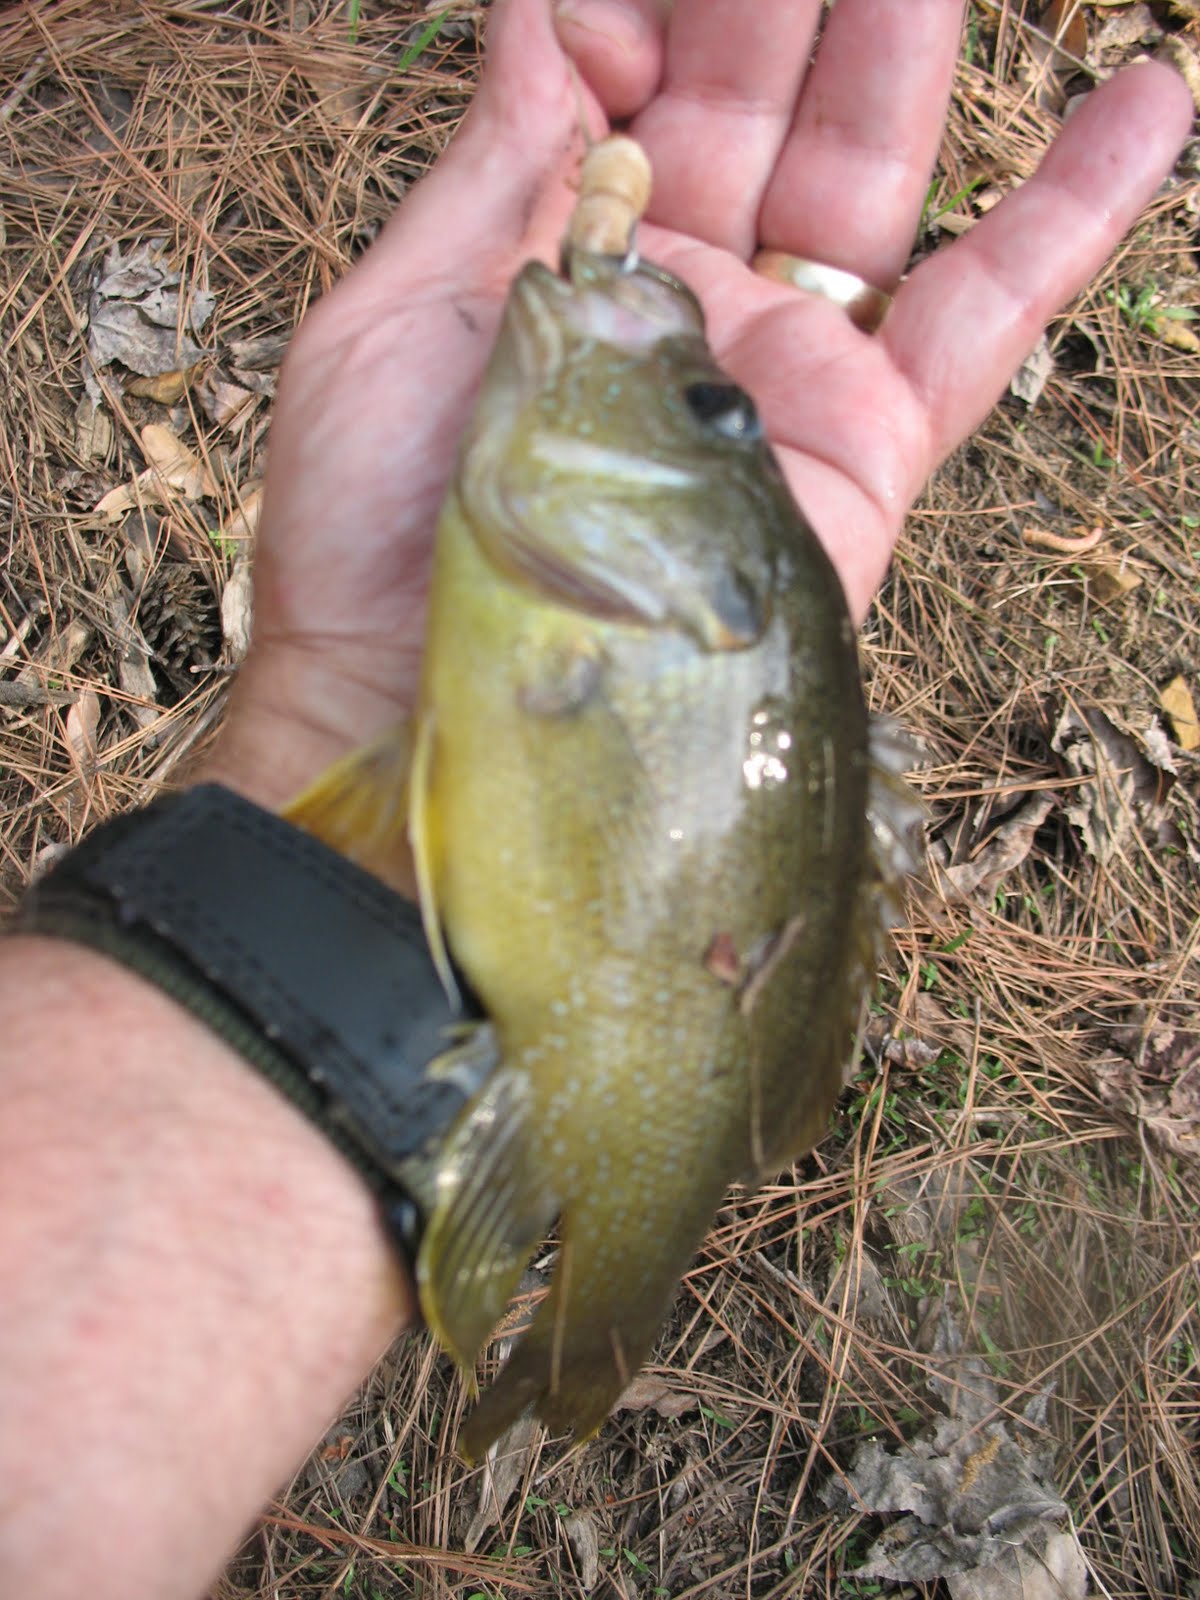
In the next twenty minutes I caught four more. None of them were huge, but combined they would make a good meal for someone that was trying to live off the land. So, that’s how it’s done. Nothing fancy, just a little old time ingenuity, and the next thing you know; it’s fried fish for dinner.
When I was a kid we used to carry our worms in an old coffee can or one of the flat type tobacco tins that would fit easily into a pocket. If we were going to carry crickets, grasshoppers, roaches, or some other type of bug we made what we called a cricket cage. This was a simple device made of stuff from around the farm.
First we cut a couple of discs of wood out of a dried pine limb.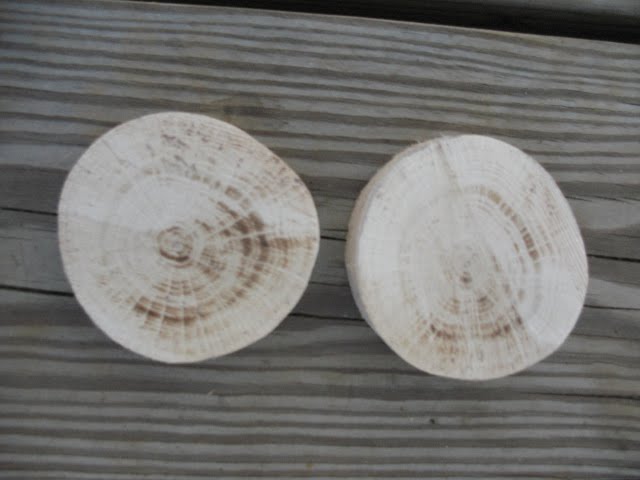
Then we drilled a hole in one of the pieces and banged a couple of fence staples into it.
Next we took an old piece of screen wire and tacked it around the two wooden discs.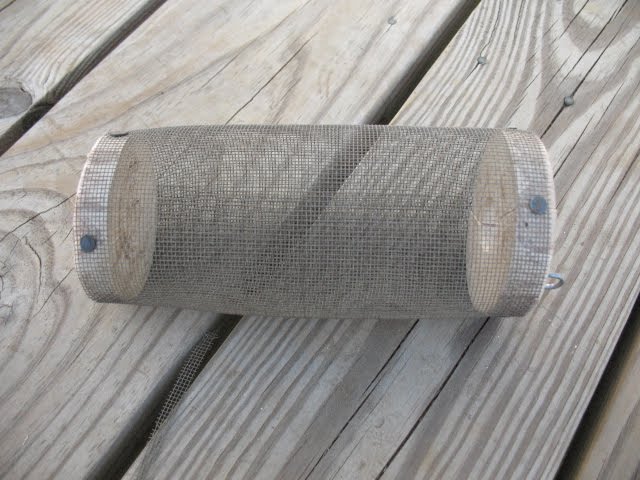
A strap of leather or cordage was attached to the fence staples so that the cage could hang over our shoulder, and an old cork was used to plug the hole. That’s it. Plain and simple country engineering. Just gather a few bugs to go in the cage and head out for the pond. All that’s left is to catch some fish. 
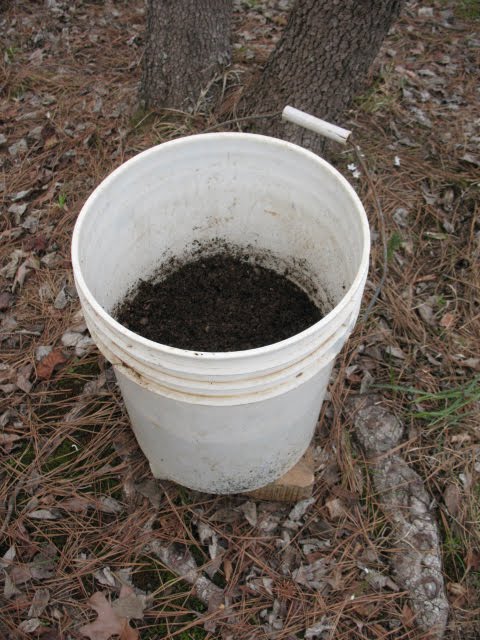
Once you accept the premise that fish will eat about anything, it makes it a lot easier to find bait. Of course the classic fishing bait is worms, and worms can be gathered while working in the garden and saved for later use. Worms like darkness, they like moisture, and they like rich loose soil. In the spring and summer I keep a plastic bucket in the shade next to my garden. I poke holes in the bottom of the bucket and put a few rocks in the bottom, then I fill the bucket about half full of dirt, compost, and manure and then I wet the contents down. When I come across a worm or a grub, I throw them in the bucket; not every worm, because earthworms are good for the garden. When I water the garden I water the worm farm as well. When I want to go down to the pond and go fishing, it’s a simple matter to grab a few worms or grubs and drop them into my bait can with a little dirt. Pictured below: A grub worm, and my mini worm farm.
Another good source of bait is wasp larvae. My granddad used to grab a bunch of broom grass, light it with his cigarette lighter, and hold it up to a wasp nest to chase the adult wasps off. He’d then knock the nest down and carry it with us to the pond. We’d remove the larvae from the nest as needed and use them for bait. Looking back on it I don’t know how he kept from getting stung. Pictured below: top, a red wasp nest; bottom, a black wasp or dirt dauber nest.

Grasshoppers are another good bait. It is best to gather grasshoppers in the early morning when the temperature is a little cool. This way the grasshoppers are not as active and are easier to catch. Crickets, roaches, water bugs, and other assorted insects also make good bait. We used to carry these critters in a little cage with a strap on it. I’ll show you how to make a cricket cage in my next post. Pictured below: Grasshopper.
If you are gathering bait in the wild, look for old rotten logs and bust them open. You will often find bugs or grubs in these logs. If you see a log that an armadillo has been digging on, it is a sure sign that there are bugs or grubs in the log. Pictured below: a log that an armadillo has been digging in, and the same log busted open to show a beetle inside.

You can also turn over rocks, and you will often find something to use for bait under them. Pictured below: Worm under a rock.
Don’t forget your refrigerator or the dinner scraps when you’re looking for bait. Any small scraps of meat, fat trimmings, unused organ meats, fish guts, spoiled lunch meat, or etc. will make good bait.
Before I post my blog about finding bait, I wanted to go on a brief rant about the myths surrounding fishing. I personally am a fly fisherman, and Lord knows that I have spent some bucks on equipment, but what I have written below needs to be said, and I promise that once I have got it out of my system I will continue with my posts about primitive fishing.
There are a lot of myths floating around out there (no pun intended) about fish. One myth is that the fish is a wily creature that is cunning and nearly impossible to catch unless one is intimately familiar with the habits of the fish and knows exactly what equipment and bait to use. Another myth is that the fish is an extremely picky eater that will only eat certain things, and it will only eat them if they are presented in a precise and totally natural manner.
Fact: fish are stupid. They have a brain about the size of a pencil lead, and the most intelligent fish on the face of the Earth is only marginally smarter than most fishermen.
Fact: fish will eat about anything. If a fish is hungry, and if something looks even vaguely like it might be food, a fish will bite it. The fish may be stupid, but it knows enough to know that, “Hey, if its food I’ll swallow it; if it’s not food I can always spit it out.” I have caught fish with bugs, worms, shrimp, chicken livers, canned corn, bacon, spam; hell, I even caught a fish once with a piece of bubble gum. So don’t tell me the cunning fish will only take a number 20 caddis fly that is properly presented on a 5X tippet that is attached to the leader with a correctly tied surgeon’s knot. The fish doesn’t give a care. It just wants a meal.
So why do these myths about fish persist? Have you been into a sporting goods store lately? There is a whole industry that is depending on you to buy a $35,000 fishing boat, a $200.00 boron/graphite fishing rod, a $50.00 reel, a $200.00 pair of breathable waders, a thousand dollars worth of tackle boxes, lures, fish finders, electric filet knives, etc., etc., and etc. Where would these guys be if you went out and caught fish with $2.00 worth of equipment like I do? Answer: they’d be in line at the soup kitchen instead of having their own fishing shows on cable TV.
Here is my open challenge to “professional” fishermen everywhere. I can catch more pounds of fish per dollar spent than any of you guys. Does that sound crazy? Well put the pencil to it. Let’s say a pro catches 1000 pounds of fish using the equipment listed above. That would be $36,450 worth of equipment divided by 1000 pounds of fish, or 36 dollars and 45 cents per pound of fish. If I catch 10 pounds of fish with my $2.00 fishing rig, that works out to 20 cents per pound of fish. See what I mean.
So, sport fishermen, forgive me. I don’t mean to rag on you and demean your choice of a hobby. That’s fine. Spend the money and have a great day on the lake. But this is a blog about survival, and I just want people to understand that if you want to catch fish to eat it doesn’t really require a bunch of costly equipment. Just remember, fish are not that smart. If they were they’d be mounting humans on their walls.
For fishing all you really have to have is a hook and a line, but a weight and float will make fishing easier. For primitive weights I use lead rifle balls or buckshot and partially split them with my knife. These weights are almost identical to split-shot weights that you buy at a sporting goods store. Of course you can use anything for a weight as long as you can attach it to your line and as long as it is heavier than water. Remember, the main purpose of a weight is to hold your bait down in the water. If it will pull your hook down, that’s all you need. Pictured below: Splitting a lead rifle ball with a knife and the finished split ball.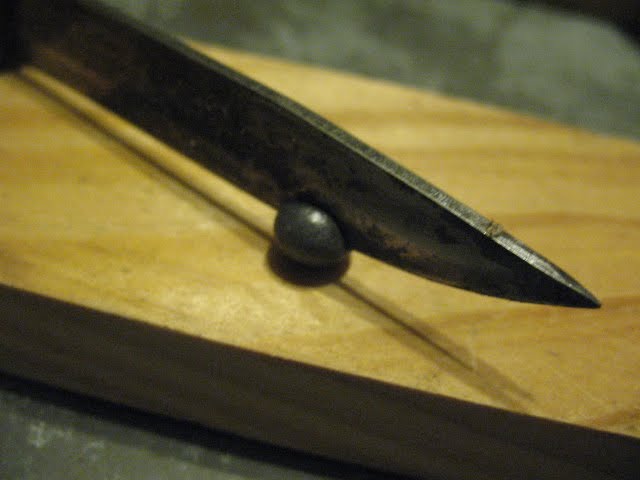

A float or strike indicator is not at all necessary for fishing. I’ve caught many a trout with a fly rod and no strike indicator, but an indicator does make it easier to know when you’re getting a bite, and if you are fishing multiple lines you almost have to have an indicator. Remember a float is not just to see if you are getting a bite. It also serves to keep your bait suspended at a certain level in the water.
If you are making floats at home you can use old wine corks to make some good ones. Use a sharp knife to cut the corks about an inch to an inch-and a-half long, then drill about a quarter inch hole through the corks. This the hardest part because the corks will want to split if you go too fast. I actually made a little tool to drill corks with. I took a piece of quarter inch metal tubing about 3 inches long and filed little teeth into one end. I chuck this up in my drill and drill very slowly through the cork. Pictured below: Drilling a cork with my home-made bit and cork with finished hole.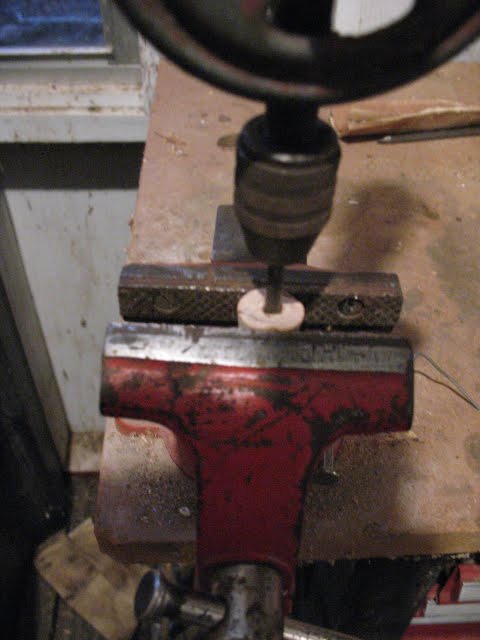
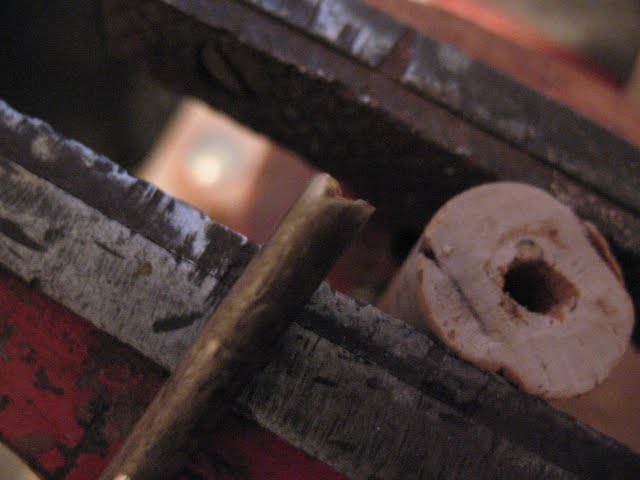
Once you have your cork drilled you can cut a small stick that will fit tightly in the hole. Don’t make the stick too oversize or you may split the cork when you push the stick in. Pictured below: Cork and stick, finished assembled float, and float attached to linen fishing line.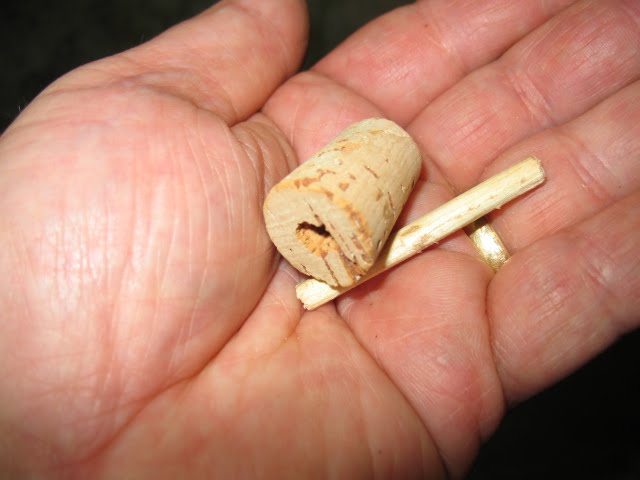


I saw an article recently that showed how to make floats out of dried corn cobs. Basically the same procedure as above but you use a section of dried corn cob instead of a cork. I haven’t tried this one yet, but it sounds reasonable. I plan to save a few cobs out of my garden this year and give it a try.
This post is about my primitive fishing gear; not to be confused with my survival fishing gear. To me, when I say primitive gear, I’m talking about homemade stuff that I can make with some simple tools out of things around the old homestead. When I say survival gear, I’m talking about stuff that I make out in nature using only natural materials, and using my knife as my only civilized tool. So this primitive fishing gear is made from common items found around the house, and it is made with a few simple hand tools. Pictured below: Primitive hooks made from wire and nails. Some have barbs, some don’t.
Let’s start with a primitive hook. If you have a vise, a hammer, a small file, and a pair of needle-nose pliers; it is not hard to make fish hooks out of the right kind of wire. What is the right kind of wire? Well, it can’t be too soft. If the wire is too soft it will straighten out when a fish starts fighting against it, and you will probably lose the fish. I have some wire that is fairly stiff that makes good hooks. If your wire is too soft, you can try heating the finished hook until it is cherry red and then quenching it in water. Sometimes this will harden the metal. Pictured below: Wire for hook making. 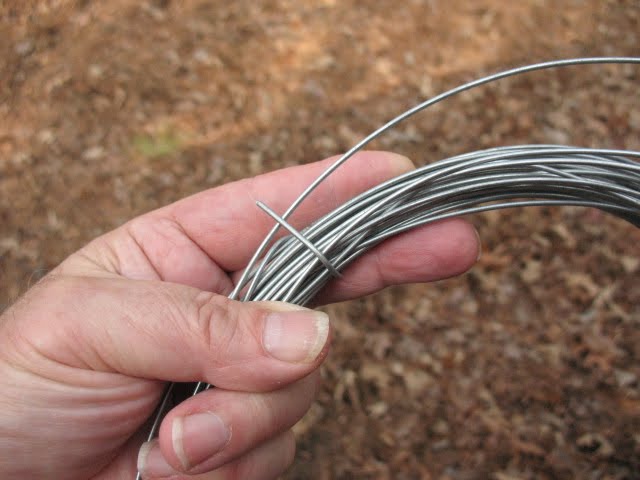
Steel nails can be used to fashion hooks, although sometimes nails are too hard. Again, you can do a little amateur blacksmithing by heating the nail until cherry red, then bending it, and hammering down the end for a barb. A lot of work for one fish hook. It will definitely make you wish that you had bought a few hundred ready made hooks. When I was a kid, we used to catch small fish on a bent straight pin. I haven’t tried that in a few years (like 50) but it might be fun to try again. Pictured below: Nails for hook making.
So let’s take some wire and make a hook. The first thing to do is to flatten out a small portion of one end of the wire. This is the part that we will file into a barb. The flattening and filing is hard to do after the hook has been bent, so we’ll do it while the wire is still straight. Now put the piece of wire in your vice and use your file to shape the flat into a barb. Make sure that the point is sharp so that it will penetrate quickly and easily. The barb does not have to be large. In fact you don’t have to have a barb at all. I have caught a lot of trout on barbless fly hooks, but if I’m fishing for dinner I would like to make as sure as possible that my hook stays attached to the fish that swallows it. Pictured below: Finished barb.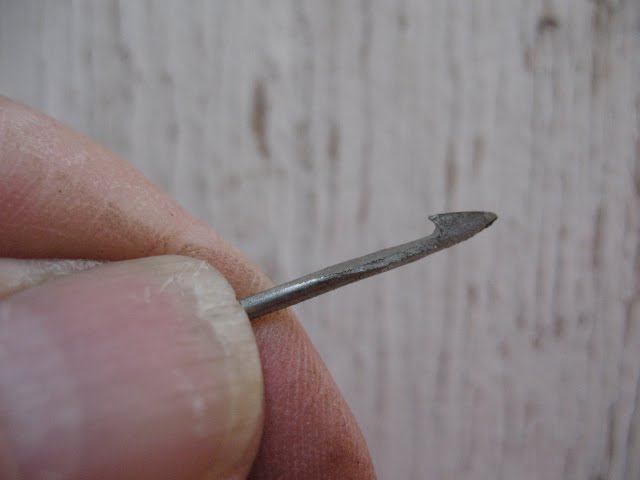
After you have the barb made, you can take your needle-nose pliers and bend the hook. After the hook is bent, use your pliers to cut the shank to length. Pictured below: Bent hook.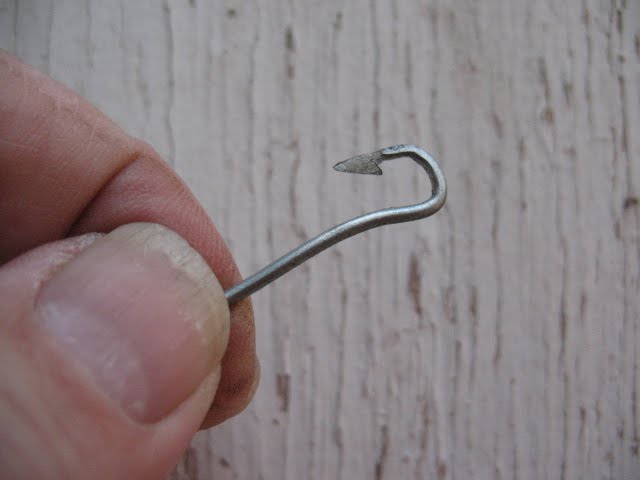
Do you need an eye on your hook? Not really. Many old time hooks did not have eyes. All you really need to do is wack the end of the shank a couple of times to spread the metal out a little. Pictured below: Shank flattened out and ready for line to be attached, and the finished hook. 
Once you have a hook, you need a line. Almost any small string will do as long as it’s strong enough to hold a fish. I usually use some small linen twine, but you could use nylon string, bailing twine, or even dental floss. If the string is too big you can unravel it into smaller strings. You will probably need about fifteen or twenty feet of line. Pictured below: Linen fishing line. 
Your fishing line can now be tied around the shank using a snell knot, and the wide spot on the end of the shank will keep it from slipping off. Pictured below: Line attached to hook.
All we need now is a weight, a float, and some bait; and we’re ready to go fishing.
When I was a kid we did all of our fishing with cane poles. The poles were probably about 12 feet long, but then I was only 6 or 7 years old so they seemed like they were as long as a football field. I remember clearly that it was a real pain to get through the woods and down to the pond with these poles. They would hang up on everything. I still have a cane pole that I use occasionally, but now I’m real up-town; I have a two-piece cane pole. The total length of my pole is about eight feet, and it is much easier to carry the two short sections through the woods. Pictured below: My two-piece cane pole. 
To make a good cane pole, first you need to locate a stand of river cane. You will need to cut at least 2 canes. One cane should be about Half-Dollar size at the base, and the other one should be Quarter size at the base. You can use the canes green but they will be better if you set them up to dry for a few weeks. Pictured below: A nice stand of river cane.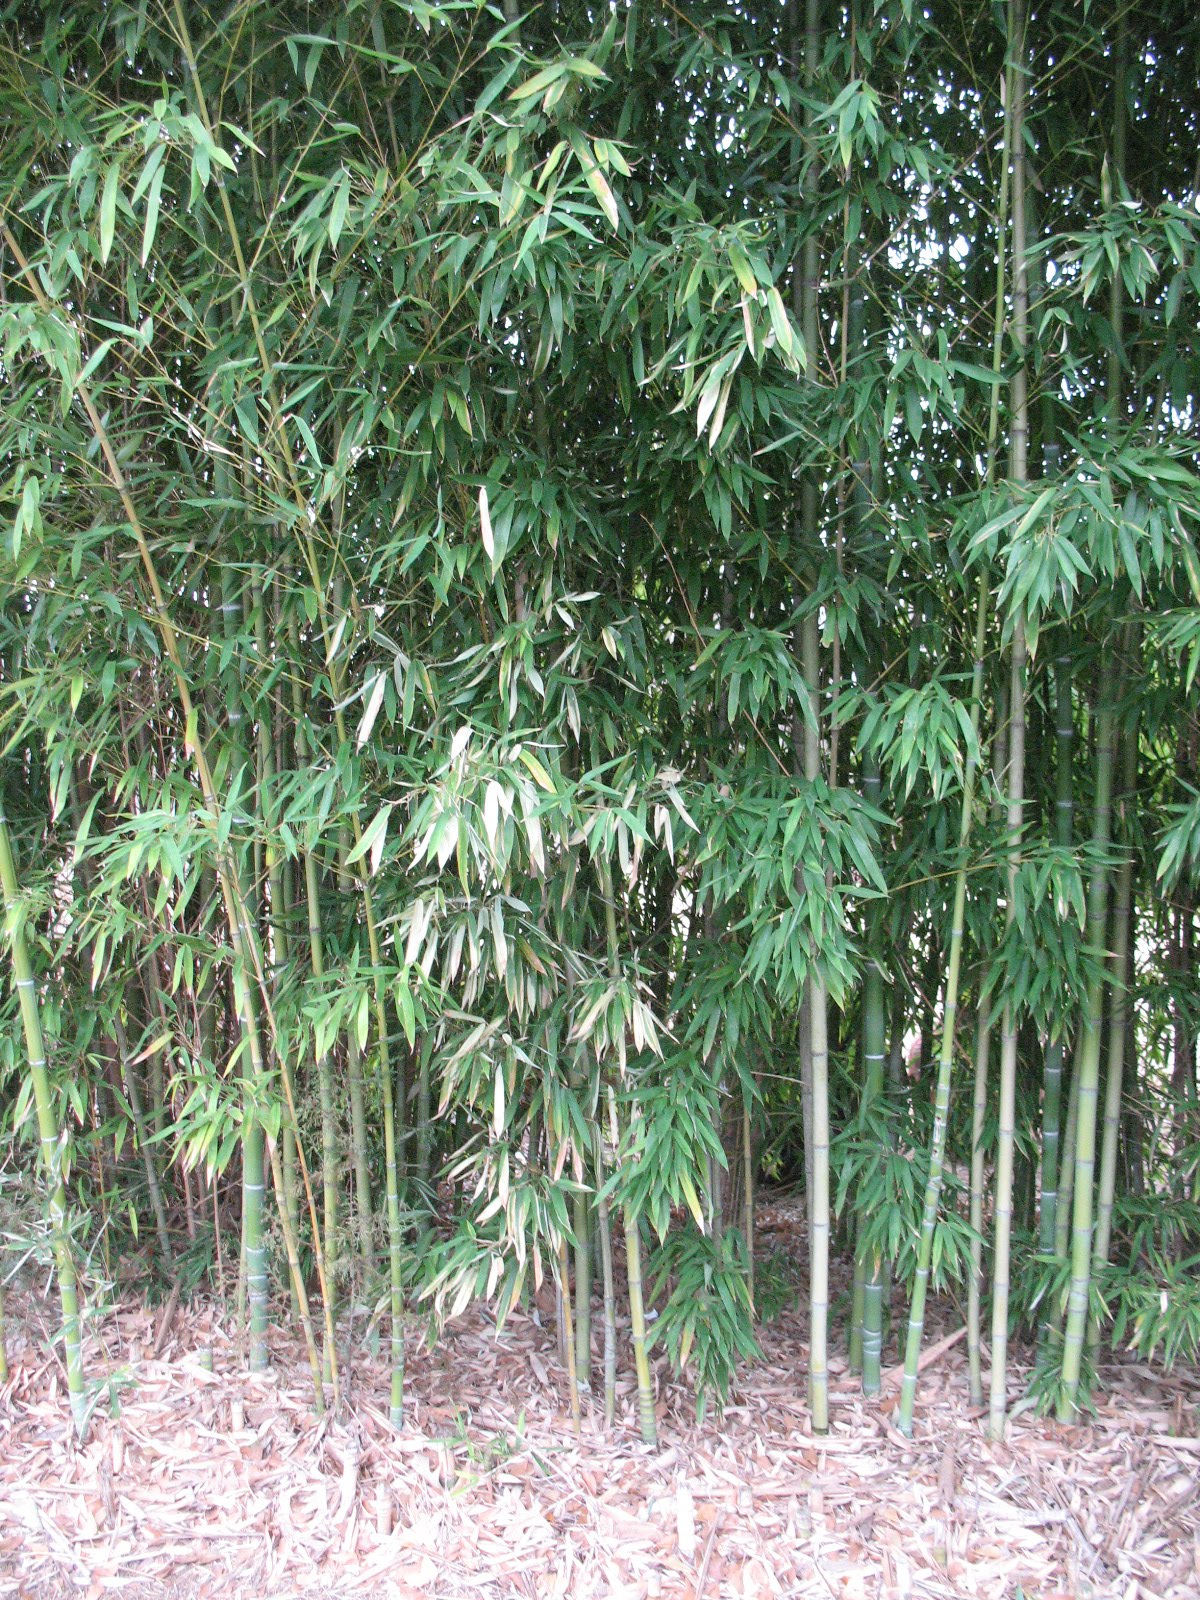
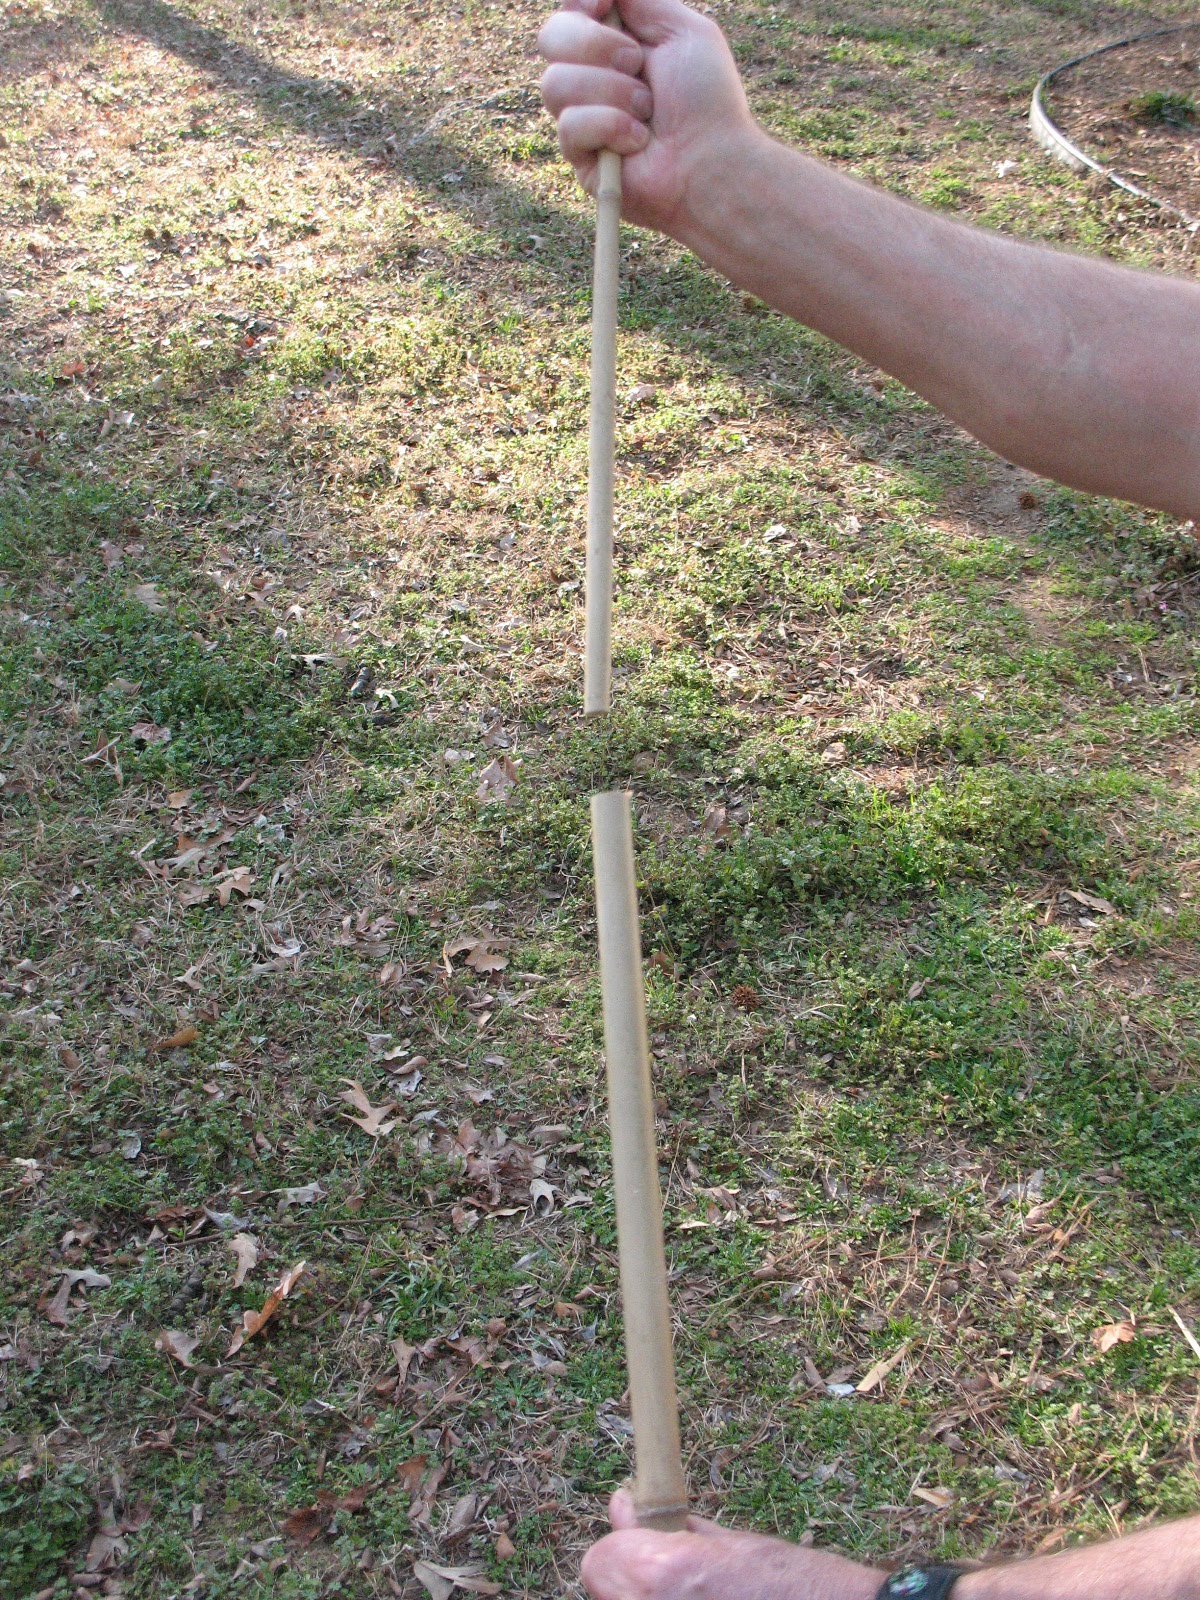
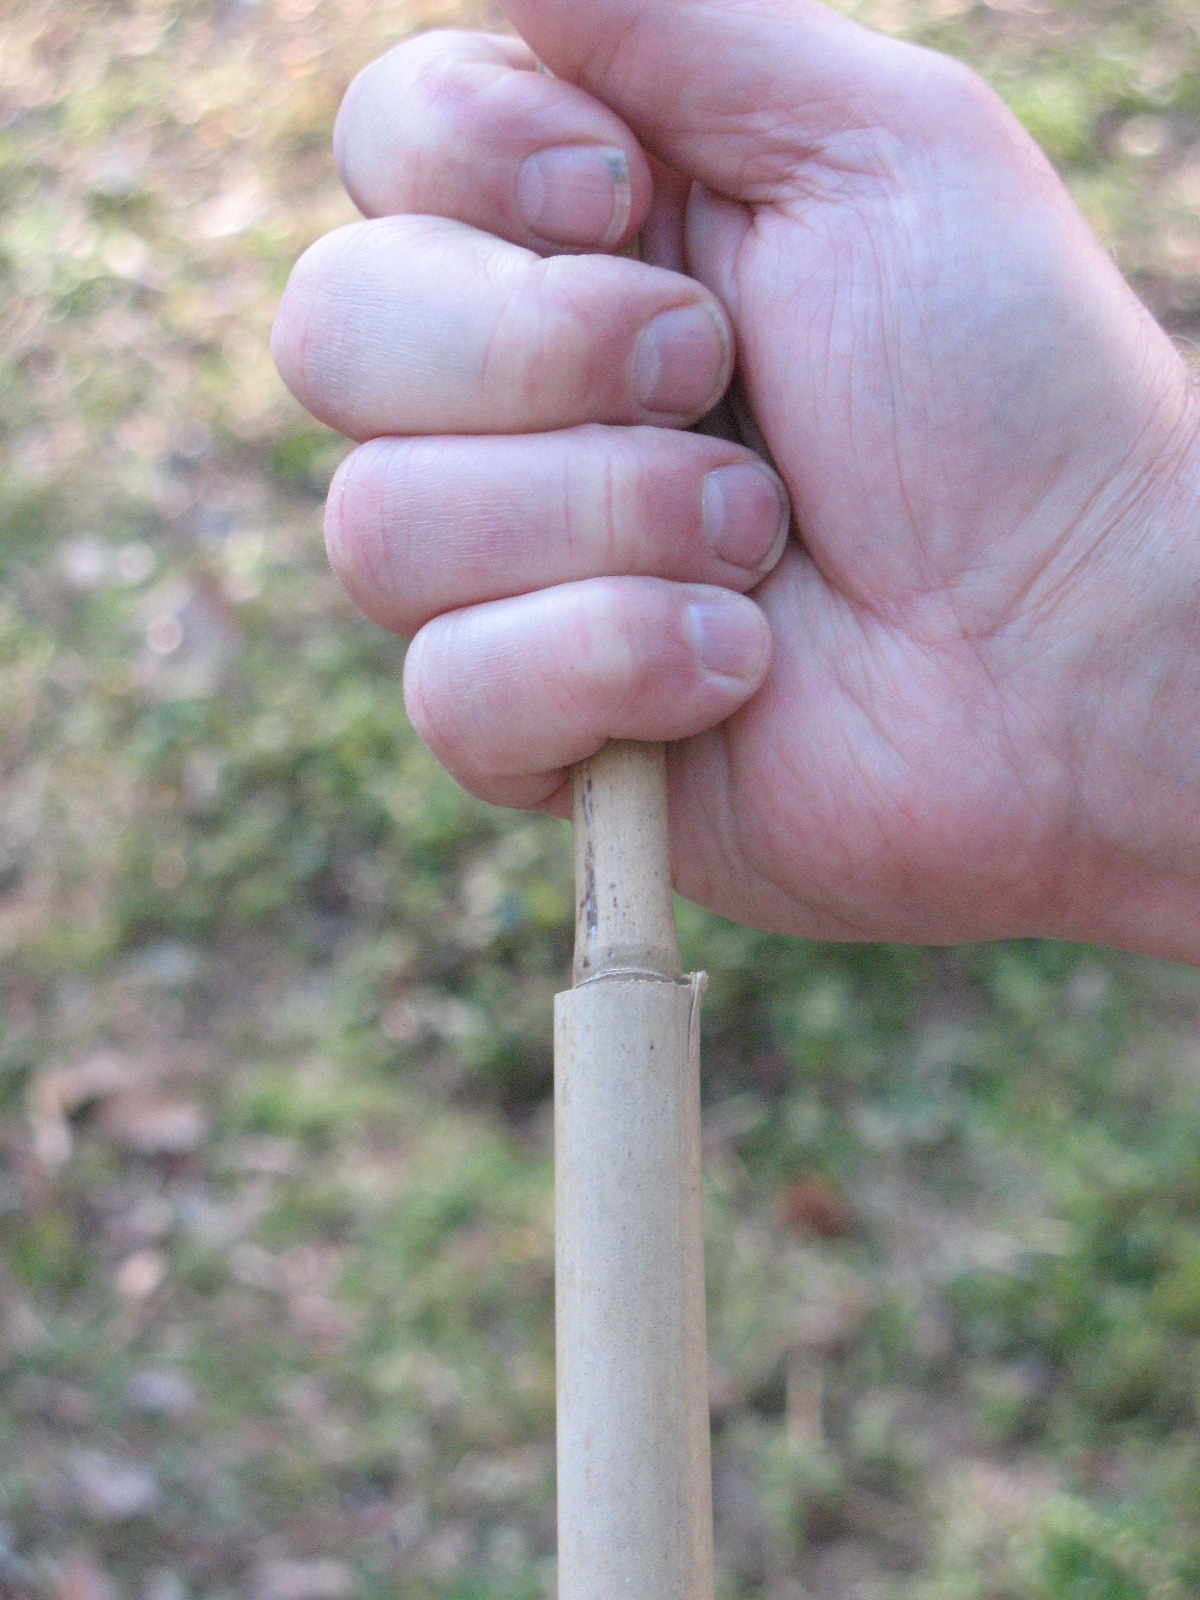
Now comes the tricky part. You want to cut the canes so that the base part of the smaller cane will slide down into the top joint of the larger cane. This means cutting the top part off of the big cane, and the bottom part off of the smaller cane. The fit between the canes must be tight enough to hold the two canes together securely, but not so tight that you split the cane. If the fit is too loose a good fish may carry off the top of your pole. You can cut the canes so that you end up with any length pole that you want. I prefer a finished pole that is eight to ten feet long, but it’s up to you. Pictured below: Two pieces of pole, pole joint about to be joined, and pole joint joined.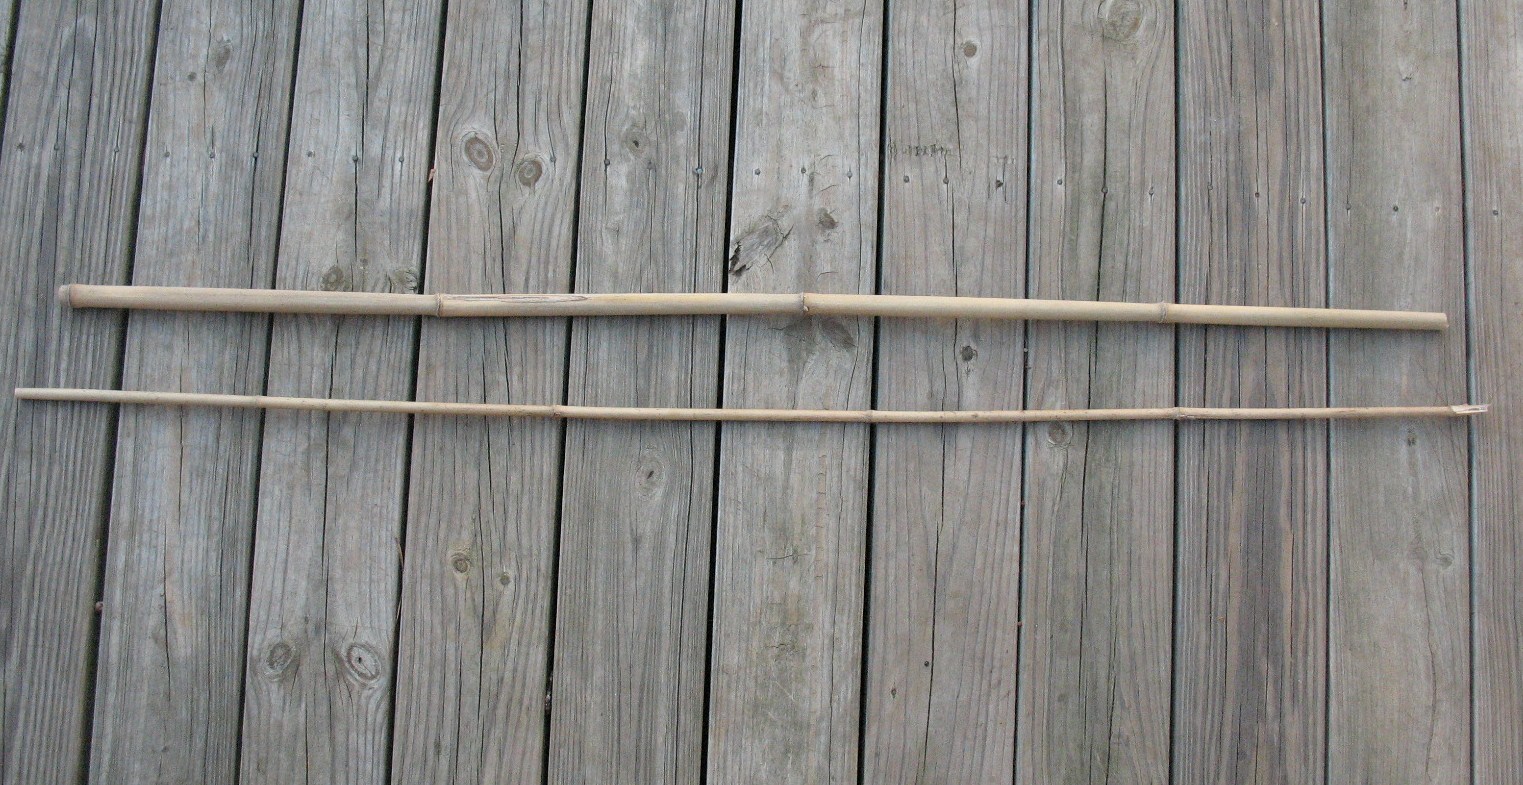
When you tie your line onto the pole I suggest that you tie the end of the line to the top joint of the bottom cane and then extend it up to make a second tie on the tip of the pole. This way if the tip of your pole breaks, or if the smaller cane is pulled out of the pole, you will still be able to save your hook and line, and maybe your fish.
