For those of you who have been bored by this series of posts, this will be my last post on blowguns and blow darts for a while. I may re-visit this subject later. Here is the promised post about making paper cone blow darts.
One of the easiest kinds of blow darts to make is the paper cone blow dart. Start off by cutting down your dart shafts to about six inches in length.
Next make a pattern for the cone out of cardboard or stiff paper. The pattern shown below is one inch wide at the bottom, three inches wide at the top, and two and three-quarters inches long. Pictured below: Pattern for paper cone blowgun darts. 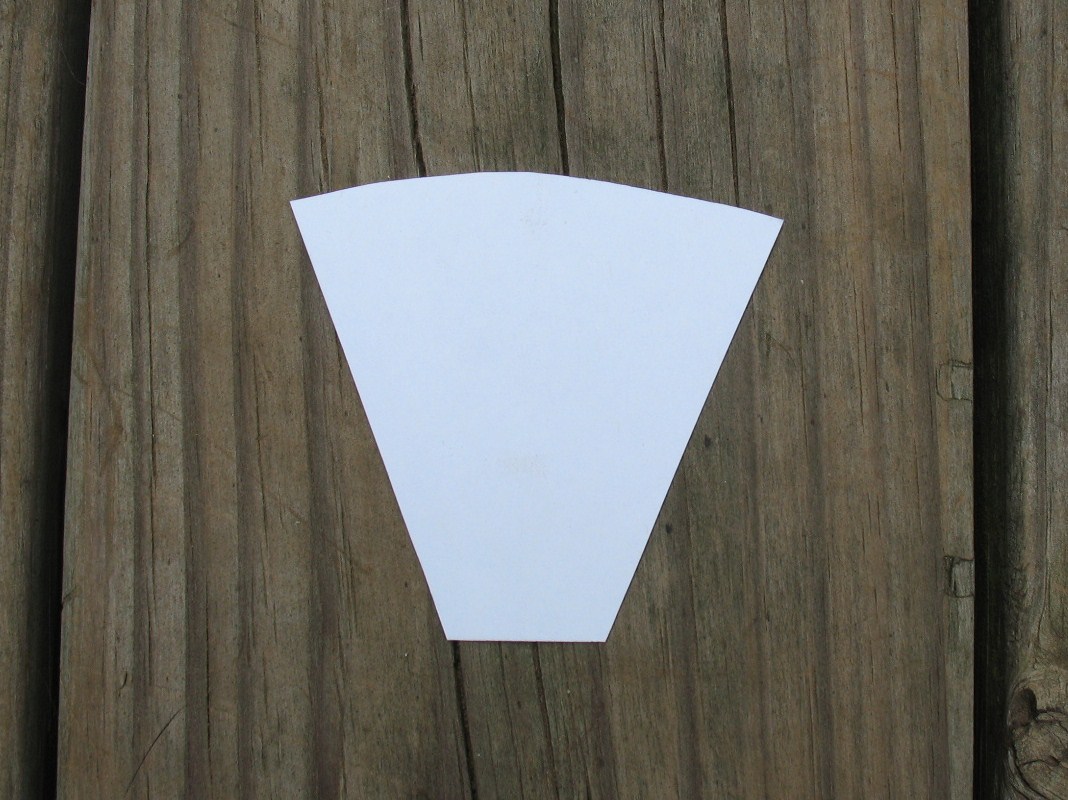
Trace around the pattern on regular weight paper and cut the shape out. Roll the shape around the dart shaft into a cone and glue the edge down. Now remove the shaft from the cone and drop a little glue down into the cone. Stick the shaft back up into the cone with about an inch inside the cone. Let the glue dry for a little bit, then wrap the front end of the cone with some sewing thread, tie it off, and put a drop of glue on the thread to secure it. Pictured below: Finished cone blow darts.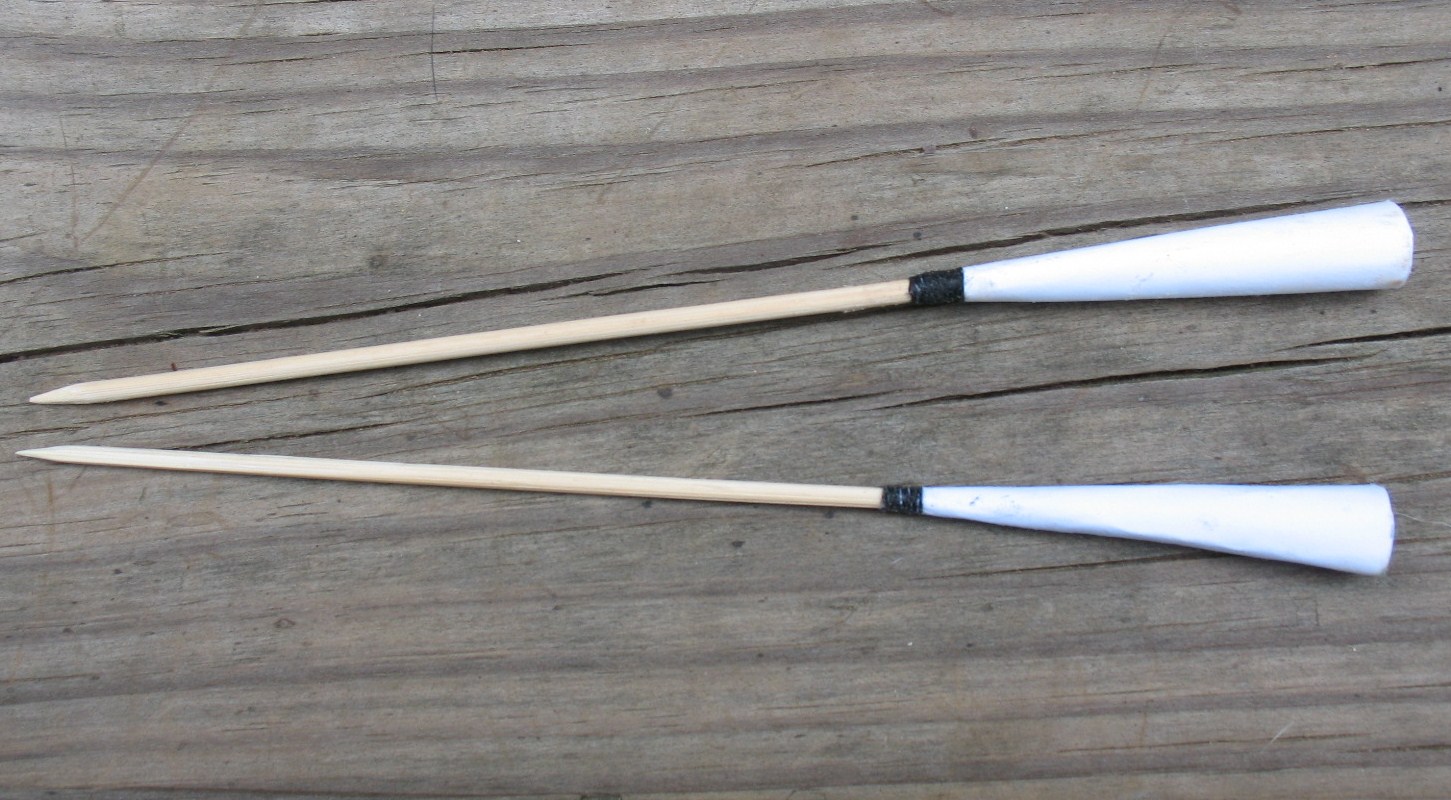
That’s all there is to it. The pattern above is good for a blowgun with about a one-half inch bore (50 caliber). Pictured below: top, Loading cone dart in blowgun made of half inch copper tubing; bottom, blow dart in target. 

Fletching a blowgun dart with cotton is the same basic process as fletching a blowgun dart with thistle, but it is considerably easier. Many people don’t realize that cotton was a native crop in the New World. In fact, the earliest know domestic production of cotton occurred in Mexico several thousand years ago. The Cherokee were raising cotton by the mid 1700’s, and both they and the Choctaw used raw cotton fibers to fletch blowgun darts.
I like to fletch darts with raw cotton because that is the traditional way. If you have access to a cotton field you can pick the cotton boles and clean them yourself, or you can go to a cotton gin and get some cotton that has already been ginned. If you can’t get raw cotton you can always use store bought white cotton balls. They will work fine, but that snowy white fletching just doesn’t look right to me. Pictured below: top, Unginned raw cotton; bottom, ginned raw cotton.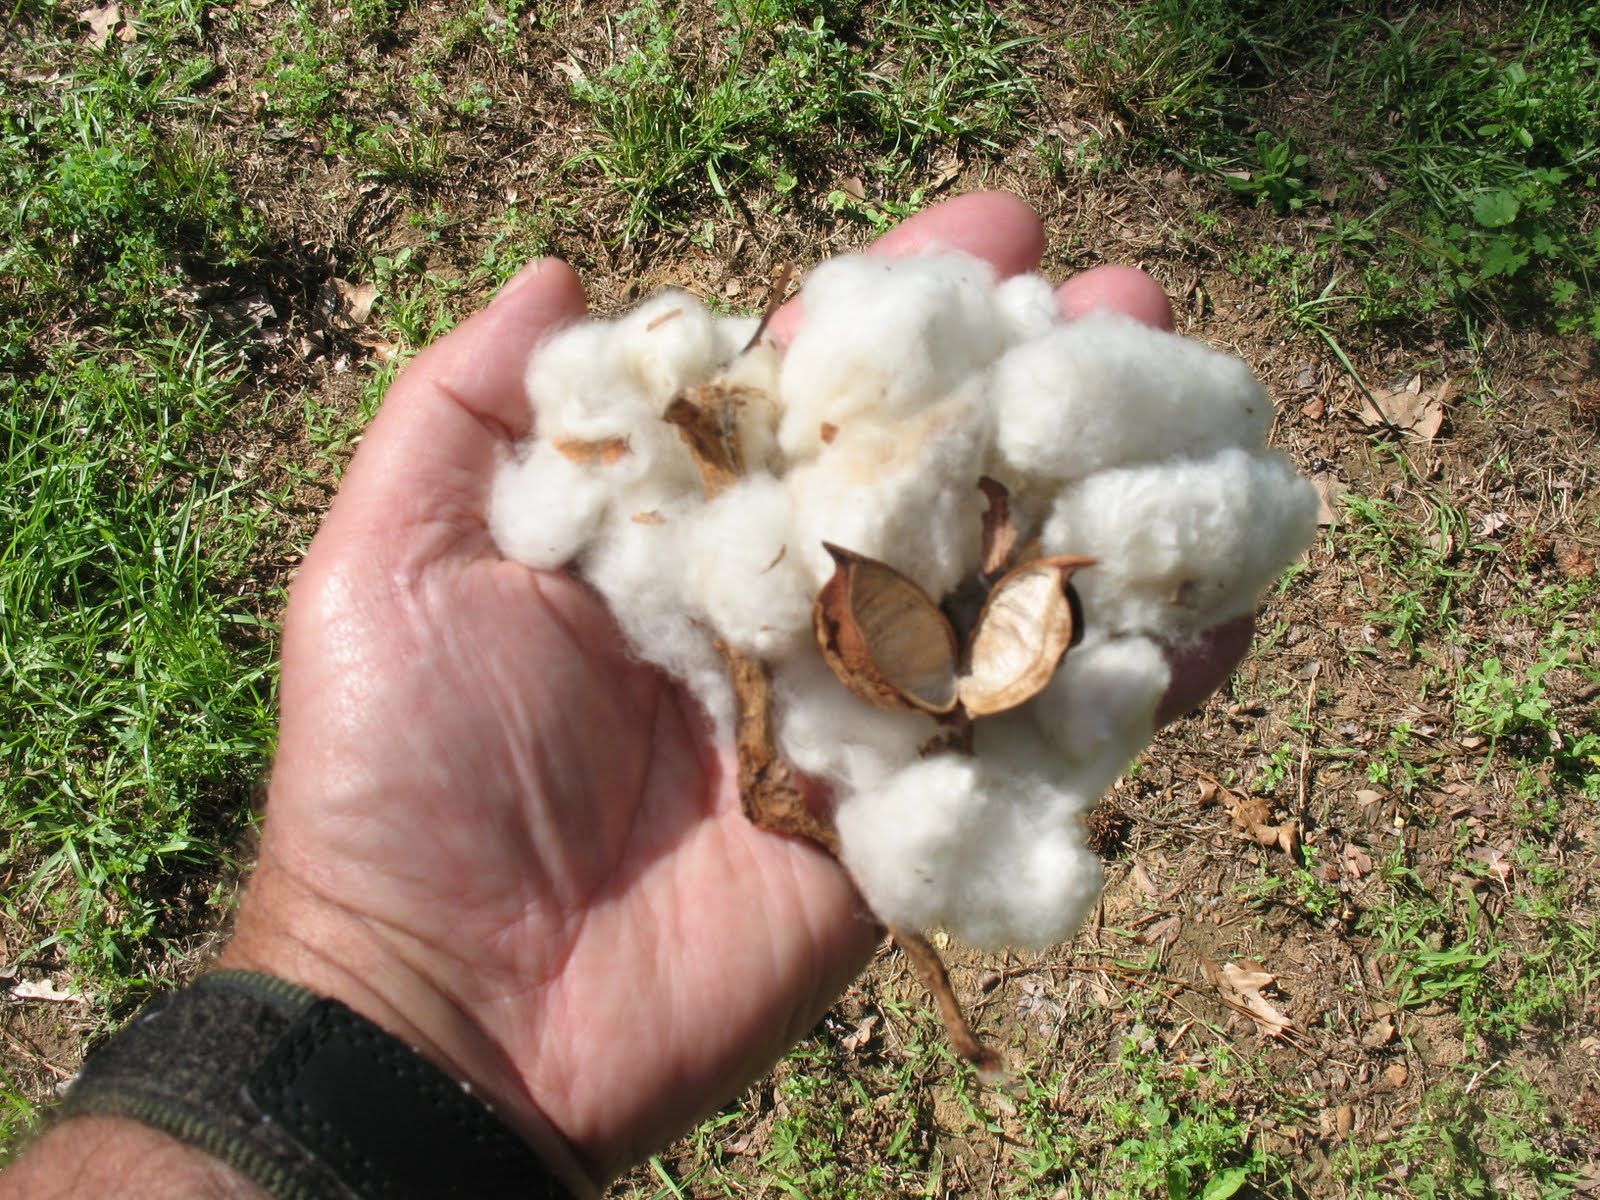
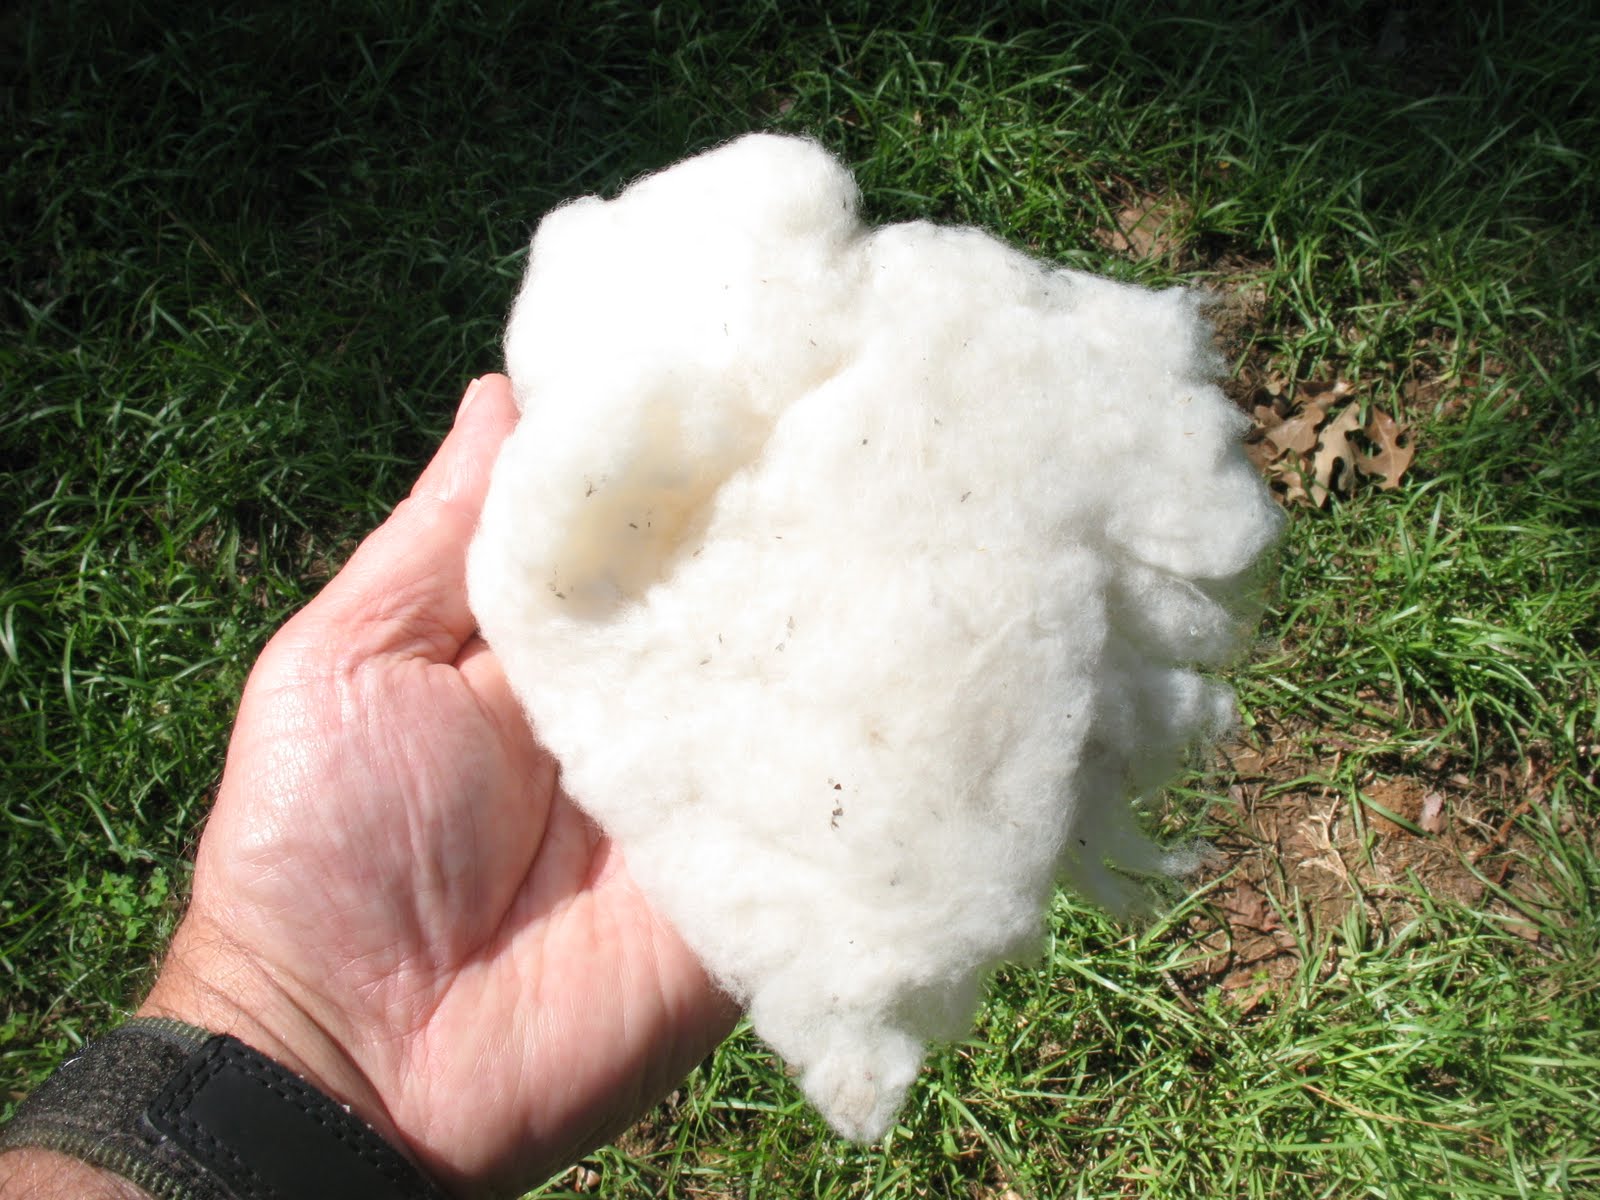
Once you have obtained your cotton, you want to pull it apart to kind of stretch out the fibers before you start applying it to a dart. Pictured below: Stretching cotton fibers.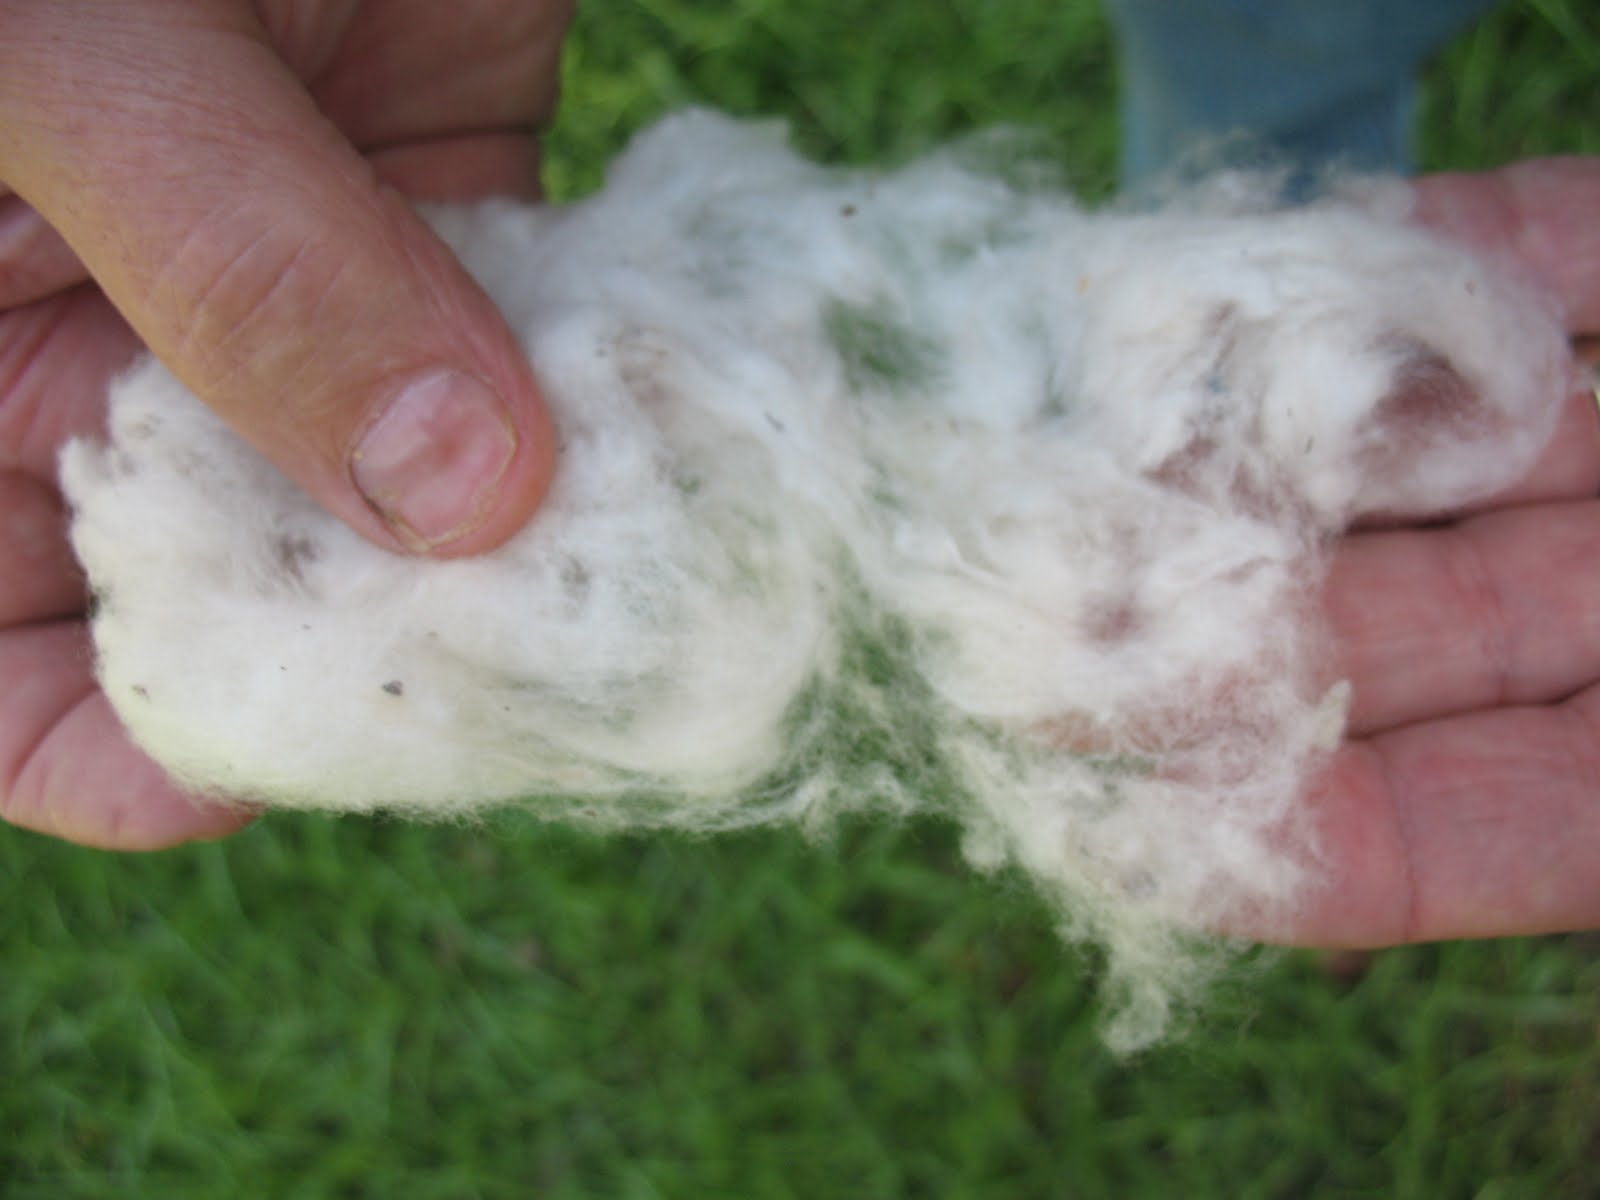
When you have your cotton prepared, take a dart shaft, split the end, and wedge your string in it just like for a thistle dart (see previous post).
Now you are going to hold the long end of the string in your mouth, the dart shaft in your right hand, and the cotton fibers in your left hand.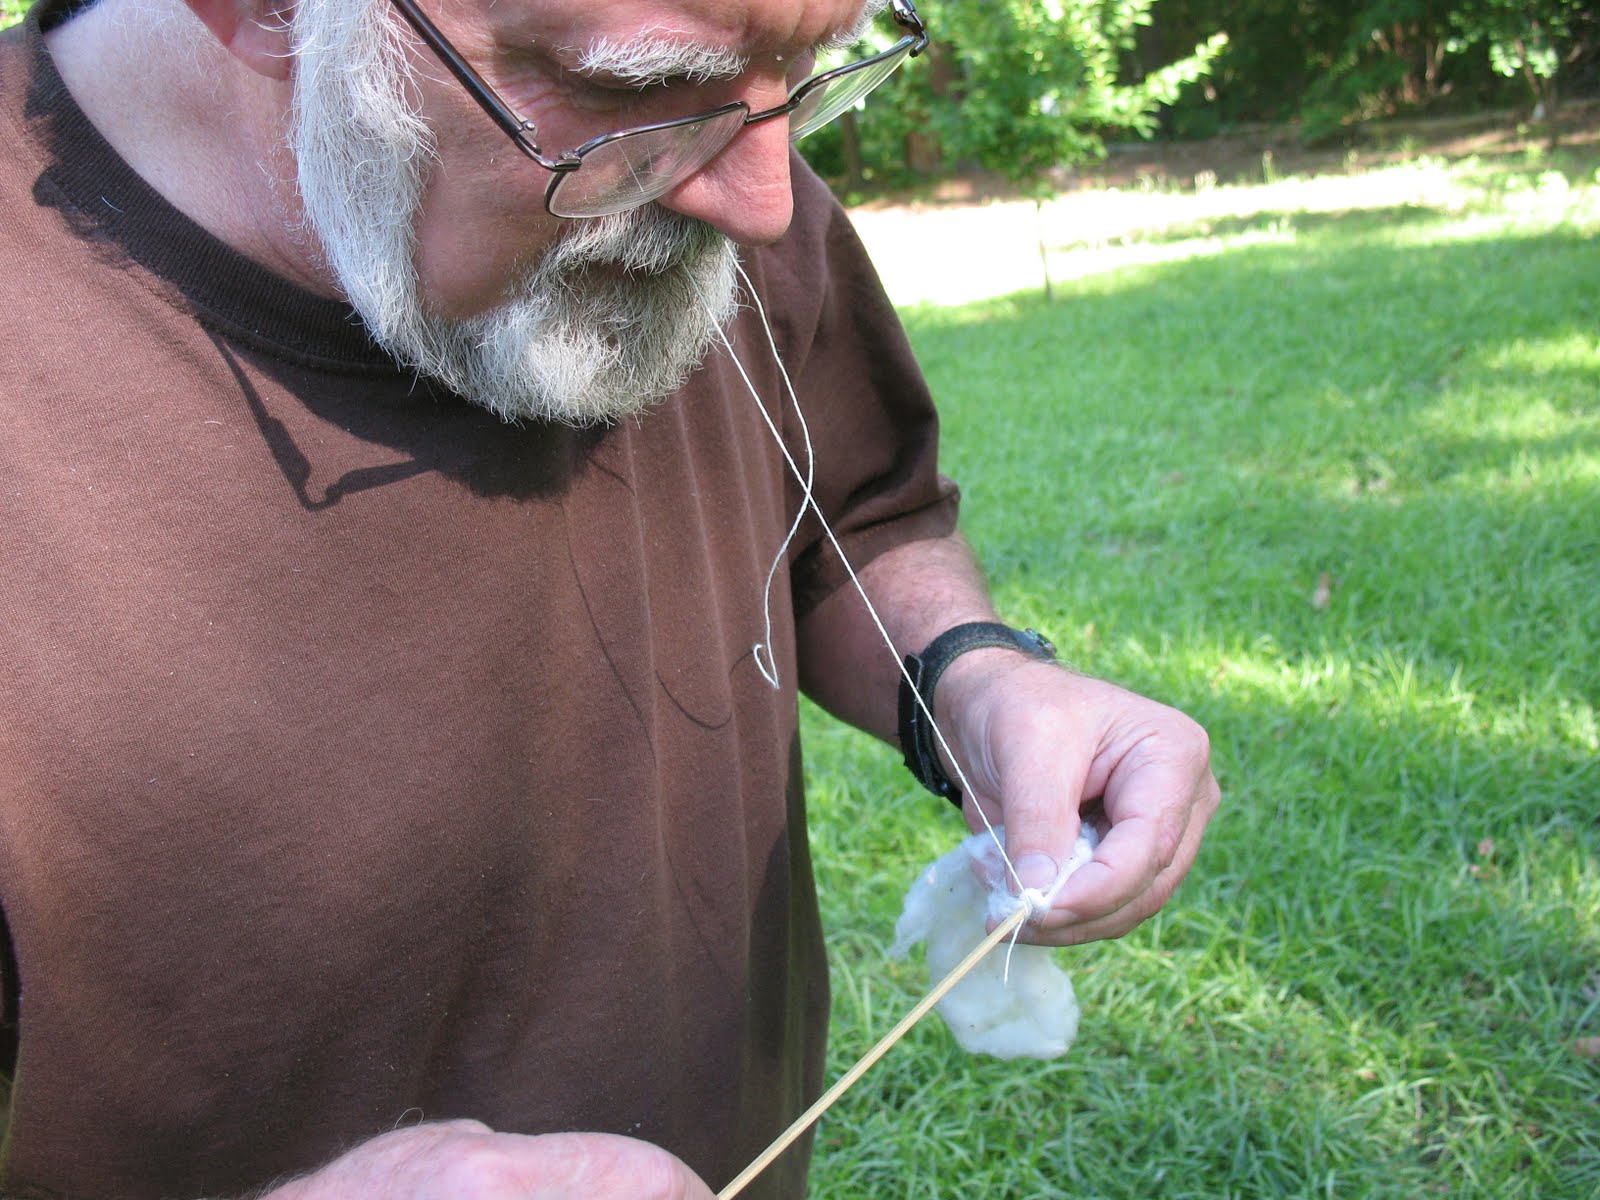
Slowly roll the shaft away from yourself; and as the string wraps around the shaft, insert cotton fibers, a few at a time, under the string. It takes a little practice to keep it smooth.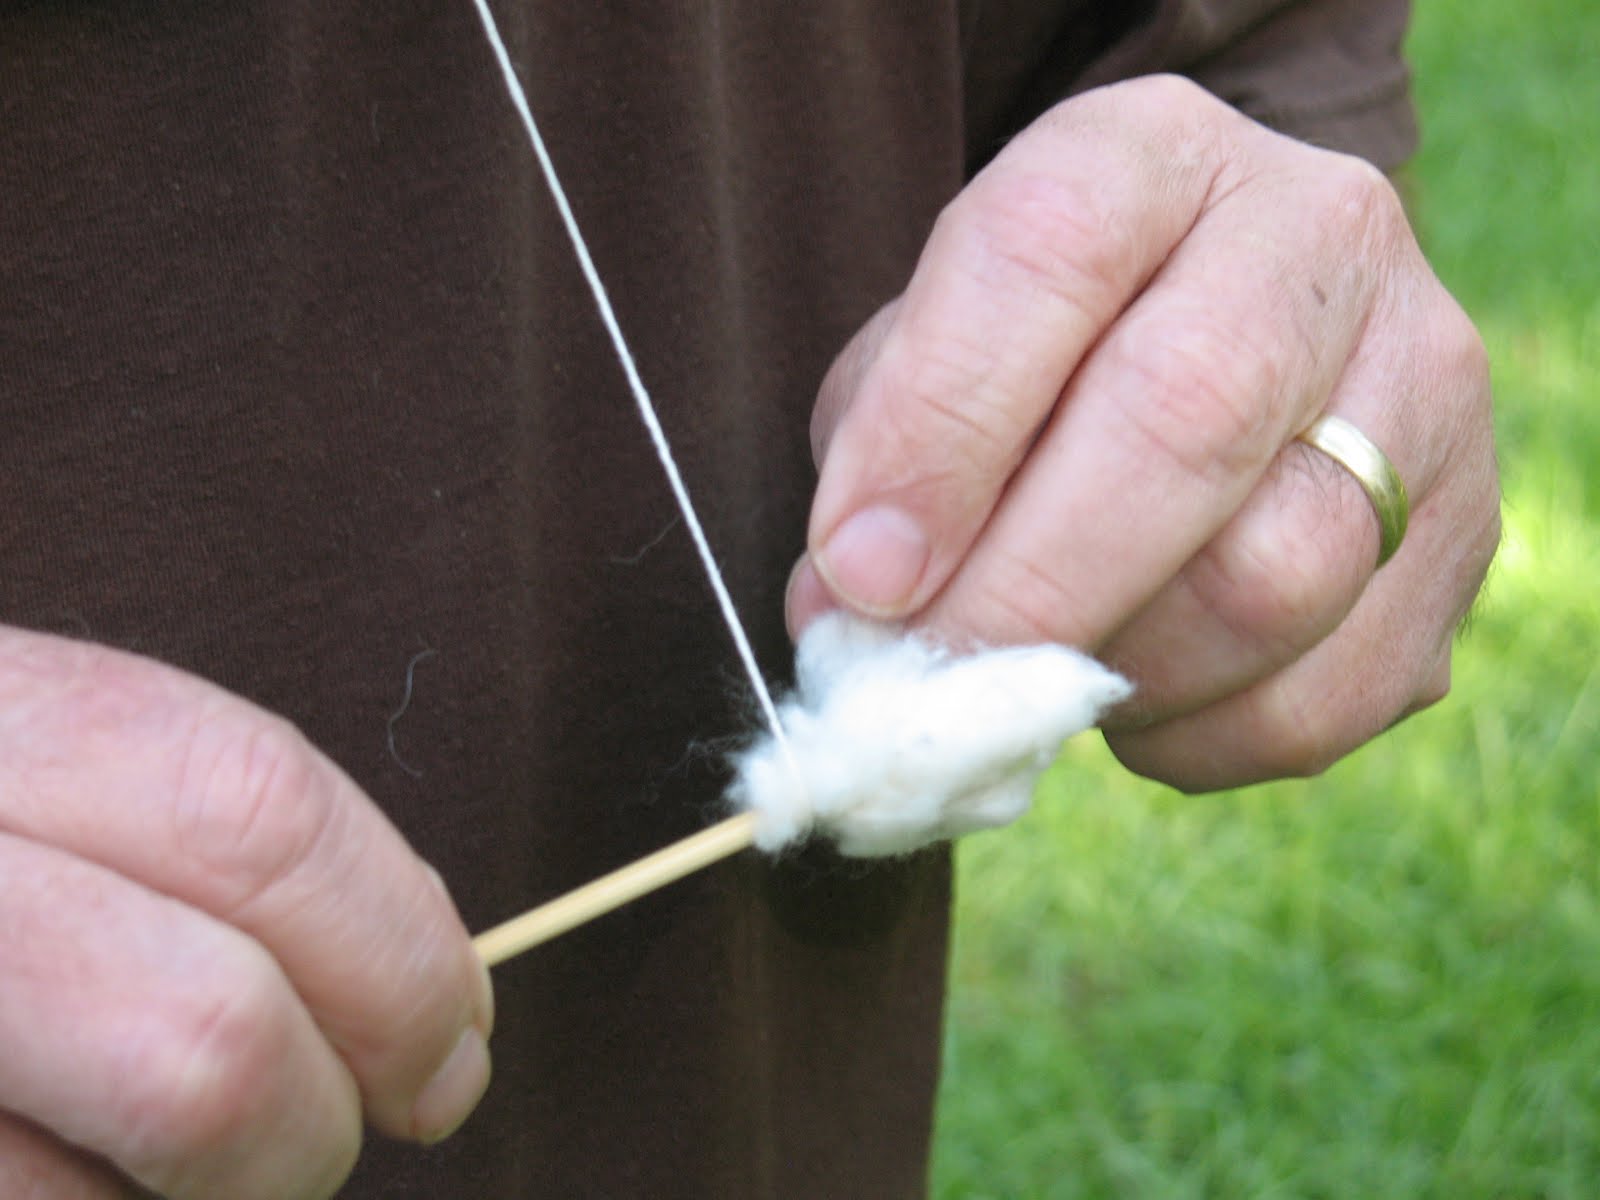
Continue spiraling the string down the shaft until you have about two inches of fletching on the dart.
Next wrap the string around the bottom of the fletching several times and tie it off with a couple of half-hitches. Apply a dot of glue to secure the knot.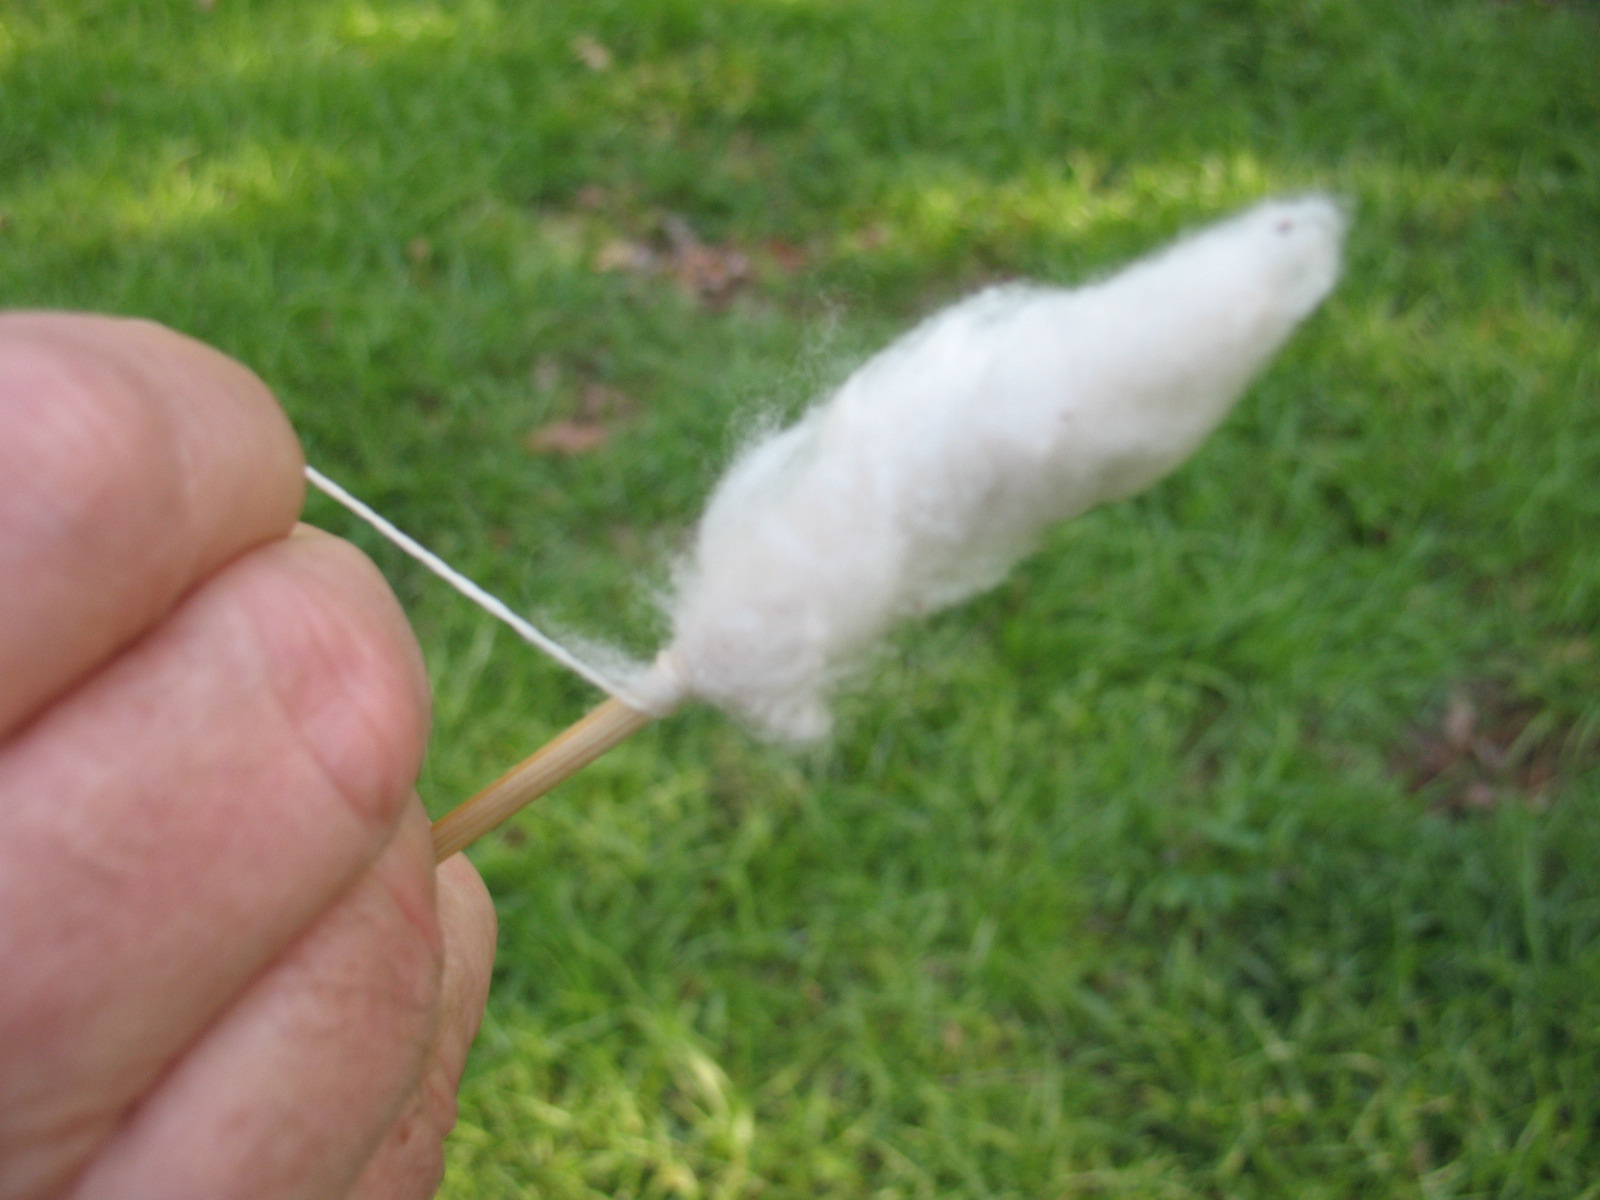
Twirl the dart to fluff the fletching, and then smooth it down.
You can use a sharp knife or scissors to trim up the fletching, and then you are done.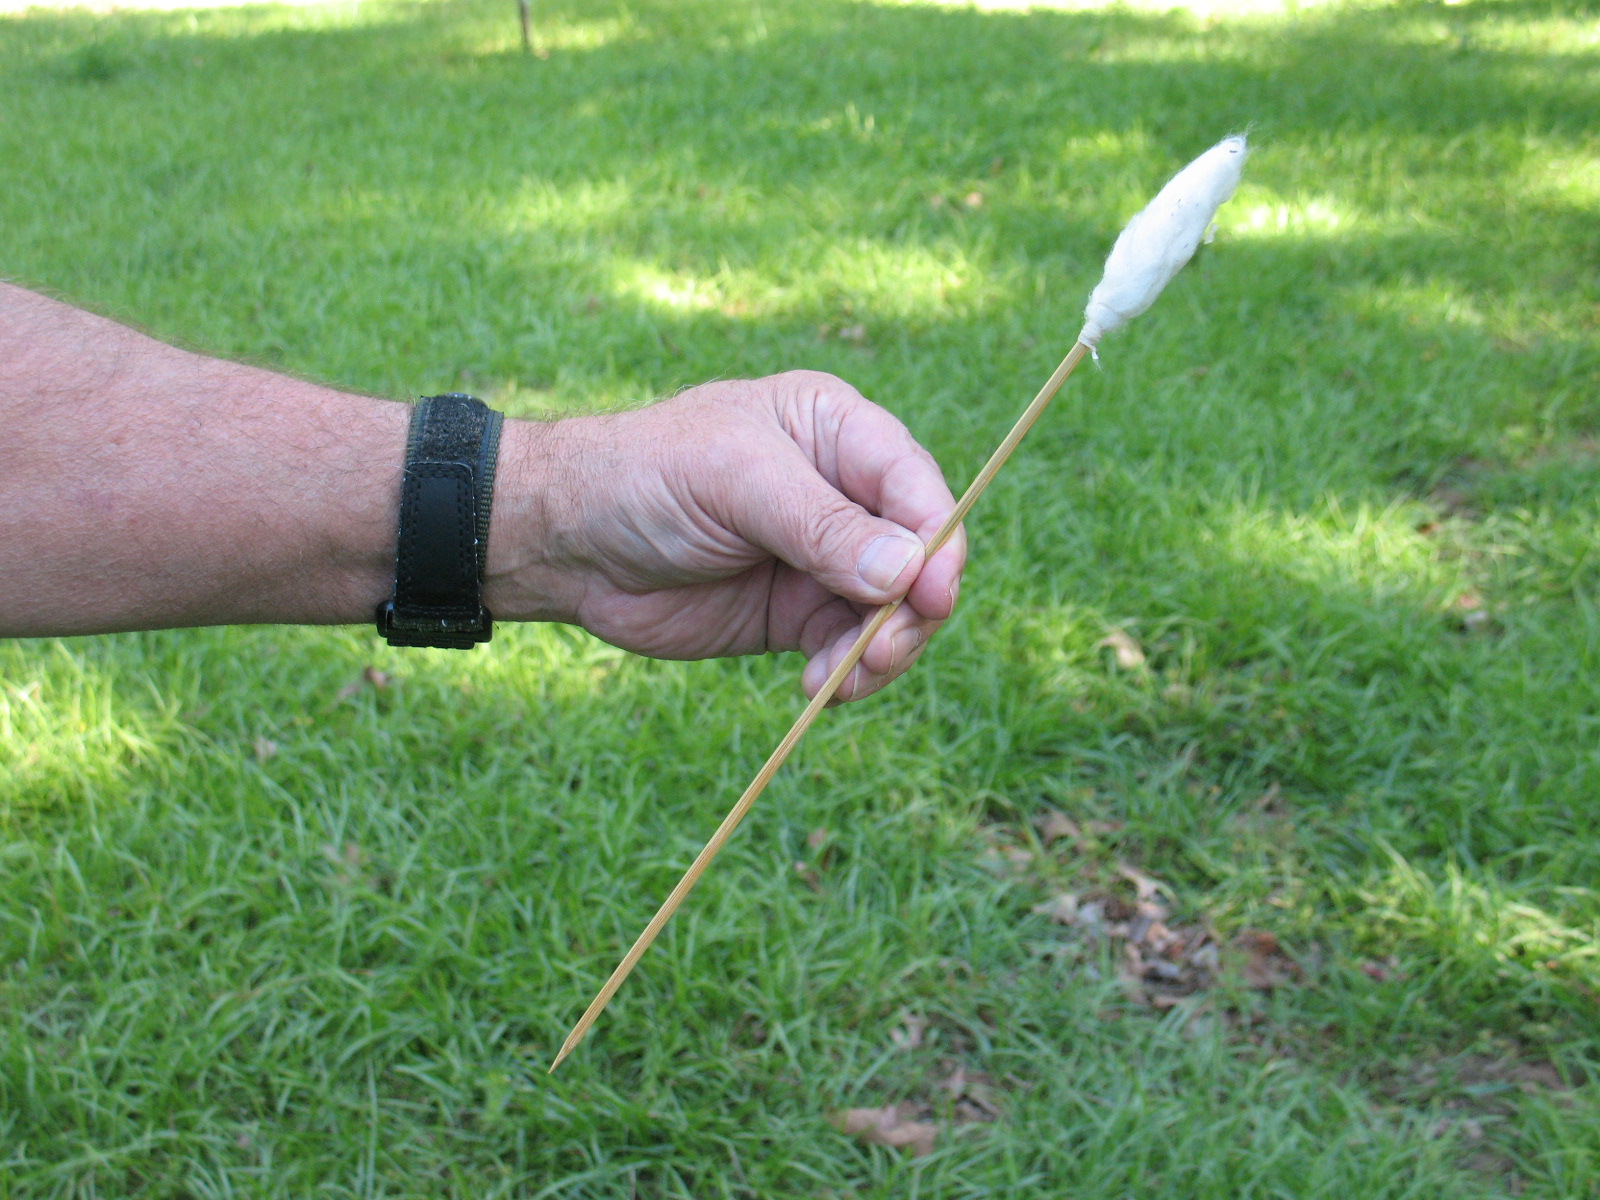
The only thing remaining is to insert the dart in your blowgun and test it out.
Now to the business of attaching the thistle fletching to your blowgun dart. To give you an overview of the process, what you are going to do is spiral a string down the dart shaft, and as you are wrapping this string you are going to be inserting thistle fibers under it. The tightly wrapped string is tied of at the front end of the fletching and holds the thistle fibers in place. So let’s do it. Hopefully the pictures will help you understand this somewhat complicated process.
First we are going to attach the string to the dart shaft. Take a sharp knife and make a small split in the back end of the shaft. The split shouldn’t be too deep; maybe a half inch. Now take a piece of string (this can be linen string, kite string, a piece of yucca fiber, or anything of a similar size) and cut it about two feet long. Gently wedge the string down into the split that you just made in the dart shaft. Leave about an inch hanging out on one side of the split. Now set the shaft and string aside while you prepare the thistle. Pictured below: top, splitting top of dart shaft; bottom, string inserted in top of dart shaft.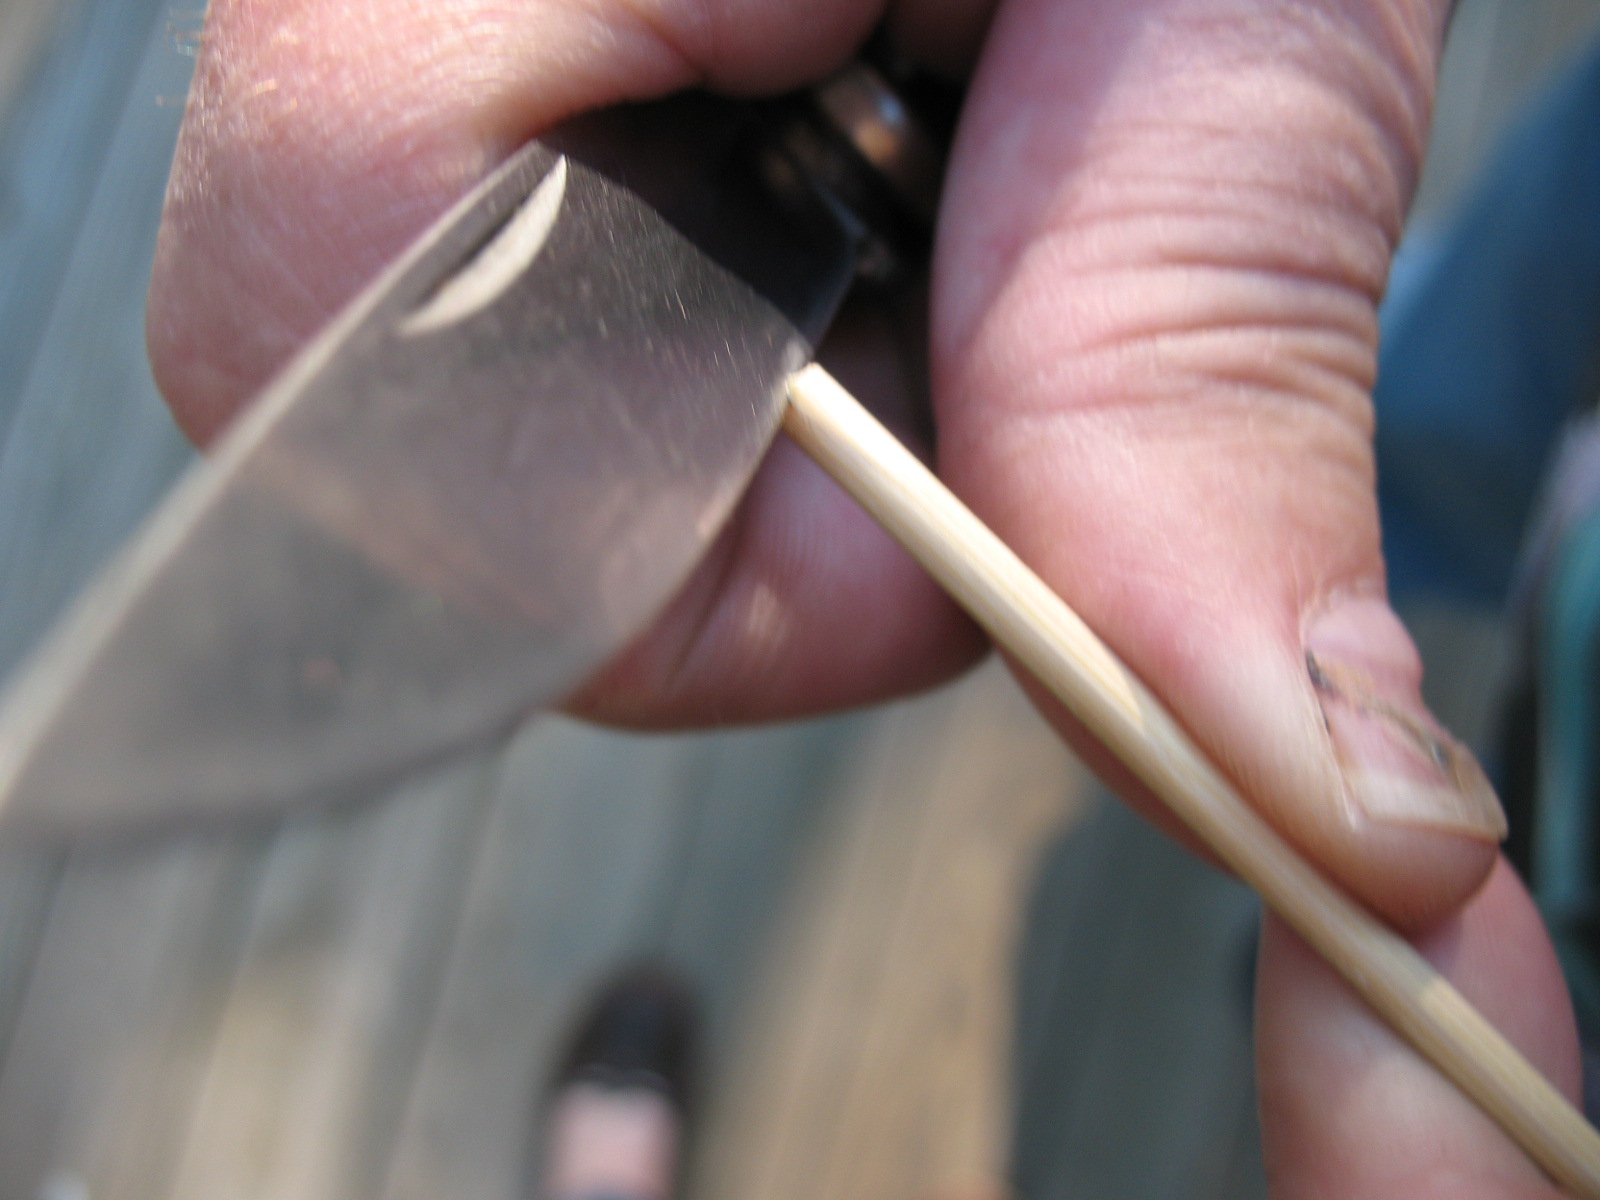

Select one of your thistle heads and cut away all of the spiny leaves around the base of it. Now cut loose the string that is holding it shut. Pictured below: top, untrimed thistle head; middle, removing spiny lower leaves from thistle head; bottom, trimmed thistle head. 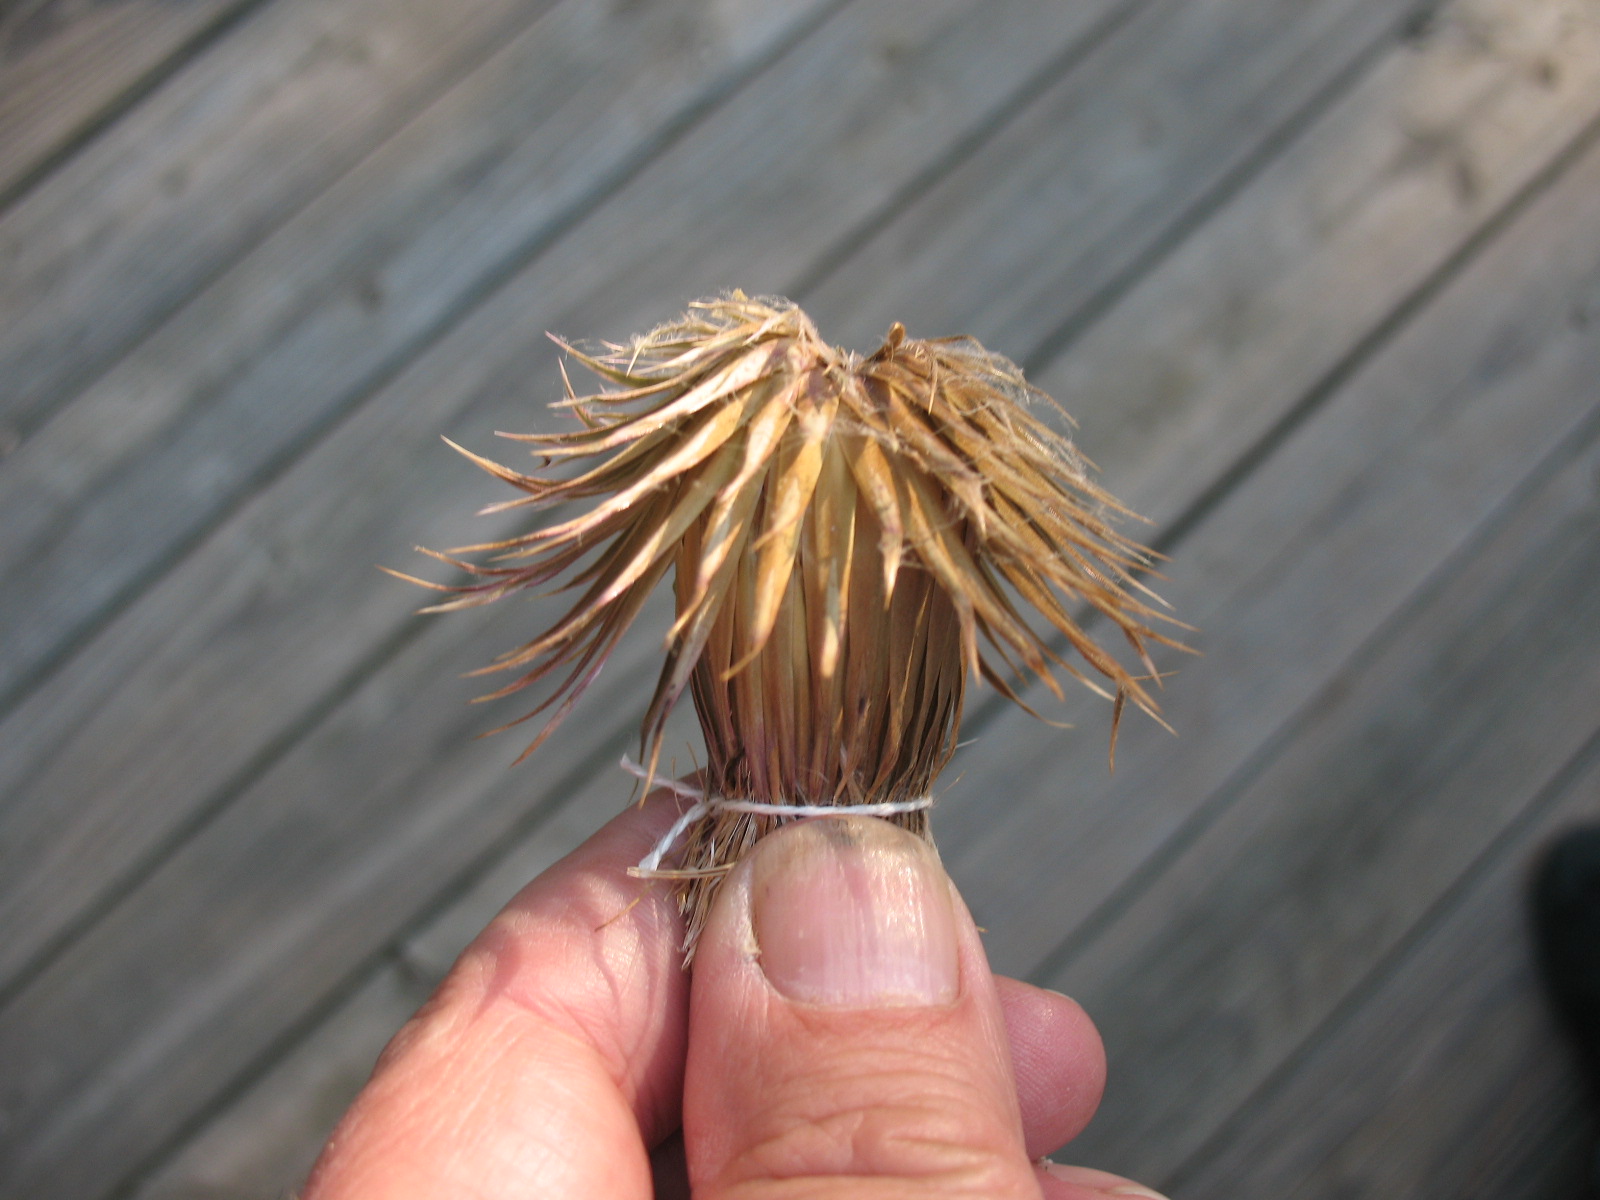

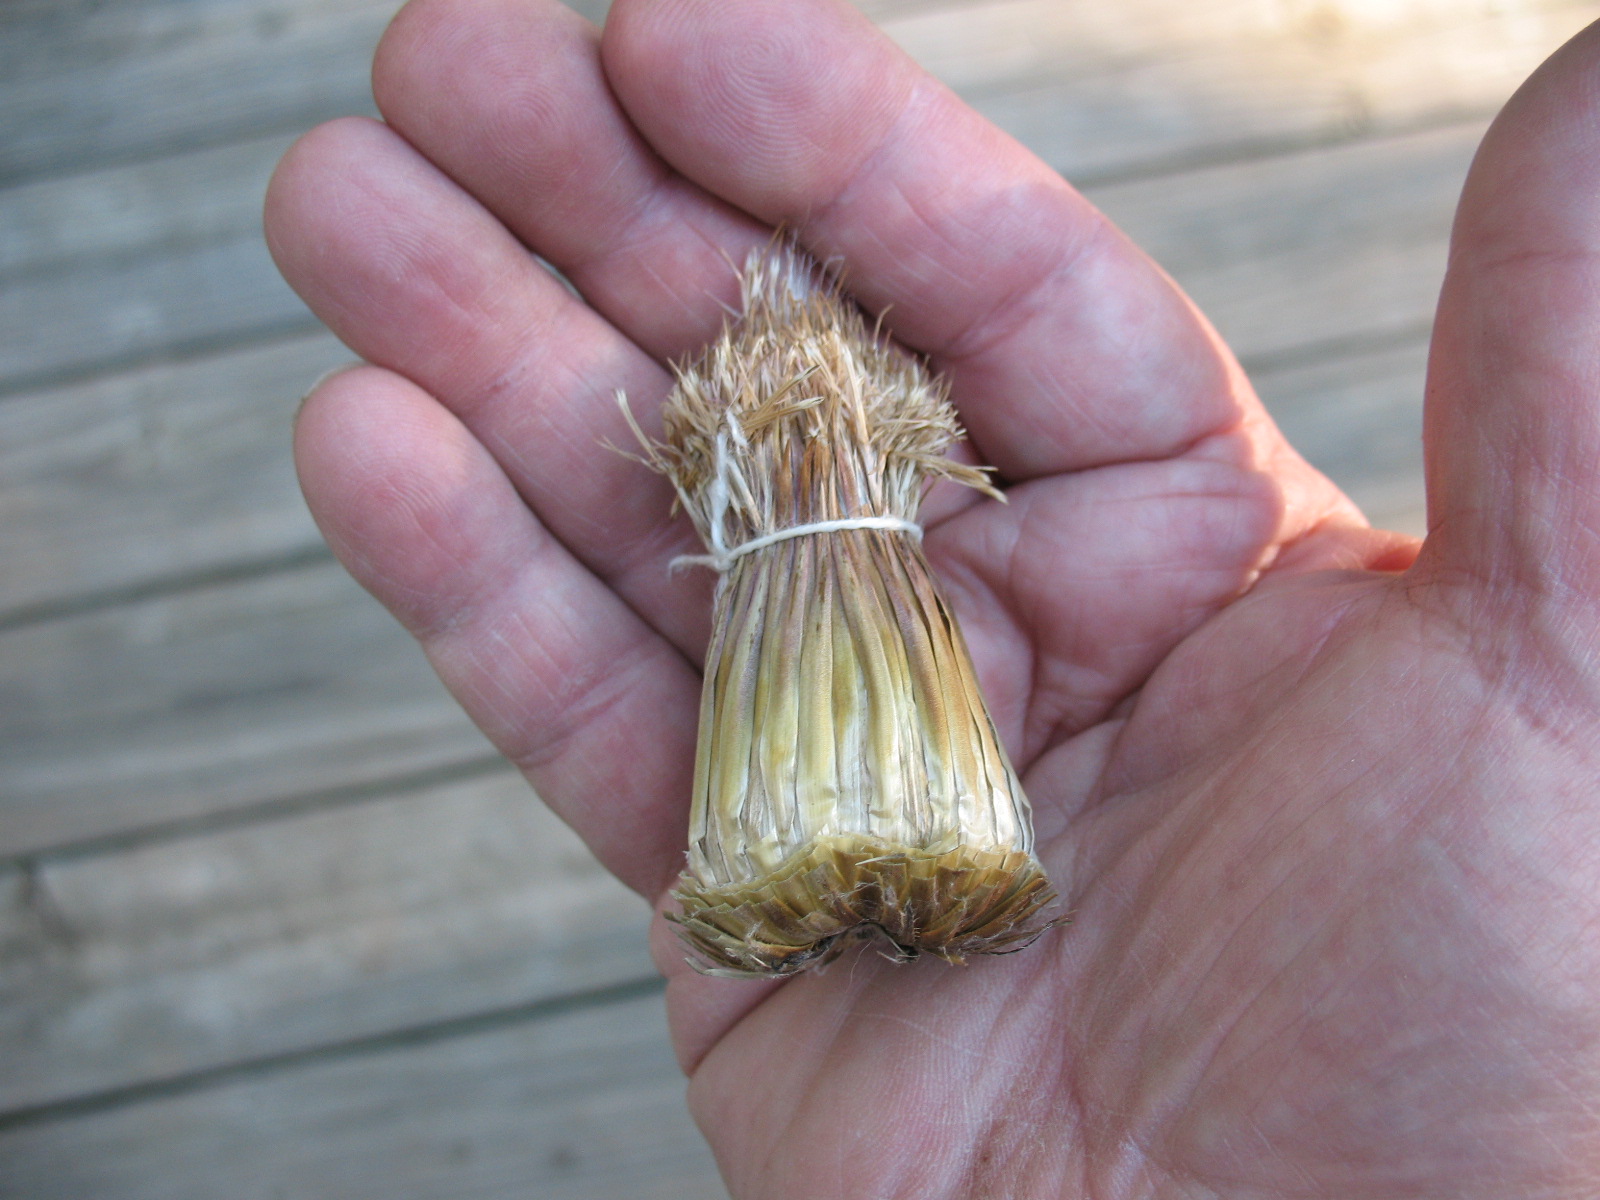
Contained inside the thistle head are two kinds of fibers. One is the white down that you will be using. Interspersed within this down are some taller fibers that are more like stiff hairs with a tuft of brown fibers on the top. Pictured below: tall fibers and down. 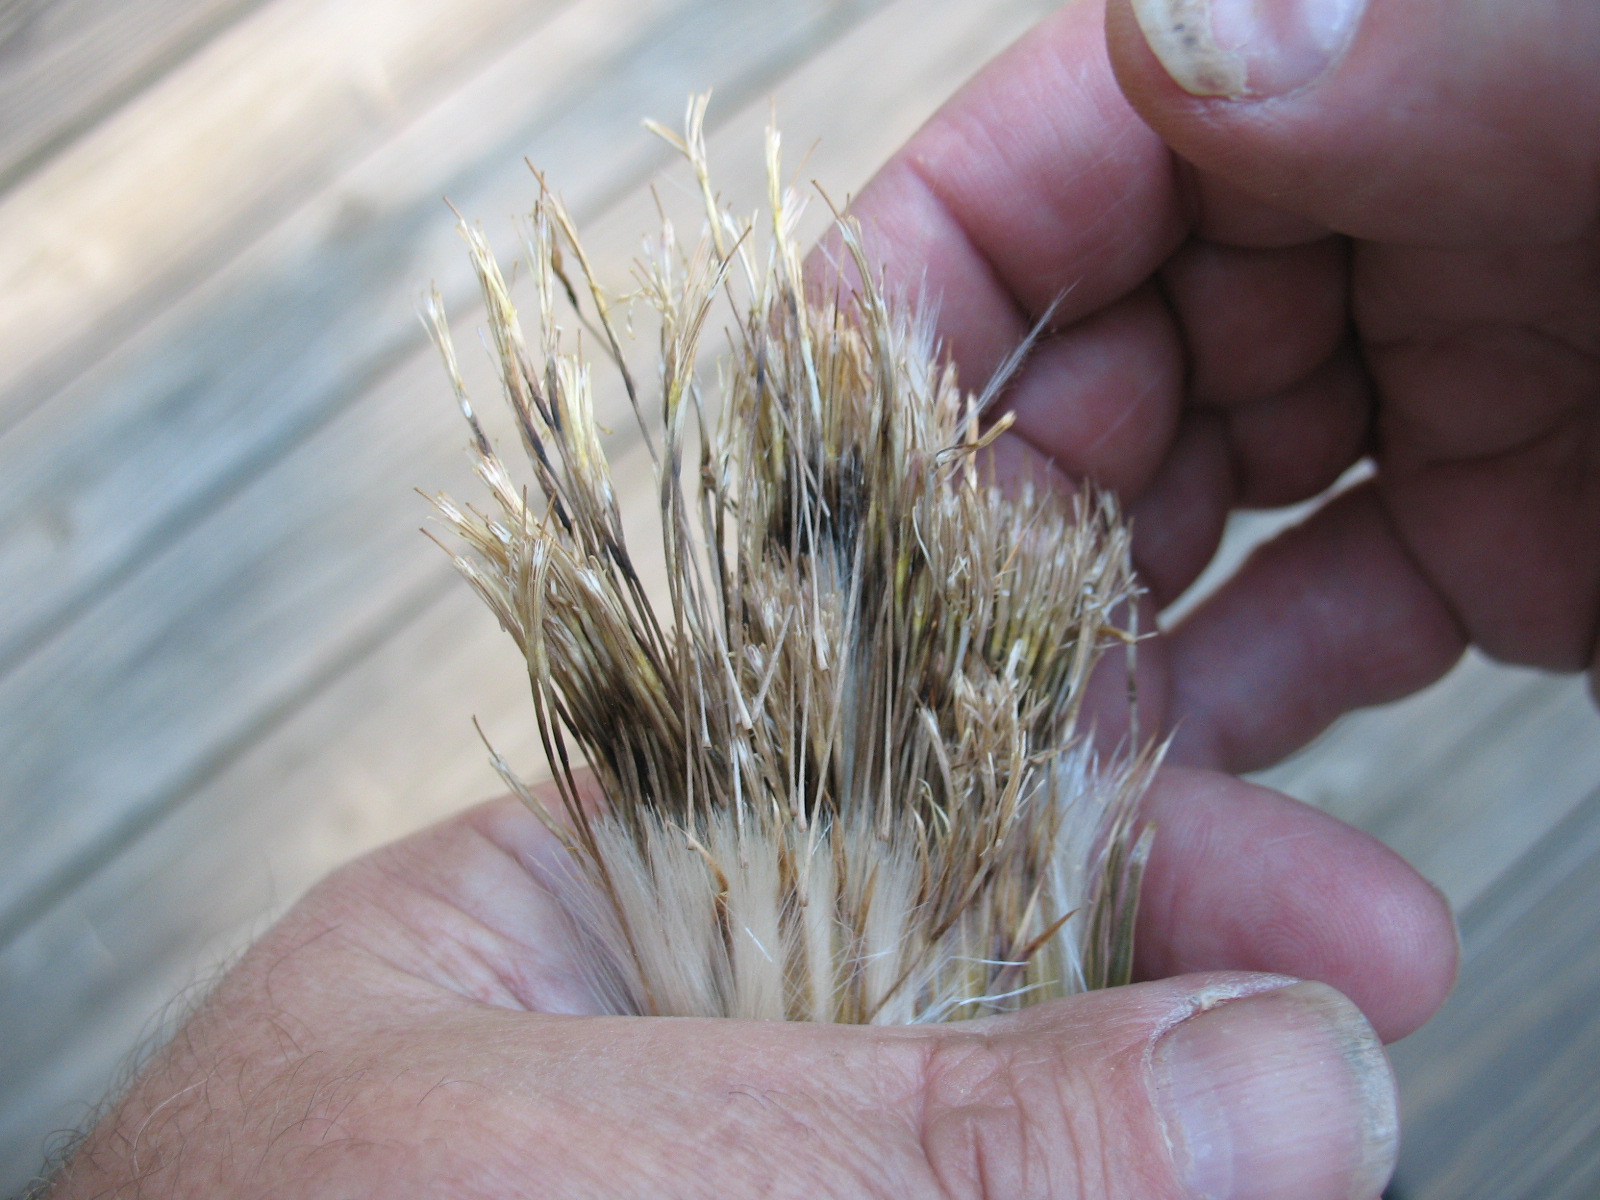
Because they are taller than the white down, you can wrap your finger and thumb around the thistle head, and gently pull these longer fibers out of the head leaving only the white down. When you have the tall fibers pulled out, you can remove the kind of paper like layer of leaves that surround the outside of the thistle head. Pictured below: top, pulling out tall fibers; bottom, thistle head with tall fibers removed and only down remaining.

Now the only thing remaining to do is to remove the base of the thistle head. Be sure that you have your fingers wrapped around the down when you pull the base off. Otherwise the down will break apart and fly everywhere. There may be some small seeds attached to the bottom of the thistle down. If there are, this is no problem. Just brush your finger gently across the seeds, and they will fall off. Pictured below: removing base of thistle flower.
Now comes the part where three hands would be helpful, but you will have to make do with two hands and your teeth. By the way, the directions that I am about to give are for a right handed person. Hold the thistle down wrapped in your left hand, palm down, with the base of the down sticking out between your encircling thumb and index finger. Hold the dart shaft in your right hand with the pointed end sticking out to your right. Take the long portion of the string between your teeth. Now lay the dart shaft up next to the thistle down with the string going over the top of the down. Pictured below: Beginning wrap around thistle down.
Slowly twist the dart shaft away from you. As the string wraps around the shaft, feed a small amount of the thistle down under the string. This takes practice. You have to feed the down in at a pretty consistent rate or you will end up with lumps of thistle in some spots and bare patches in other spots. Pictured below: Wrap in progress.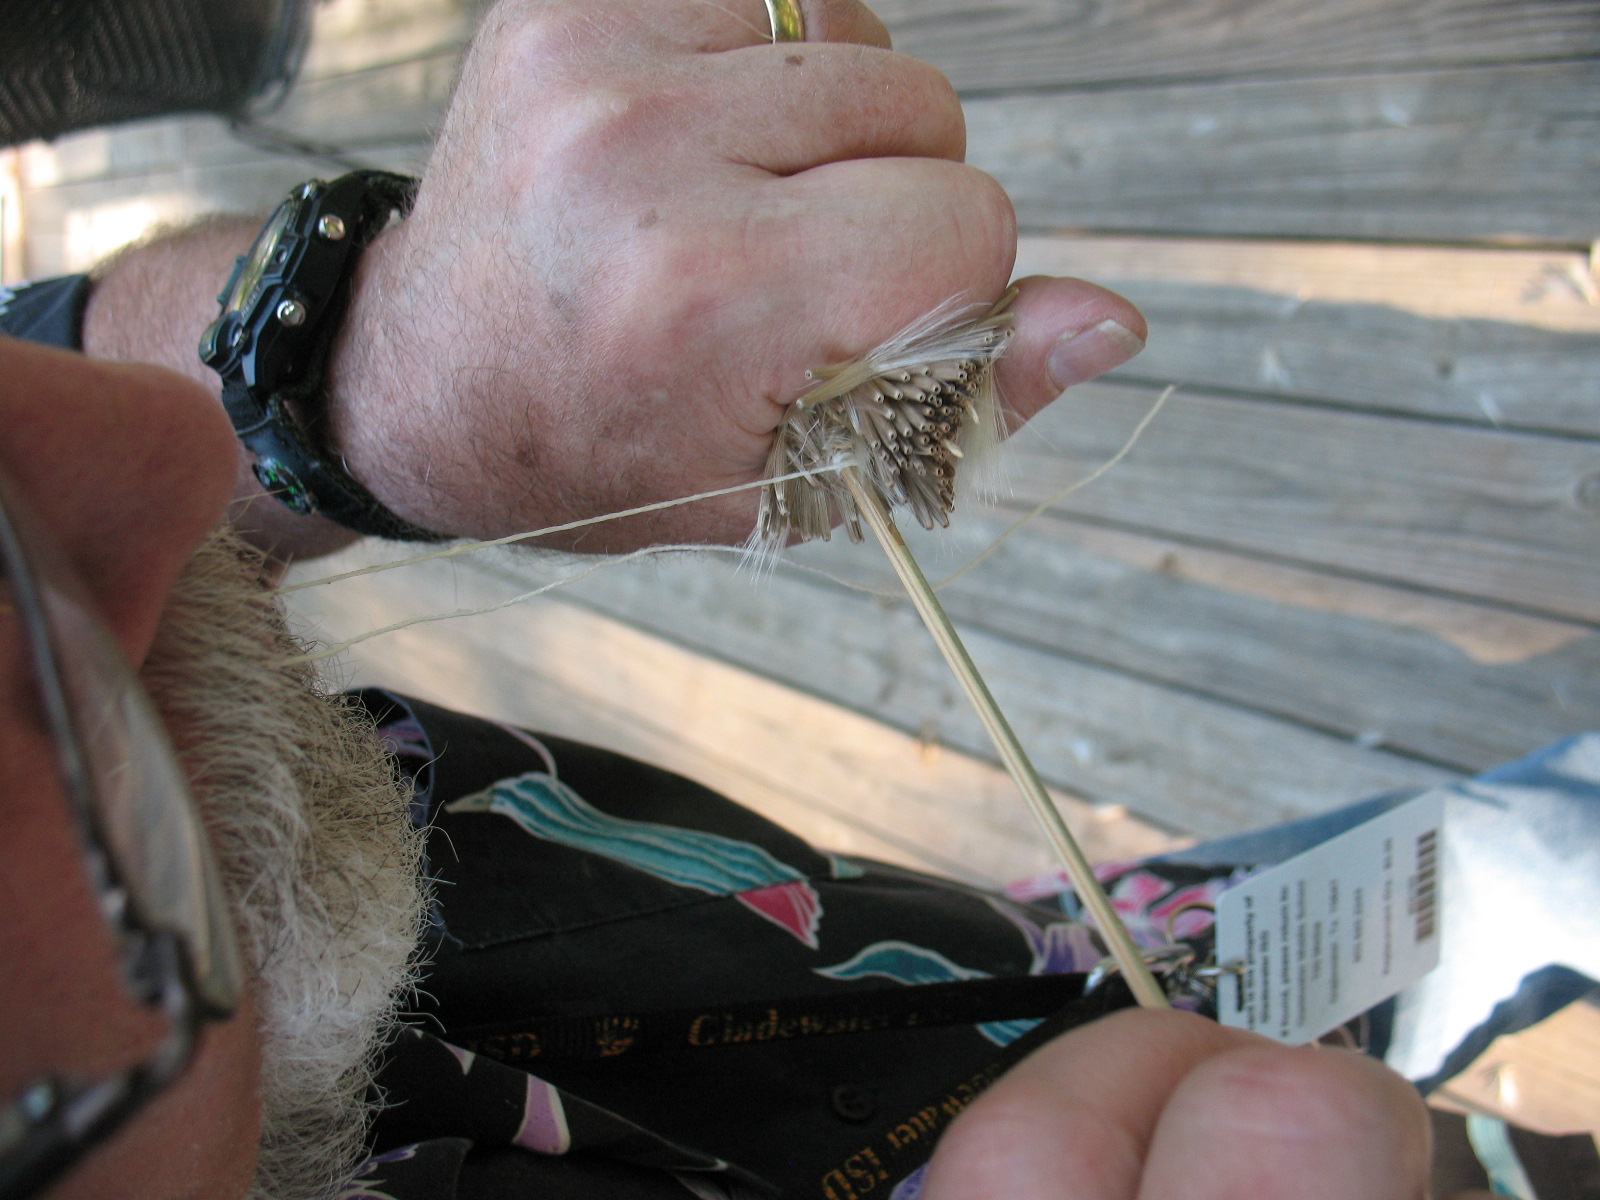
As you continue wrapping, make sure that the string is spiraling slowly down the shaft, and keep feeding the thistle down under the string. I usually keep wrapping until I have about two inches of fletching on the dart. Pictured below: Wrap almost complete, down looks really sloppy at this point.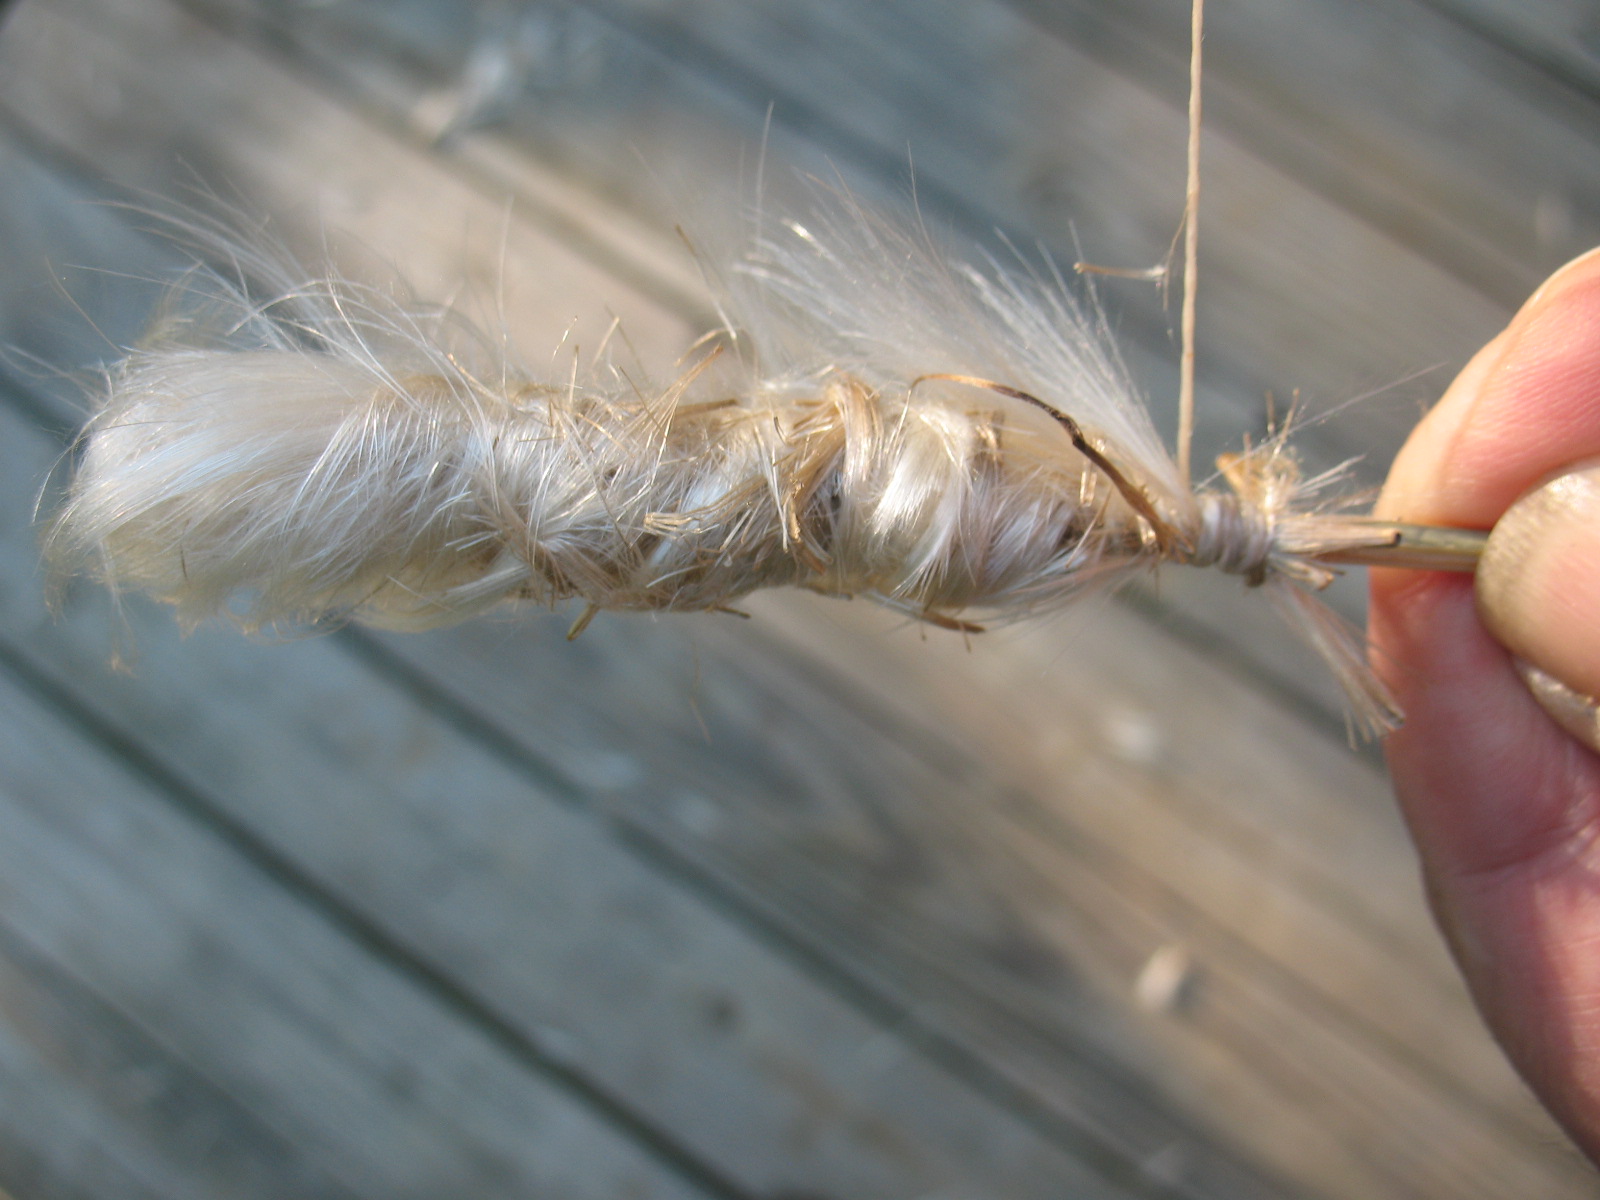
When you have all of the fletching that you want, wrap the string around the front end eight or ten times to finish off the front end neatly; then tie a couple of half hitches in the string to hold it in place. A drop of glue or sap over these wrappings will help hold them in place. Pictured below: Finishing off wrap at front of fletching.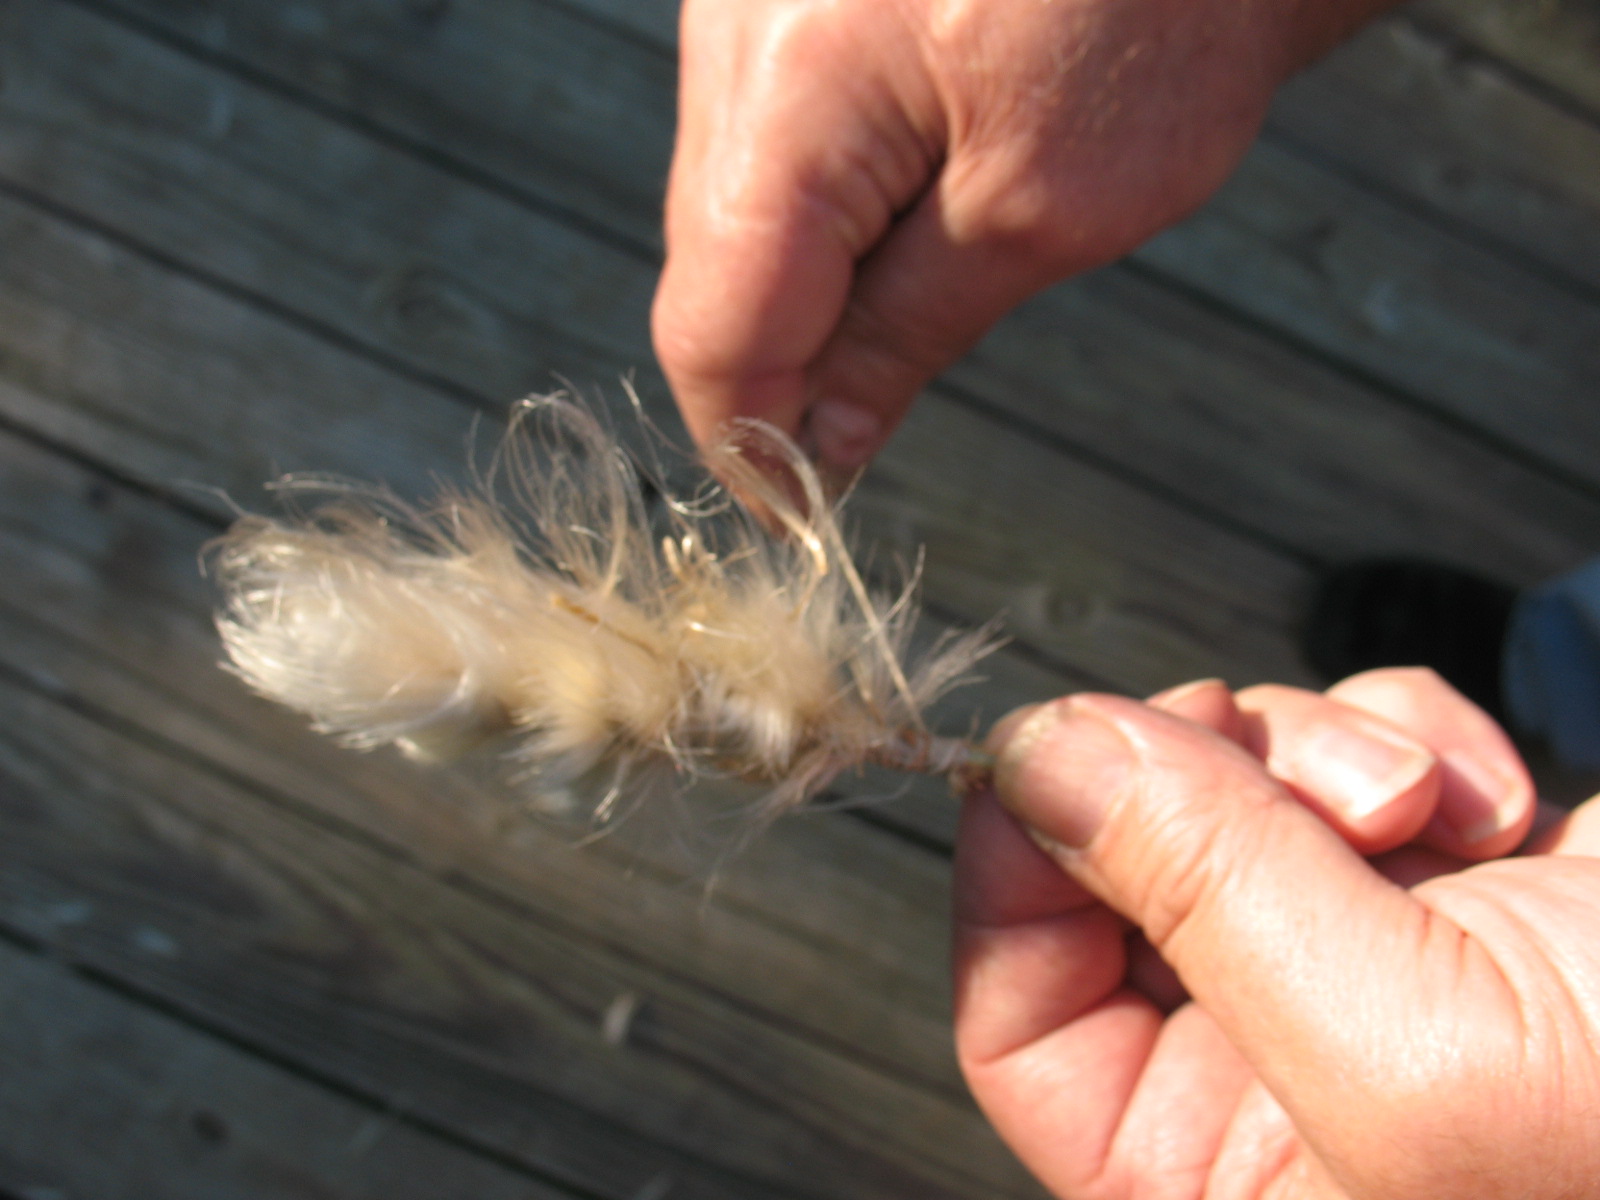
Now hold the dart up and spin it, and blow on it. This will remove any loose down and fluff out the fletching a little. Pictured below: Spinning and blowing the fletching to remove loose down.
Now smooth the fletching down, and if you have any wild fibers sticking out you can use a sharp knife or a pair of scissors to trim up the fletching a little. Pictured below: Trimming the fletching.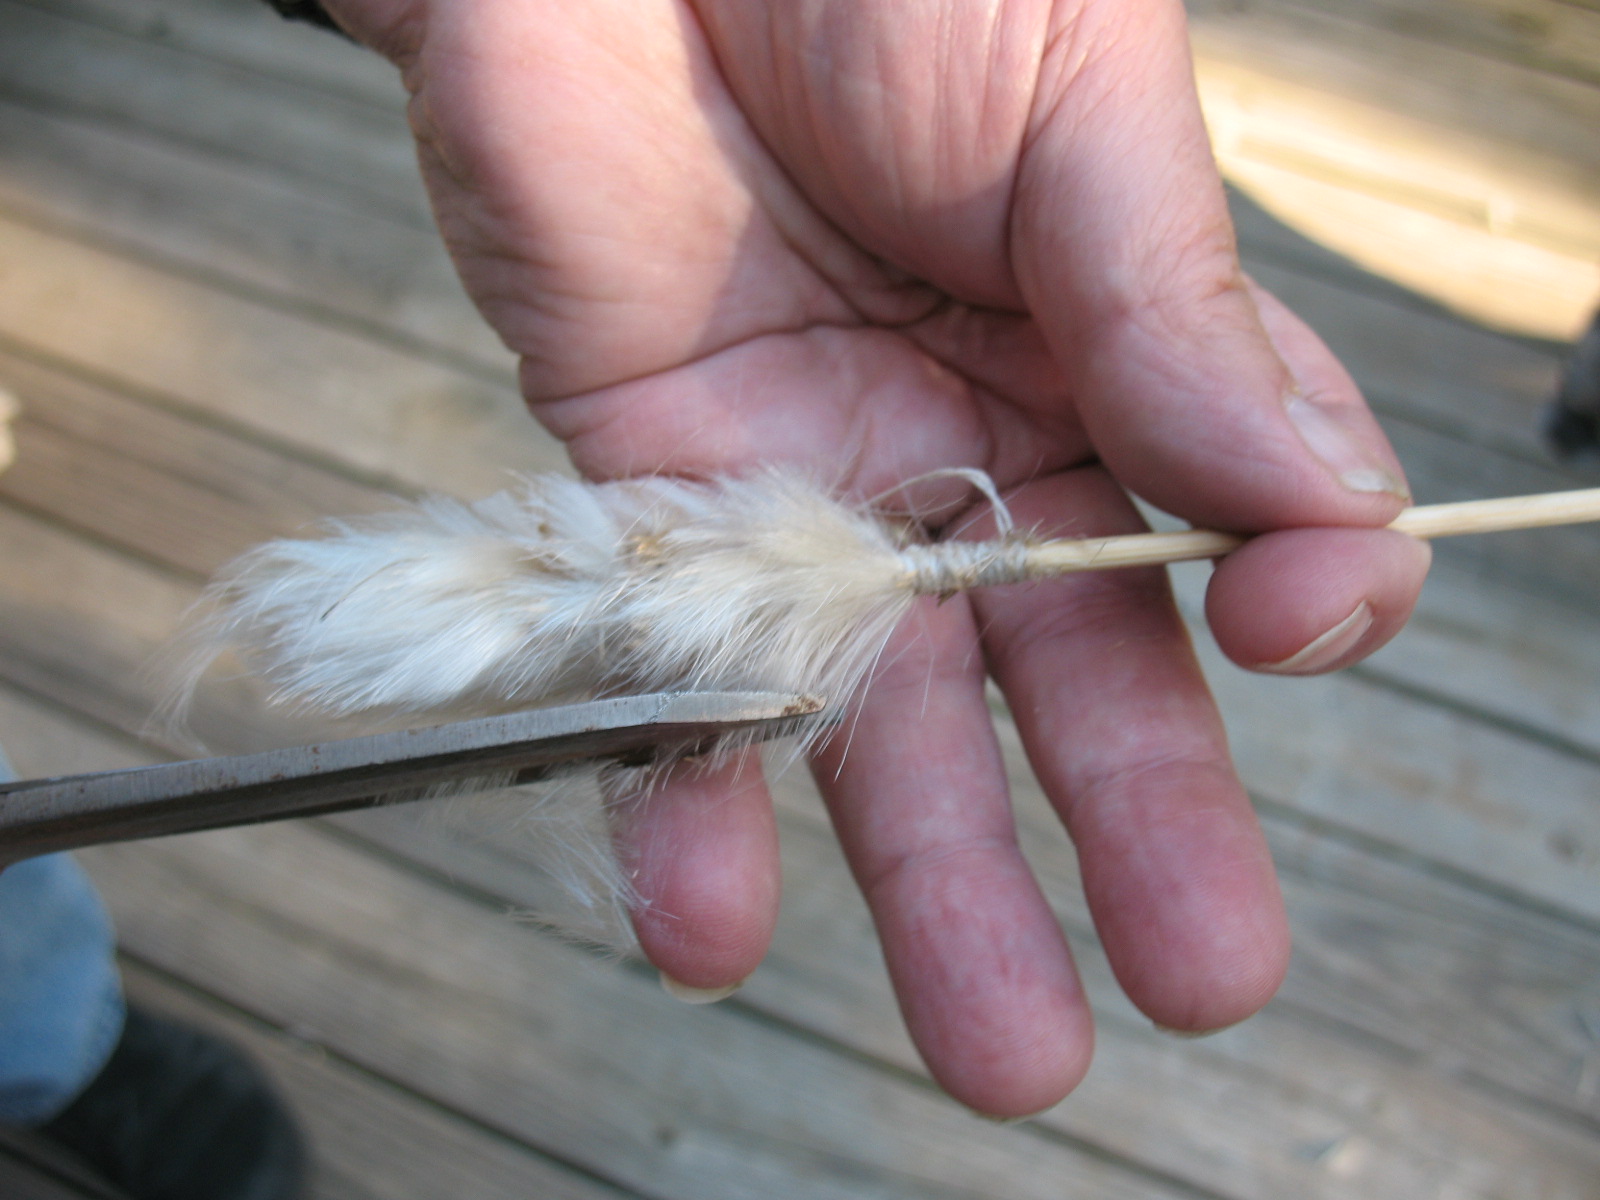
That’s it! You’ve just made a traditional thistle blow dart. Pictured below: Finished dart. 
The only thing left is to stick it in your blowgun and see how it flies. Pictured below: Loading and shooting dart. 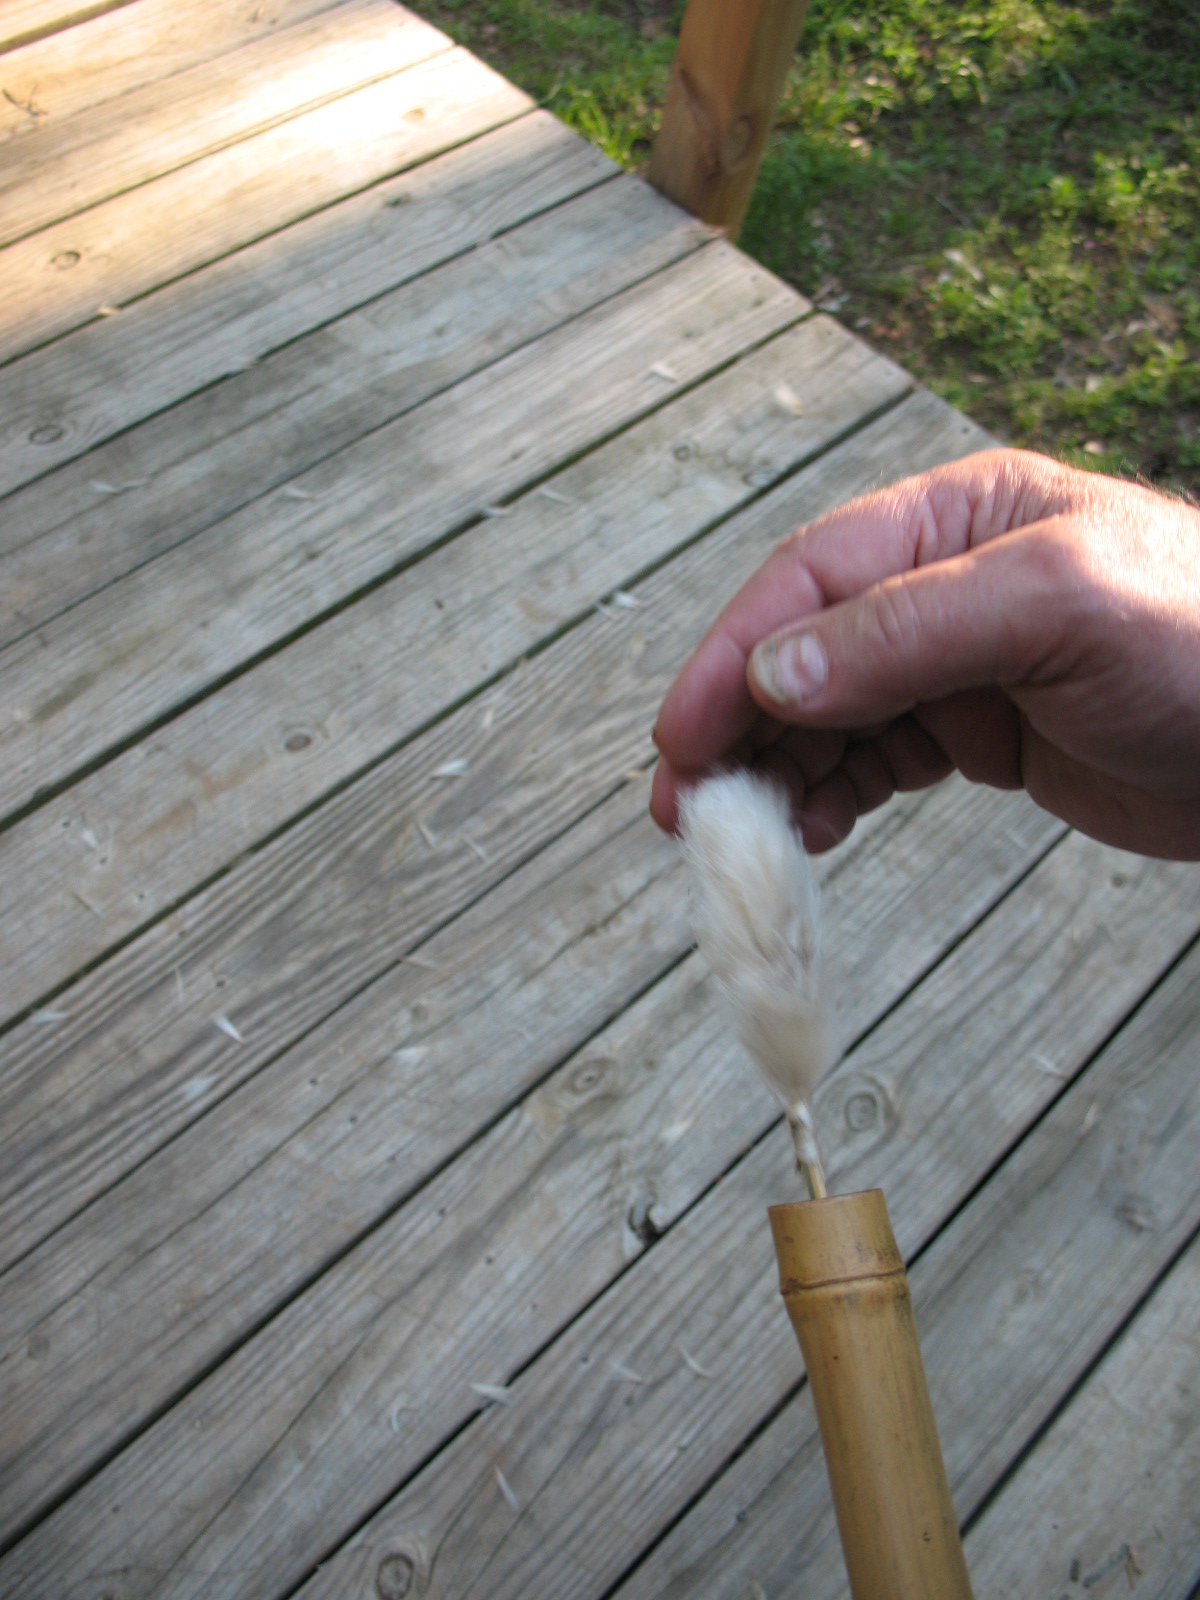

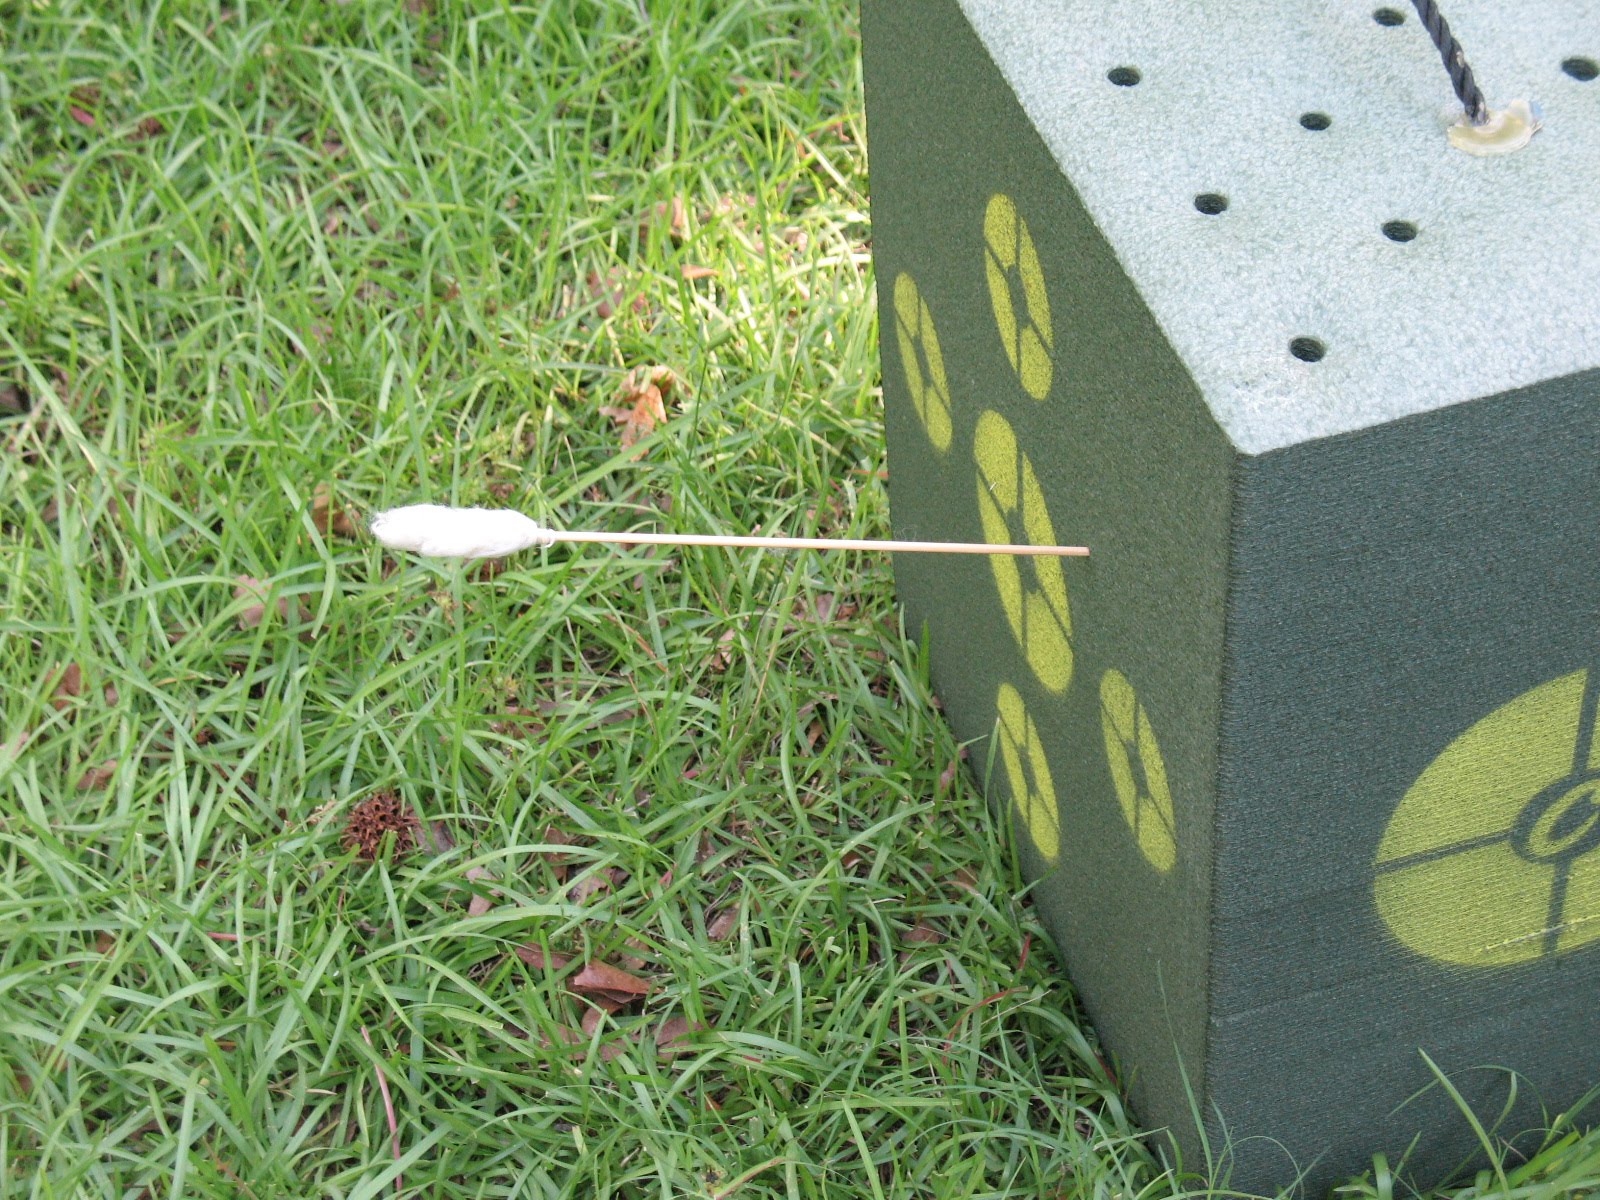
If you did a good job it will fly straight, true, and fast. Don’t be disappointed if you have trouble with this skill. It is one of the harder ones to master, but if you stay with it you will get it down. Pictured below: Dart in target.
My next post will be about how you can fletch darts with raw cotton.
A blowgun dart consists of two basic parts; the shaft which is made of wood, and the fletching which may be made from thistle down, raw cotton, or downy bird feathers. No matter what the fletching material, it is attached using the same method. I am going to show you how to make darts using thistle down. It is not easy. You will probably fail at your first couple of attempts; but if you keep at it, you will be successful. If you just absolutely can’t master it, I am going to do another post on how the Japanese used paper to fletch darts. It’s quite a bit easier. Pictured below: Finished thistle dart.
The first step in making darts is to make your dart shafts. I have read that the Cherokee and Choctaw made their dart shafts out of split White Oak. I like to make my dart shafts out of splits from River Cane. I already have River Cane lying around from making blowguns, it is easy to split, so that’s what I use. If you want to be really lazy you can go to the grocery store and buy a package of the thin bamboo shiskabob skewers. They work great for making dart shafts. Pictured below: Store bought bamboo skewers make good dart shafts.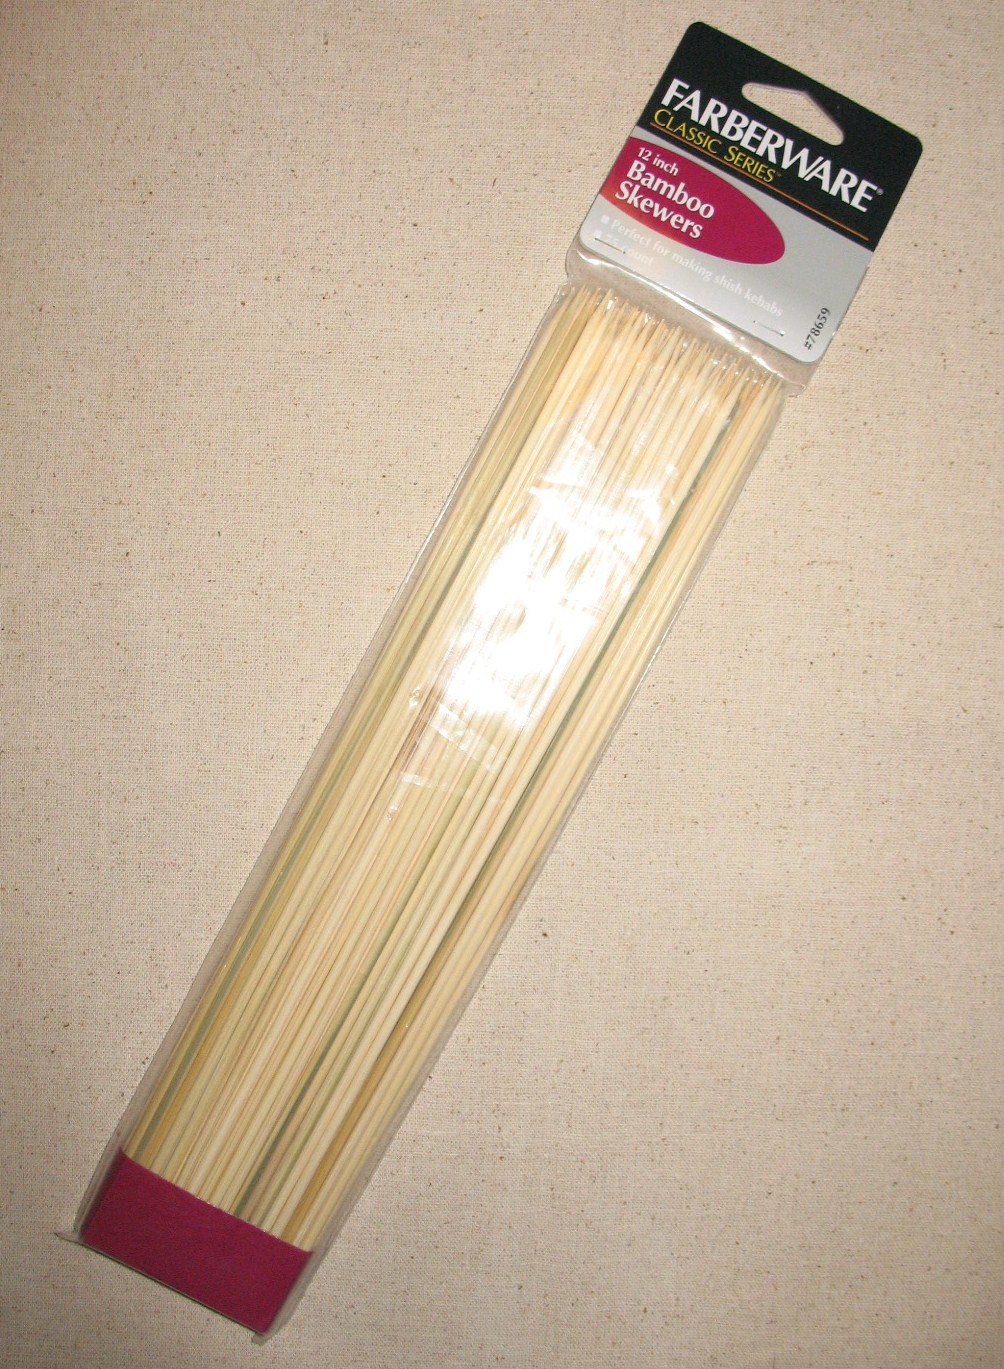
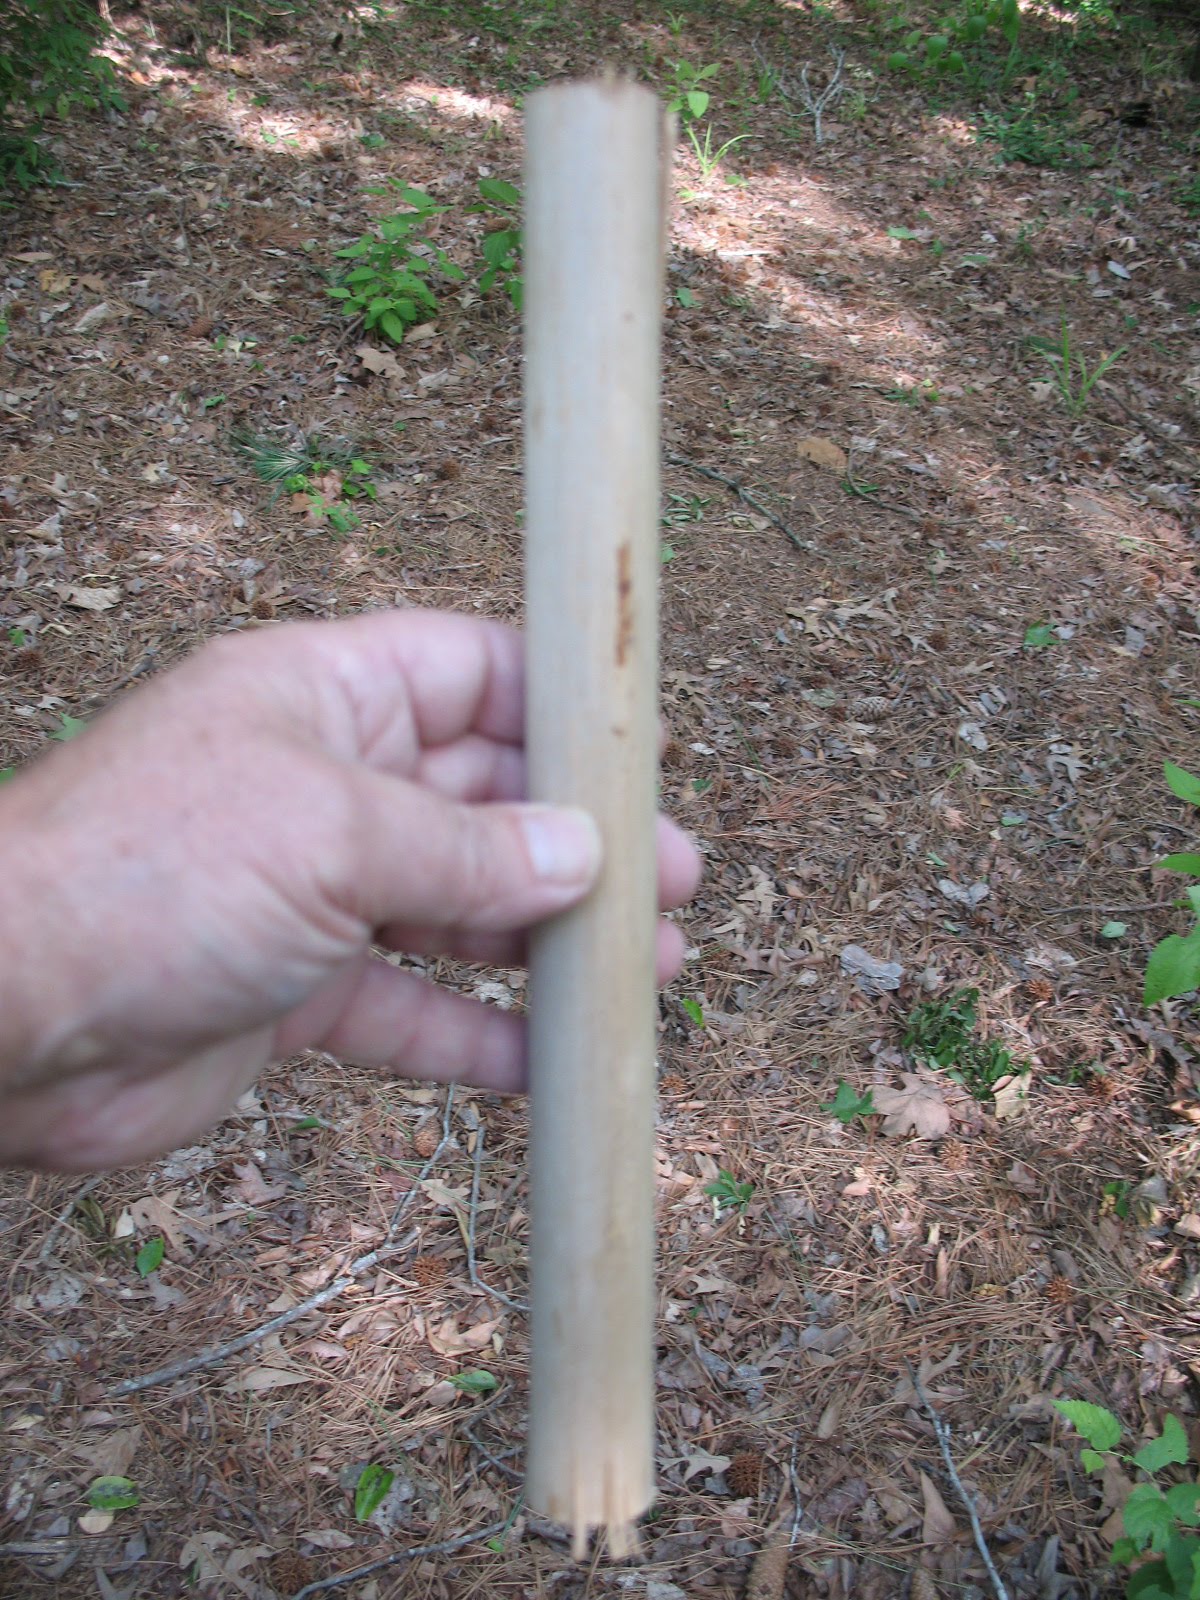
To make River Cane dart shafts select a dried piece of River Cane that has walls about an eight of an inch thick or more. You want to cut the cane up into sections removing the joints. You are looking for a hollow tube about 12 inches long. Pictured below: top, section of cane; bottom, section of cane with joints cut off of each end leaving a tube.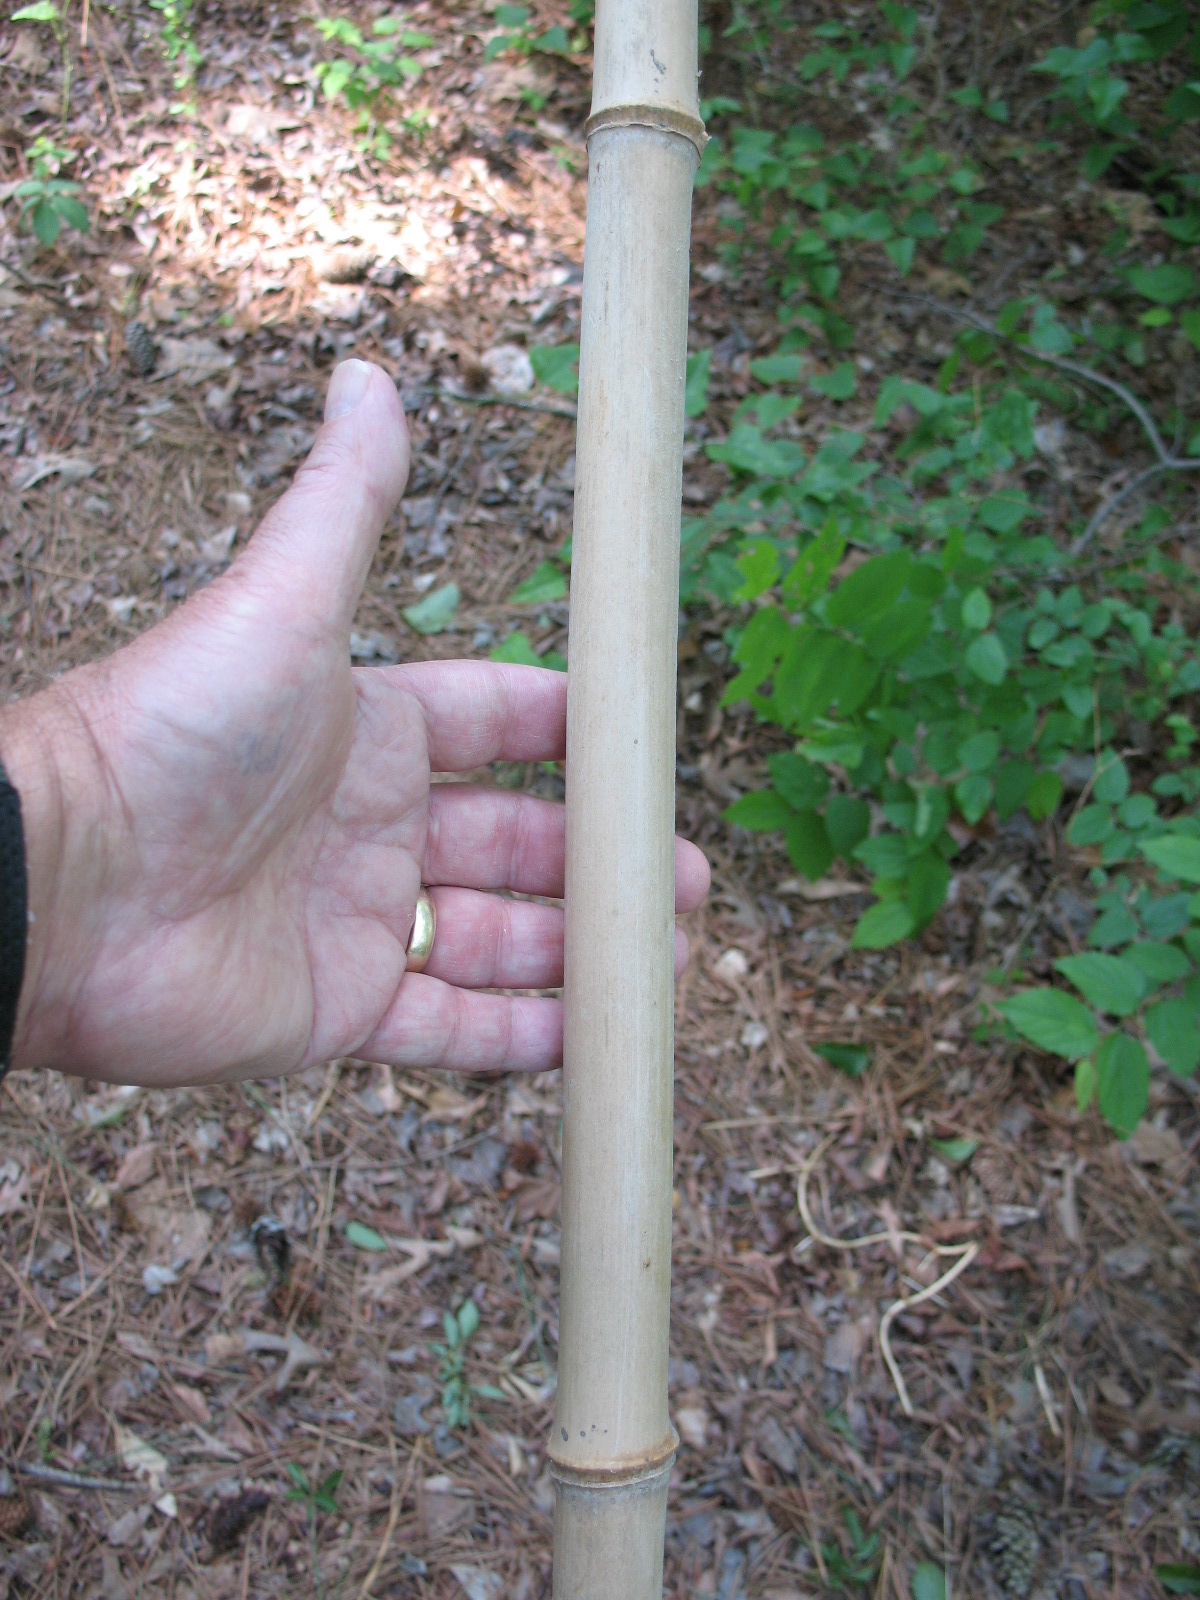
Turn the tube up on end and split it in half. The cane will split easily with a sharp knife and a light tap with a stick. Pictured below: Splitting cane with knife and stick.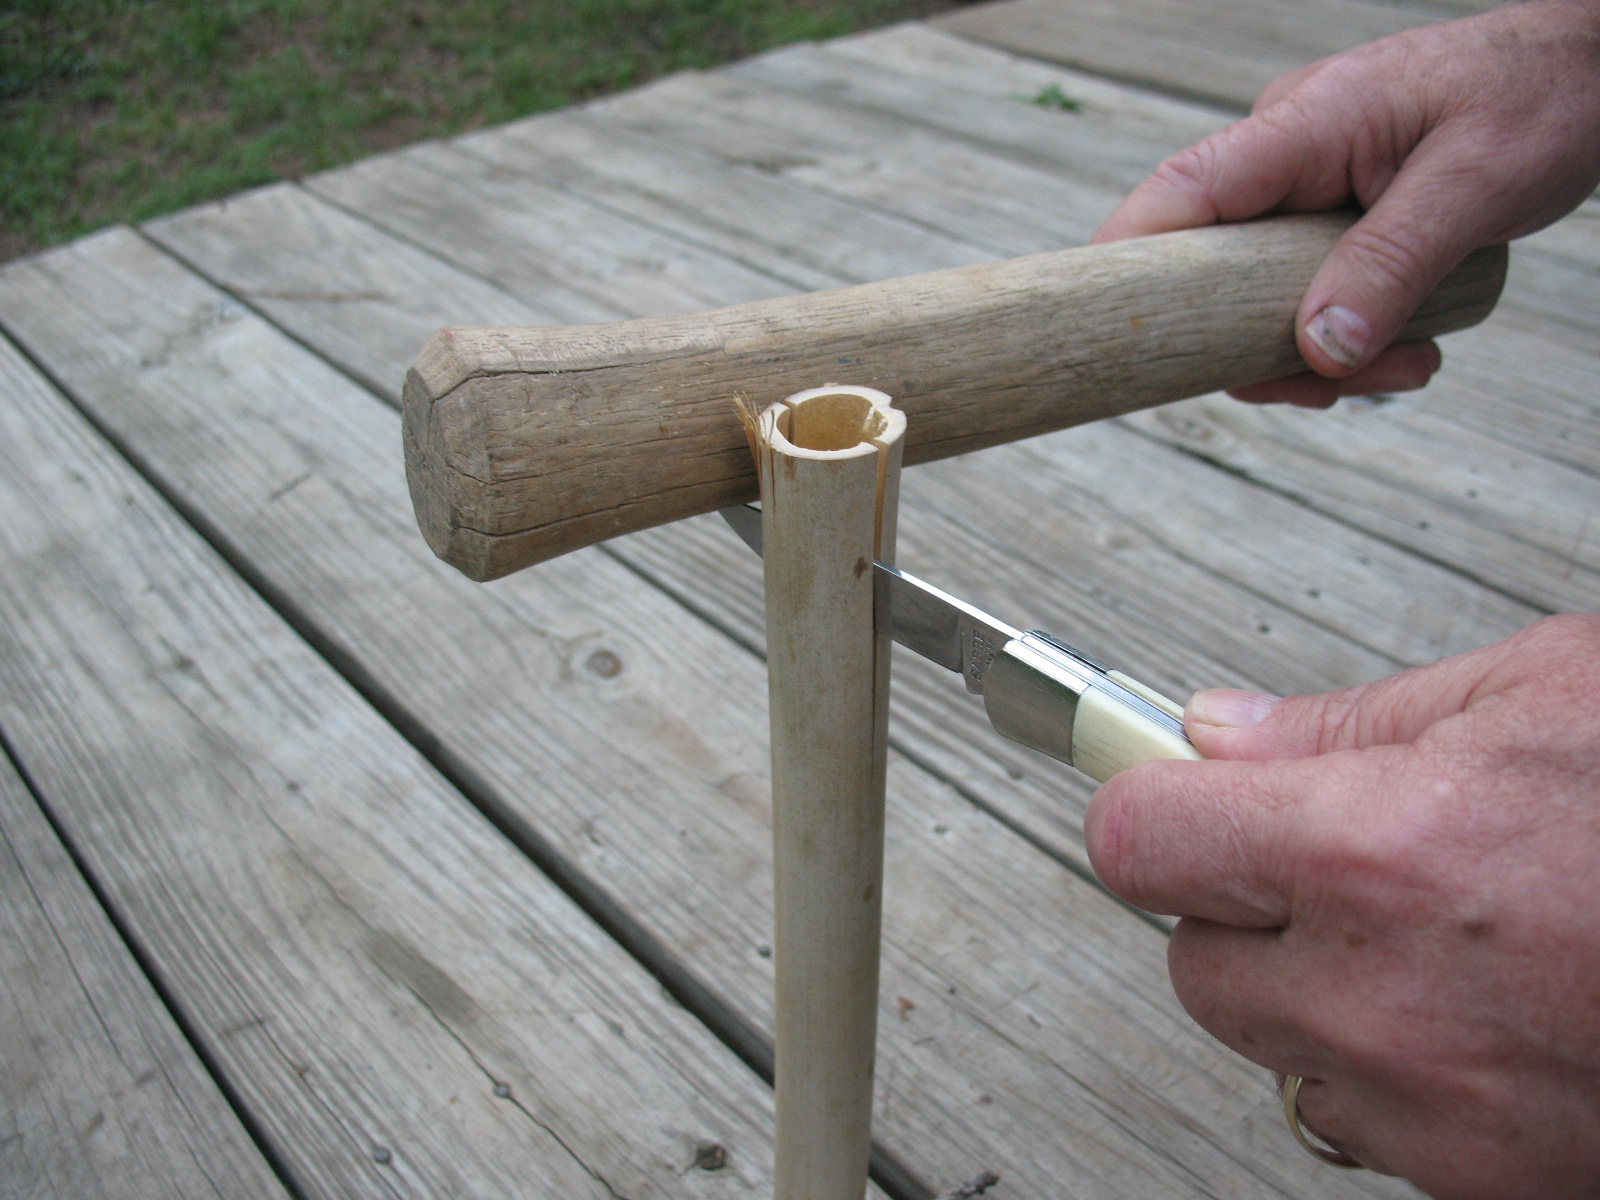
Now start splitting off pieces of cane that are about one-eighth to three-sixteenths inch square and as long as possible. Pictured below: Splitting off rough cane shafts.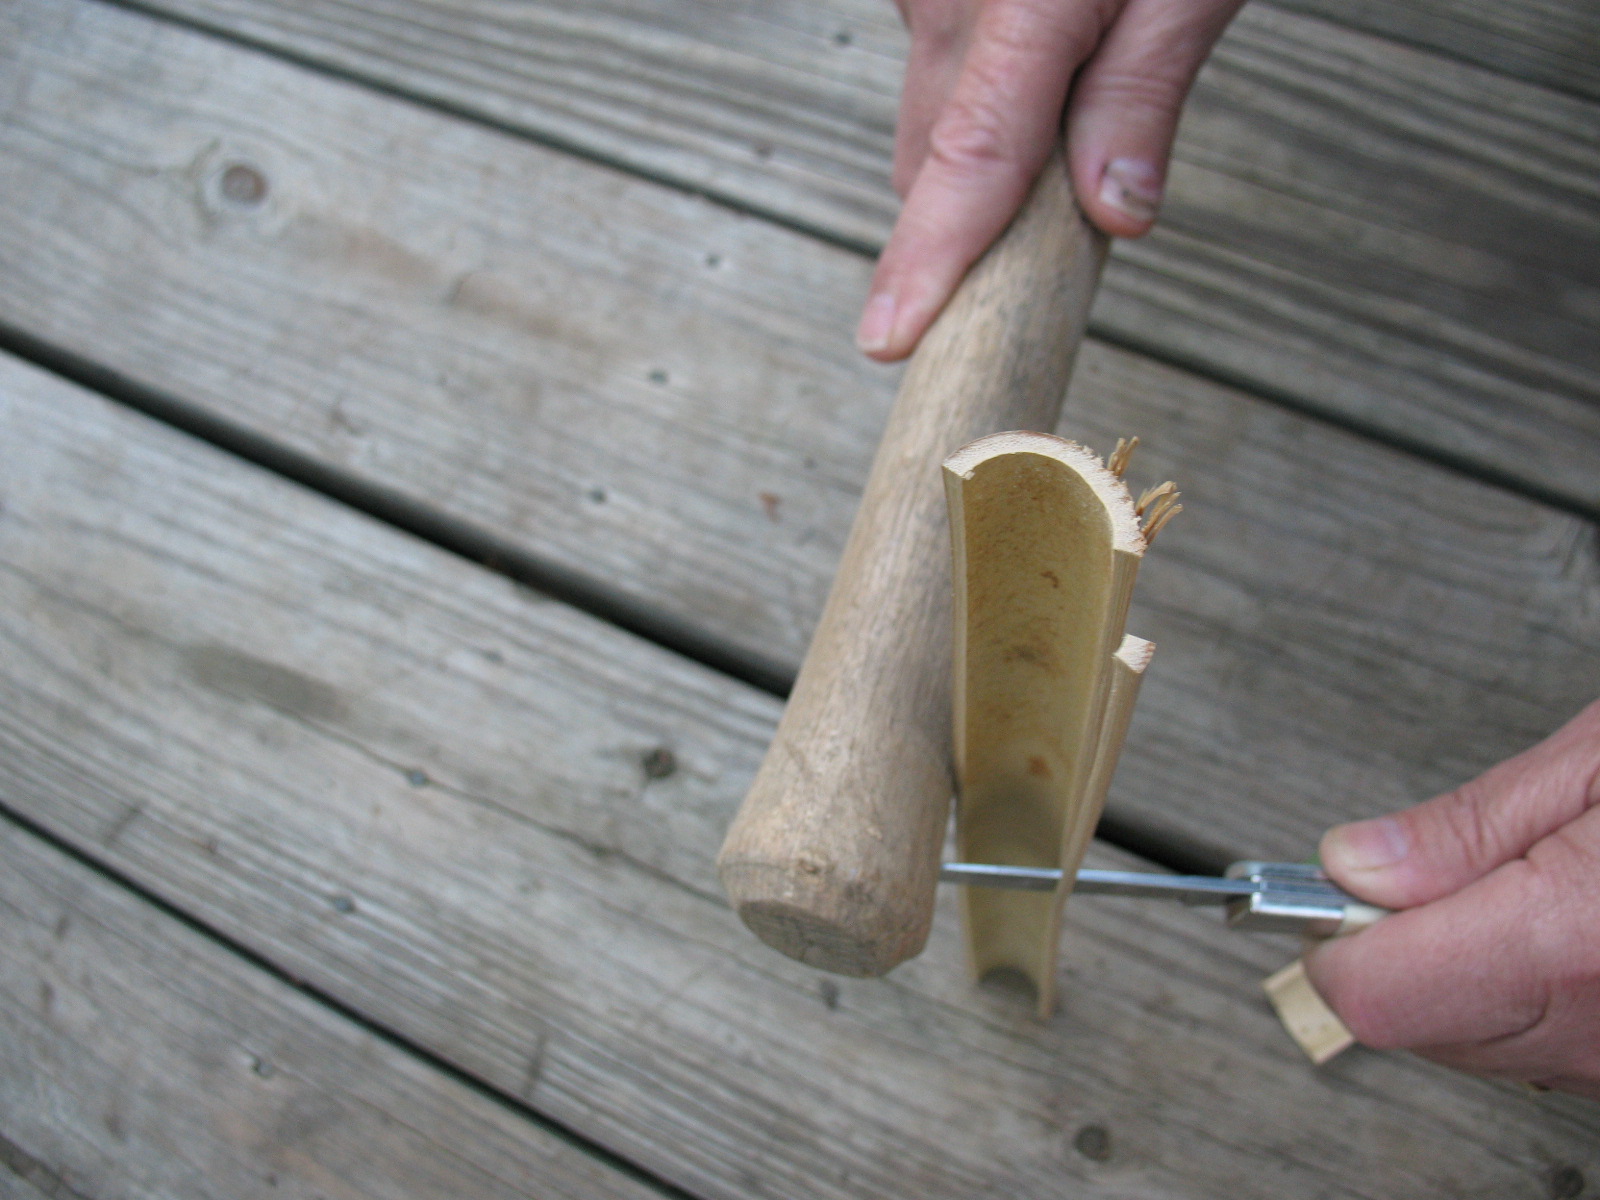
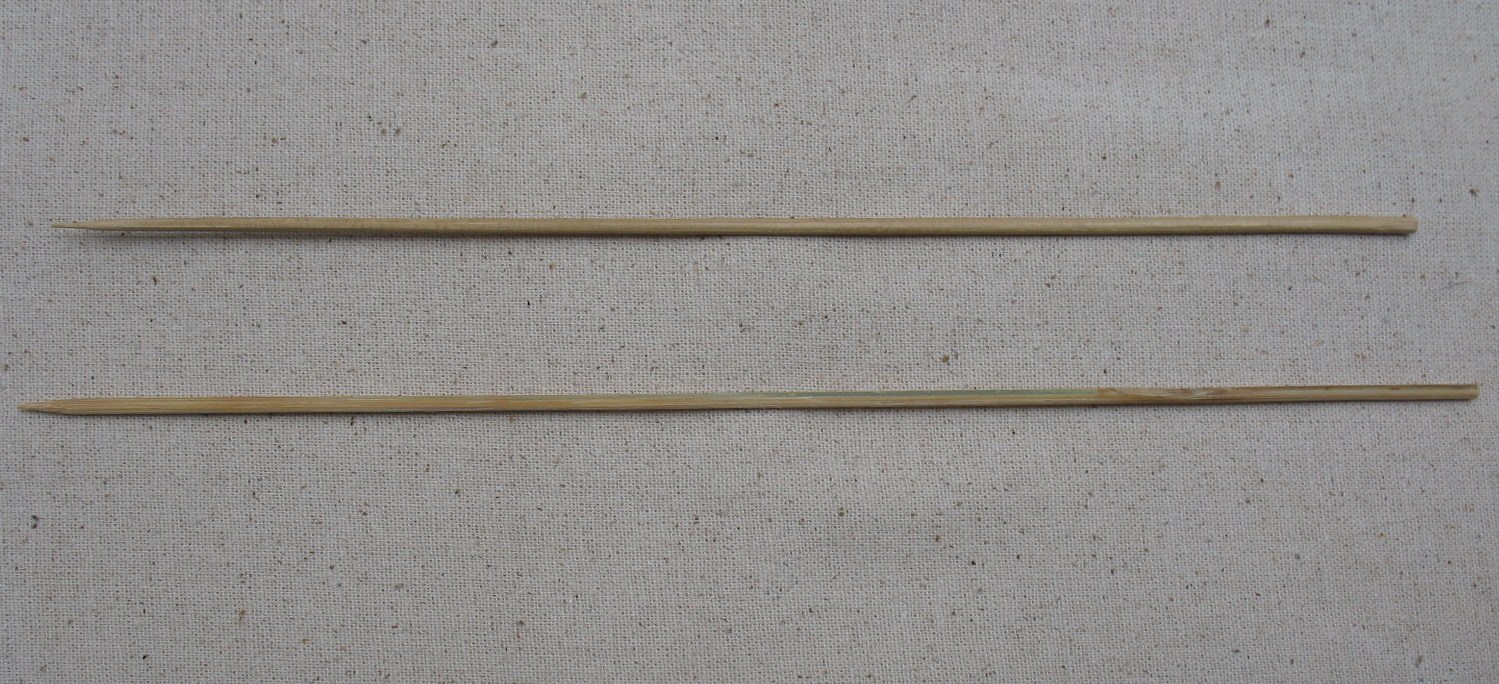
Take the little square splits of cane and use a sharp knife to scrape them round. Congratulations, you now have a dart shaft. Pictured below: top, finished cane shaft; bottom, comparison of homemade cane shaft and store bought bamboo skewer.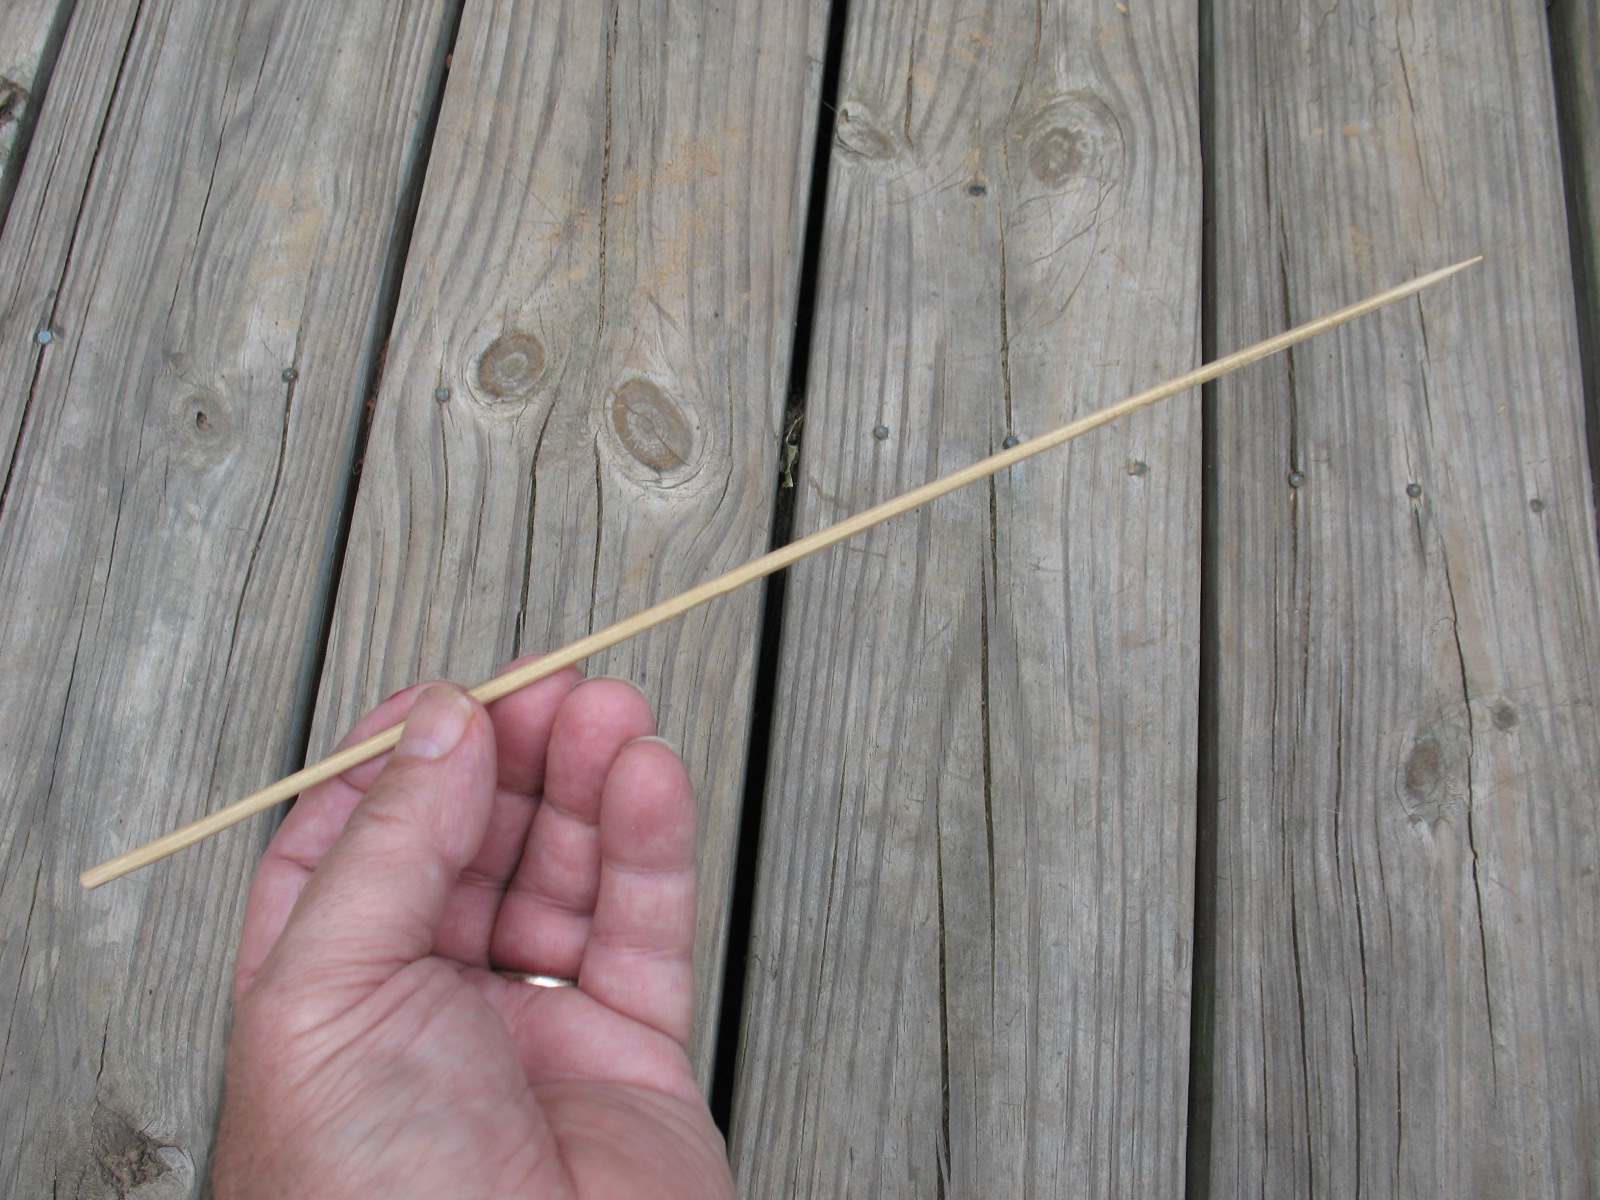
To make thistle darts you will be using the down from an unopened thistle flower. There are two kinds of thistle that grow in East Texas. Bull Thistle (Cirsium vulgare) is a large thistle that blooms in early spring. This is the thistle that I use for dart fletching. There is another thistle called Texas Thistle (Cirsium texanum) that blooms in the late spring and early summer. Texas Thistle has considerably smaller flowers than Bull Thistle, but it can still be used to fletch darts. Pictured below: Bull thistle plant.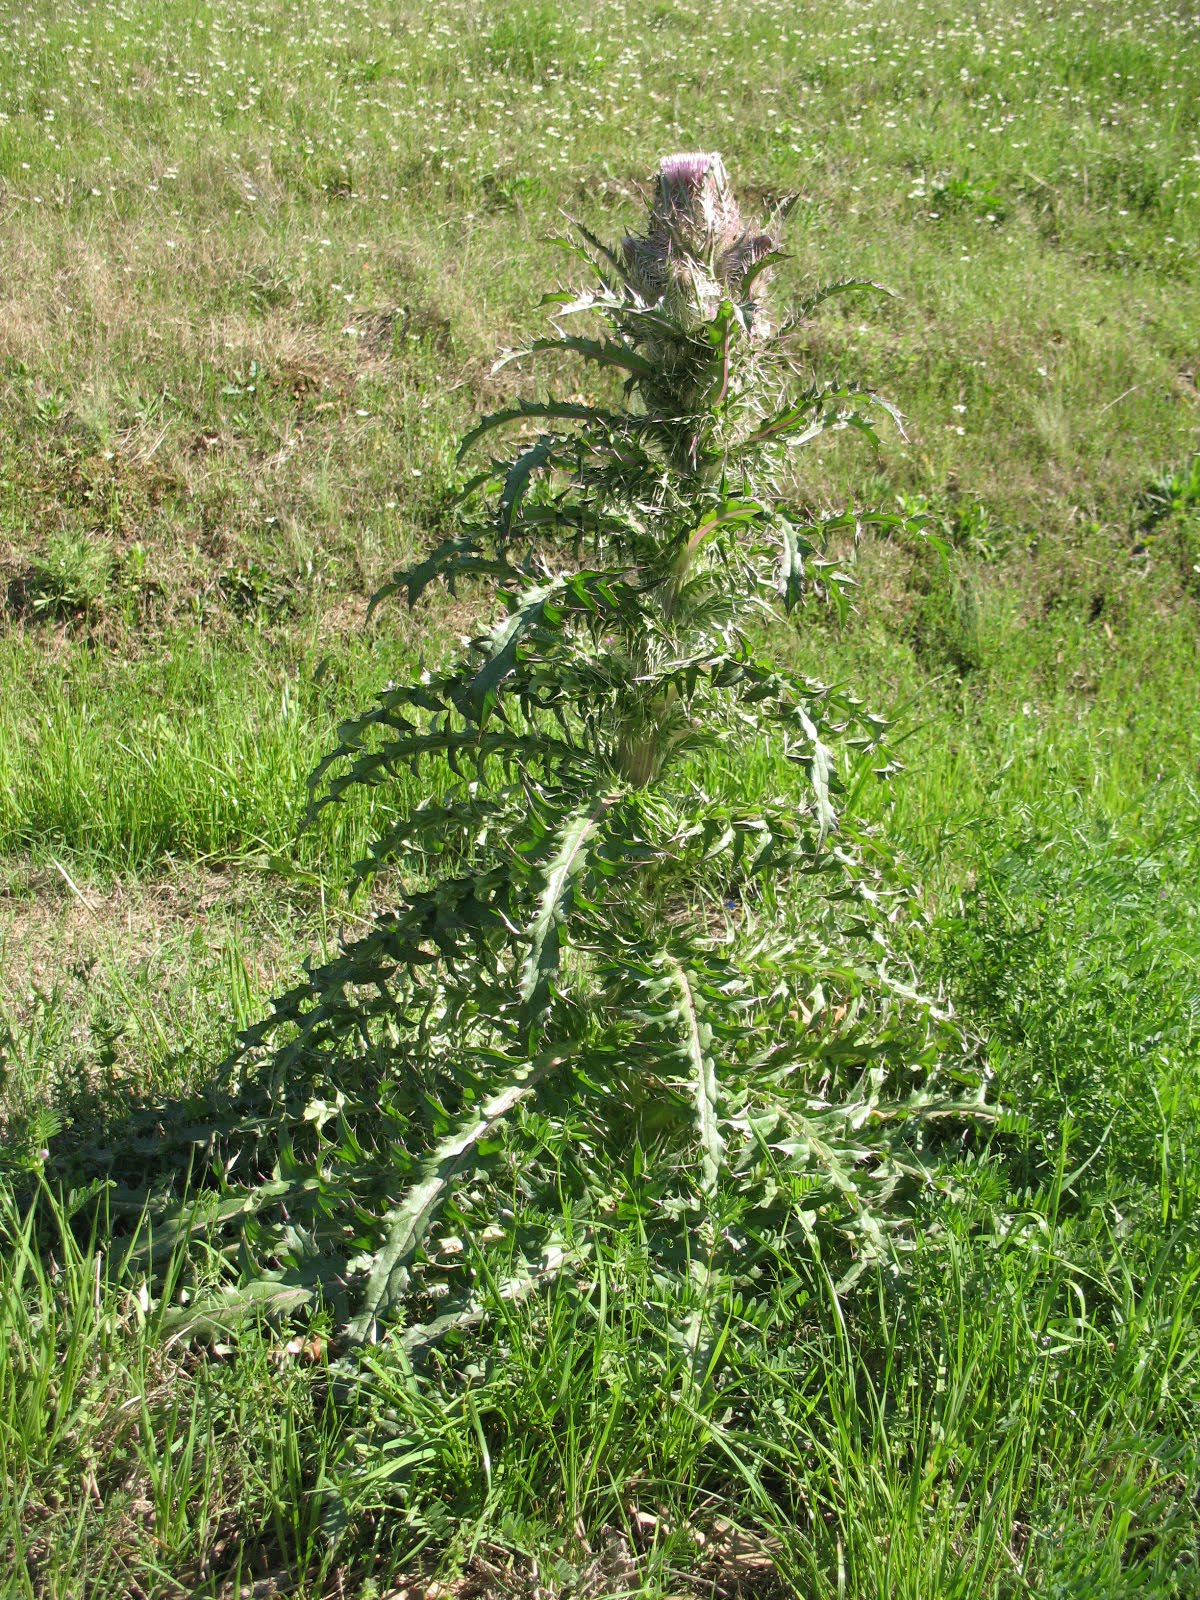
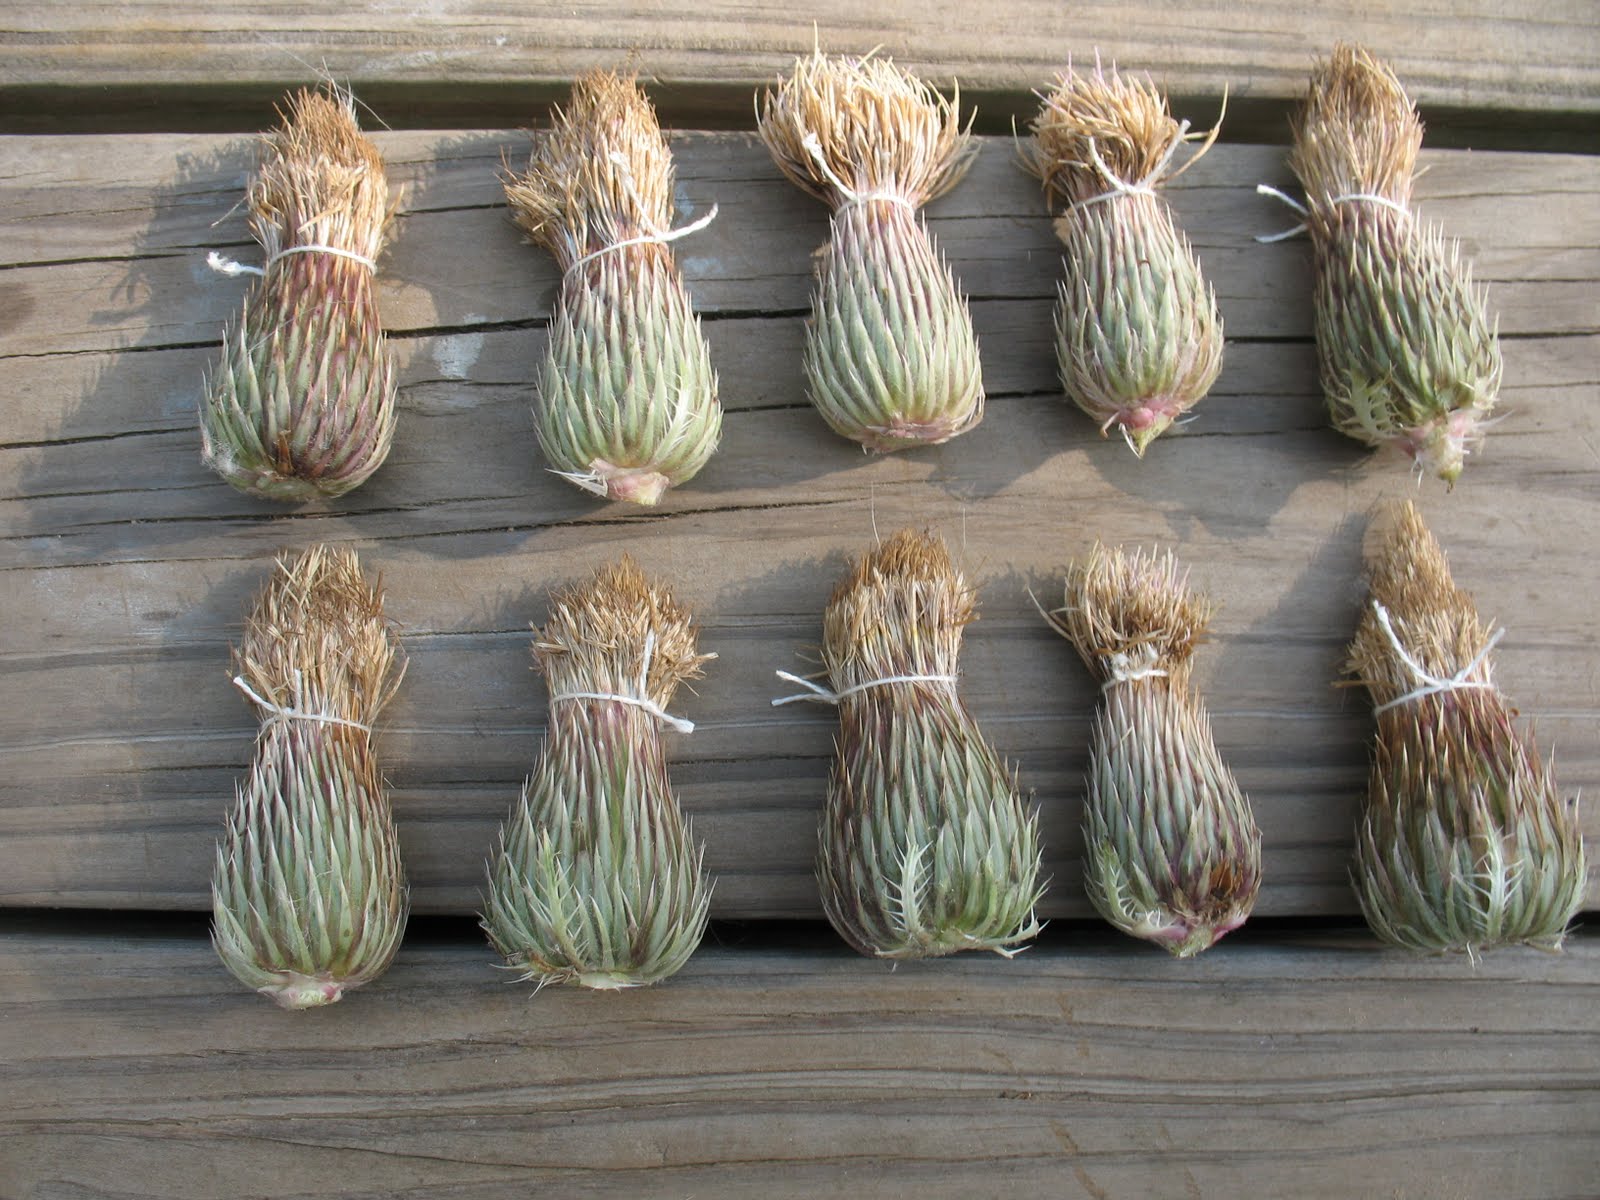
Thistle heads can be gathered in the spring before the flowers open and release their down. The thistle heads need to be tied closed or the will open as they dry and you will be left with nothing but a bag of loose down. Pictured below: top,Unopened thistle flower; bottom, thistle flowers gathered and tied closed.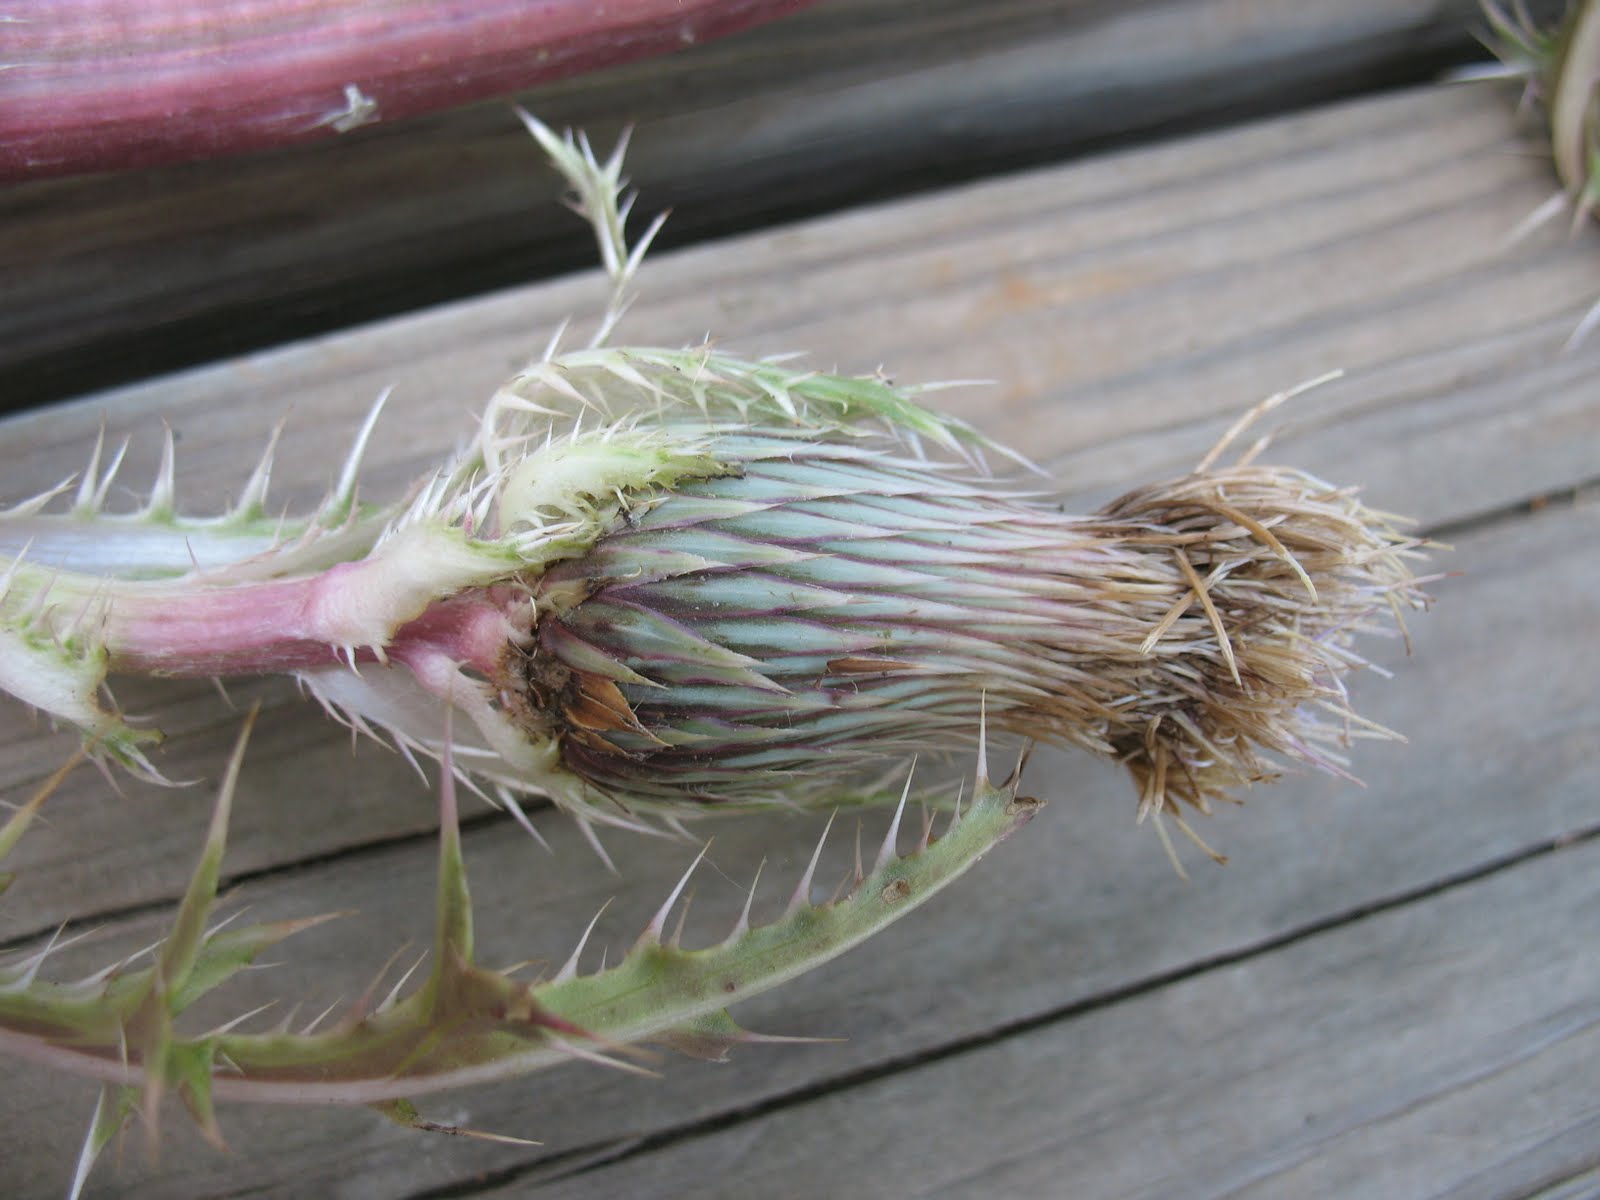
In the next post we will tackle the tricky task of attaching the thistle down to the dart shaft. Here’s a hint: No glue is involved.
Whenever I’ve done demonstrations with survival weapons, the river cane blowgun and thistle darts have always been one of the crowd favorites. One reason is that almost anyone can shoot a blowgun with reasonable accuracy after just a couple of shots. Because the blowgun is held centered between your eyes, your binocular vision makes it very easy and natural to aim. About all you have to learn is how much the dart will drop over a given distance. Another reason the blow gun is so popular is because it is just plain fun to shoot. Pictured below: Shooting a river cane blowgun. 
But is the blowgun really that useful as a survival tool? To that I would have to say that it would be pretty far down my list of survival items that I would build in a true survival situation. You are going to provide yourself with a lot more usable protein by setting traps and fishing lines than you will ever harvest with a blowgun. The Cherokee, Choctaw, and other Native American tribes in the Southeast United States used blowguns, but from what I understand, they were considered more of a child’s or teenager’s hunting tool. Children were sent out to shoot birds, squirrels, wood rats, and maybe even rabbits with their blowguns. Adult hunters used bows and arrows. If I were in a true survival situation; I, like the Cherokees, would give a blowgun to my grand children and tell them to go out hunting. This would keep them occupied, and maybe provide a little extra meat for the pot.
Of course blowguns were used for hunting and warfare in South America, but this was with the addition of natural poisons that made the darts much more deadly.
With all that said, let’s learn how to make a blowgun. They’re fun to make, fun to shoot, and it’s a skill that might come in handy some day. We’ll start off with the blowgun itself. The native people in my area used River Cane to make blowguns. River Cane is a good choice because it is durable, it doesn’t taper down too fast, and (if you select carefully) it doesn’t require too much straightening. Pictured below: A nice stand of river cane. 
Select your canes carefully. You will want your finished blowgun to be from five to eight feet long, and it must be straight. We will use heat and bending to straighten the cane, but you can keep the work to a minimum by choosing straight canes to start with. Always cut the canes three or four feet longer than you need to allow for splitting on the ends. It is best to cut the cane off just past a joint on each end. Having an intact joint on the end will help the cane hold its shape while it dries. I like to cut canes that are just about one inch outside diameter on the large end and taper down to seven-eights or so on the small end. The hole in the large end of the cane should be about one-half of an inch in diameter, and it should not be much smaller than that on the little end of the cane. When you have cut a good selection of canes, set them aside to dry for a couple of weeks at the minimum. I put them up in the rafters in my shop. If you can find standing dead canes that are still in good shape you can eliminate the drying time.
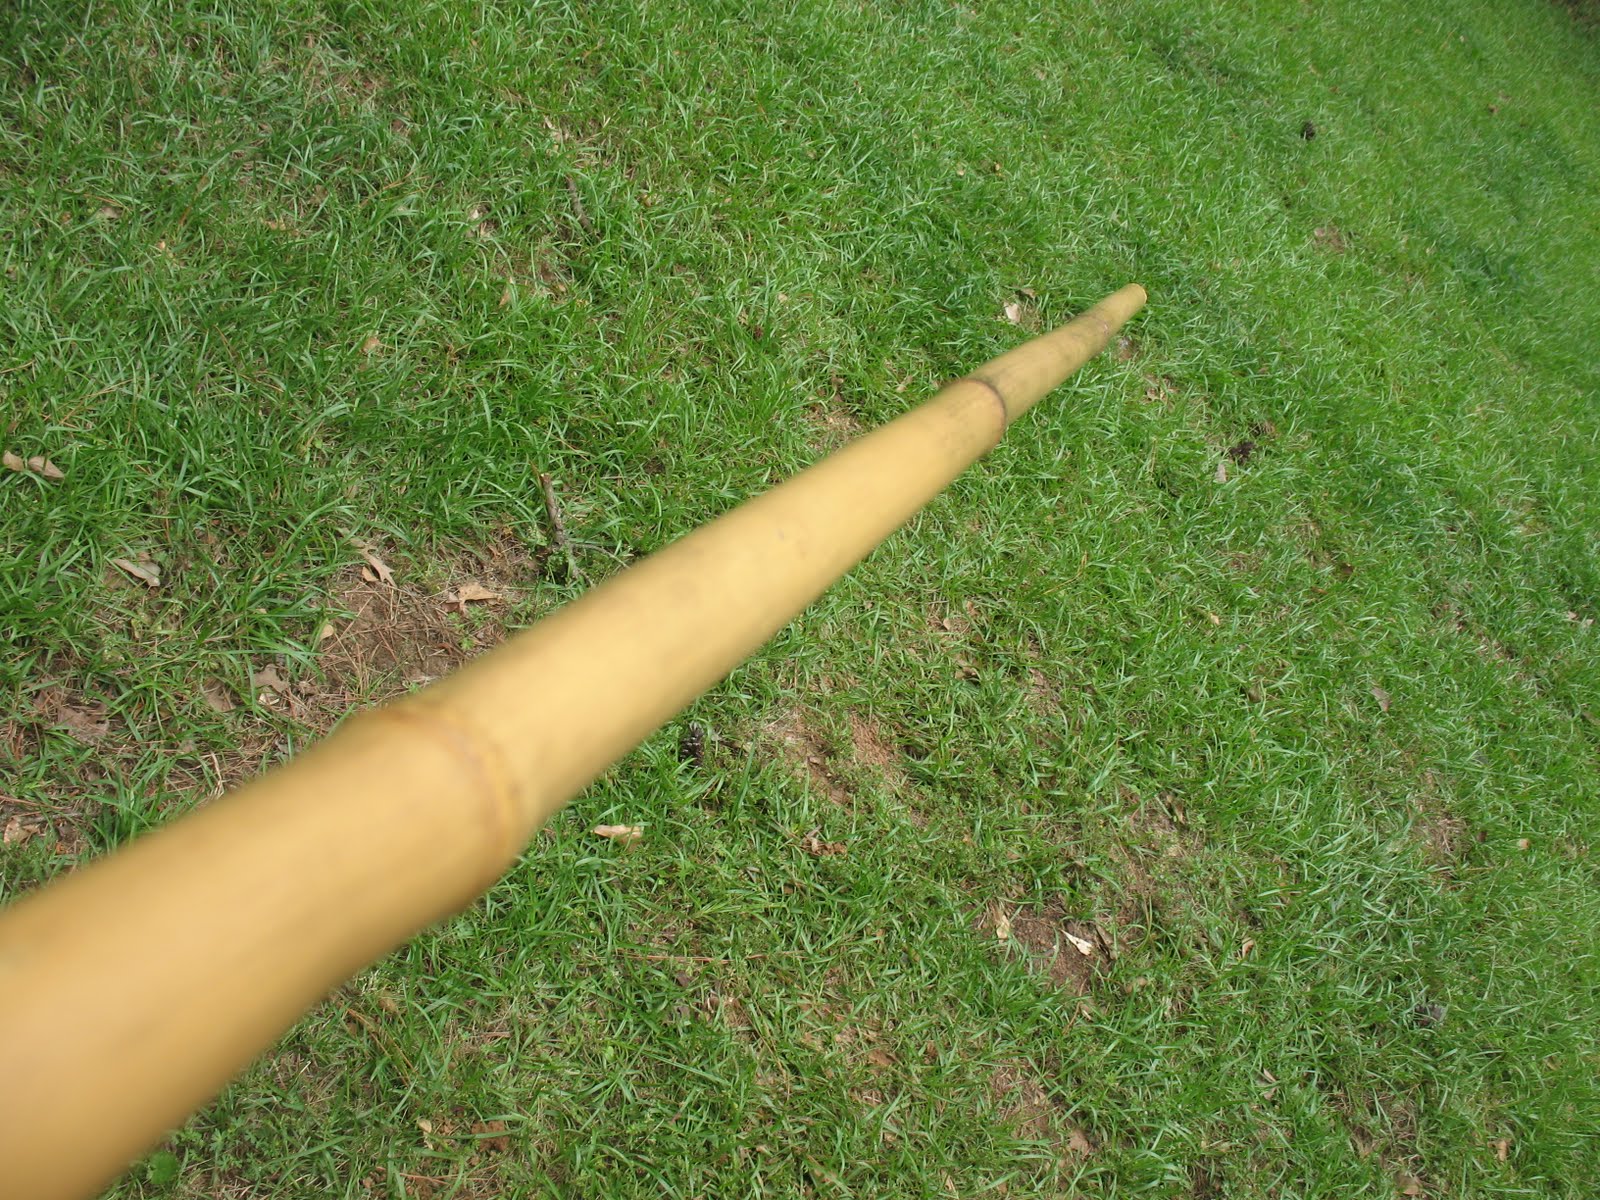
Once the canes are dry, it is time to straighten them. The procedure for straightening a blowgun cane is the same as for straightening a cane arrow shaft. That is to say that you heat it gently, and then bend it gently, and then hold it in place for 30 or 45 seconds while the cane cools. Of course, given the larger size of a blowgun cane, you have to heat it a little more, bend it a little harder, and let it cool a little longer; but all of the basic principles are the same. Grease the cane if possible before heating. Heat it over coals rather than an open flame if possible, and keep the cane moving so that it doesn’t scorch. When you bend the cane, you need to over-bend it just a little. It will spring back a little after you let go of it, and by over-bending just a tad it will probably end up pretty straight. You can straighten the cane at the joints, and you can also straighten it between joints. Sight down the can and turn it after each straightening. This will give you a good visual as to how much progress you are making. Pictured below: top, unstraightened cane; bottom, straightened cane.
When you have the cane as straight as you can get it, it is time to cut your blowgun to length and remove the joints from inside of the cane so you will have a hollow tube. I personally like to cut the big end of the tube (the part you will be blowing on) so that there is a joint about an inch down from the end. This gives a little strength to the tube. On the front end of the cane I cut off the joint right next to the end. This sounds a little confusing but if you look at the pictures below I think you will see what I mean. Pictured below: top, big end of blowgun; bottom, front end of blowgun.

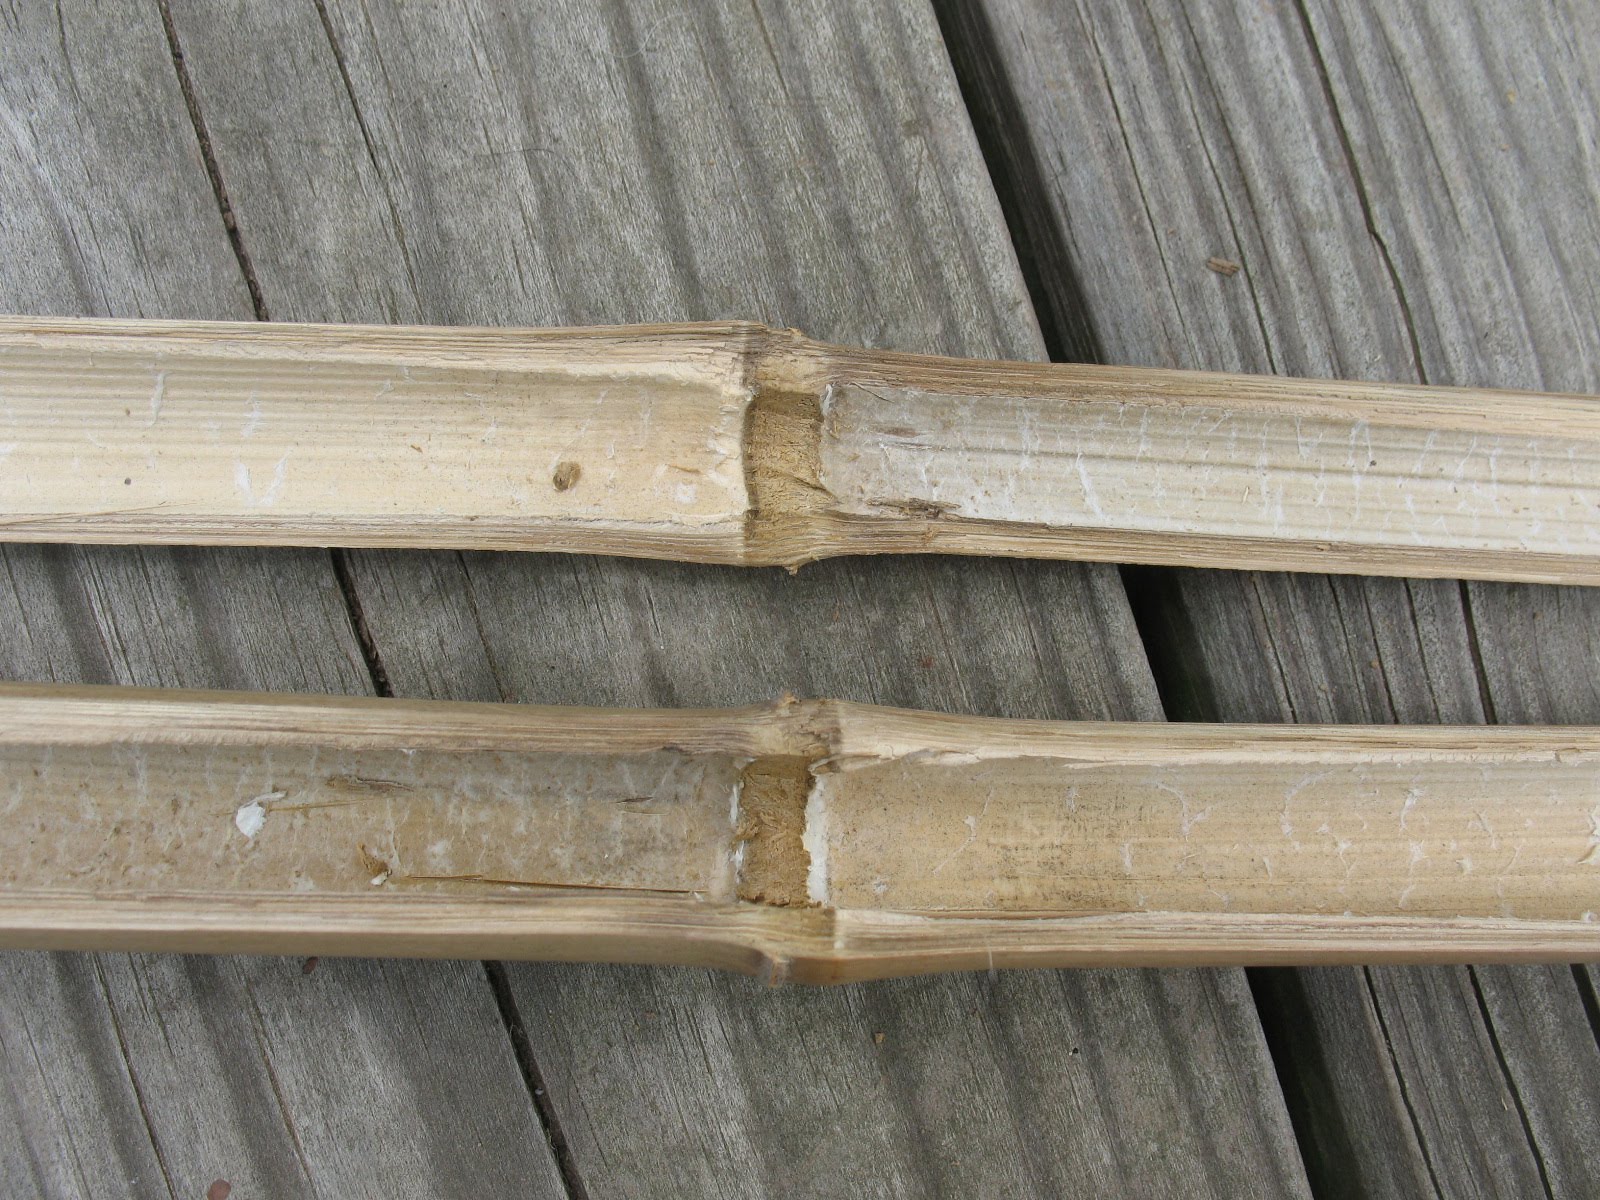
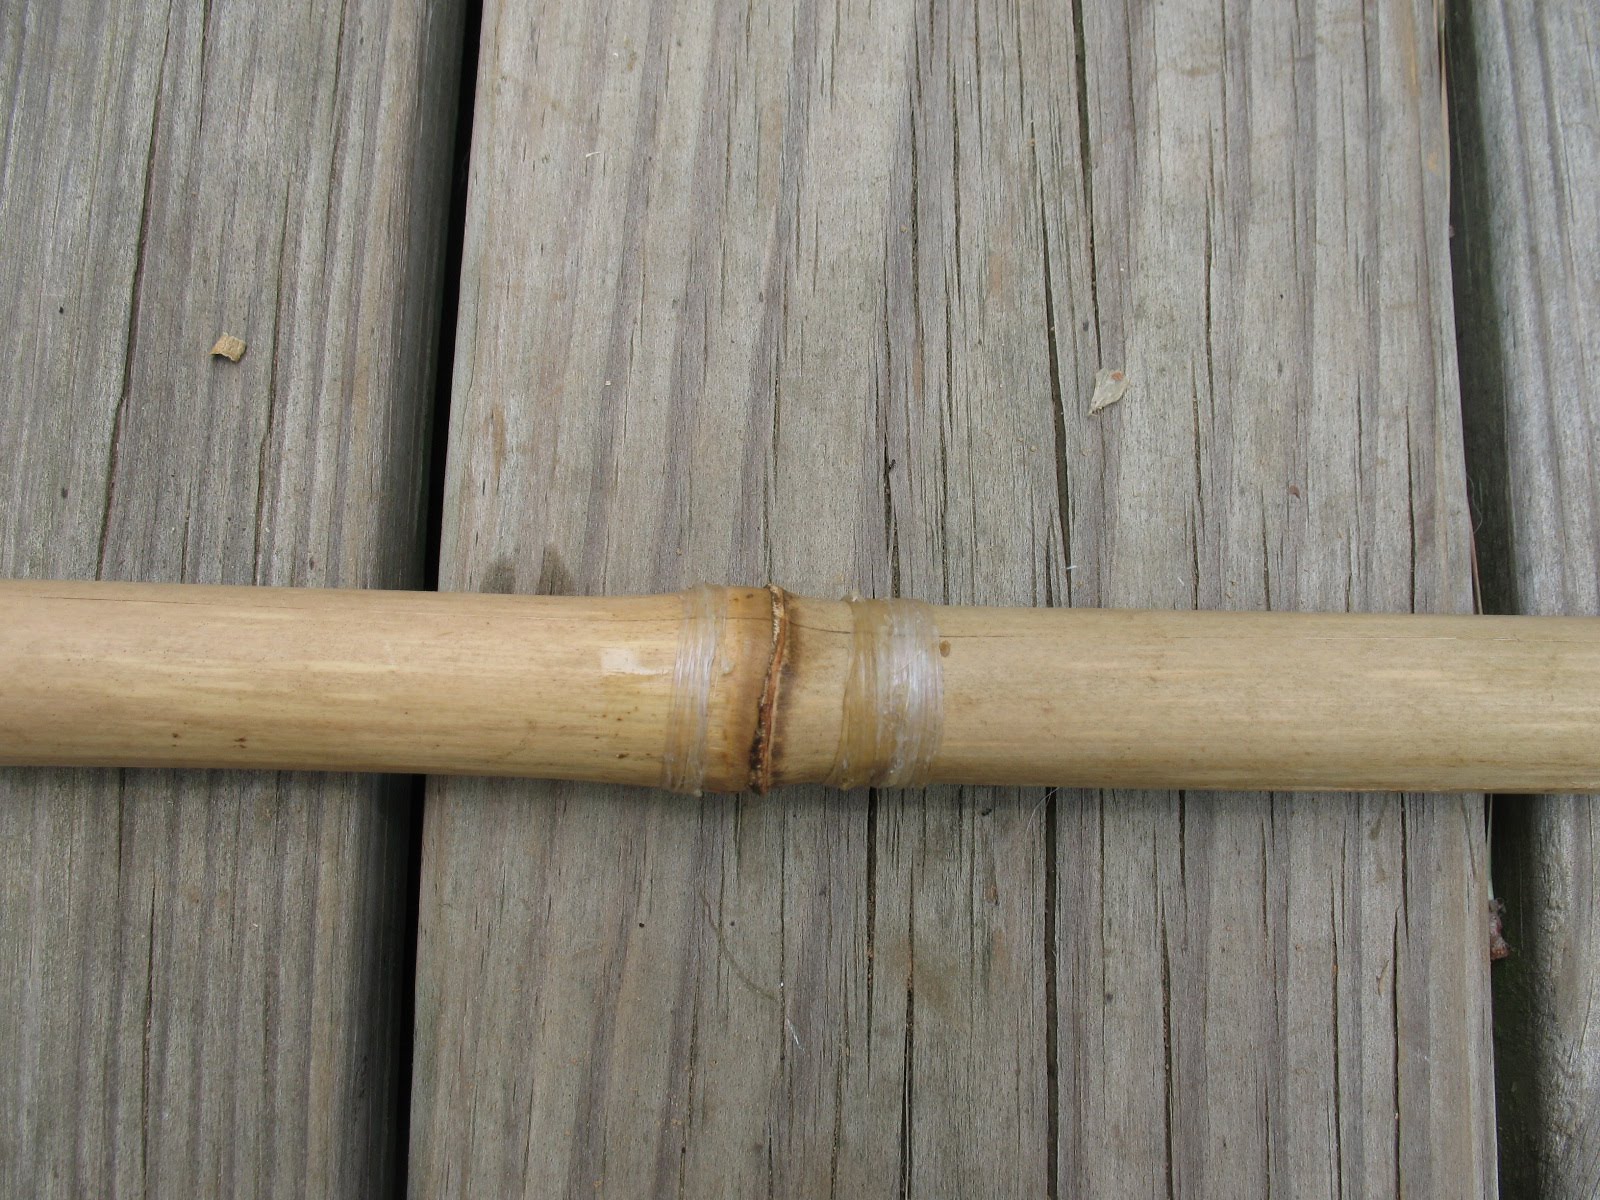
Now we need to get the joints out of the inside of the cane. Historically there were two different methods used to accomplish this. One method was to split the cane in half, carve the joints out, and then glue the cane back together. Bands of sinew or vegetable fiber were then wrapped around the cane at intervals to help keep it together. Pictured below: top, split cane with joint intact; middle, split cane with joint removed; bottom, cane glued back together and wrapped with sinew. 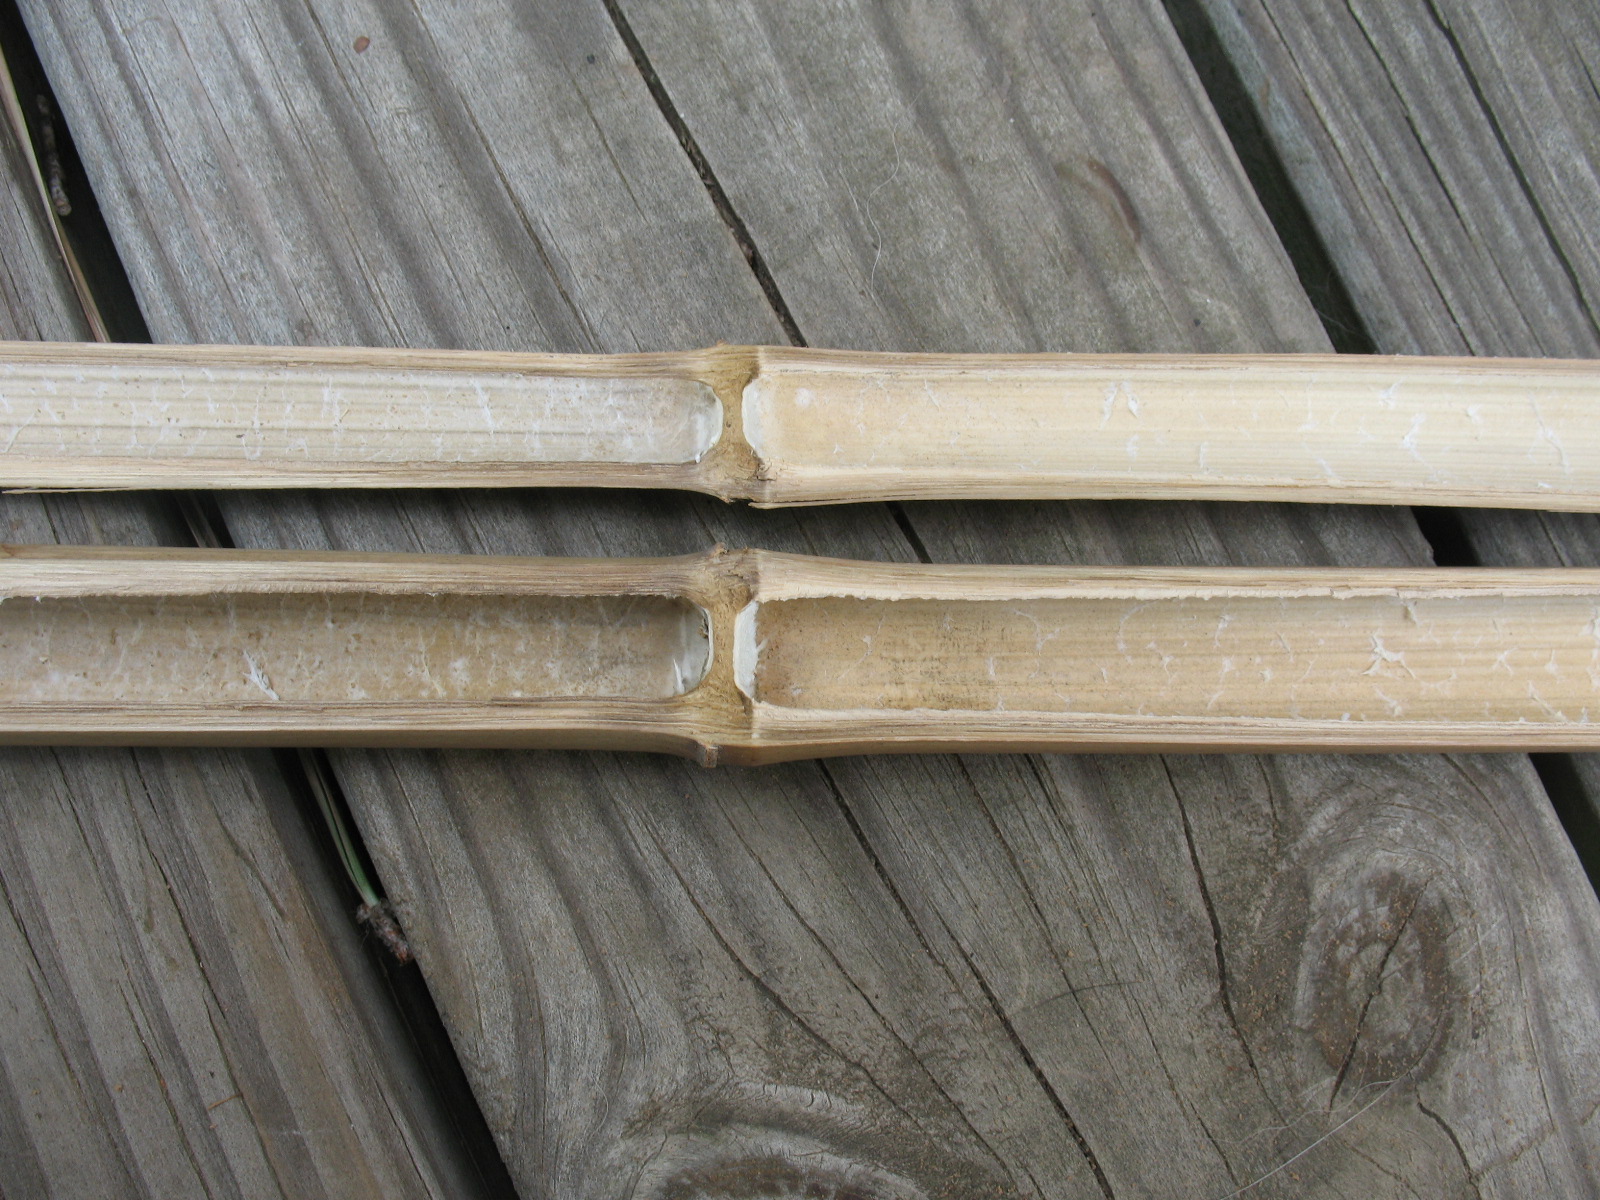
The second method, and the one I prefer, is to drill the joints out with a special tool that looks like a long, un-fletched arrow. Pictured below: Arrow drill.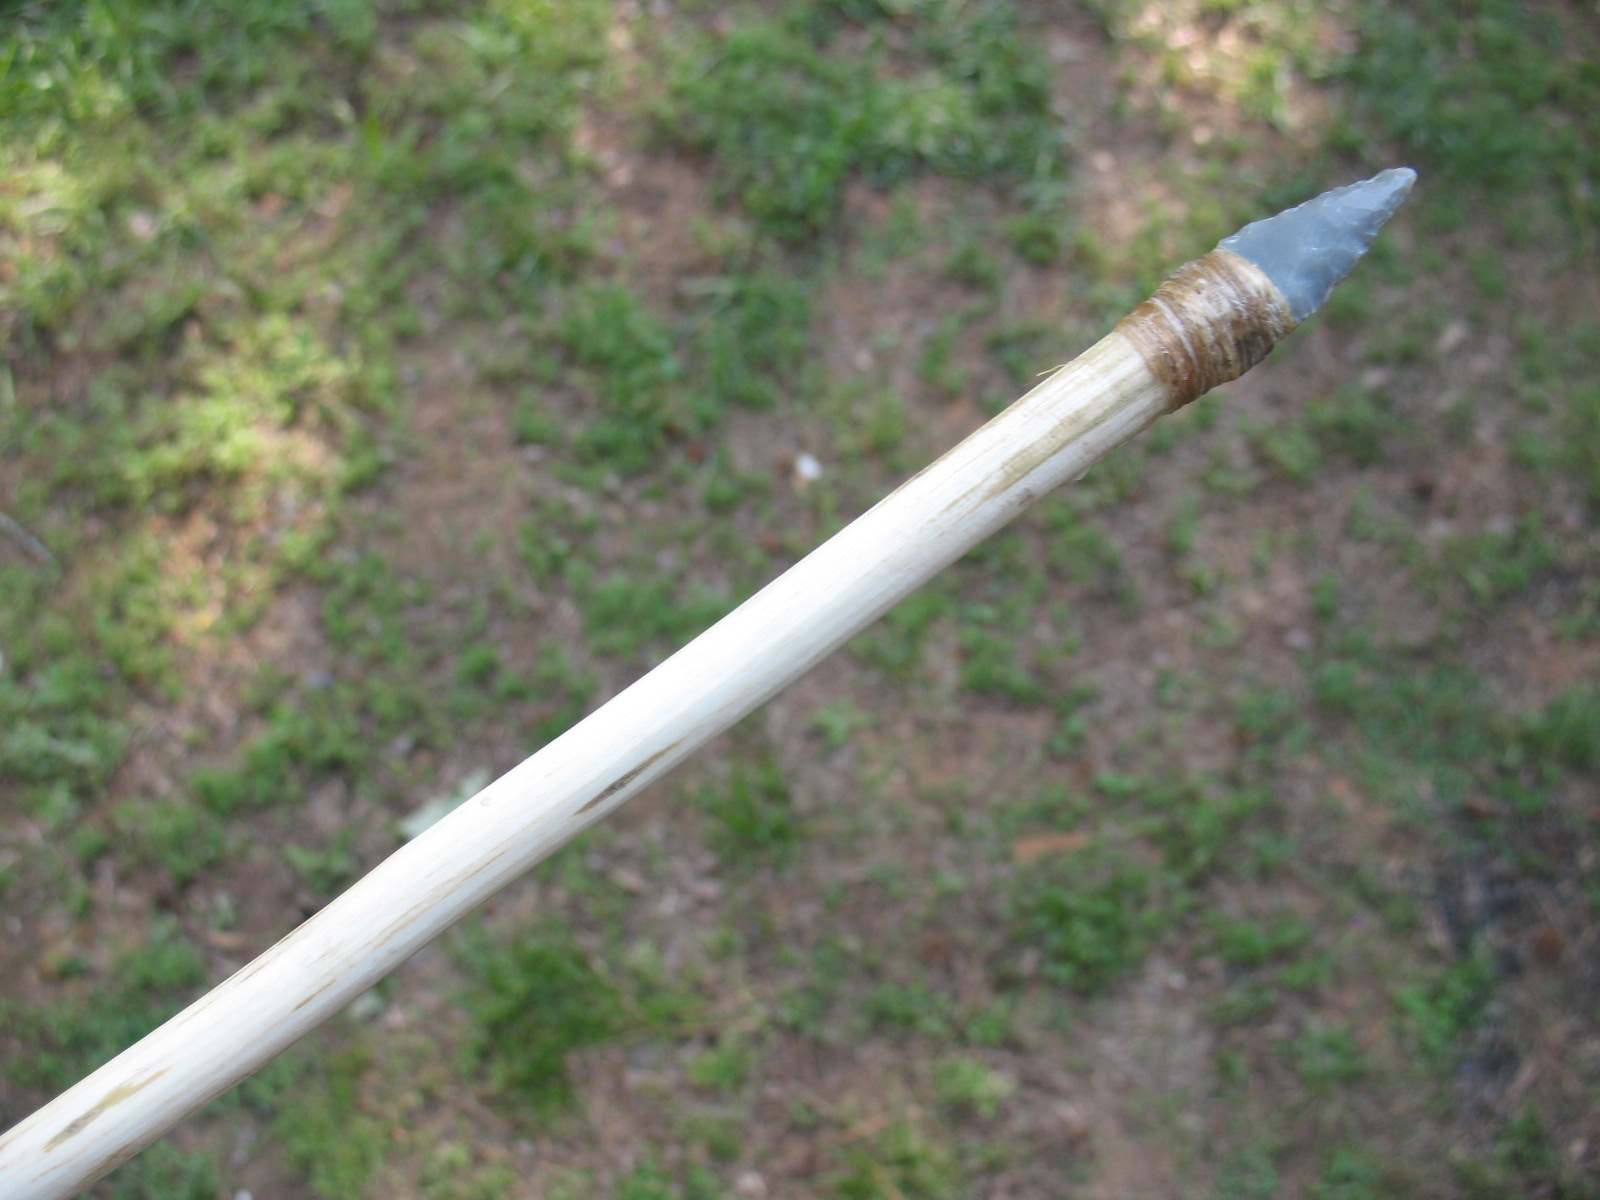
Remember that you can drill from both ends of the cane, so the arrow/drill only needs to be a little over half the length of the finished blowgun. The arrow/drill can be turned by hand by rubbing the palms back and forth to turn the drill. Pictured below: top, Inserting arrow/drill in cane ; bottom, using the arrow/drill as a hand drill.

An easier method is to make a little bow and hand-hold, and turn the arrow/drill like you are trying to start a bow-and-drill fire. Pictured below: Using a bow to turn the arrow drill.
I make quite a few blowguns, so I cheat. I took a paddle bit and welded a four foot long steel rod to it. I can chuck this baby up in by electric drill and bore out a blowgun tube in a couple of minutes. Pictured below: Modern drill bit used for blowgun manufacture.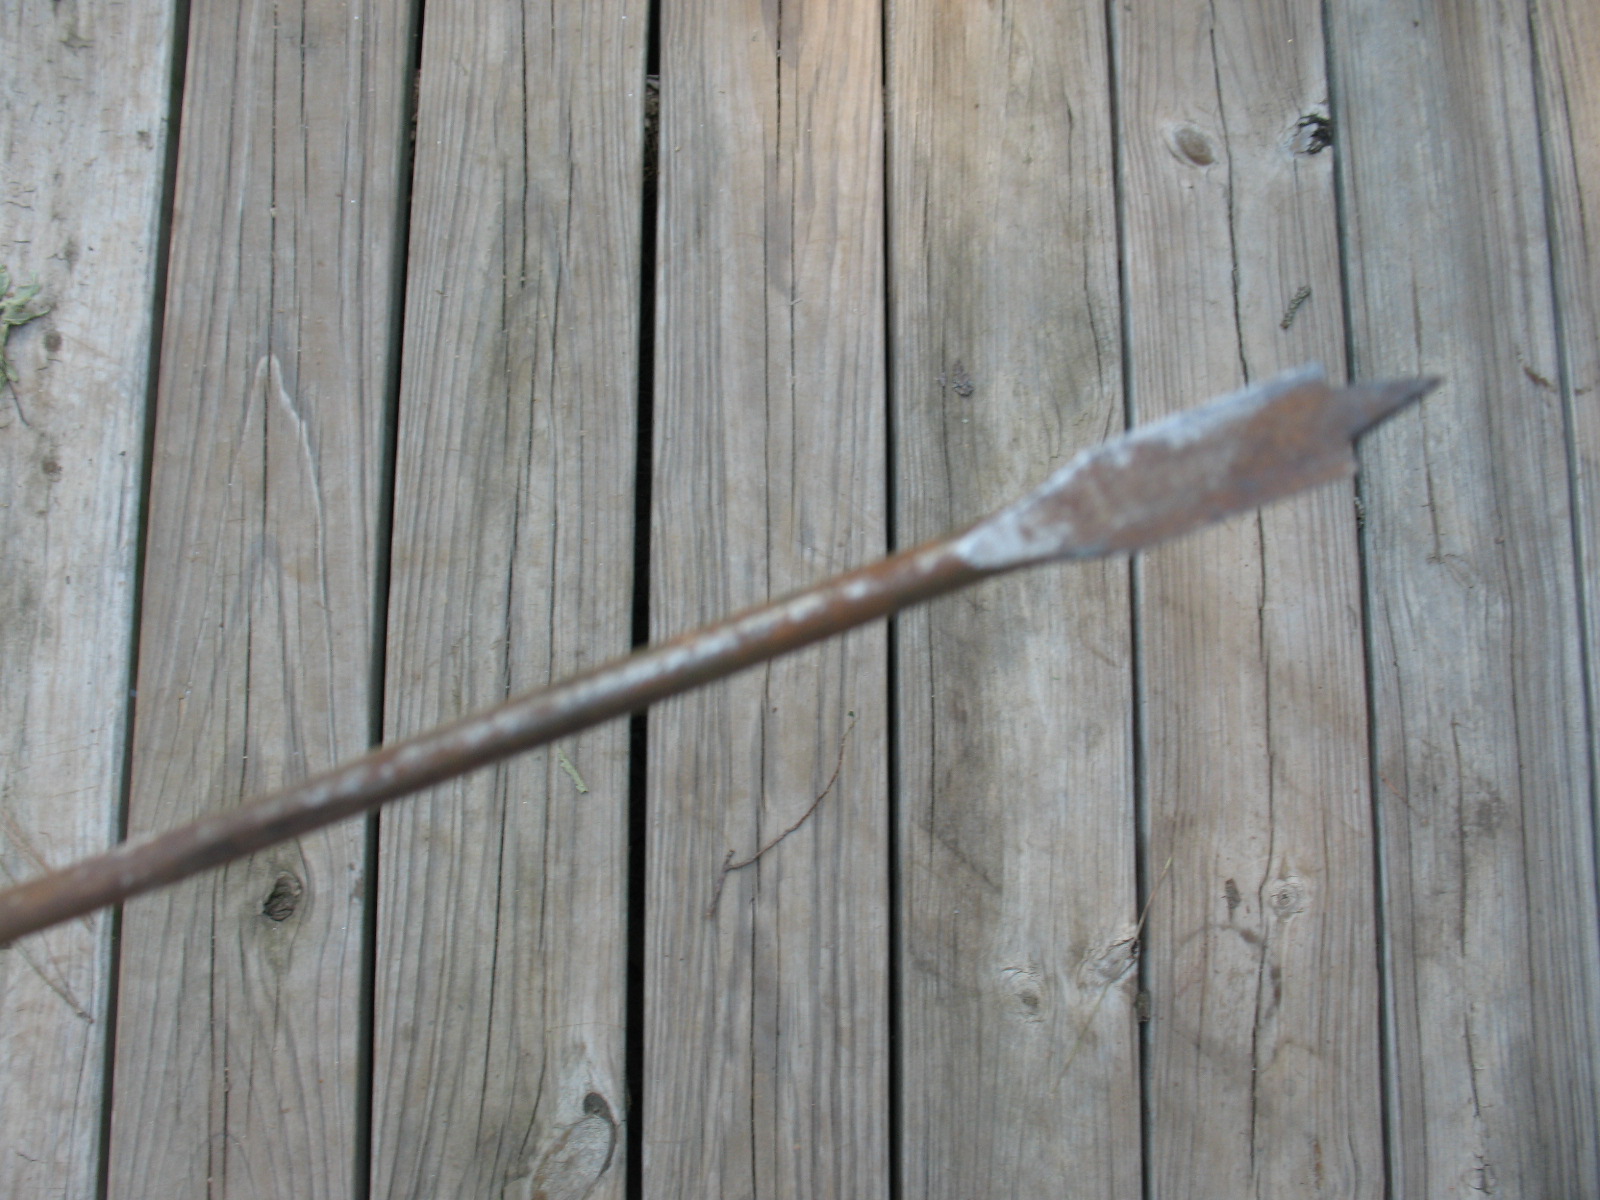
When you have your blowgun finished, it’s time to make some darts. That will be the subject of my next post.
DISCLAIMER: Don’t believe anything I or any body else tells you about edible wild plants. Don’t eat edible wild plants based on what you see in a book or on the inter-net. Get a qualified instructor to show you the plants, and don’t eat them until the instructor shows you how to prepare them, and then eats them him or herself. Be aware that you may be allergic to a plant that someone else can eat without harm. Be sure that any plants that you gather have not been sprayed with pesticides or herbicides. Pictured below: Wild Onion plant.
When you are cooking in your kitchen, onions are a nice addition to a stew or a salad, and they can really enhance a pot of greens. Just because you are in a survival situation is no reason to go without onions. In my part of the world wild onions are easy to find in the spring. Just make sure that you are picking onions (genus Allium) and not crow’s poison (Nothoscordum bivalve). Onions will flavor your food; crow’s poison will make you very sick. These two plants really don’t look much alike. The flowers are entirely different as you can see from the photos below. Pictured below: top, Crow’s Poison; bottom, Wild Onion.

And the smell is totally different. They both have a bulb shaped root; but the wild onion smells like an onion, and the crow’s poison does not. Also, in my area the crows poison blooms first and then is completely gone when wild onions bloom. This may not be the same where you are, but it is definitely true here.
Pull wild onions when they are flowering and use them in stews, salads, or with greens. They have a strong taste so they are not so good if eaten by themselves. Pictured below: Wild Onion plant with flower, stem, and bulb.
When you pull wild onions, they will have an outer skin that is kind of like a fibrous netting over the bulb. Pictured below: top, Wild Onion bulbs with outer skin; bottom, Wild Onion bulbs with outer skin removed. 

Remove this outer skin before using the bulbs. The green stalks of the wild onion can be chopped up and used like chives. Wild onions, just like garden grown onions, can be hung and dried for later use.
DISCLAIMER: Don’t believe anything I or any body else tells you about edible wild plants. Don’t eat edible wild plants based on what you see in a book or on the inter-net. Get a qualified instructor to show you the plants, and don’t eat them until the instructor shows you how to prepare them, and then eats them him or herself. Be aware that you may be allergic to a plant that someone else can eat without harm. Be sure that any plants that you gather have not been sprayed with pesticides or herbicides. Pictured below: Lamb’s Lettuce
Lamb’s Lettuce is a member of the Valerianella family. There are at least a dozen different species of Valerianella and to tell you the truth I’m not exactly sure which one we have here in East Texas. All I know is that the old man who taught me about edible plants showed me this plant, showed me what to look for to identify the plant, showed me how to eat the plant, and told me that it was called Lamb’s Lettuce. He had an interesting philosophy about naming plants. He used to say, “Don’t think you know a plant just because you know its name.” In other words, it’s more important to know how to identify the plant, where to look for it, what time of year to look for it, what parts are edible, and how to prepare the plant for human consumption. That’s the important stuff.
So back to Lamb’s Lettuce. Look for Lamb’s Lettuce in disturbed areas like old fields. It comes up in the early spring and will have little white flowers on the upper part of the stems. The most striking feature of Lamb’s Lettuce, and the thing that makes it easy to identify is how the stems fork into a perfect “Y” shape. The leaves of Lamb’s Lettuce are not large, but they have a very mild lettuce-like flavor. They are a true pick-and-eat wild green. Pictured below: Distinctive “Y” of Lamb’s Lettuce stem. 
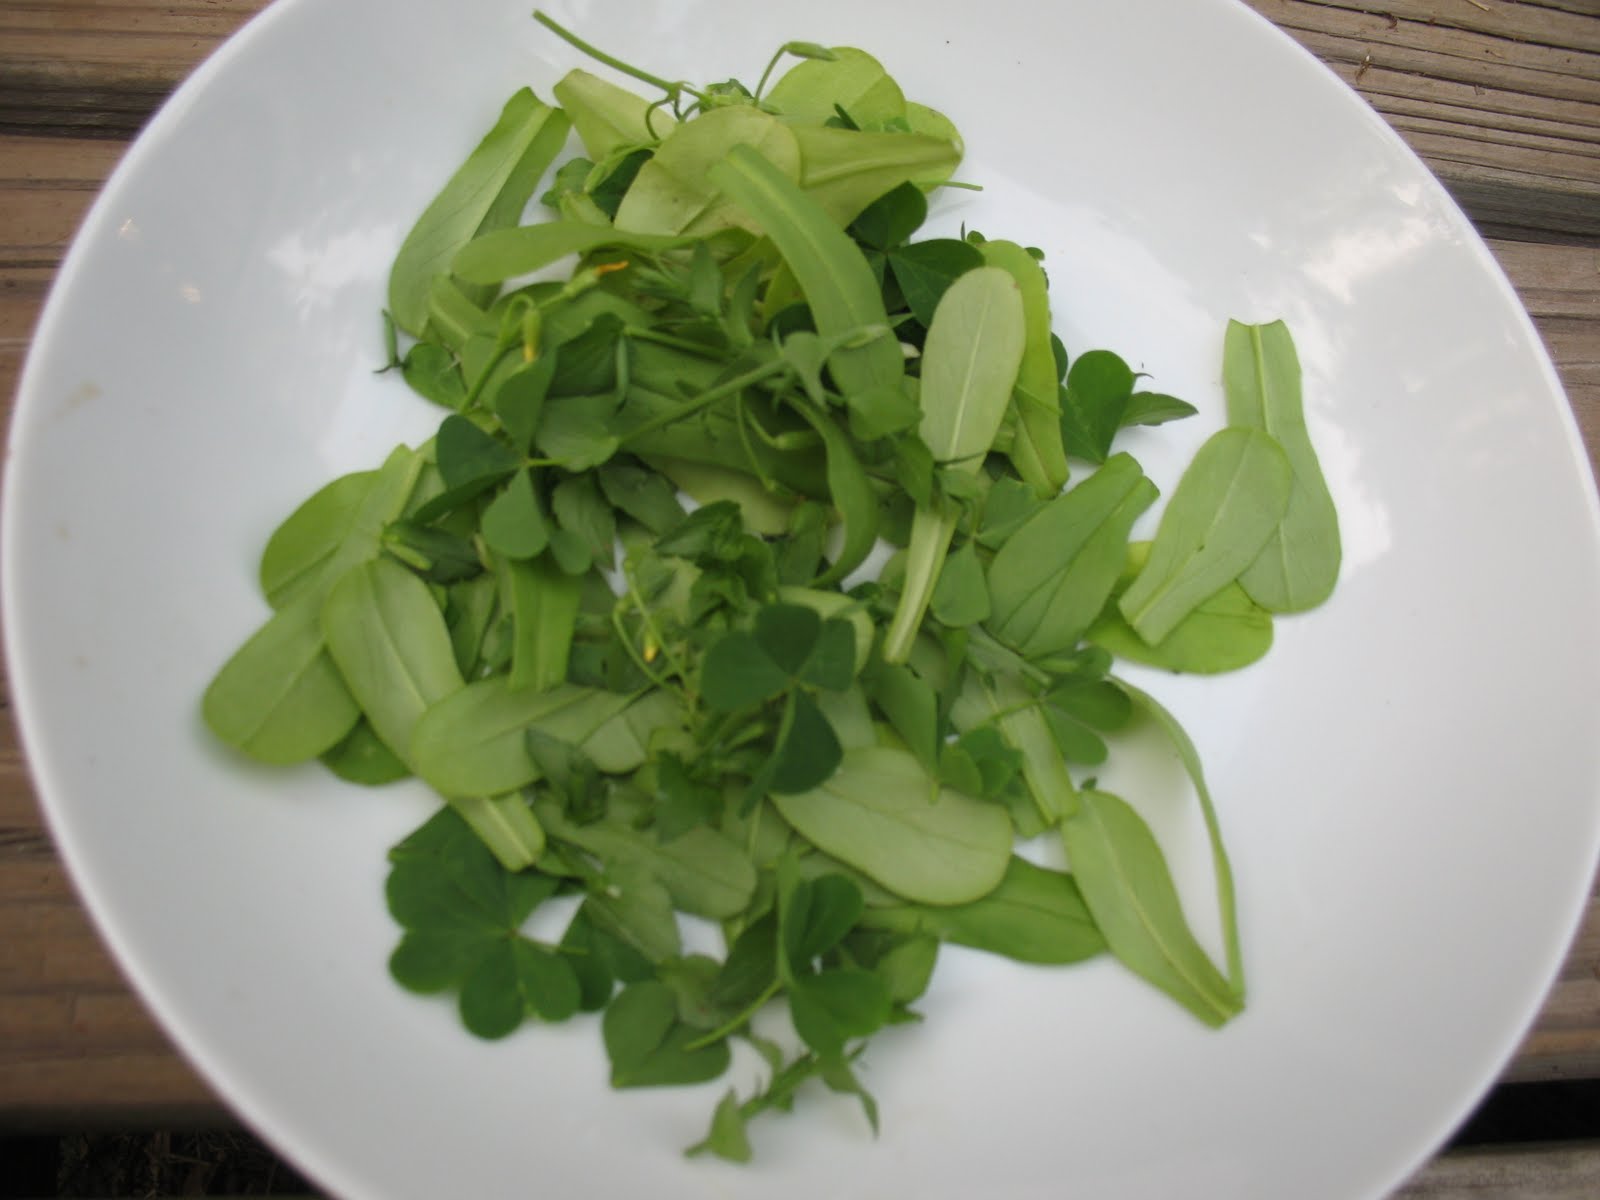
I like to eat Lamb’s Lettuce as part of a wild salad made with other greens that are available at the same time. Lamb’s Lettuce, Chickweed, and Yellow woodland sorrel make a good combination. The Yellow Woodland Sorrel adds a nice lemony taste to the salad. Just wash your salad greens and if you have it add a little oil and vinegar and maybe some salt and pepper. Makes a really tasty salad. Pictured below: Top, Dish of Lamb’s Lettuce; bottom, Mixed greens including Lamb’s Lettuce, Chickweed, and Yellow Woodland Sorrel. 
Of course if you are in a survival situation, you can eat any or all of these as a raw nibble. I will put some info about Chickweed and Yellow Woodland Sorrel in future posts.
One way to harvest fish is with a spear. Unless you are in a survival situation spear fishing is pretty well limited to non-game fish, so if you want to practice spear fishing make sure that you do it in a legal manner. Pictured below: Fish spears 
One thing that we have going against us in East Texas is that there is not much clear water. It is usually pretty hard to see fish in our mud bottom rivers and lakes. One time of the year when spear fishing, or bow fishing, is popular is in the spring when the Gar are spawning.
These big fish come up into the shallows and roll on the surface of the water in spawning season and are an easy target for a spear. The main problem with spearing Gar is that they have a very tough skin. Early Spanish explorers referred to them as “the armored fish” and Native Americans actually used the dried scales for arrow points. So if you are trying to spear Gar, make sure you have a sharp and durable spear.
I have three fish spears. One is the kind that you can buy at hardware or sporting goods stores. You just buy the spear head and then attach it to a wooden shaft. Pictured below: Fish spear with store bought point.
I have another spear that a friend of mine made for me. The shaft of this spear is a sealed hollow tube, so if you drop it in the water it actually floats back up and about a foot of the shaft bobs up out of the water. Pictured below: Floating fish spear.
I have a survival spear that I made out of a Hickory sapling and some Yucca cordage. To make this spear I cut a small Hickory tree, and while it was still green I split the smaller end into four pieces. I wrapped cordage tightly around the bottom of the split section to keep it from splitting any farther. I then placed small sections of dried limb across the bottom of each split to spread the barbs out. Some more Yucca cordage was added to hold the barbs together above the wedges. I used my knife to taper and shape the barbs. Pictured below: My survival fish spear.
One thing that you have to keep in mind when you are spear fishing is that the fish is not where it appears to be. Because of the light being refracted by the water, the fish is actually closer to you than it appears. I’ve read all kinds of formulas for calculating where the fish is, but I don’t see myself doing the math fast enough to spear a fish. It’s one of those things, like instinctive archery, that you just have to practice.
DISCLAIMER: Don’t believe anything I or any body else tells you about edible wild plants. Don’t eat edible wild plants based on what you see in a book or on the inter-net. Get a qualified instructor to show you the plants, and don’t eat them until the instructor shows you how to prepare them, and then eats them him or herself. Be aware that you may be allergic to a plant that someone else can eat without harm. Be sure that any plants that you gather have not been sprayed with pesticides or herbicides. Pictured below: Dandelion Greens
Most parts of the Dandelion (Traxacum officinale) are edible, but for right now we’re just going to talk about the greens. Dandelions are pretty easy to identify. The leaves grow in a rosette that is close to the ground and about three to six inches in diameter. The leaves are deeply toothed. In fact, the plant gets its name from the French dent d’leon which means “tooth of the lion.” In the center of the rosette the Dandelion puts up a shoot with a round yellow flower on it. Pictured below: Dandelion flower
In older plants this flower turns into a white puff-ball that kids love to pick and blow on so that the down flies away into the air. Pictured below: Dandelion puff-ball
The green is edible and very nutritious and some will tell you that you can pick it and eat it as a salad green straight off the plant. I must respectfully disagree. These are either (a) people who have never eaten a Dandelion Green, (b) people who are heavy smokers and have no taste buds left, or (c) cruel practical jokers. I have never tasted a fresh Dandelion Green that wasn’t bitter. Maybe they exist, but I haven’t run across them. Fortunately, the chemical that causes Dandelions to be bitter is water soluble, so it is easy to get rid of.
This is the easiest way to prepare Dandelion Greens so that they taste good. Collect a basket of fresh young Dandelion Greens. Gather more than you think you need because they will shrink when you cook them. Chop the greens up into one or two inch pieces and wash them. Bring two pots of water to a good boil. Drop the greens into the first pot and let them boil for three minutes. Pour the boiled greens into a strainer to remove the water, then dump the greens immediately into the second pot of boiling water and boil for another three minutes. Remove the greens from the second pot, strain, add salt and pepper to taste and serve. I like them with a little vinegar sprinkled on them, or better yet, a little Pepper Sauce.
If you want to avoid the boiling, you can wilt Dandelion Greens. Here’s how to wilt greens. Pick a mess of fresh, young Dandelion Greens. Wash the greens and place them on a plate or in a shallow bowl. Fry up several pieces of bacon in a skillet. Pour the hot bacon grease over the greens. Crumble up the bacon and sprinkle it over the greens. Some people like to chop up a hard-boiled egg and add it to the greens. That’s it; time to eat. You can use this same recipe with other types of greens including that lettuce that has started to wilt a little on its own.
This is a quick and easy way to make a minnow trap out of a two liter plastic bottle.
Equipment needed:
a two liter plastic bottle
a knife
five or six feet of cordage
some small wire or paper clips (helpful but not necessary)
a nail or ice pick (helpful but not necessary)
some kind of bait ( bread crumbs, dog food, etc)
Directions:
1. Remove the bottle cap and dispose
2. Using your knife, cut off the cap end of the bottle at the point where the bottle starts to taper down from its full width.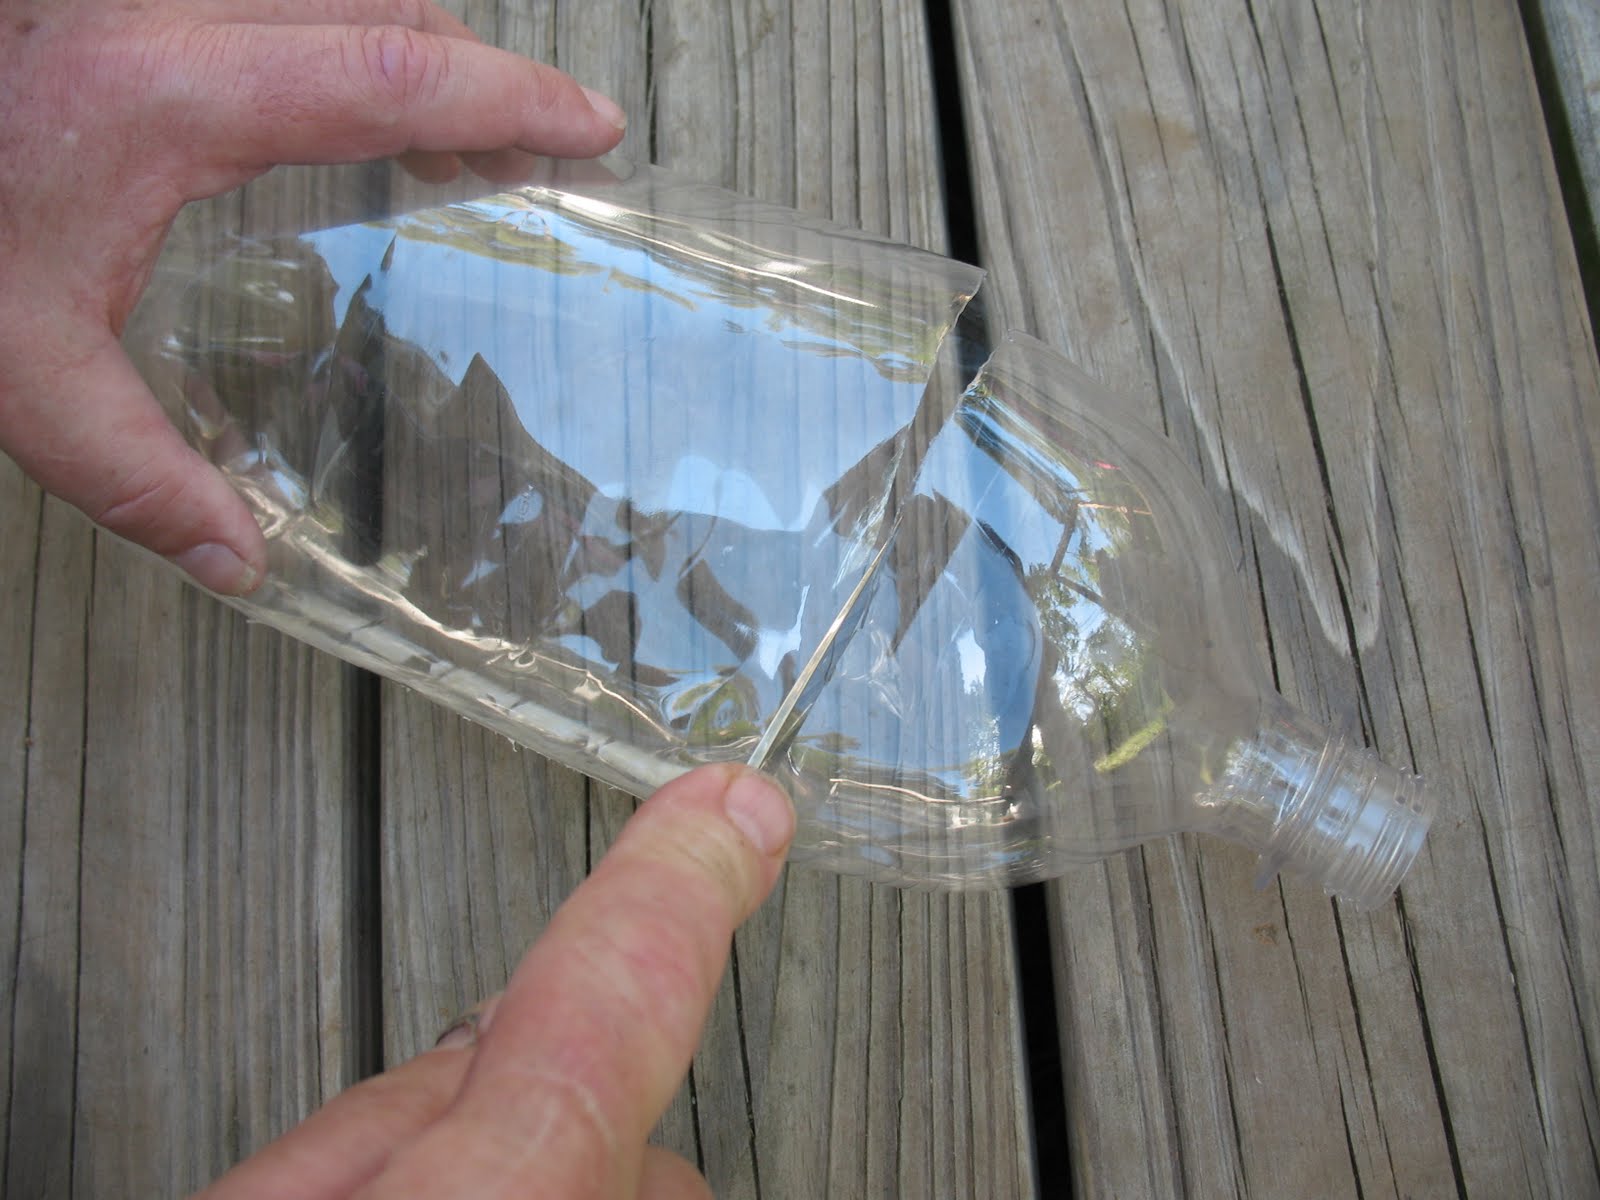
3. Use you knife, nail, or ice pick to poke two holes in the bottom of the bottle. 
4. Thread your cordage through these two holes and tie the cordage off. 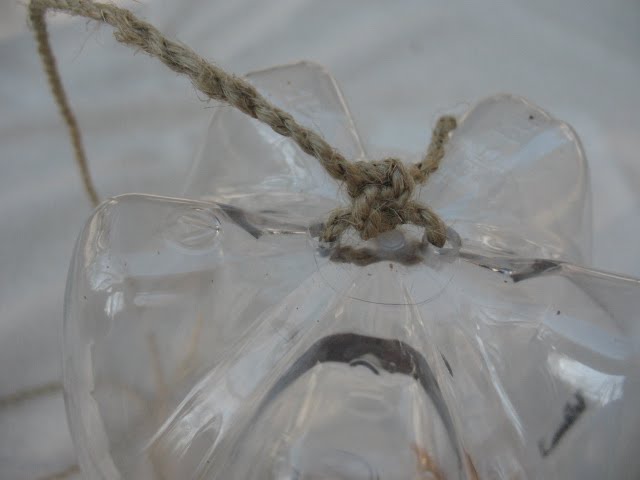
5. Use your knife, nail, or ice pick to poke six or eight small holes in the body of the bottle. This will allow air in the bottle to escape, and help the bottle to sink down into the water.
6. Now the tricky part. Invert the top of the bottle that you cut off, and insert it down into the body of the bottle.
7. Line the edges of the bottle up and use your knife, nail, or ice pick to poke a small hole through both layers of the plastic. Make the hole about a quarter inch back from the edge and be careful not to cut all the way to the edge.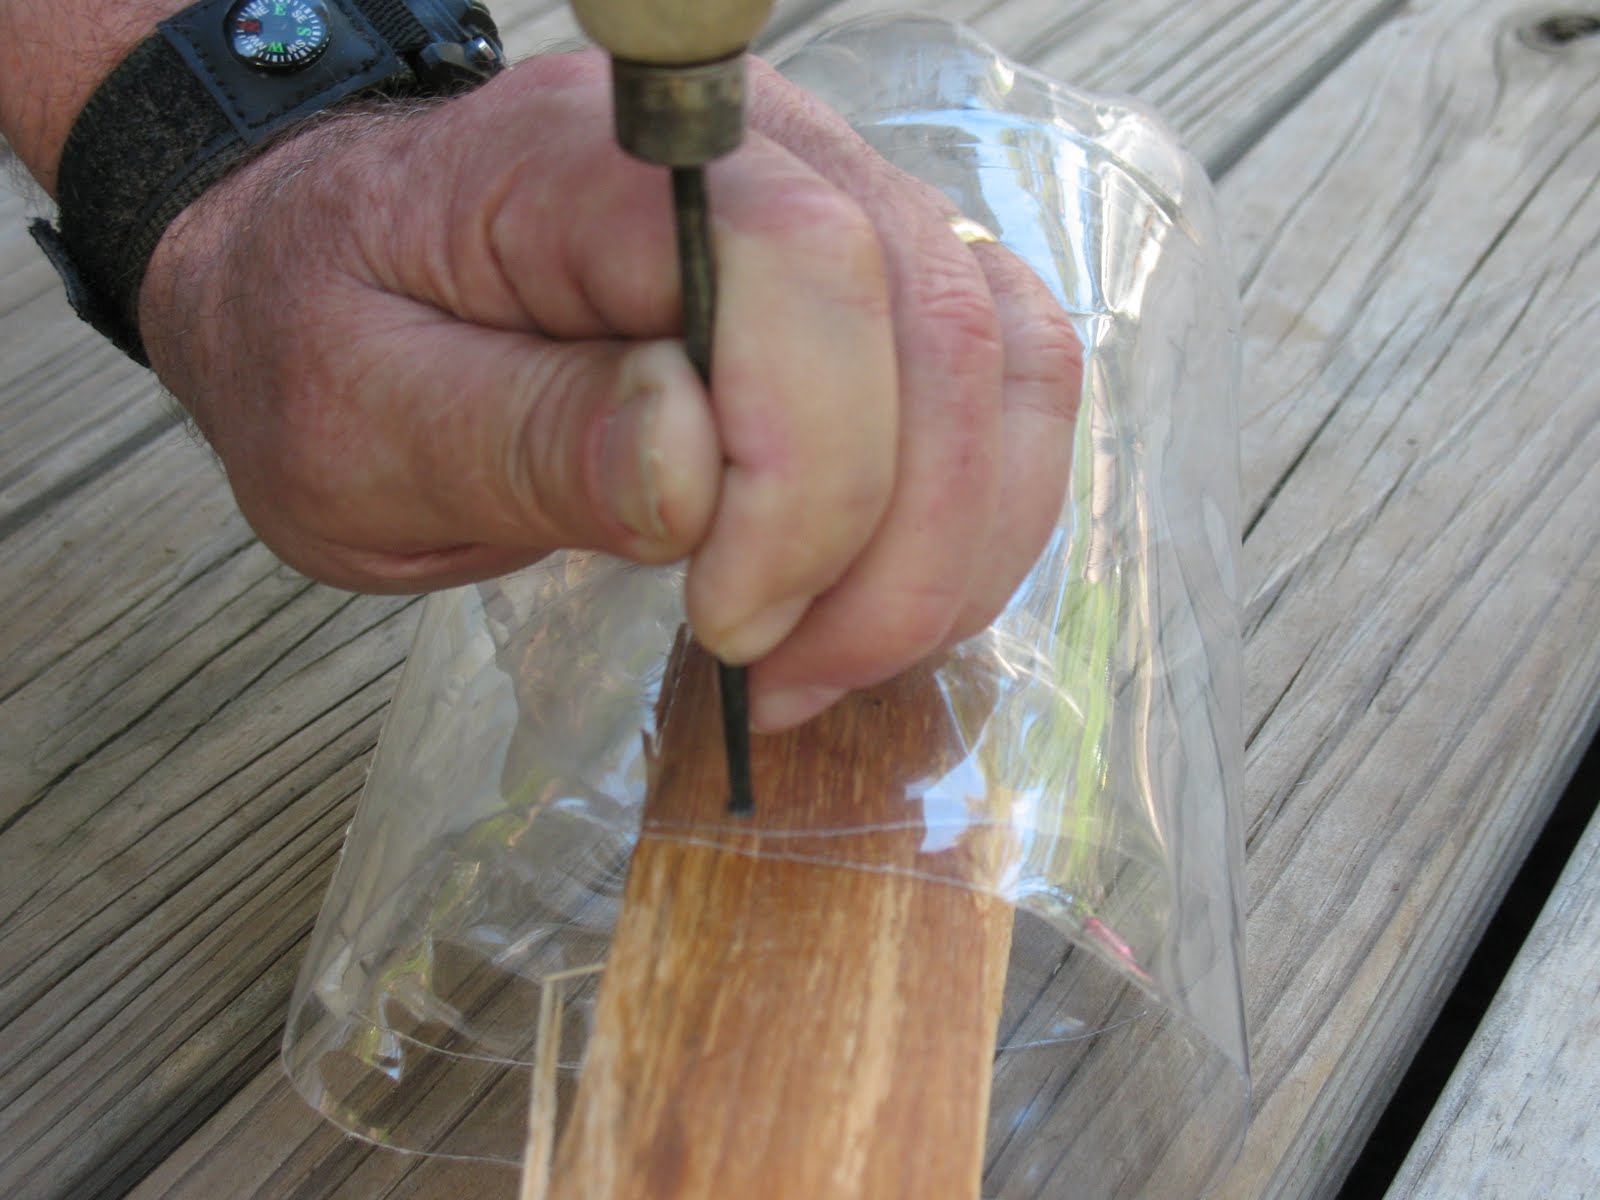
8. Take some small wire, a piece of paper clip, or some small string and thread it through both hole, loop the string over the edges of the plastic and tie a knot in the string.
9. When this is done poke two or three more holes around the rim of the trap and run wire or string through them just as you did the first hole.
10. Drop a few pieces of bread or some dog food down into the bottle, and you are done.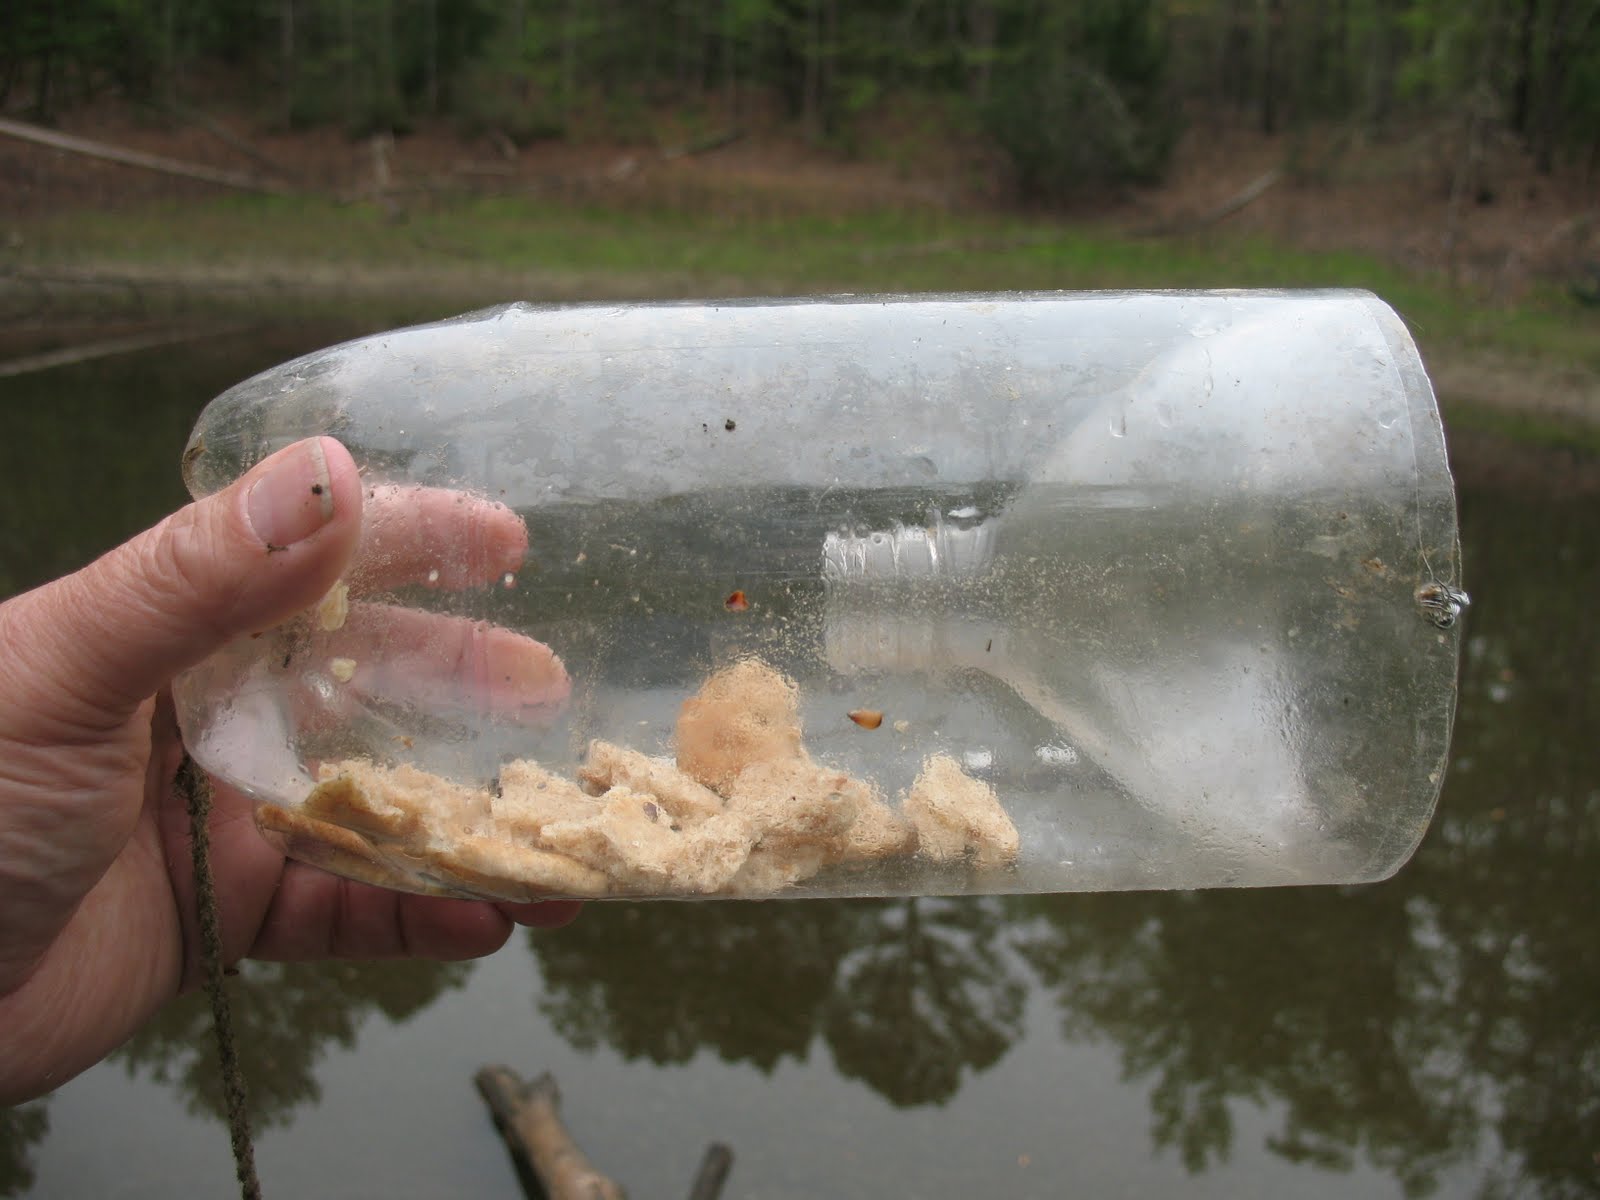
Take your trap down to the water, push it down to get some water inside the bottle, then toss the bottle a few feet out into the water. The air will escape through the holes that you punched, and the bottle will sink. Use the string attached to the bottom to tie the trap off to a log or rock and let the trap sit for twenty-four hours. 
If there are any minnows in the area, they will swim into the bottle to get at the bait, and then they won’t be able to find their way out. All you have to do is pull the trap in and remove your minnows. 
Be aware that because of the small size of this trap you will not get many minnows in one trap (I usually get three to six). So if you want to get a good mess of minnows, you should put out multiple traps.
