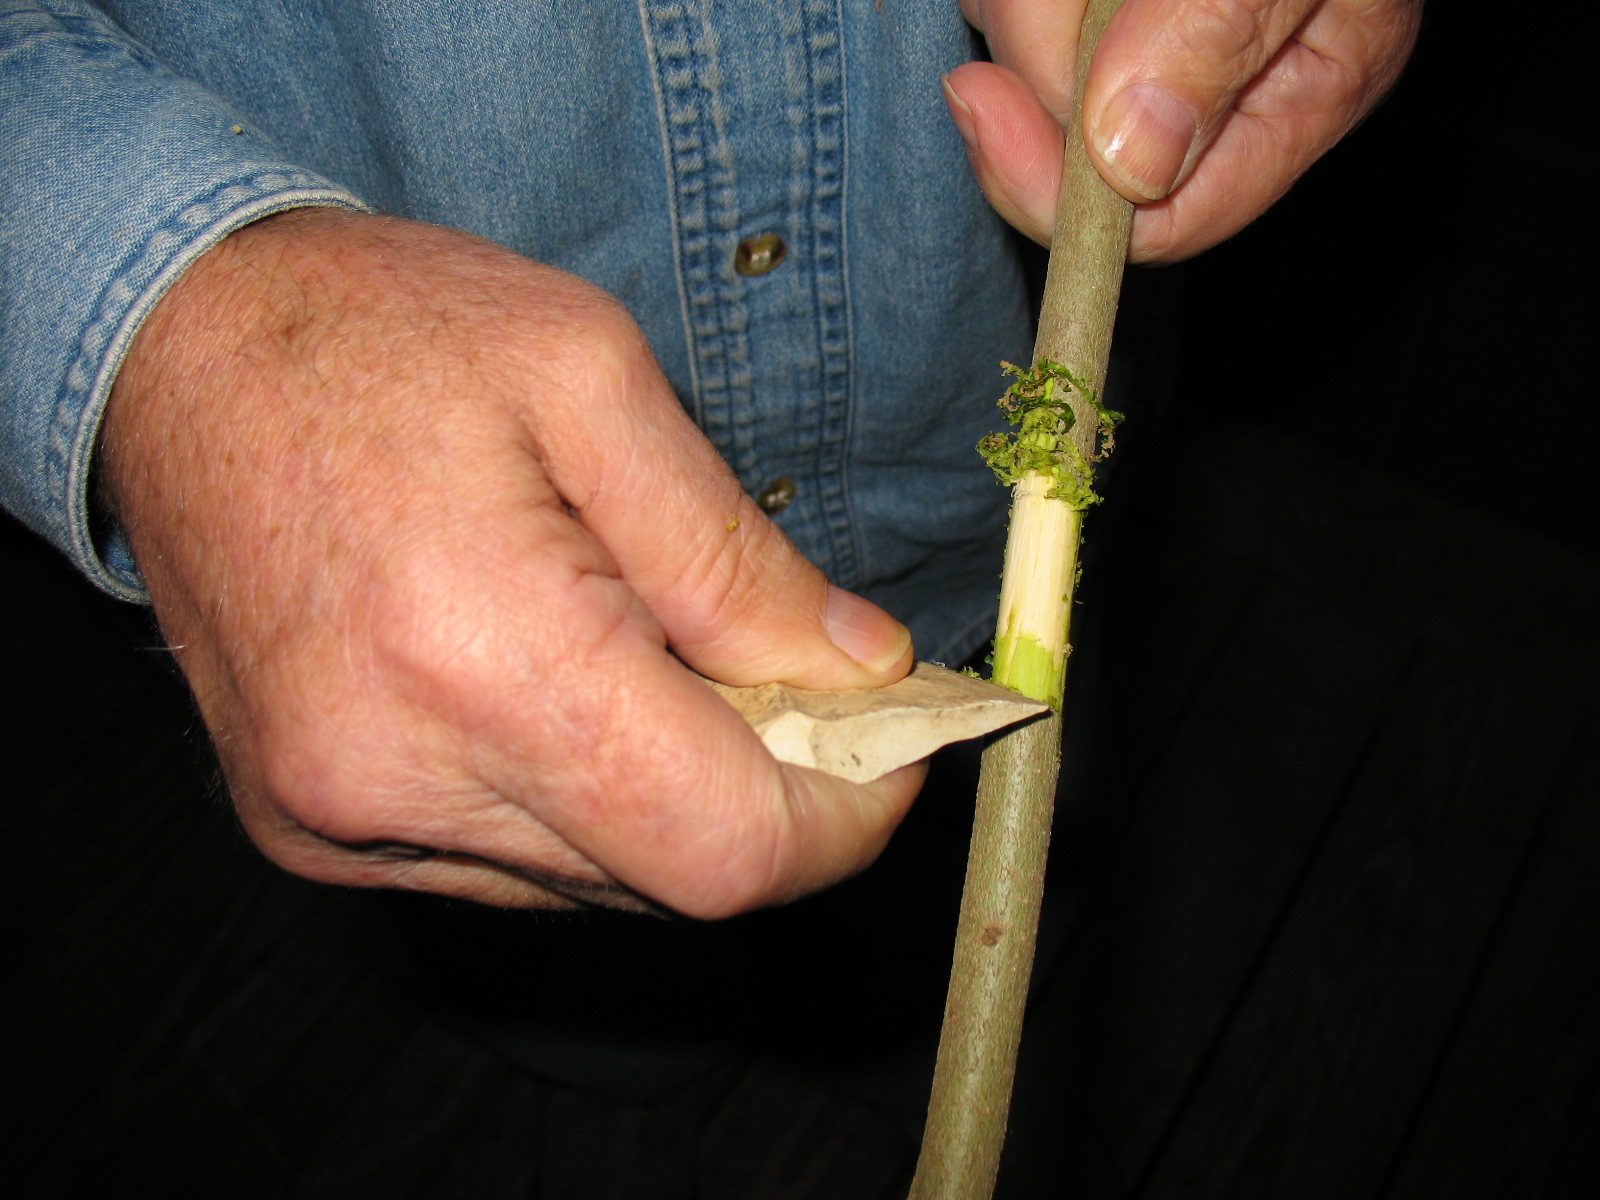
Flint or chert can be used to make a nice scraper. A scraper is used to smooth a surface or to remove small amounts of material from wood or bone. Scrapers are also used to remove flesh and hair from hides to make rawhide or to prepare hides for tanning. The blade of the scraper is held at a ninety degree angle from the surface being worked.
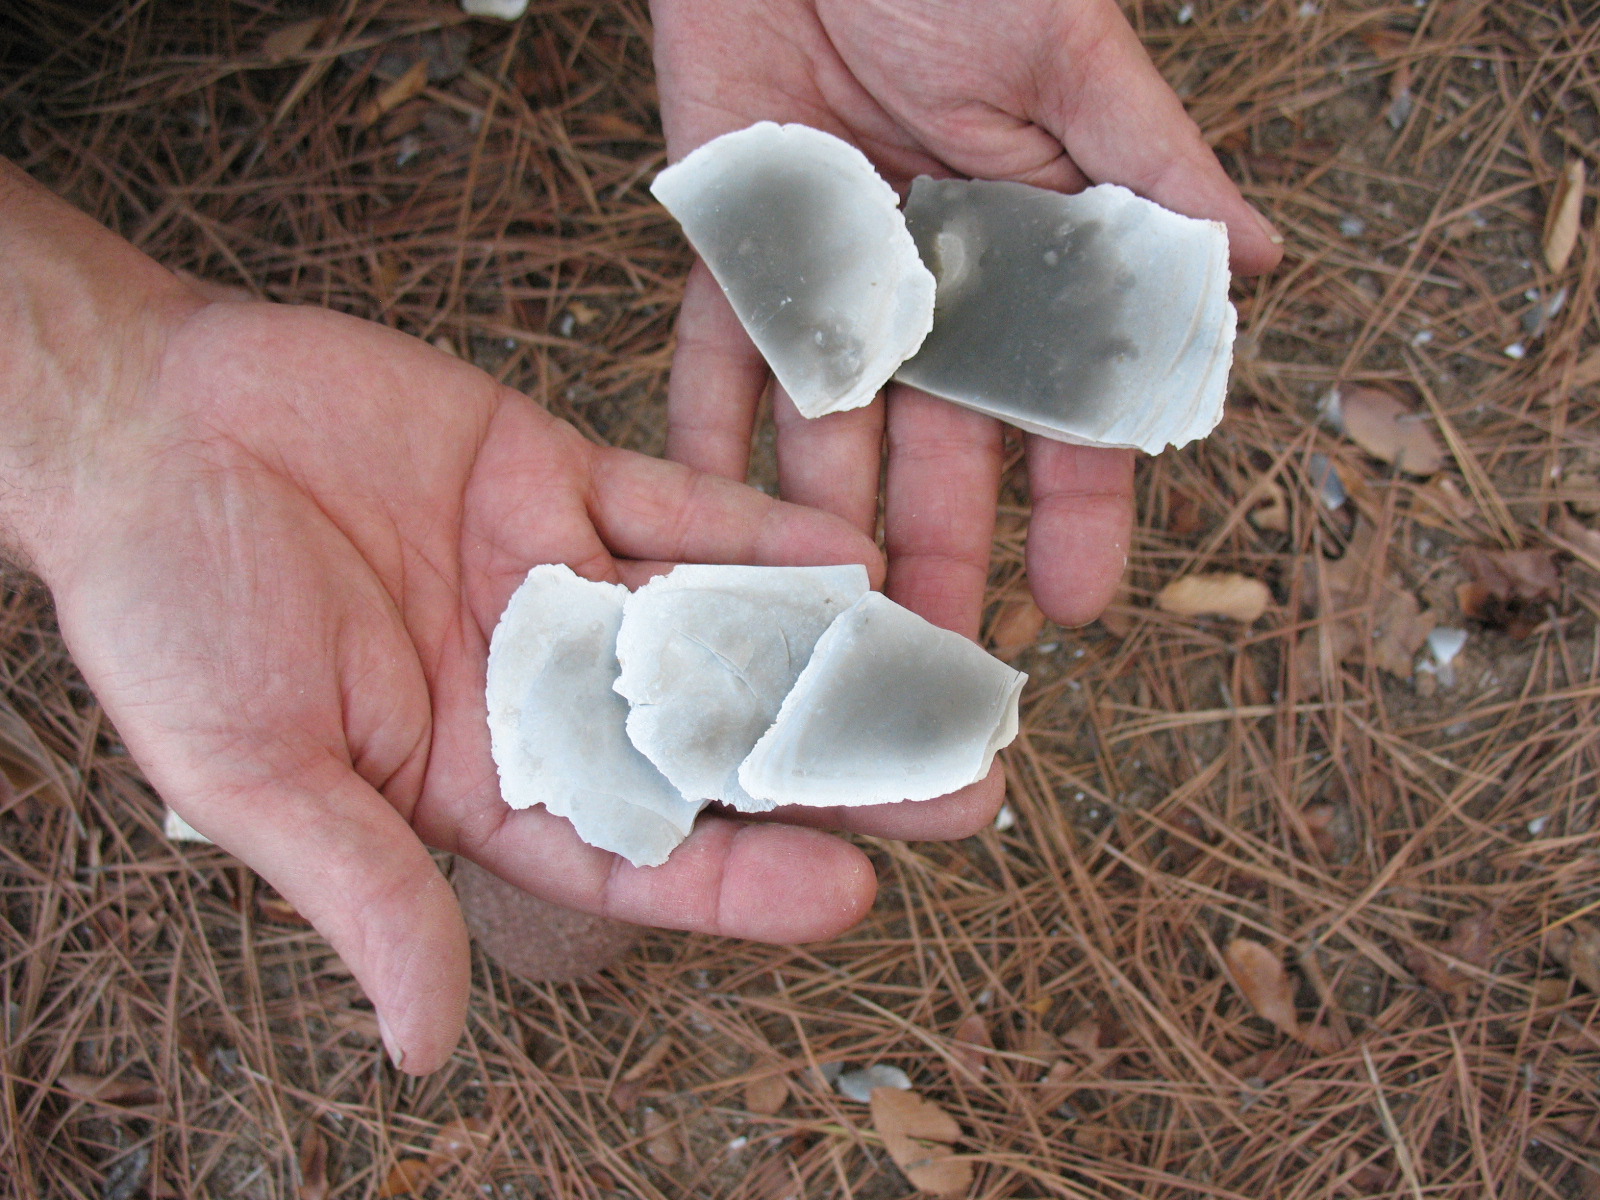
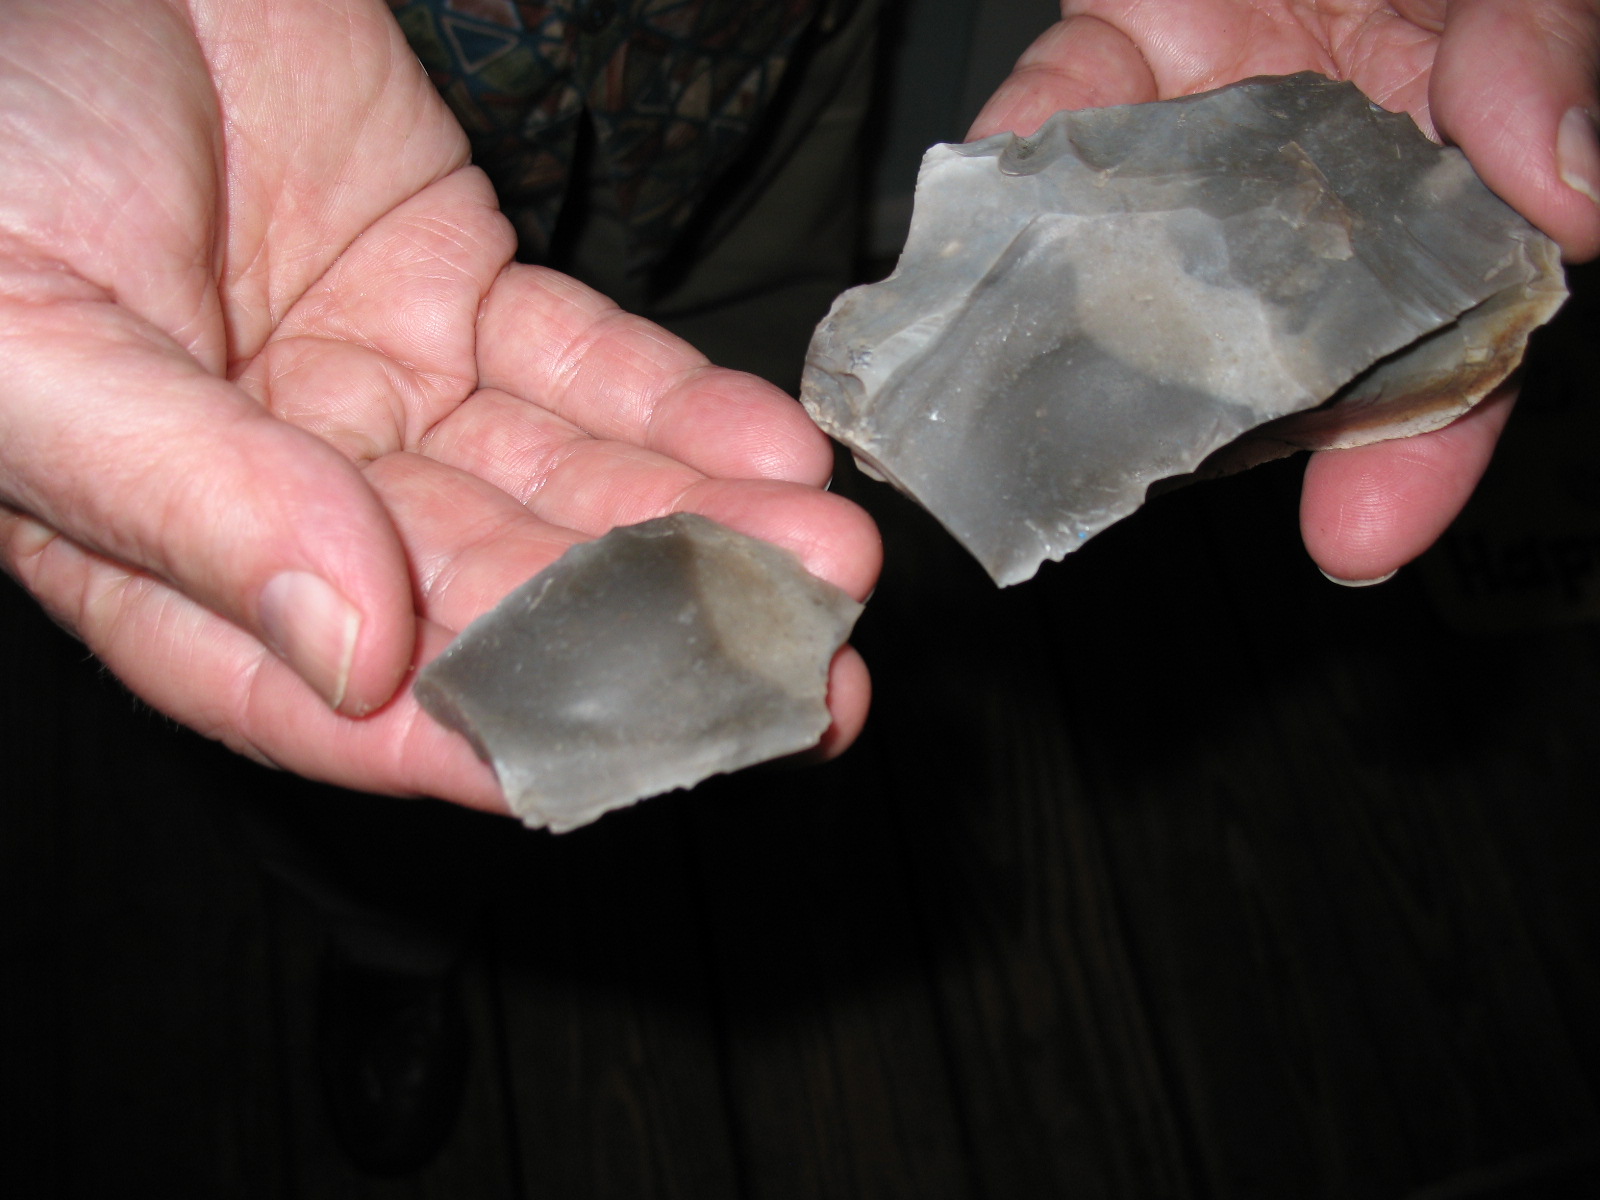
All you have to do to make a scraper is knock a good flake off of a piece of flint, chert, or even glass. If you have already made a hand axe you will probably have several flakes that will work as scrapers. Pictured below: top, flakes that were produced while making a hand axe; middle, front view of scraper made from Arkansas flint; bottom, side view of the same scraper.
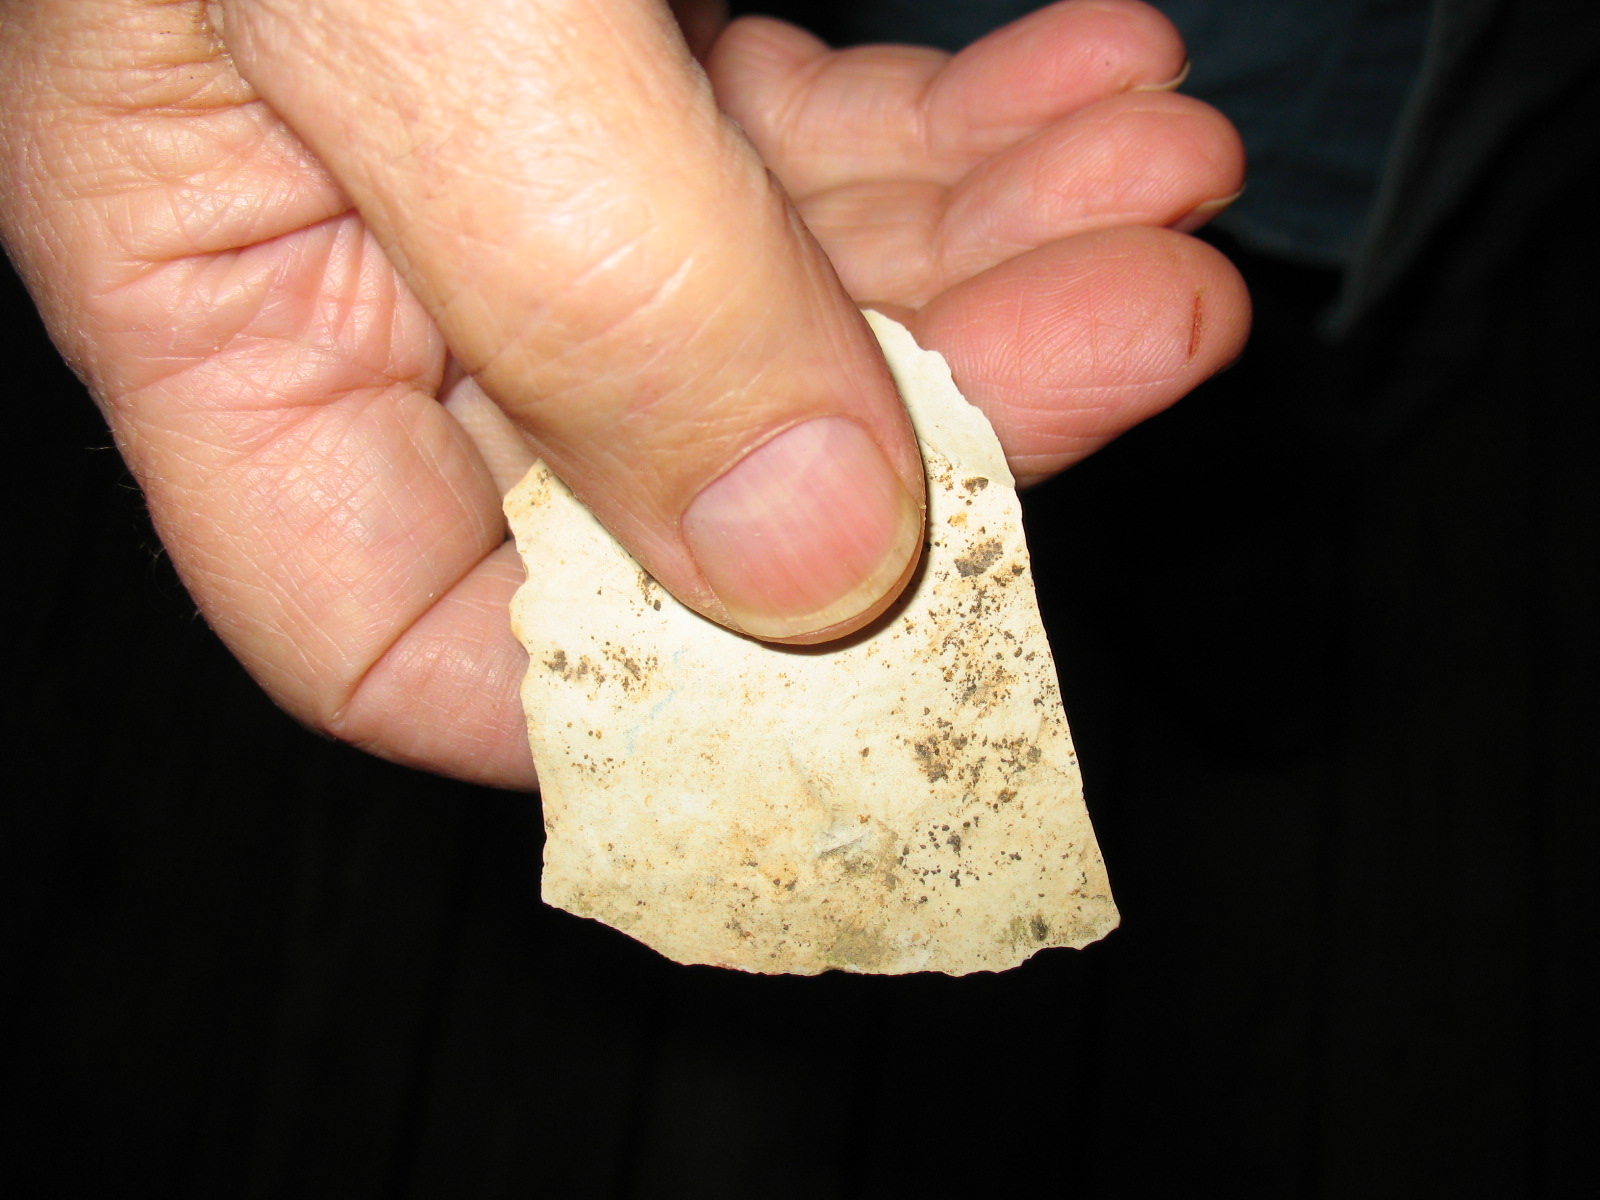
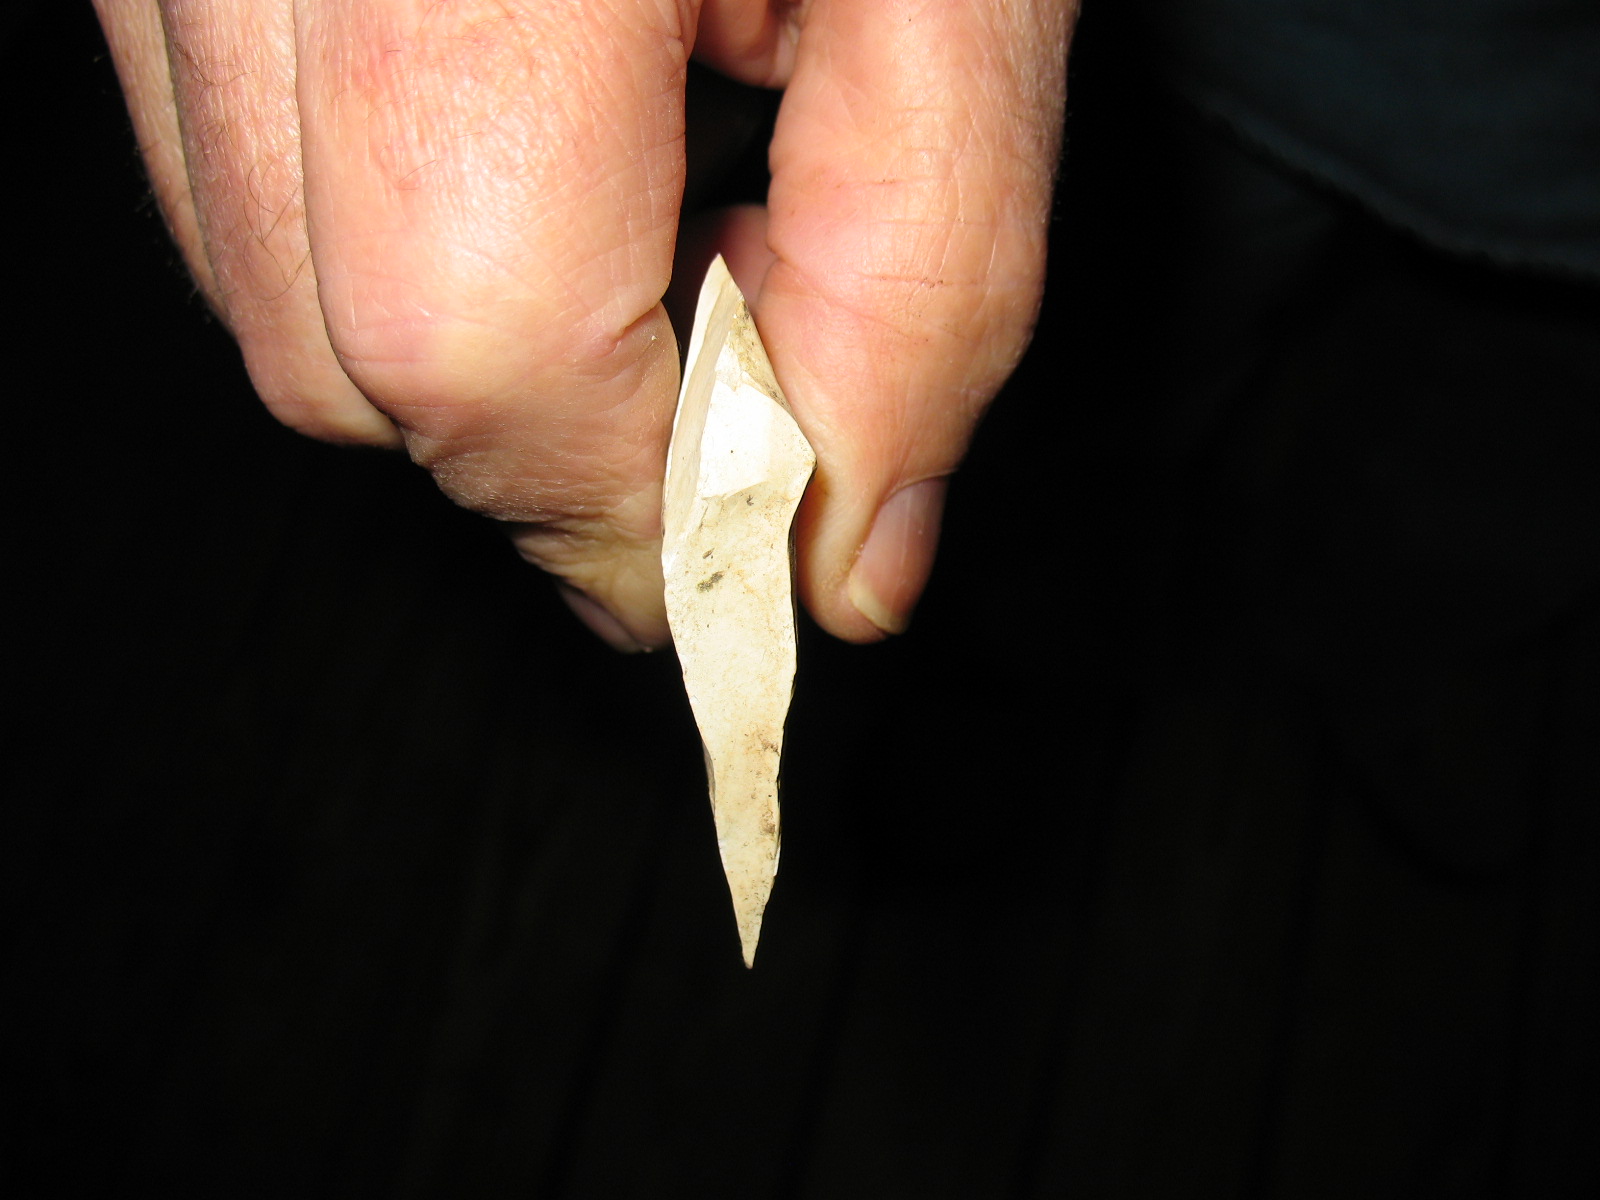
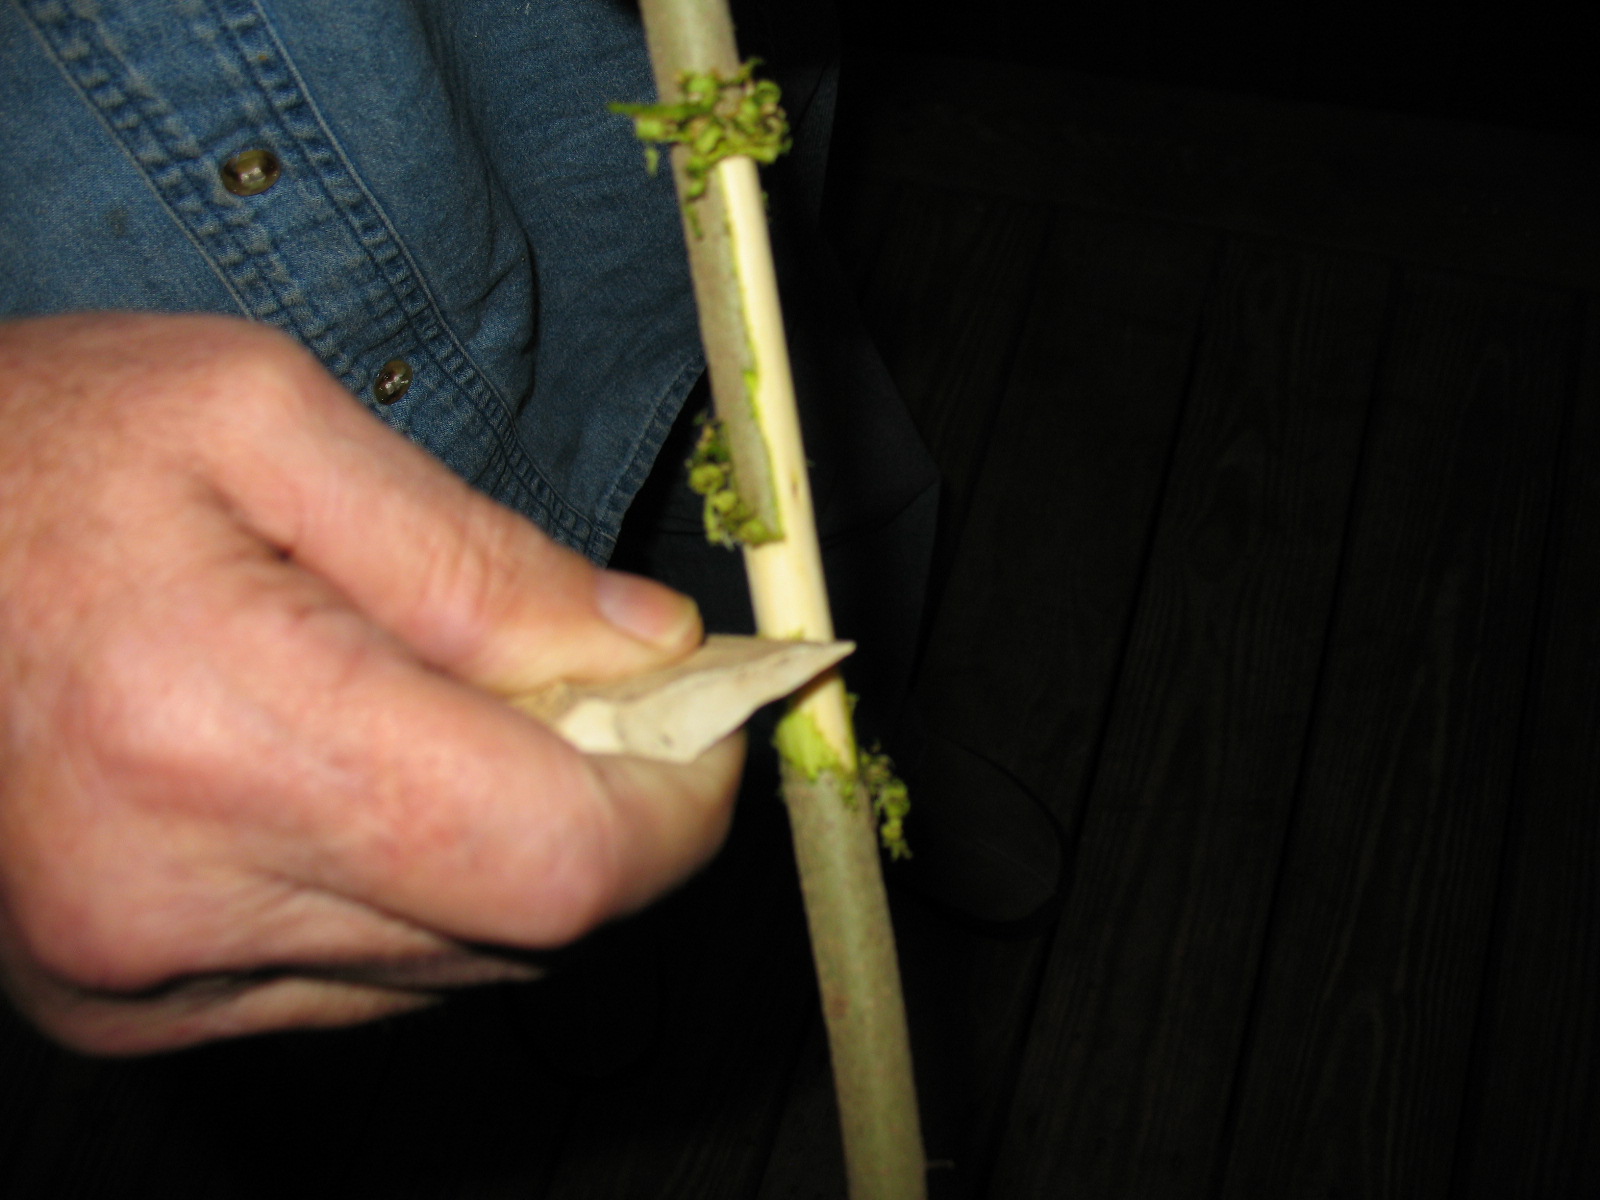
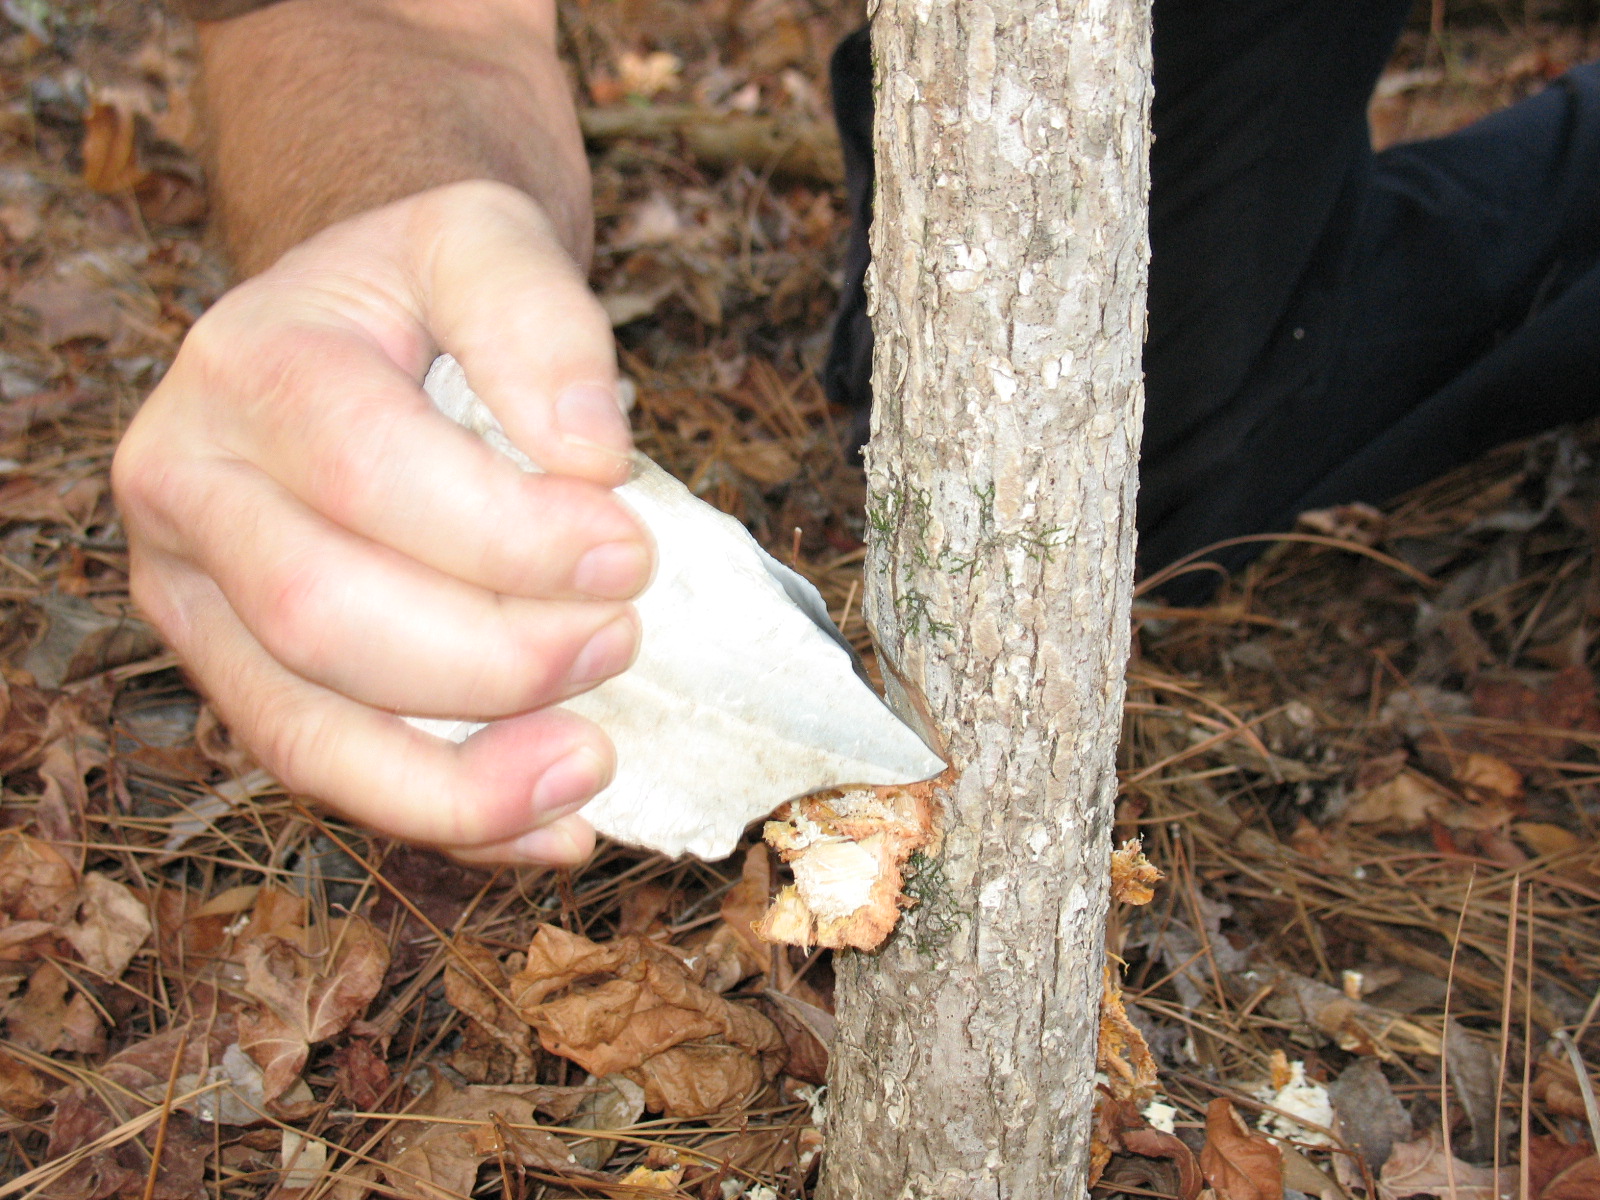
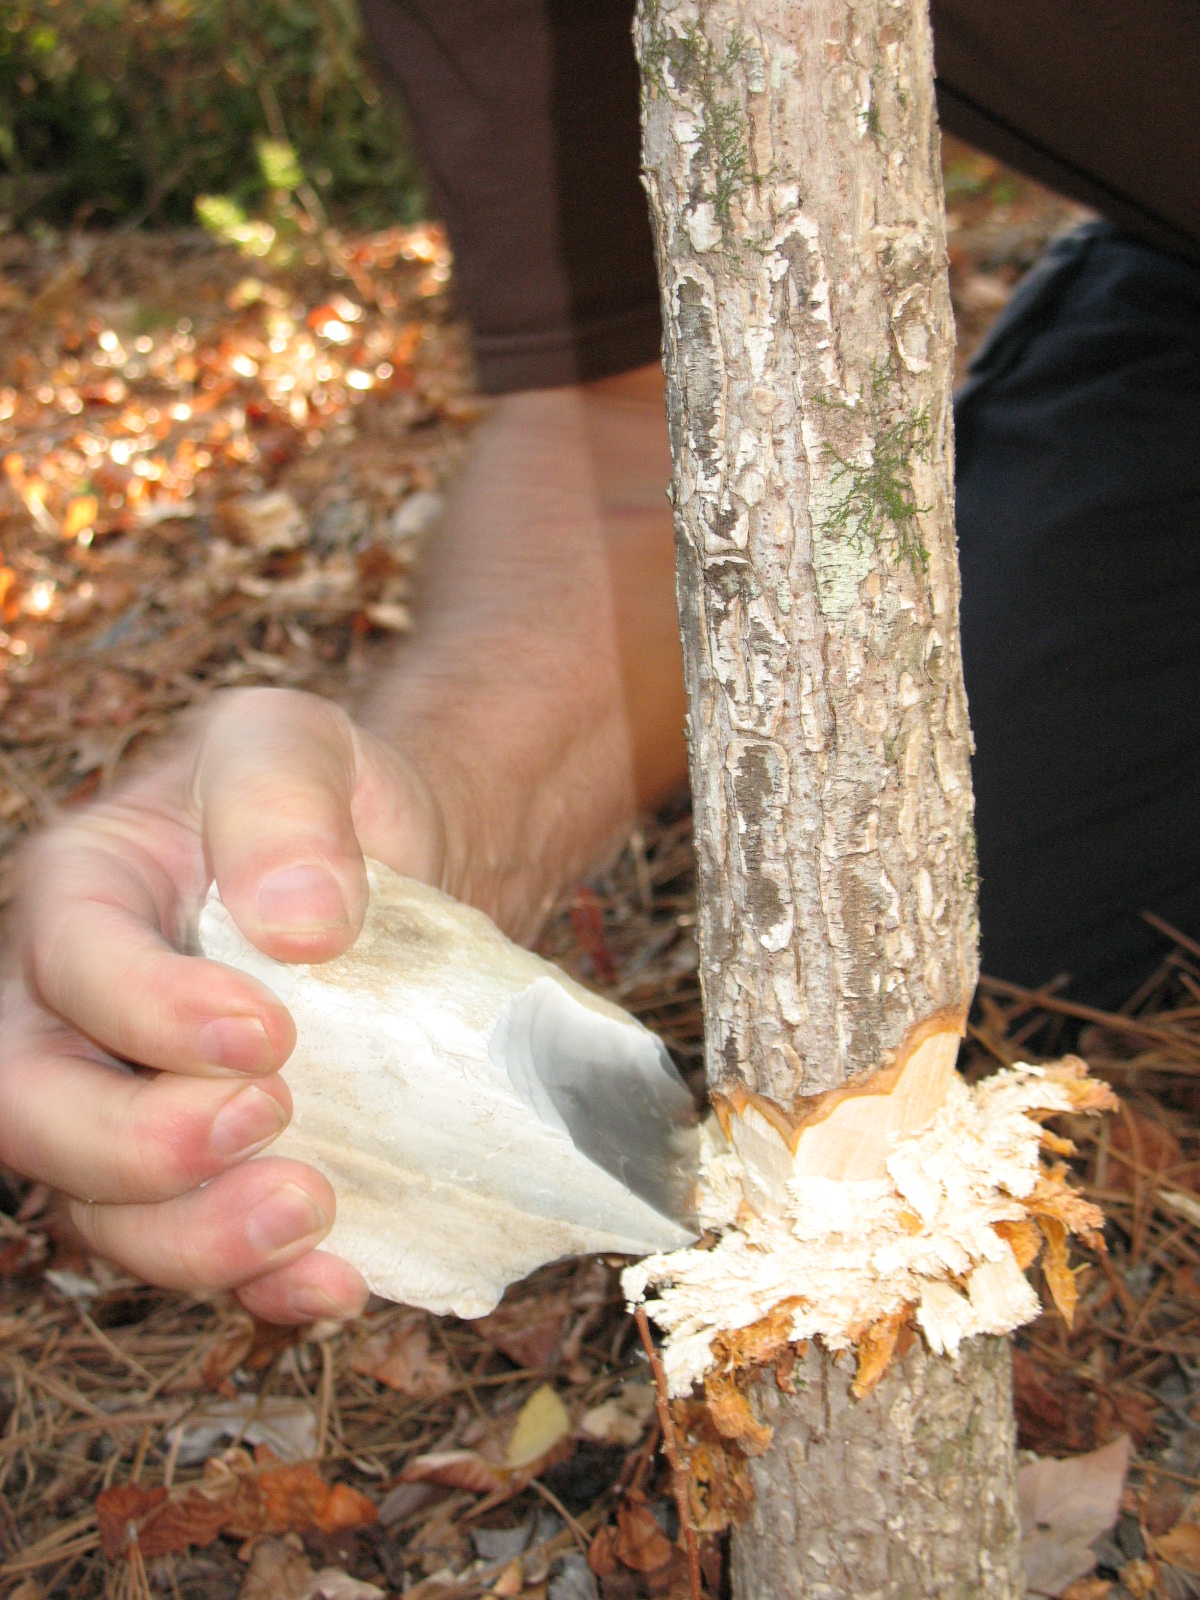
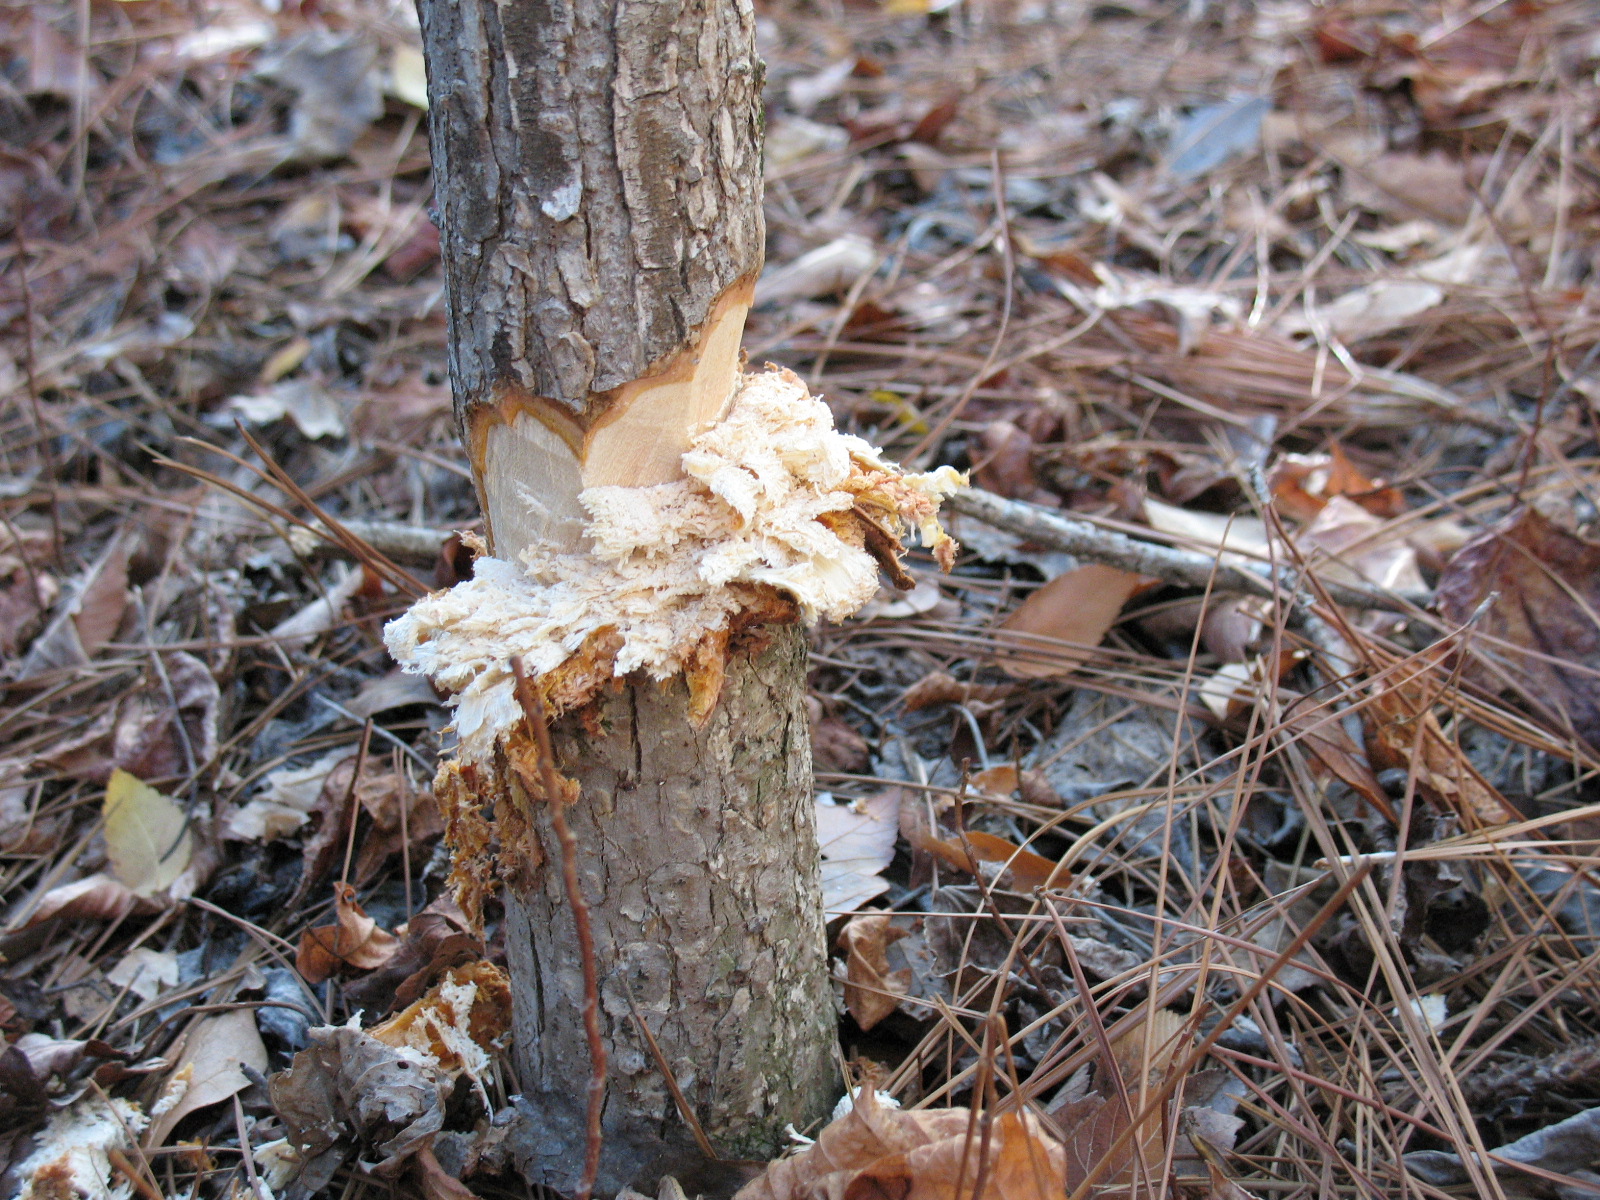
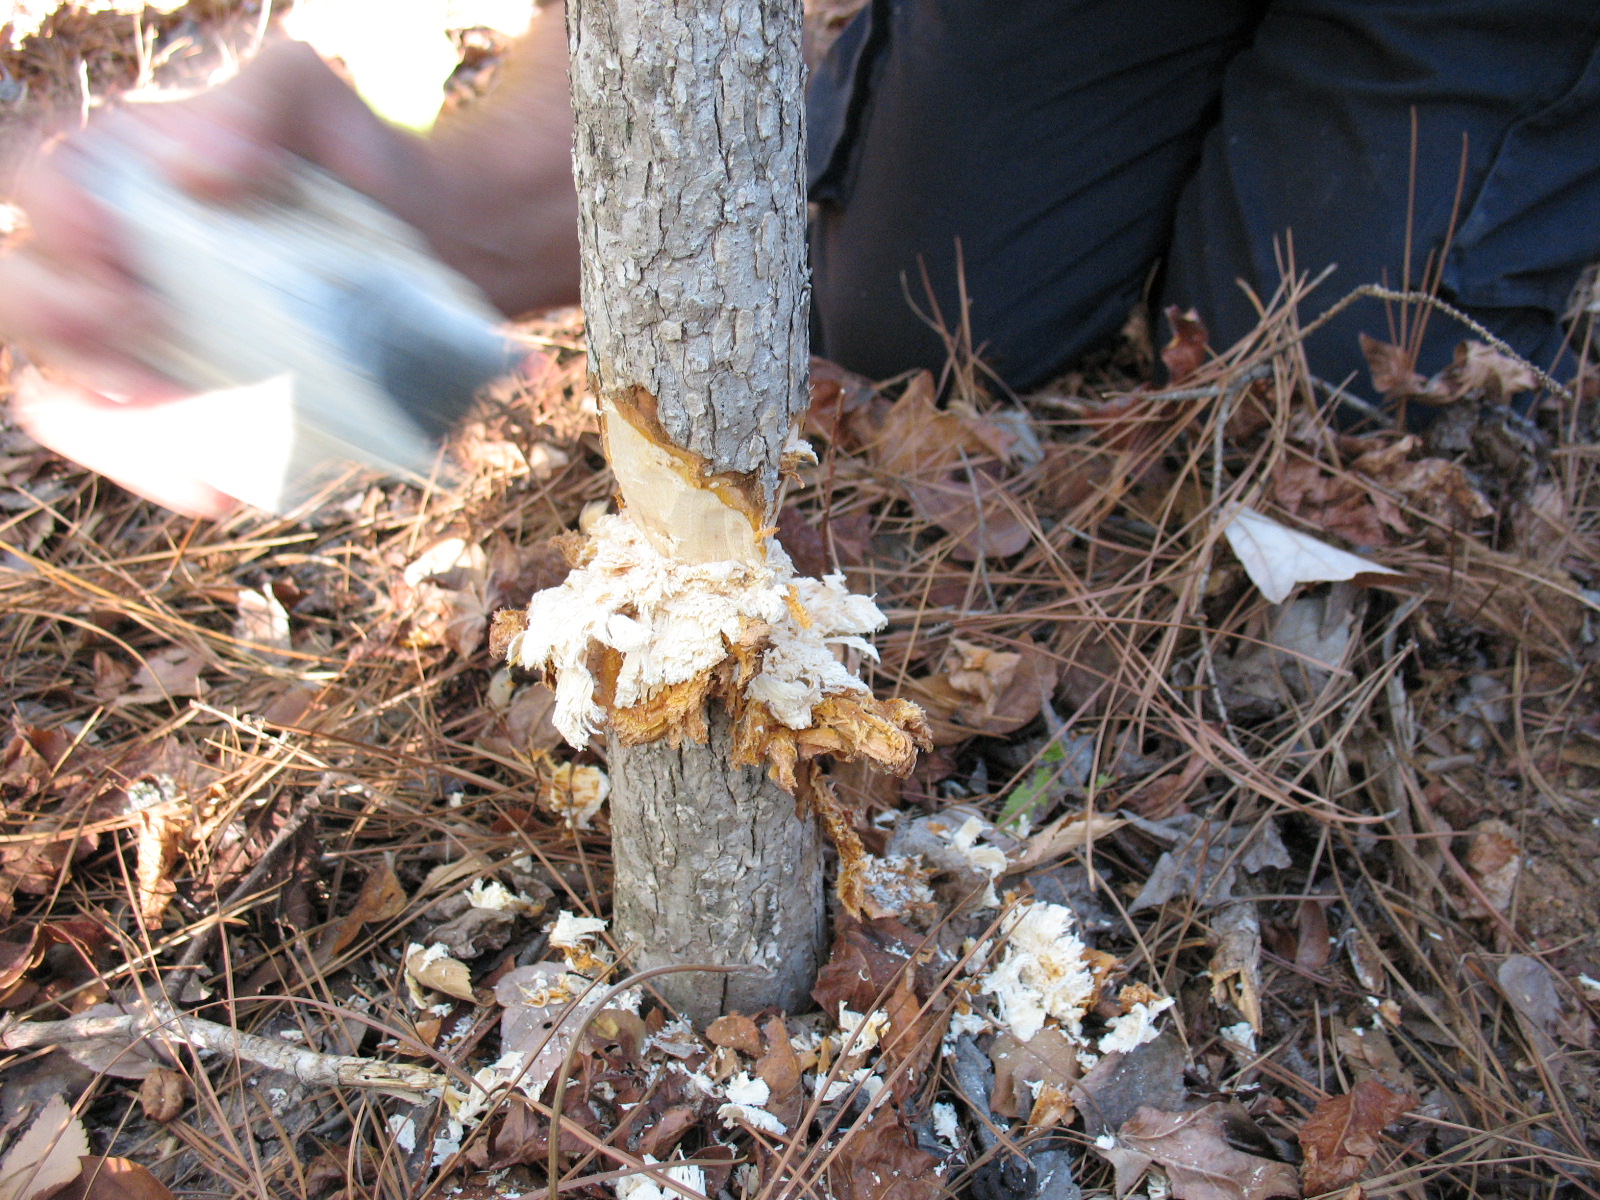
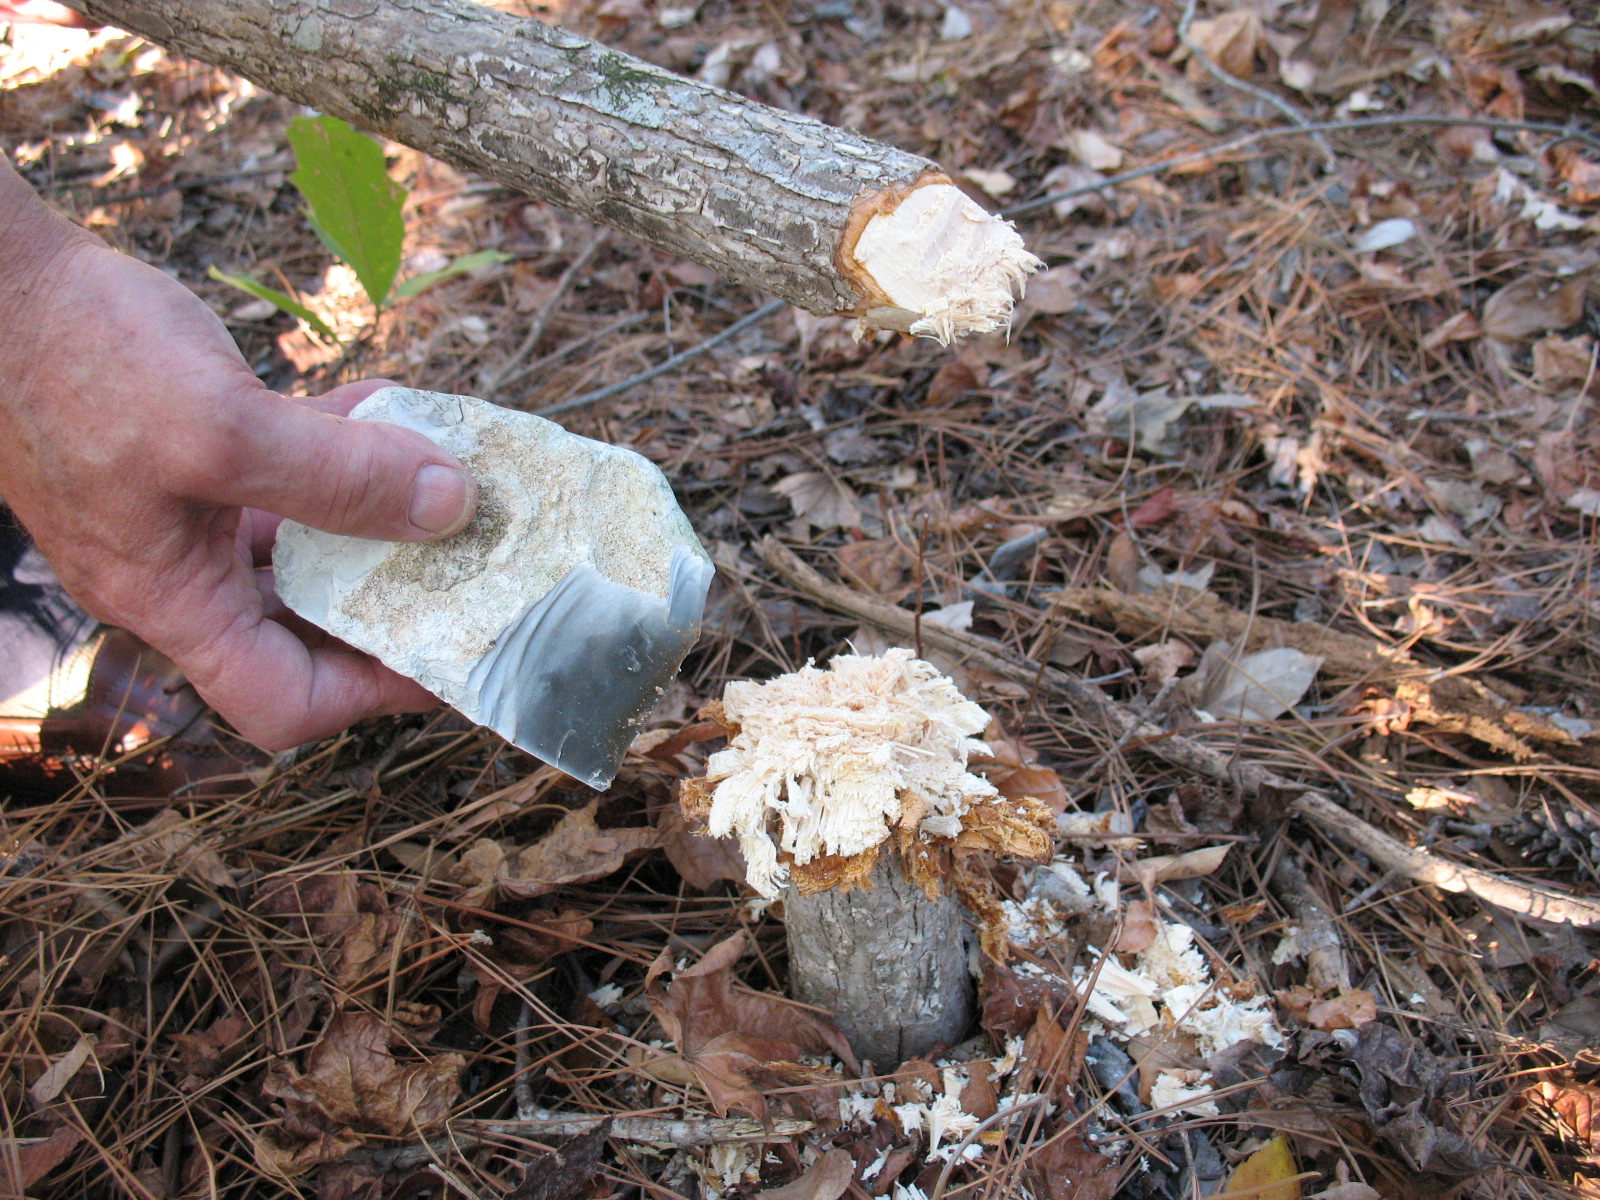
Scrapers can be large or small depending on the job at hand. One word of caution about scrapers; you do not want the blade to be too thin. A thin blade will crumble or break when you use it. Pictured below; series of pictures showing the scraper being used to remove bark from a yaupon holly stick.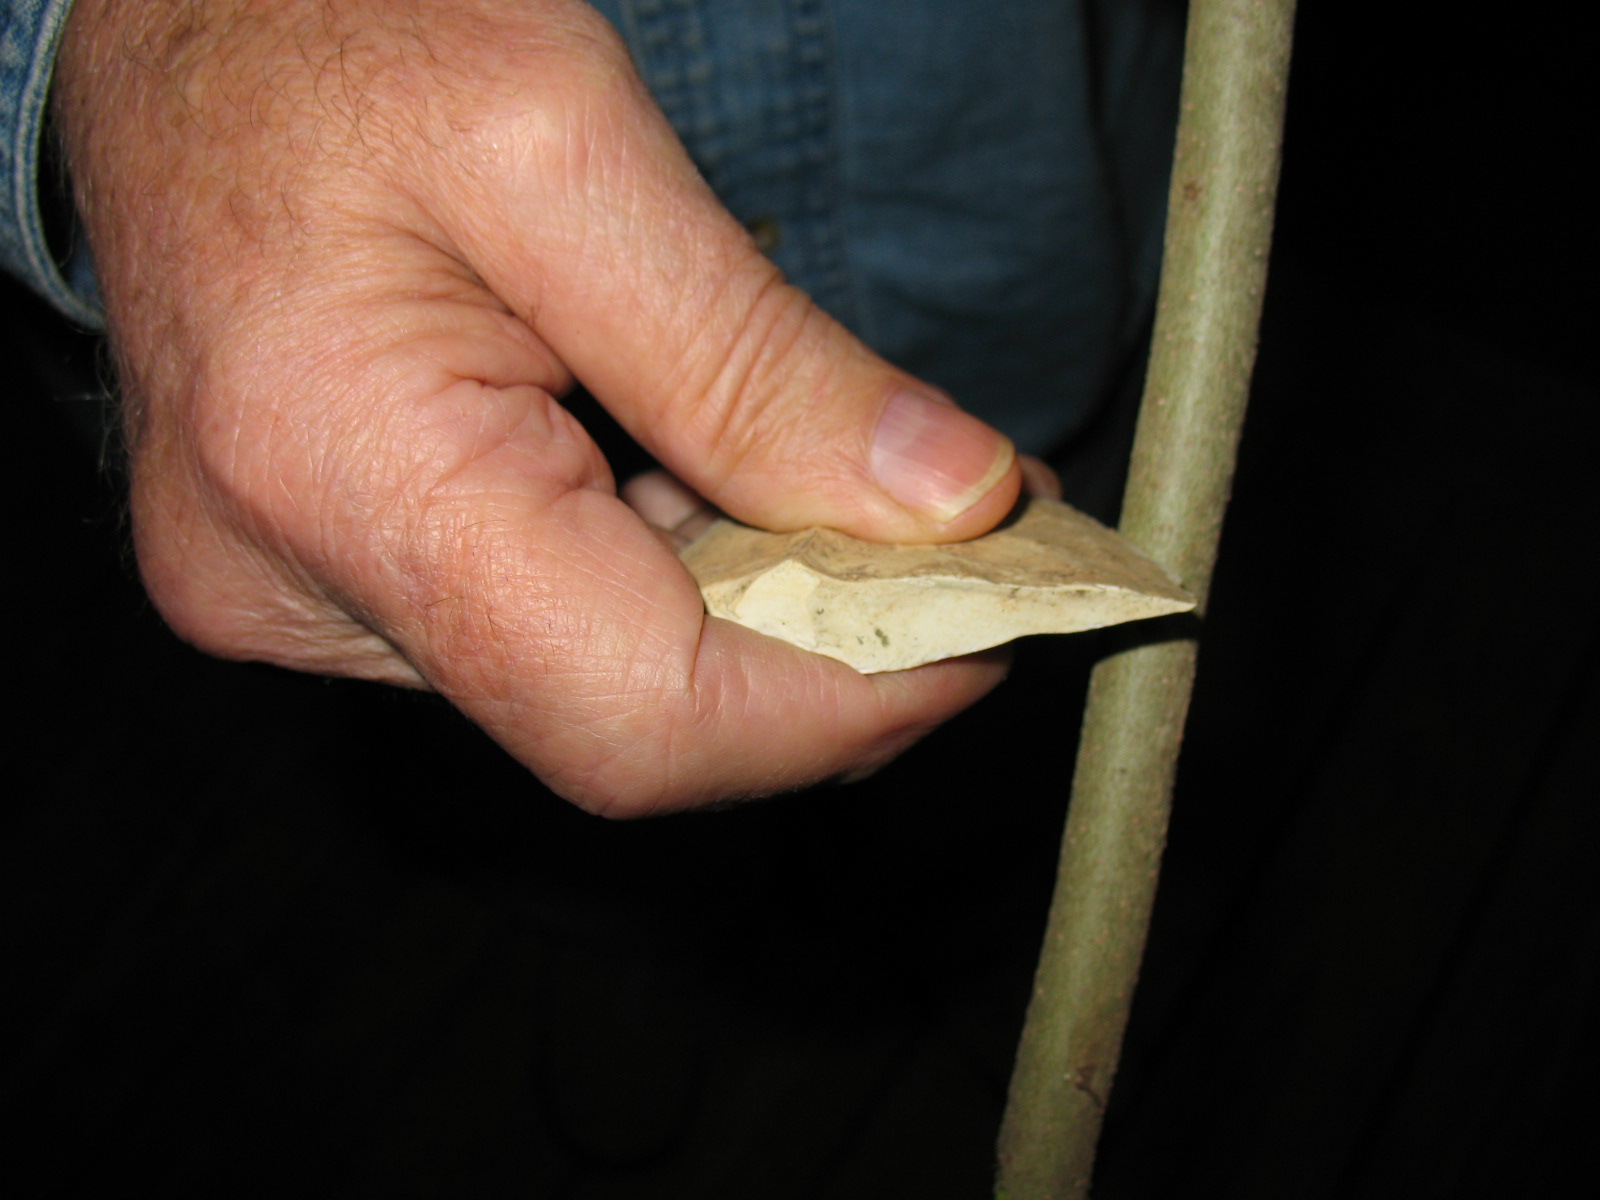
In the next post we will learn how to make a stone hand saw.
A hand axe is a piece of roughly shaped stone that can be held in the hand and used to cut down saplings or to cut limbs off of trees. The hand axe is a good basic tool that can be used to make other tools, and the hand axe is easy to make.
All you need is a good flint cobble and a hammer stone. Obsidian does not make a very good hand axe because it is too fragile. The first time that you chop into a tree with an obsidian hand axe, the blade will probably crumble. So find a good piece of flint or chert. I try to find a whole cobble so that the back of the hand axe, the part that will be in my hand, does not have any sharp edges. Pictured below: a flint cobble, also referred to as a flint nodule, and a hammer stone
Now hold the cobble in one hand and strike downward on the other end of the cobble with your hammer stone. This should take a nice flake off of the cobble. Pictured below: top, preparing to strike off the first flake; bottom, first flake removed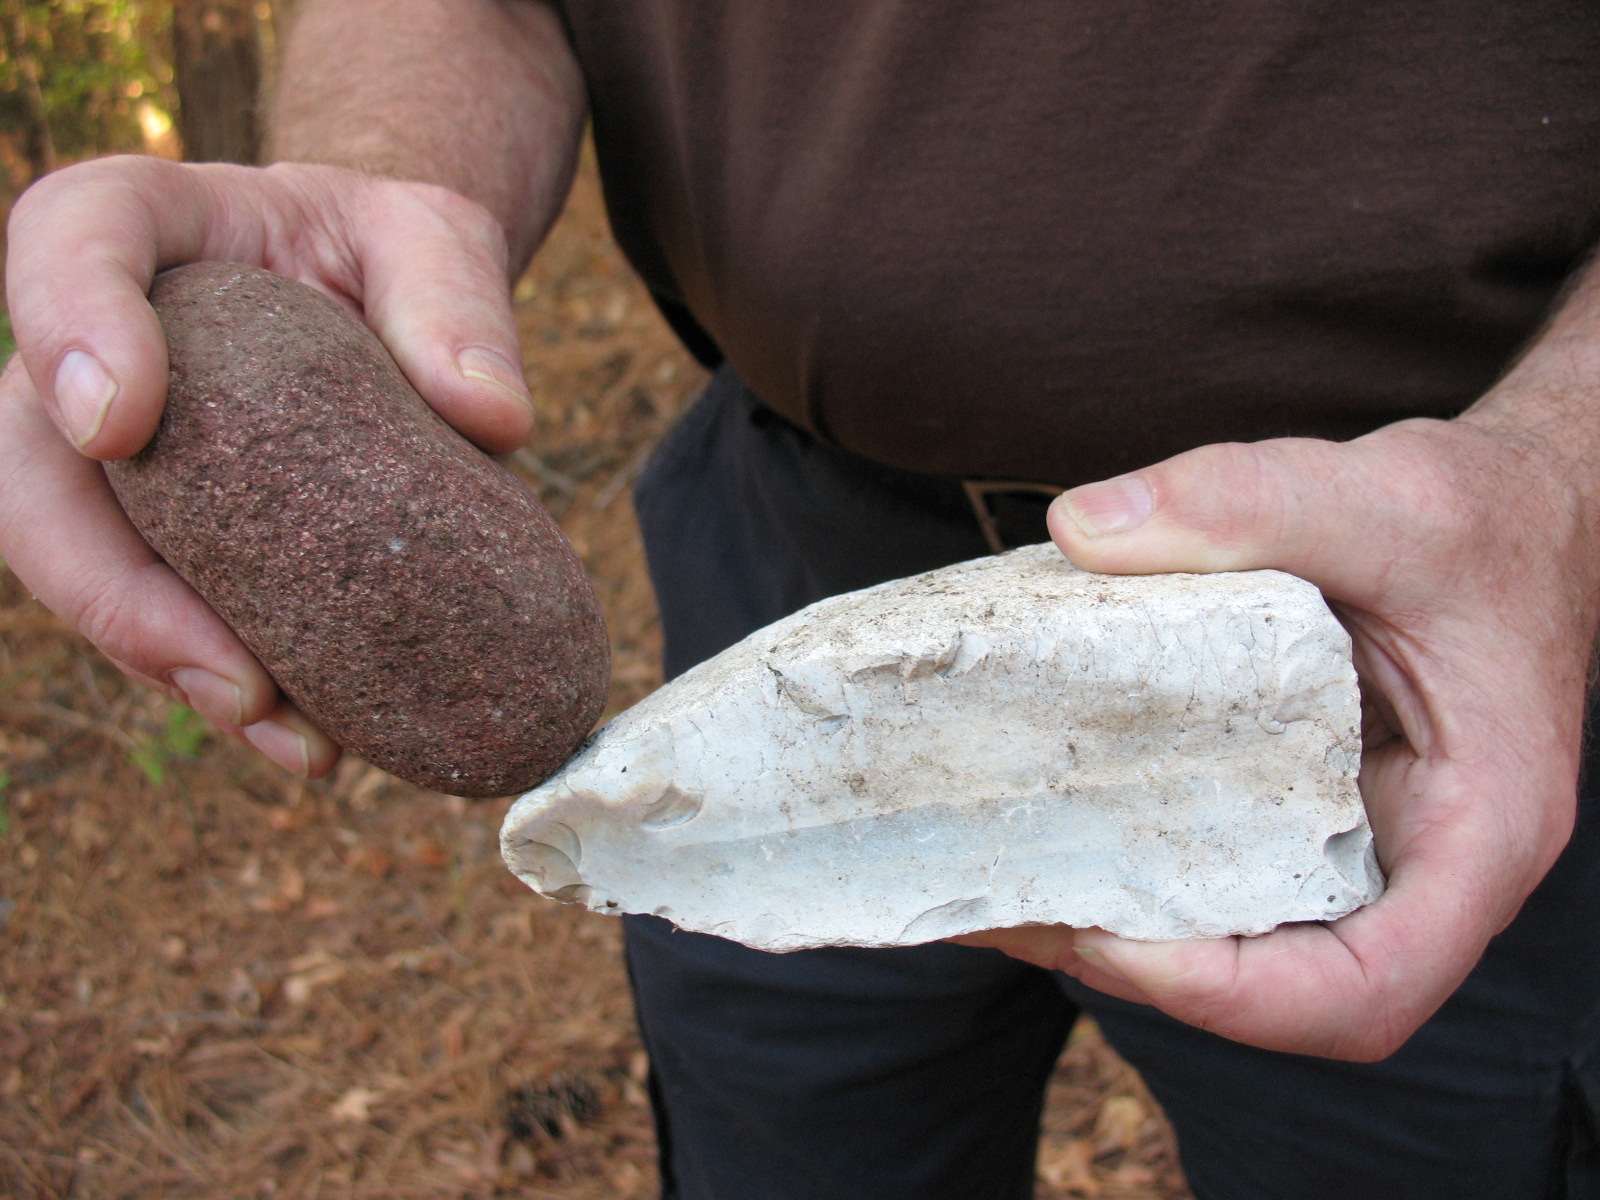
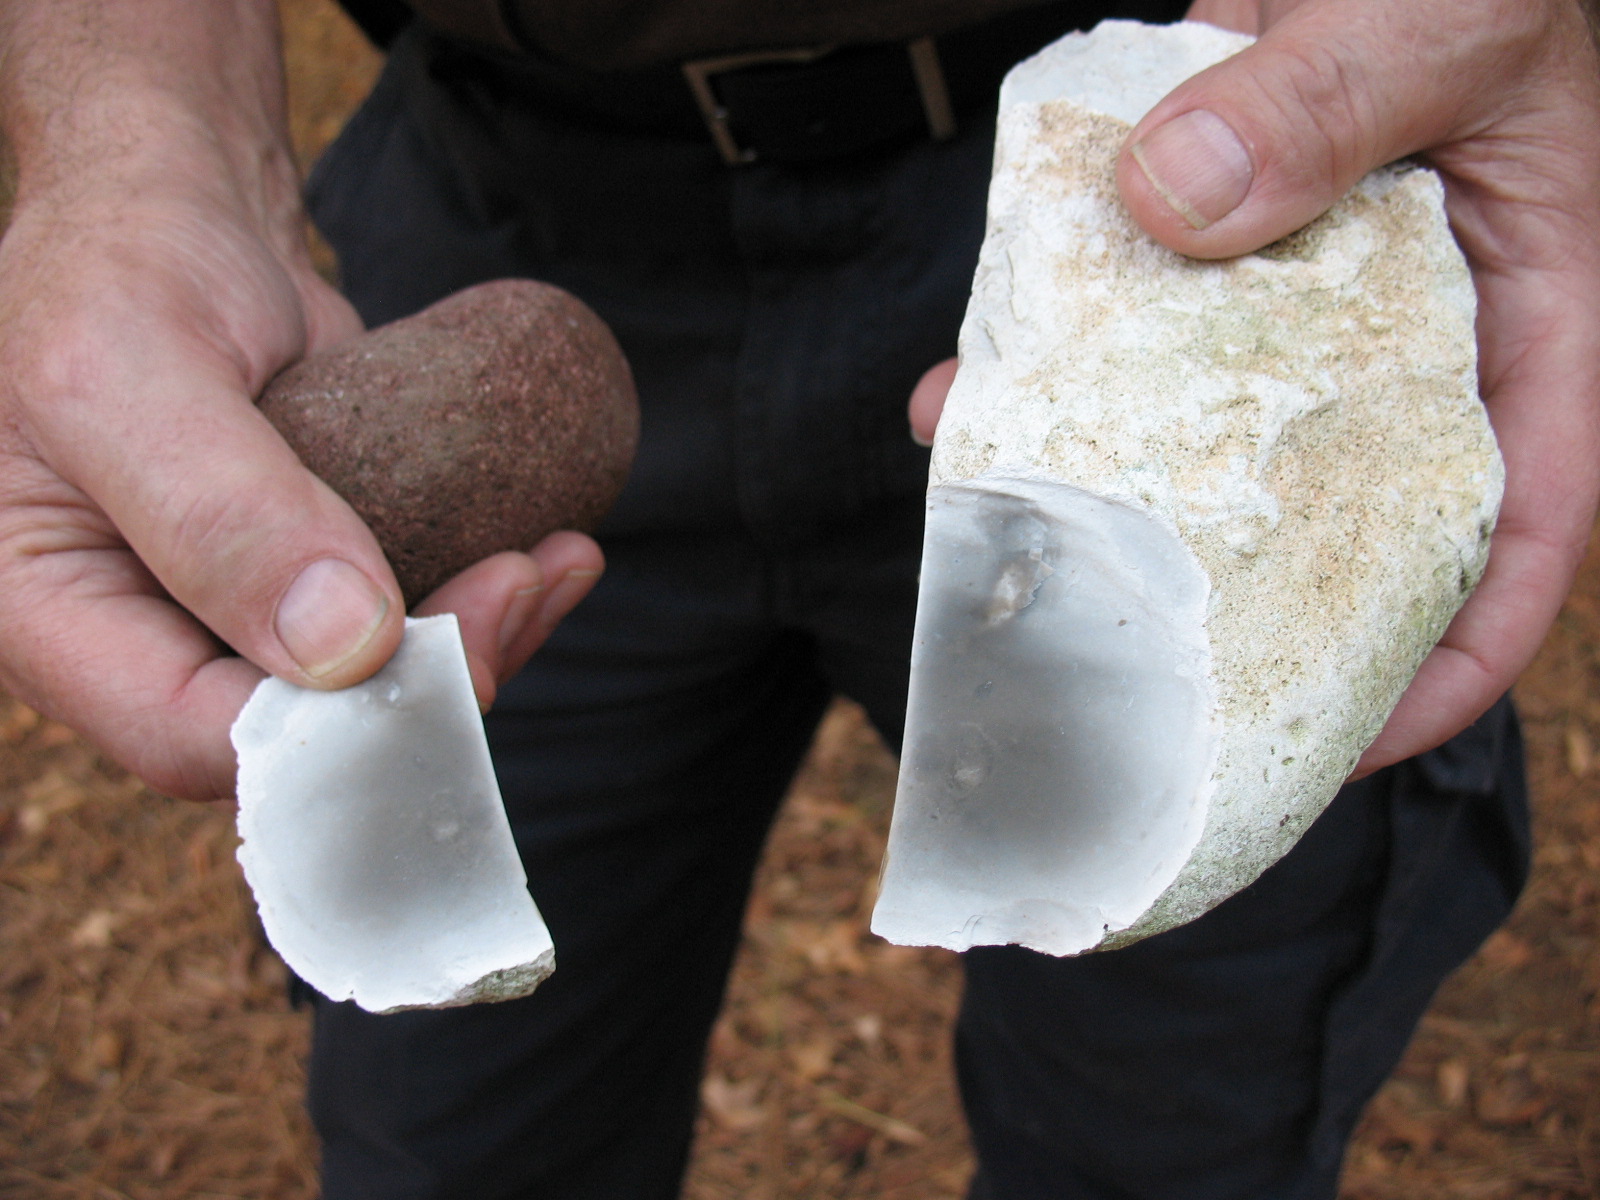
Next turn the cobble over and use the same technique to knock a flake off of the other side of the cobble’s point. Pictured below: second flake removed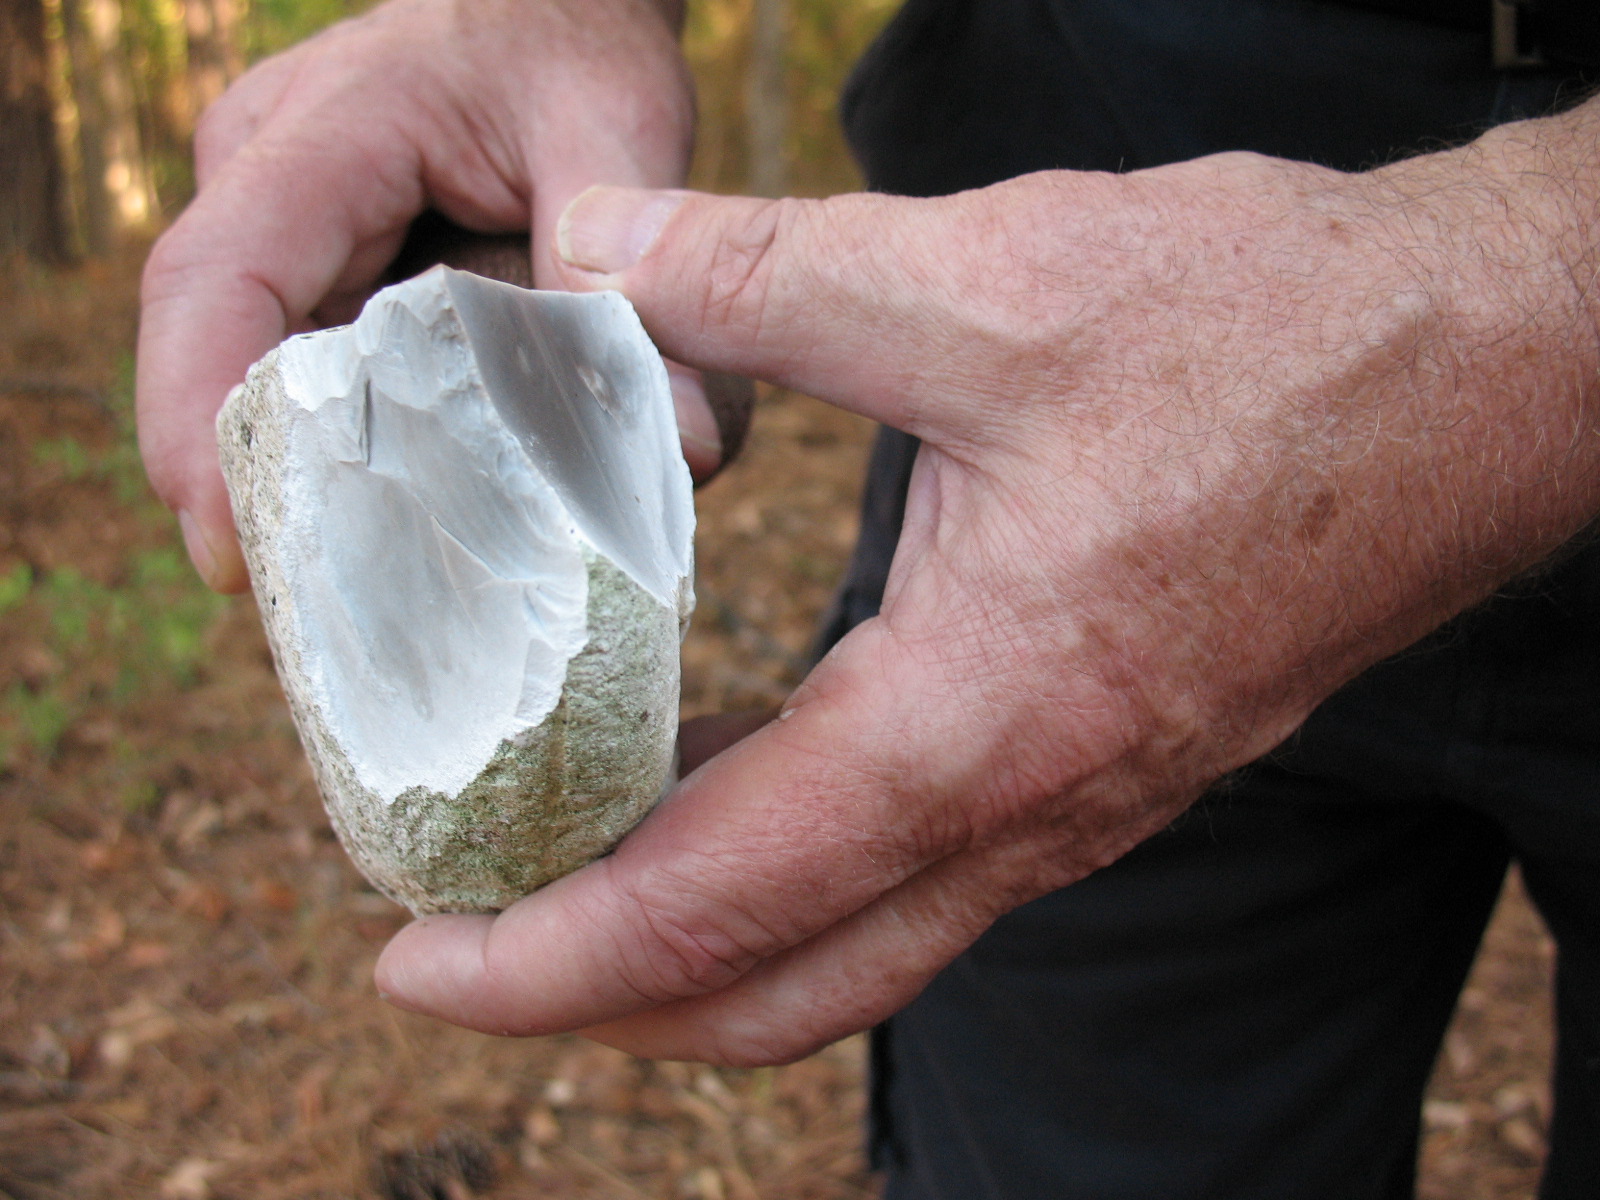
You should now have the beginnings of a crude edge to your hand axe. Keep taking flakes off of first one side and then the other until you have formed your hand axe. Pictured below: Finished hand axe.
One of the nice by-products of making a hand axe is that you will have a nice assortment of flakes left over with which you can make hand saws, scrappers, drills, and arrow points. Pictured below: left-over flakes from shaping the hand axe
When you have completed your hand axe try cutting down a green sapling. You will be surprised at how quickly you can do this. Pictured below: series of pictures shows a green, two-inch, hardwood sapling being cut down with the hand axe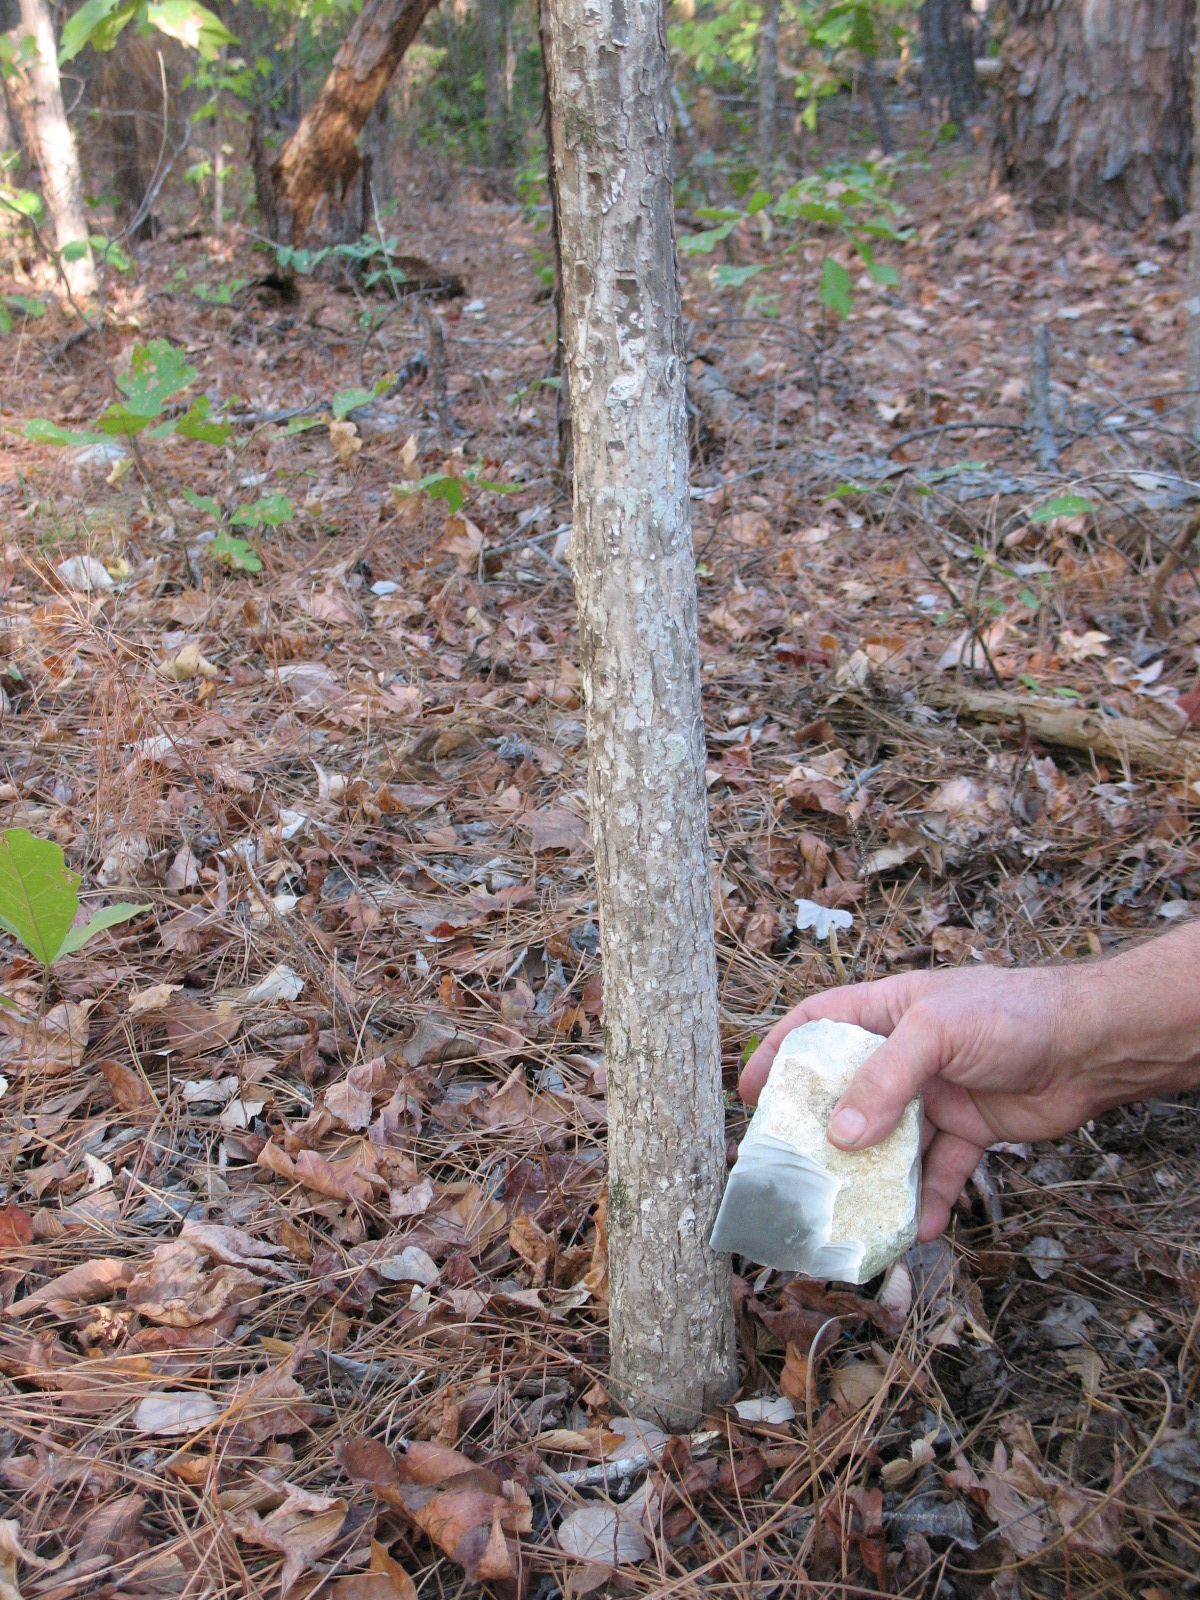
The total time to cut down the sapling was four and a half minutes. Not as fast as a steel axe, but a heck of a lot faster than you could cut it with a pocket knife, and that’s if you have a pocket knife.
Today you can buy some beautiful stone knives. These knives are made of obsidian or flint and have long beautiful blades. Only a really first rate craftsman can make one of these. I have a great one myself that was a gift from a friend. Pictured below: Beautiful but impractical long bladed flint knife.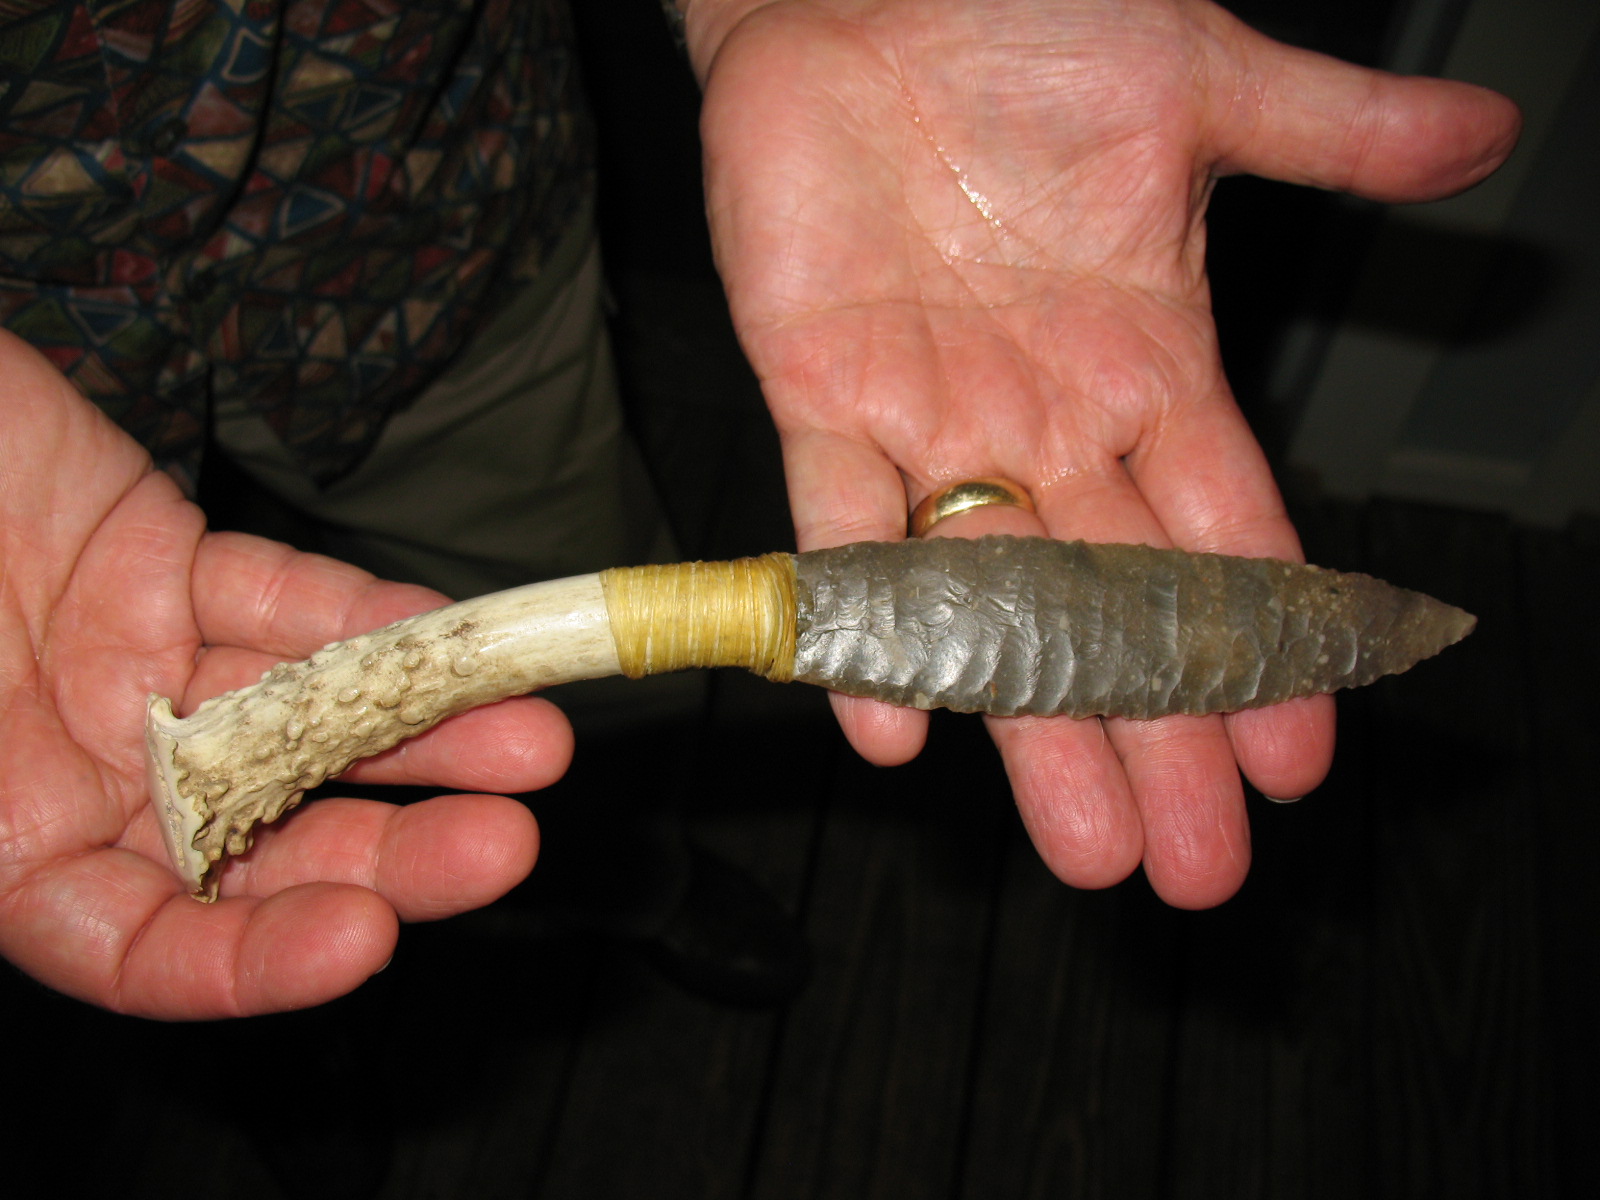
The problem with these knives is that they are very brittle and easily broken. For this reason most primitive knives, with the exception of a few ceremonial knives, did not look anything like these works of art. Most stone knives looked more like slightly lop-sided arrowheads.
A good example is the knife carried by the “Ice Man”, a late stone-age man who was found frozen in a glacier in the Italian Alps. The Ice Man knife had an overall length of five inches. It is described as looking like an “arrowhead” that has been wedged into a split wooden handle and secured with animal sinew. Pictured below: The Ice Man’s knife.
The Ice Man’s knife is not an exception but is, rather, the rule. There are hundreds of examples of these small stone knives that have been found at archeological sites around the world.
I have made a couple of these stone knives and have found that they work well. They are plenty sharp and pretty sturdy. Pictured below: A stone knife that I made. 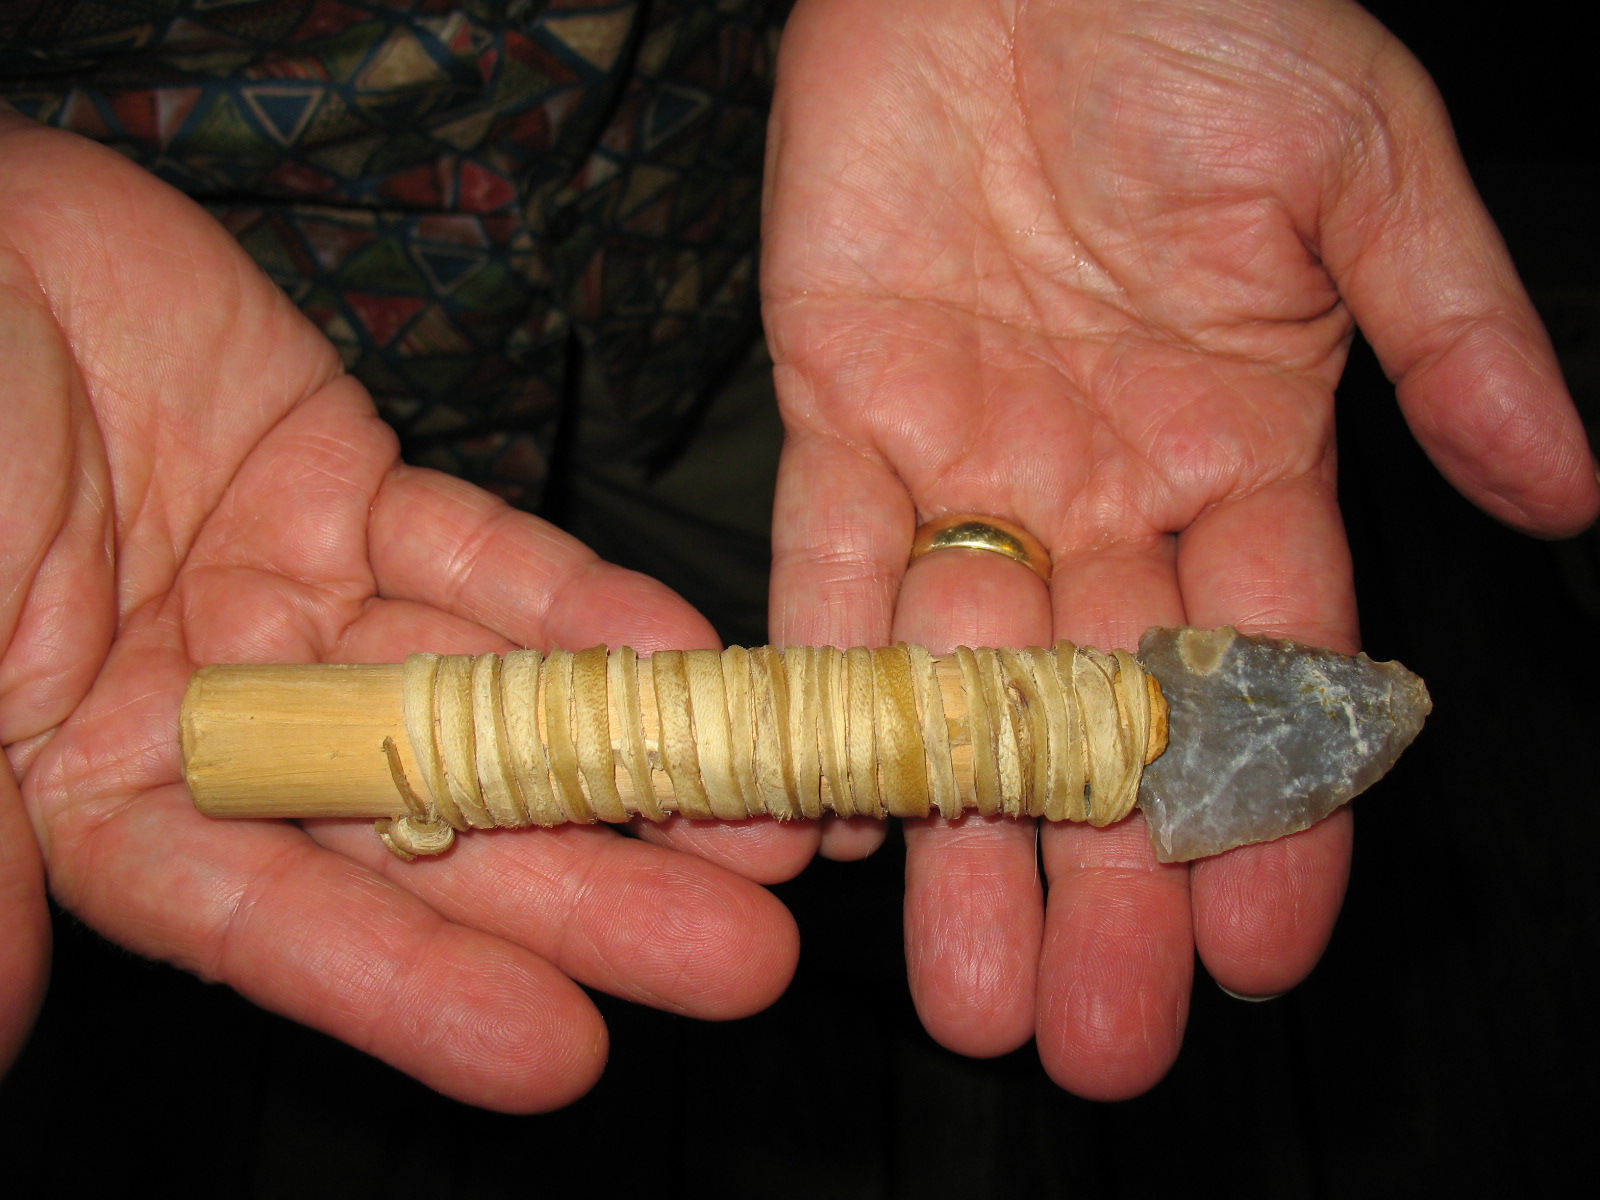
But some of the most commonly used stone knives are overlooked because they look like nothing more than a flake of stone. If there is any flint, obsidian, chert, glass, or other knappable stone around, you can make a flake blade in seconds. It requires no tools, except another rock, and it requires no flint knapping skill. This makes the flake knife an ideal survival tool. And don’t think that a flake blade is a second rate tool. They are sharper than surgical stainless steel and can skin and butcher a deer as fast as any modern knife.
To make a flake blade you will need a fist size piece of flint and another rock to hit it with. Your striking stone, called a hammer stone, should not be flint because it will shatter. Most sandstone is not very good because it is too soft. I like to use a granite river rock. Sometimes they break, but they usually won’t shatter and throw rock splinters into your eyes. Needless to say when you are practicing this skill you should always wear safety glasses. Pictured below: Hammer stone and piece of flint.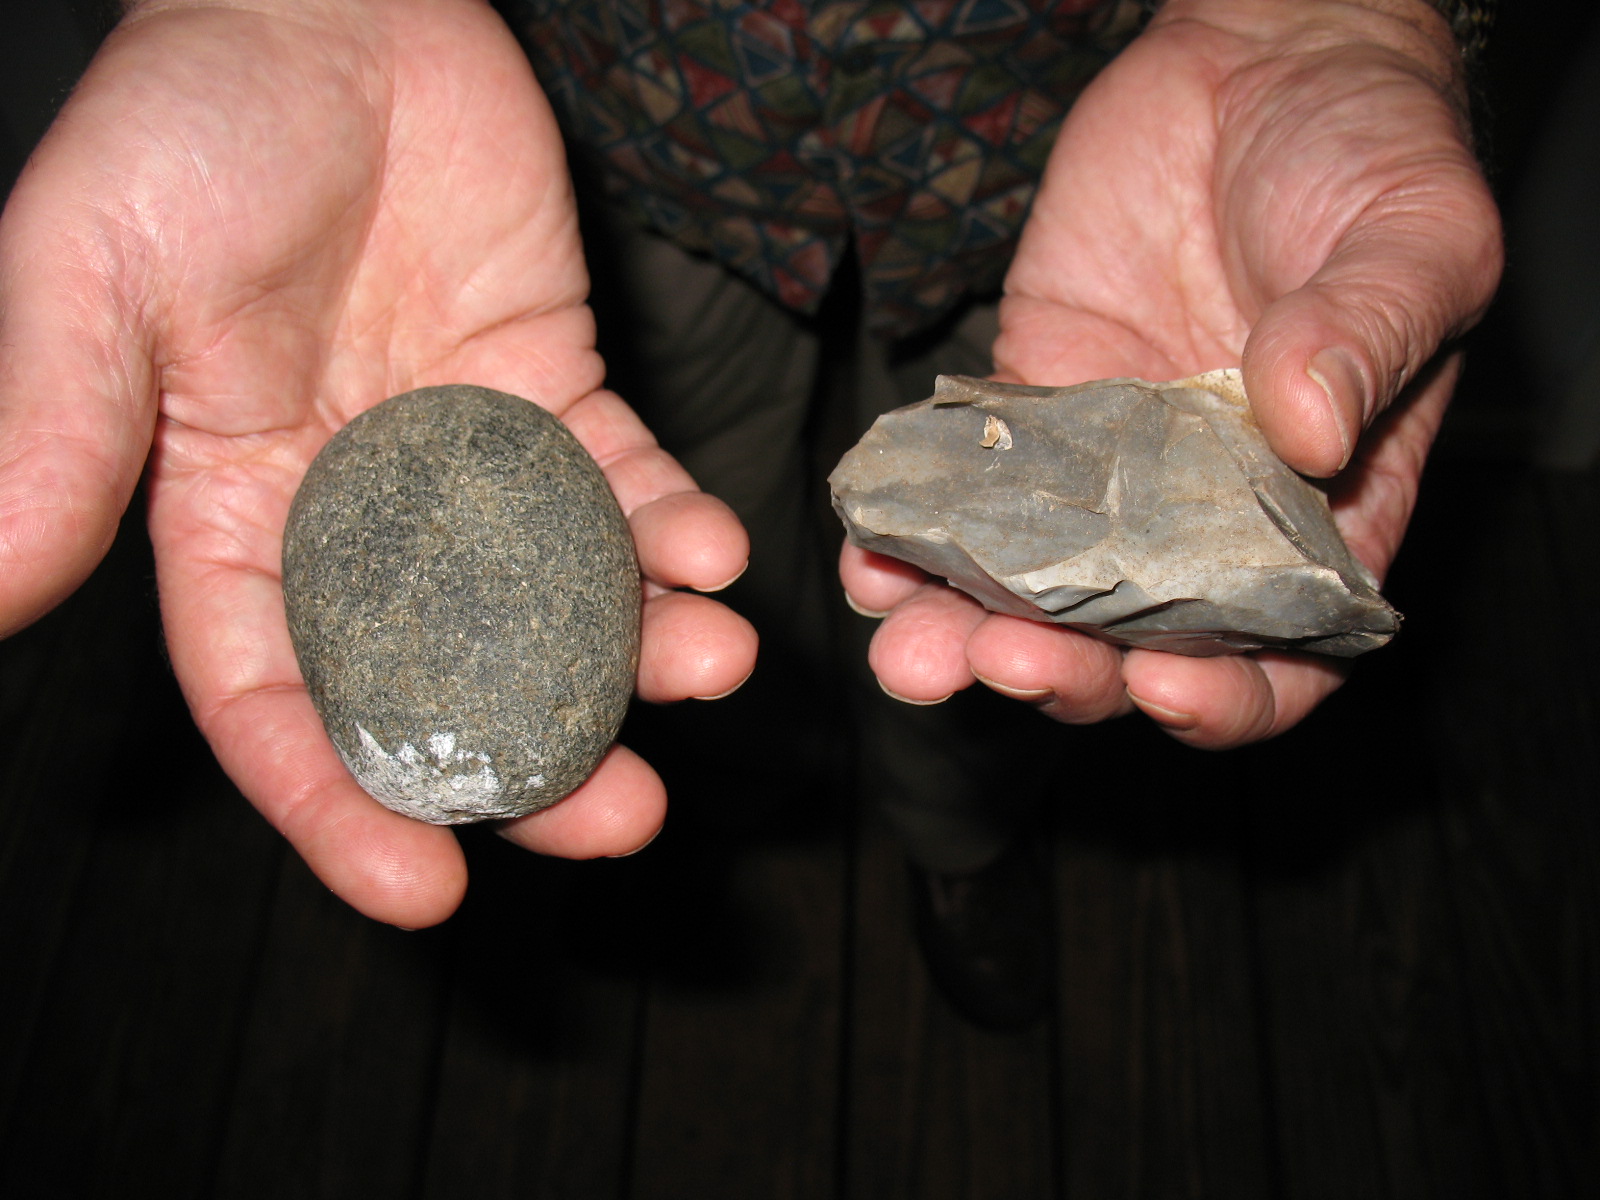
Now, let’s make a flake blade. Hold the flint rock in one hand, then take the hammer stone in your other hand and strike down on the edge of the flint rock. With any luck a nice flake will pop off. Pictured below: top, striking the flint rock; bottom, resulting flake.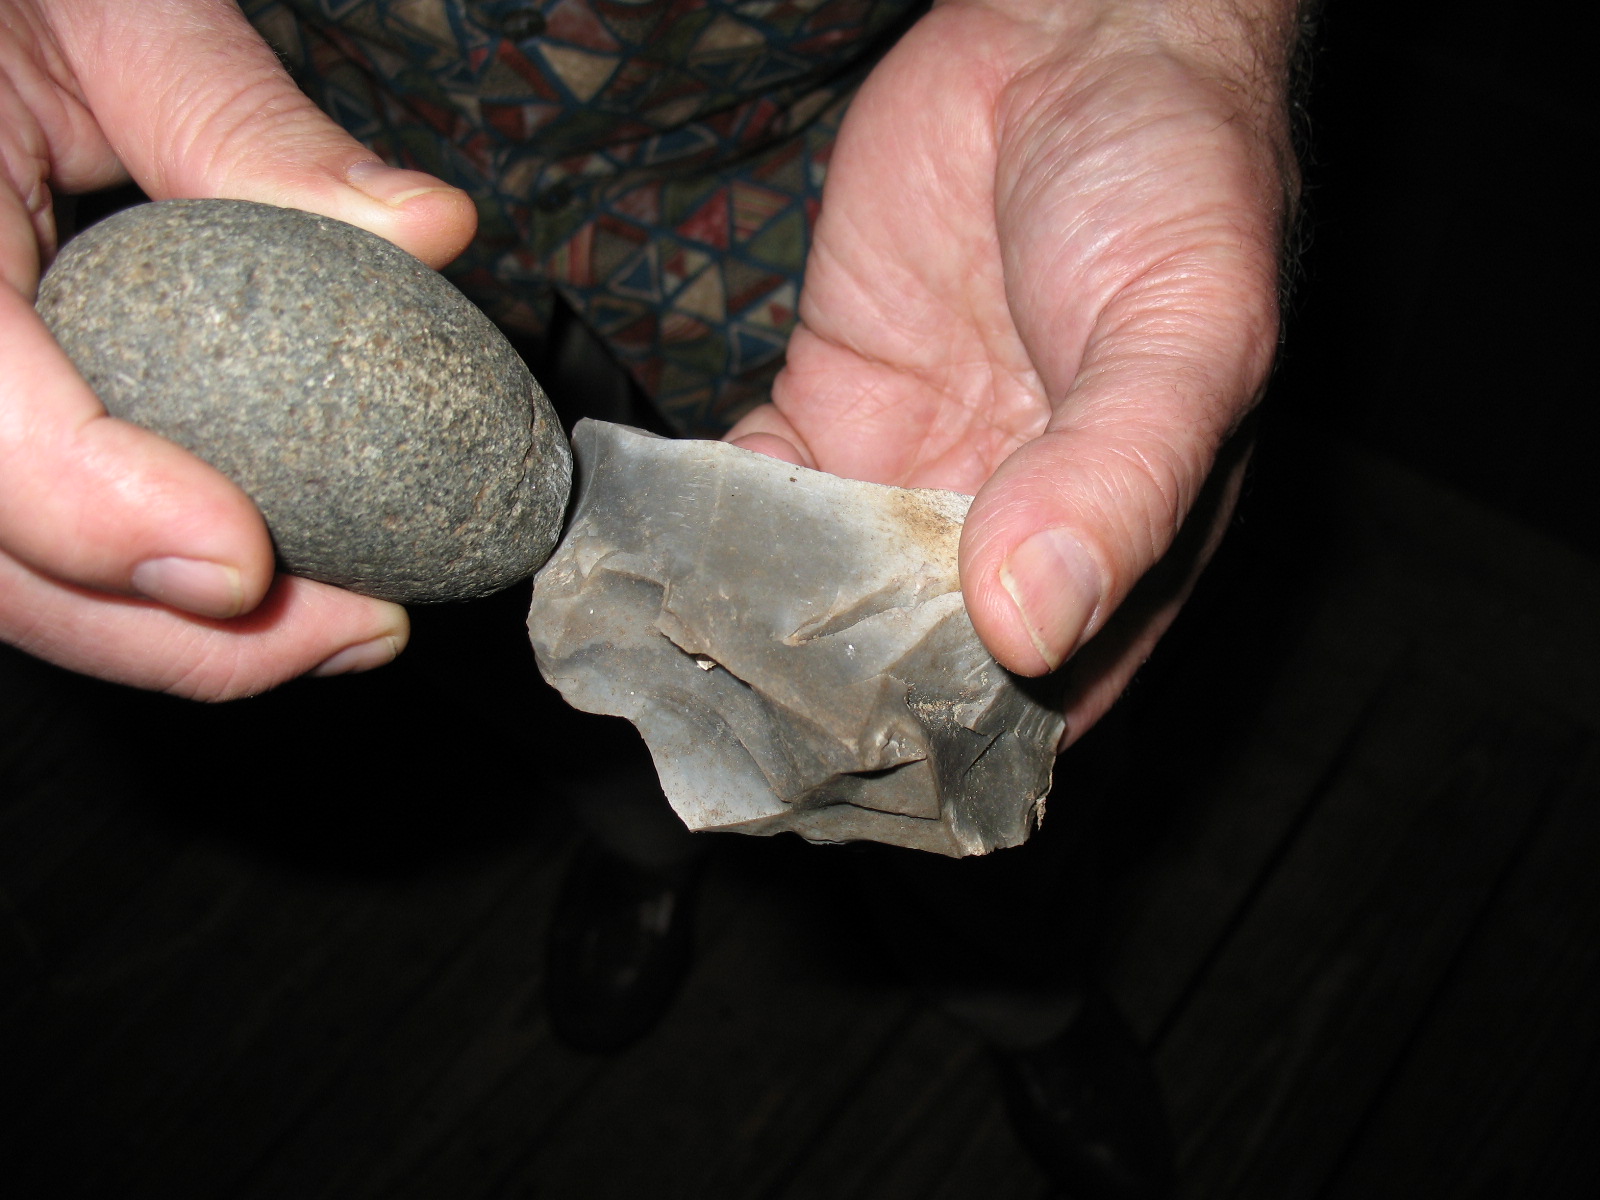
Be careful. The edge of this flake is sharper than a razor blade. Pictured below: Using a flake blade to slice meat. 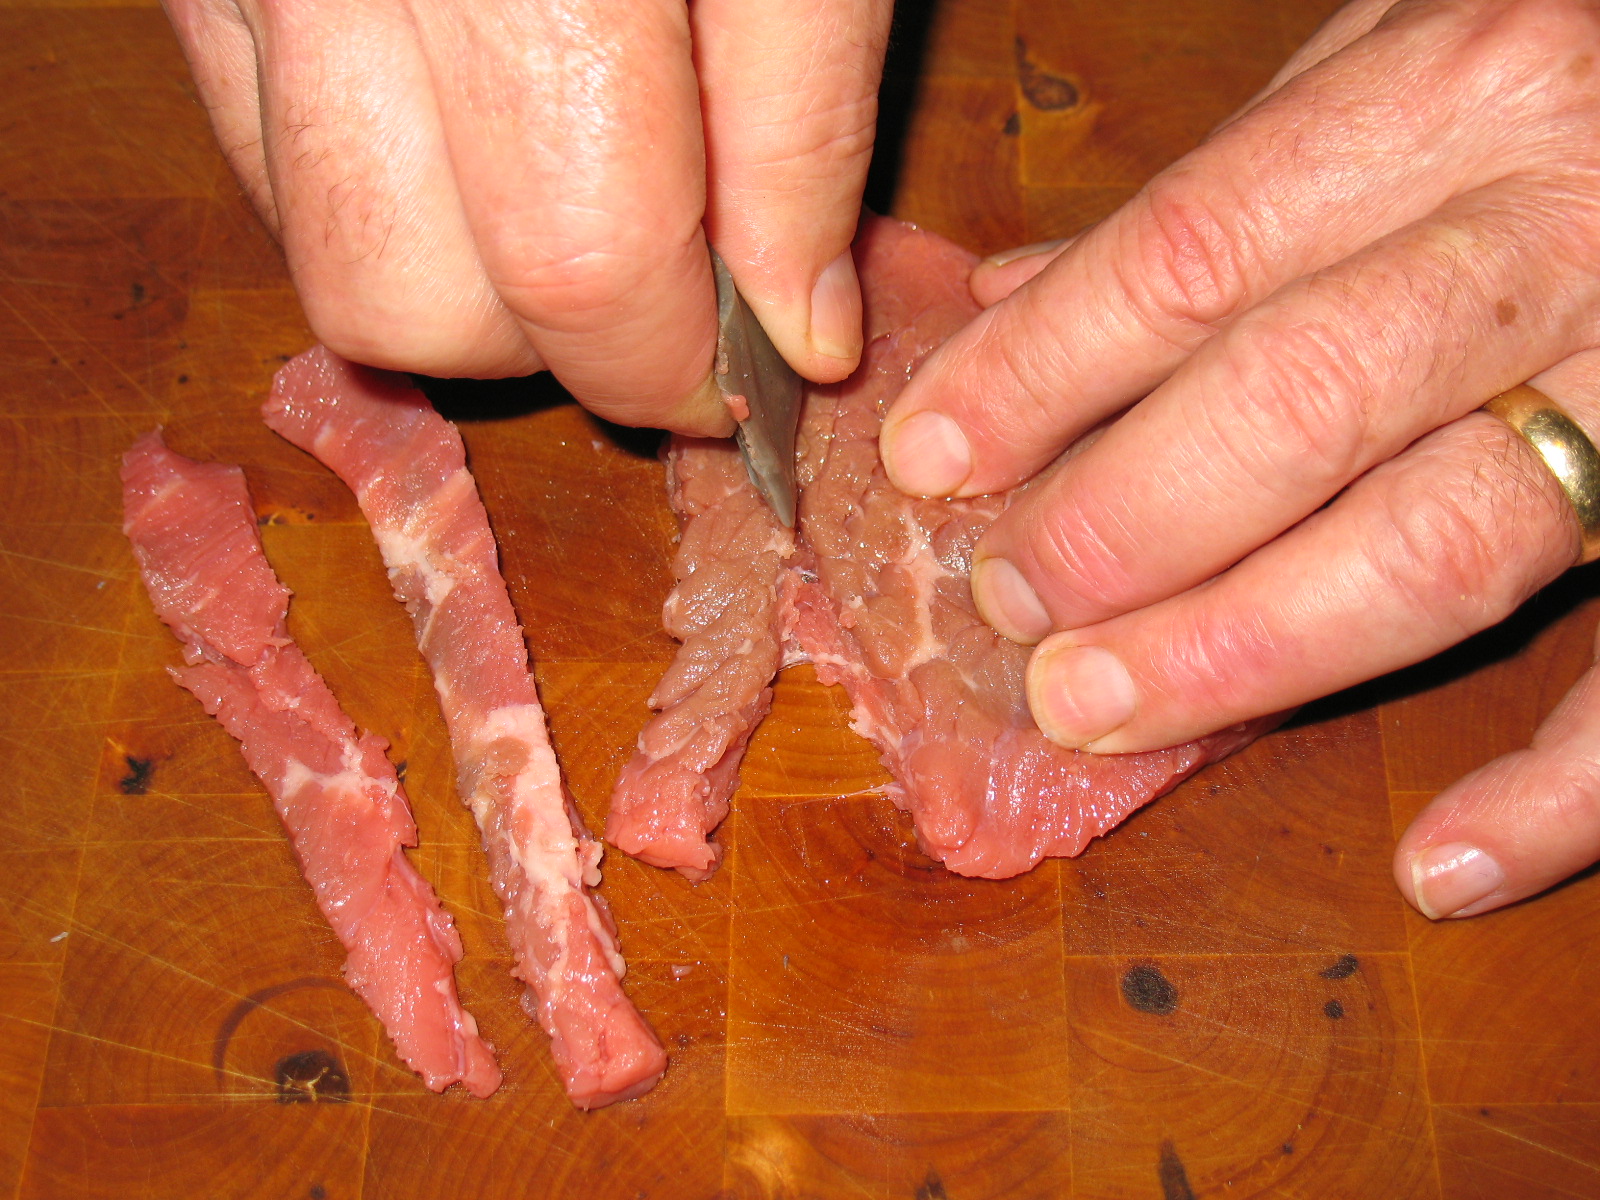
The flake blade can be used to carve wood, but it is not as effective as a steel blade for this. The edge of the flake blade is extremely sharp but it is pretty fragile, and heavy whittling will likely cause the edge to crumble. For removing wood and shaping wood a flint flake is more often used as a scraper rather than a cutting blade.
I raise a bed of garlic every year. I grow white hard-neck garlic, which cloves; and elephant garlic which is a single bulb. The elephant garlic grows like a weed. I have actually pulled elephant garlic while thinning the bed, and thrown it out in the woods. I now have patches of garlic growing in the woods where it has rooted, grown, and reproduced. The hard-neck garlic looks like what you buy at the store. For a new crop each year you just save three or four bulbs, separate them into cloves, and plant the cloves in the late fall. By the way, cultivated garlic is only vaguely like the wild garlic plants of the allium family. The original garlic plant has been selectively bred for about 5000 years until it now bares no resemblance to the original plant 
Garlic is a great spice for cooking, but did you know that it is one of our most potent herbal medicines? Garlic is a natural antibiotic, and it has a very positive effect on the circulatory system. Garlic does its work best if it is consumed as part of the daily diet. It will help strengthen the immune system, lower blood pressure, and help keep the arteries free of plaque build up. One clove of garlic per day is the recommended dose, so plant a lot of garlic. If you can’t stand the taste of garlic you can buy garlic capsules or coated garlic pills, but these won’t be available if the economic and transportation structure falls apart.
Here is a partial list of the complaints for which garlic has been historically used to help prevent or cure:
Strengthen the immune system
Lower cholesterol and triglycerides
Fight infections
Reduce blood pressure
Prevent fungal skin infections
Help prevent intestinal parasites
Repel insects which may carry diseases like malaria, lyme disease, West Nile virus etc
Help prevent pneumonia
Help prevent strokes
During World War I (before the use of penicillin or sulfa) the British government bought tons of garlic for use in treating battle wounds. Garlic juice was squeezed directly into wounds to help prevent infection. If the skin became irritated from direct contact with the garlic, the cloves were mashed, placed in gauze, and used as a poultice.
Of course there is no replacement for professional medical care; but if you are in a survival situation, and medical help is not available, you might want to consider garlic as an alternative treatment. In modern, everyday life, garlic will certainly do you no harm; and it could help prevent many medical complaints.
Every home should have a home medical library. Back in the pre-internet days nearly every household had a book where mama could look up symptoms and see what kind of illness a kid, husband, or mama herself had come down with. The book would also tell what steps could be taken for home treatment if possible. Today when we have a home malady the first stop is the inter-net, but you have to remember how fragile the inter-net is. A natural disaster, cyber warfare, of the government itself could close down the inter-net in a heartbeat. Don’t get left in the dark for information. Buy some good home medical books. Download information from the inter-net, print it off, and put it in a labeled binder. Pictured below: Binder where I keep medical information printed off the net.
Here are a few books and websites that I would recommend:
For quick everyday reference I keep a copy of the Harvard Medical School Family Health Guide in my library. This guide is easy to use and can help you diagnose and treat minor illnesses, or advise you if you need to see a doctor for treatment.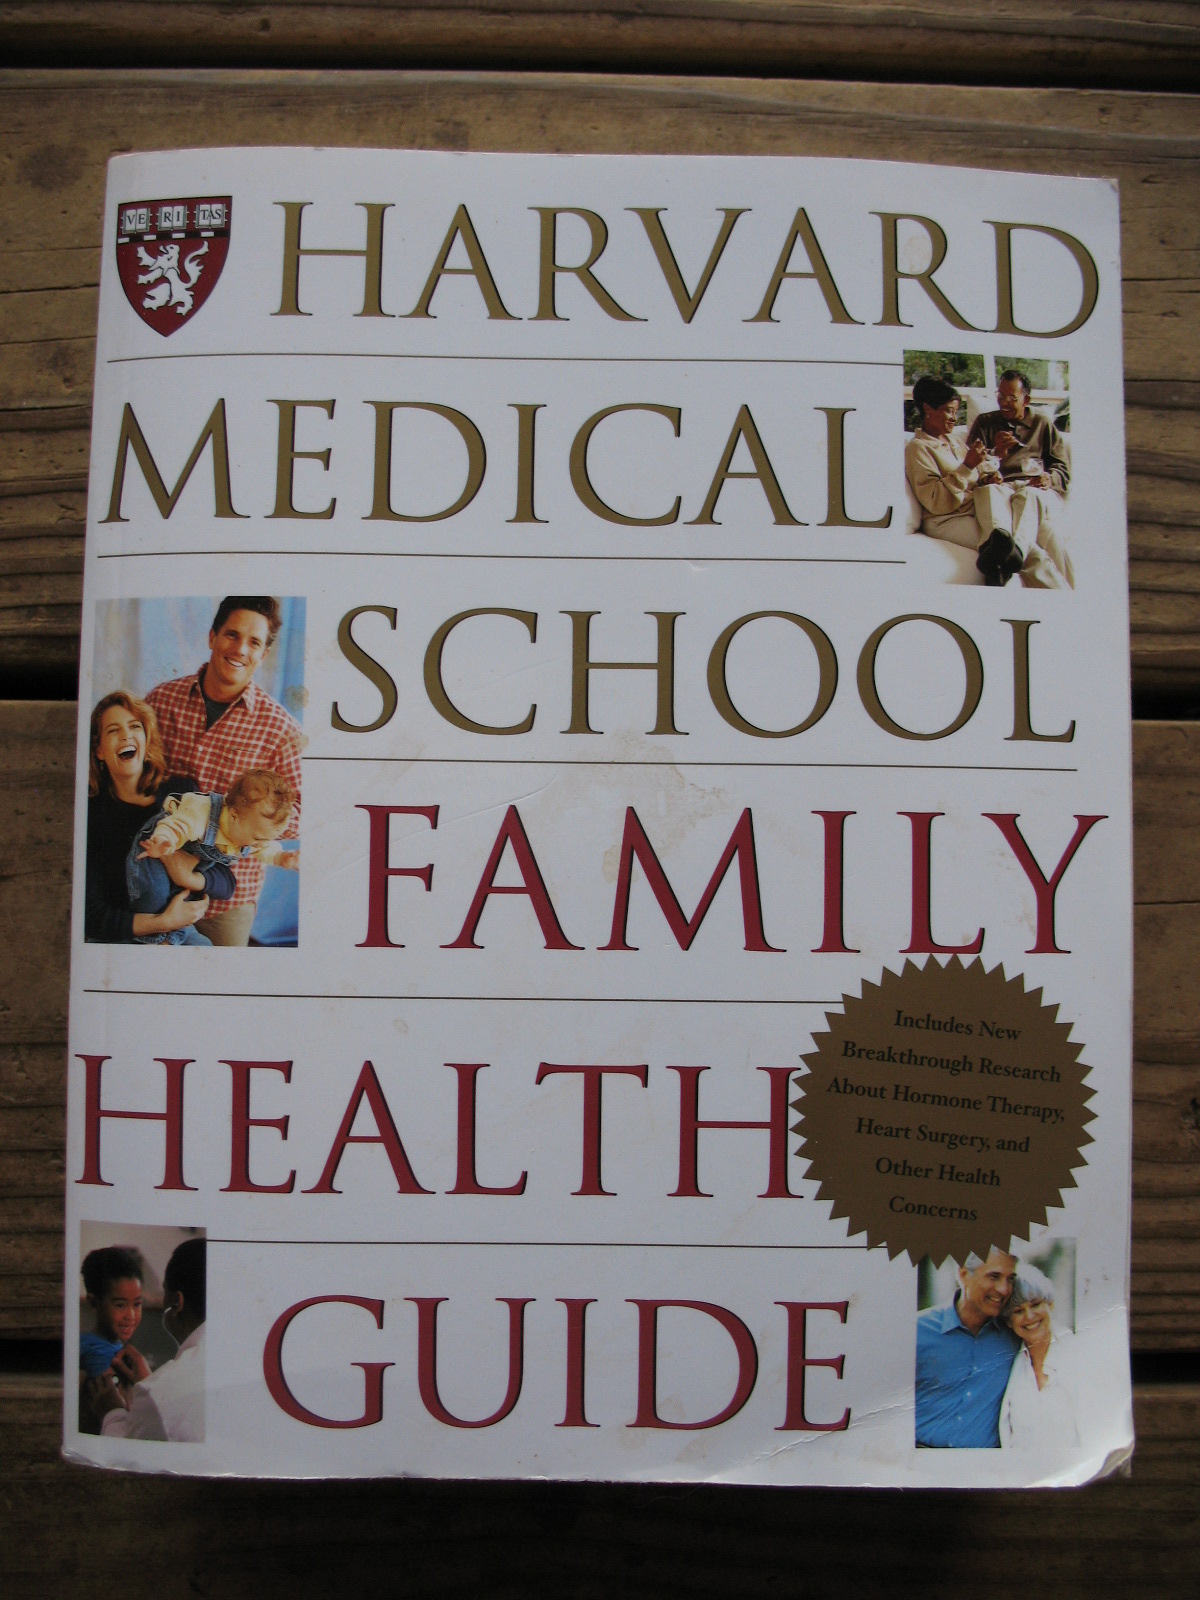
The Herbal Drugstore by Linda B. White, M.D. and Steven Foster is a good book for holistic medicine. It lists various complaints, then tells what modern medicines are used to treat them, what essential oils can be used to treat them, and what herbs can be used to treat them. Could be very handy when the medicines run out.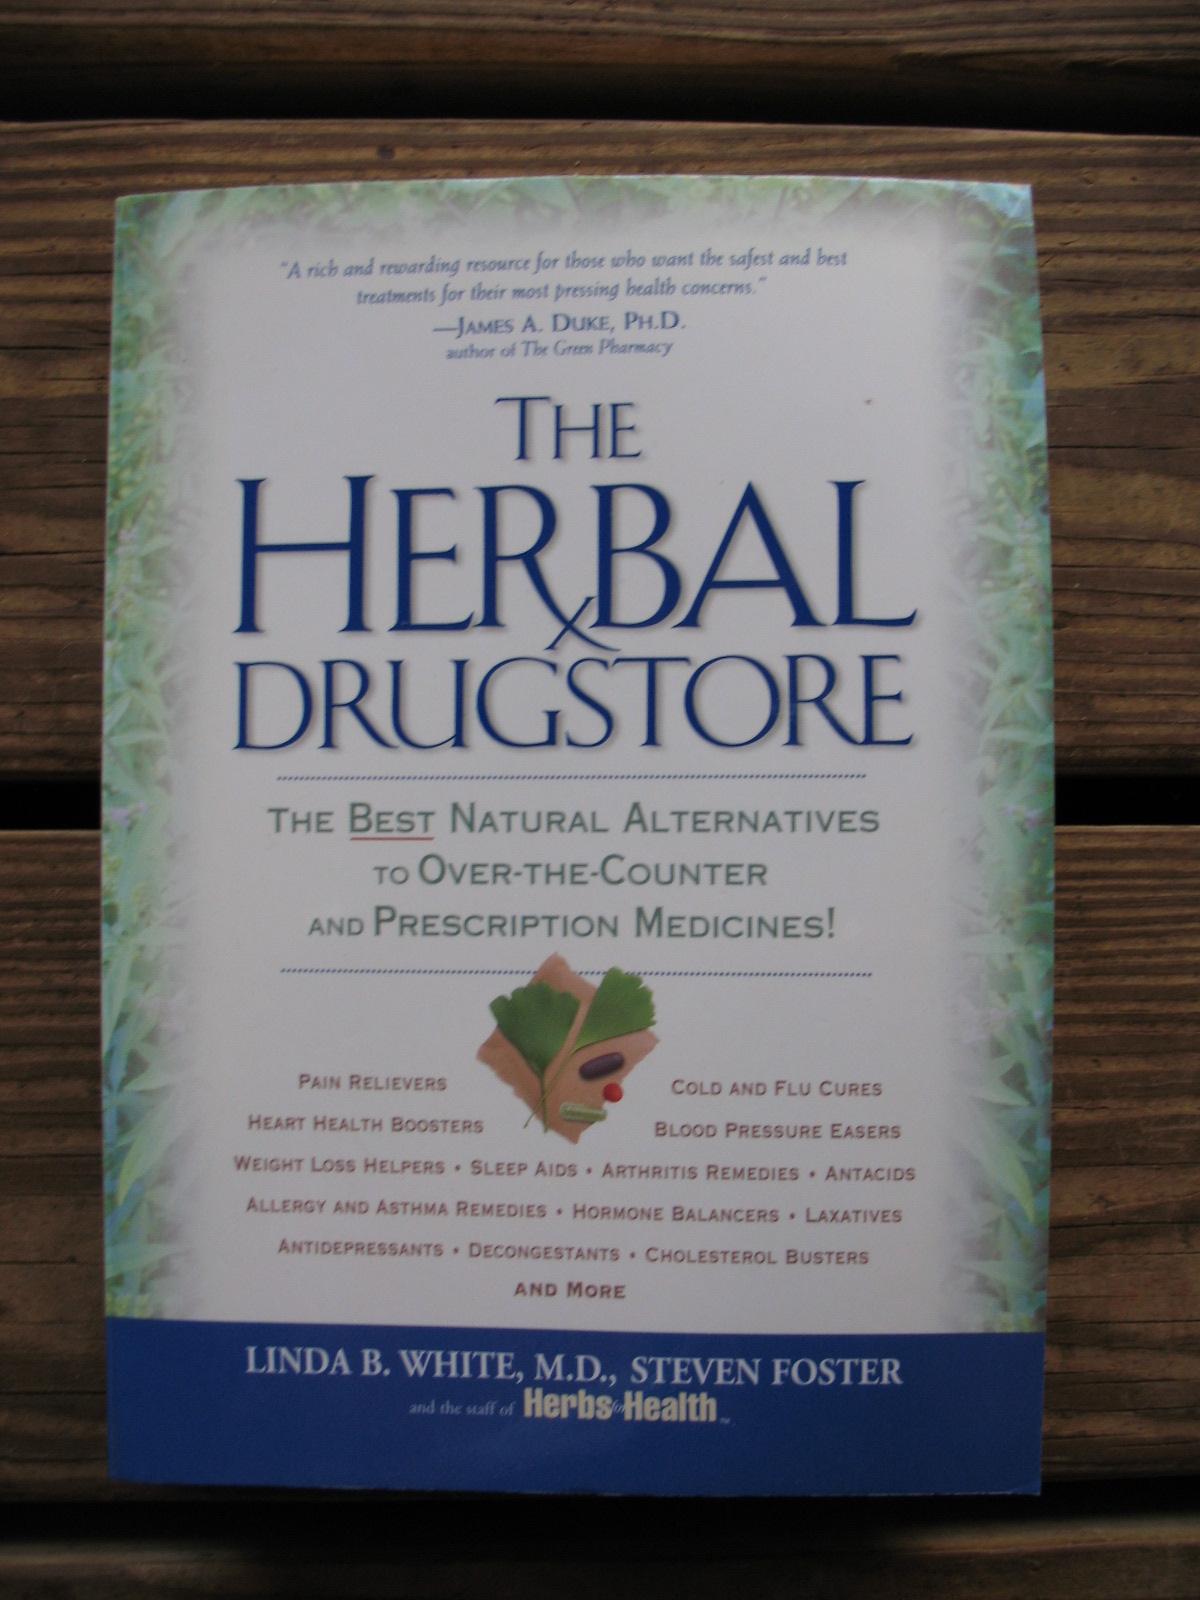
The Green Pharmacy Guide to Healing Foods by James A. Duke PhD is another holistic medicine book that lists herbs and foods that may be eaten to prevent and help cure various illnesses.
I keep a paperback copy of the Physician’s Desk Reference in my library. This book lists prescription medications, the complaints they are used to treat, and common dosages used for adults and children.
One of the best books that I’ve seen on basic medical care for the layman is Where There is No Doctor by David Werner. This book is published by the Hesperian Foundation. The book is designed to be used by non-medical aid workers in third world countries. It gives simple clear instruction on disease prevention, diagnosis, and treatment. It also has a good first aid section. You can download the book for free here
http://hesperian.org/10411911.php
but it is over 400 pages long in PDF format and a bugger to print. You can order it on-line here
http://hesperian.org/mm5/merchant.mvc?Store_Code=HB&Screen+PLST
for $22 U.S.
Another great medical text is Survival and Austere Medicine. This book discusses diagnosis and treatment of disease and injury under survival conditions and using very primitive equipment and supplies. You can only get this book as a free download, and it is a long PDF file, but it is well worth the paper and ink. Download Survival and Austere Medicine here http://www.endtimesreport.com/Survival_Medicine.pdf
I would discourage anyone, except a licenses physician, from attempting to practice medicine on themselves or anyone else except when there is absolutely no other choice. But if there is no other choice I personally would want as much information as I could get on this subject. Of course I can’t vouch for the accuracy of any of the advice given in any of these texts. Use them at your own risk, but I will say that I have all of them in my home medical library.
One hundred and fifty years ago diseases like pneumonia, typhus, cholera, anthrax, and even infected wounds where usually a death sentence. With the advent of penicillin and other modern antibiotics most of these diseases and conditions became curable. If the current social and economic order breaks down we could see a resurgence of deaths from diseases and injuries that are easily and commonly treated with antibiotics. As stated earlier, doctors will be in short supply; and medicines, including antibiotics, will disappear from pharmacy shelves within days if not hours. So it might not be a bad idea to include some antibiotics in your medical supplies.
Some antibiotic ointments are available without a prescription. Neosporin and triple antibiotic ointment are examples of these ointments. They are pretty pricy, but they are good to treat minor wounds before bandaging. I have a number of tubes of antibiotic ointment which I store in a refrigerator to extend their shelf life.
Oral and injectible antibiotics are another story. In the U.S. these medications require a doctor’s prescription. The only legal way to obtain a supply of these medications is to find a doctor that is sympathetic to your preparations and get him or her to write you a prescription for the medication. If this you find a doctor that will do this, I would suggest that you ask for some broad spectrum antibiotics like Ampicillin or Tetracycline. These are available in capsules that will stay viable for a long time if kept sealed and refrigerated.
Injectible antibiotics require refrigeration, so if the power goes out you only have a limited amount of time to use these antibiotics before they spoil. If you had to, you could keep them cool enough by placing them in a waterproof container and lowering them into a well. If you do acquire injectible antibiotics, be sure to also buy appropriate syringes, learn how to determine correct dosages, and learn how to give the injection. 

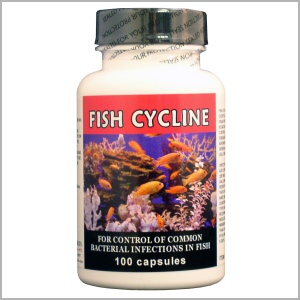
Some people skirt the law by buying veterinary antibiotics. Veterinary antibiotics are available without a doctor’s prescription, and you can find them on-line, or at pet and/or feed stores. Buying them is perfectly legal, but they are labeled for animal use only; so if you use them for human consumption it is technically illegal. For this reason I cannot recommend that you go this route, but if you want to look into it there is a lot of information on the inter-net. Veterinary Ampicillin costs around $30 for 100 250mg capsules. Veterinary Tetracycline in around $20 for 100 500mg capsules. Injectible antibiotics are also available as veterinary medicines but they have no dosage instructions for humans since they are not legally labeled for human use. If you are going to use injectible veterinary antibiotics do some careful research first.
Some people have allergic reactions to certain antibiotics. If these people ingest or inject an antibiotic that they are allergic to, they risk death from anaphylactic shock. So, don’t mess with any of this stuff lightly. Best course of action is to stay legal and get a doctor’s prescription and professional advice.
If something major bad happens we will all be in trouble when it comes to health care. Doctors would be few and far between and most of them would have a hard time practicing their craft without electricity and modern pharmaceuticals. No new pharmaceuticals would be manufactured, and many of those already in existence would ruin without refrigeration. That’s the bad news. The good news is that everyone would be a lot more physically active and so probably healthier. Also, people wouldn’t be traveling as much, so contagious diseases wouldn’t spread as much.
But, injury accidents would still be a problem, as would chronic diseases like diabetes and arthritis. Nutrition based diseases could become a problem with people not getting enough of certain vitamins. Also insect born diseases like malaria, West Nile virus, and hanta virus could see an increase. The lack of antibiotics could mean that illnesses and injuries that are easily treatable today would once again become fatal.
So what can you do to prepare? Well the short answer is to get healthy and stay healthy. If that doesn’t work for you then you are going to need basic knowledge, medicines, and equipment; and basic medical skills.
I have four basic medical guides in my library; The American Red Cross First Aid Handbook, Grey’s Anatomy, The Harvard School of Medicine Family Medical Guide, and The Guide to Survival and Austere Medicine. None of these take the place of a good doctor or physician’s assistant, but they are better than nothing.
How about medical supplies? Let me just give you a list of what I keep around:
Adhesive bandages
Sterile gauze bandages
Butterfly bandages
Ace elastic bandages
Super Glue (handy for gluing wounds together that might otherwise require stitches)
Metal finger cots
Cotton swabs
Cotton balls
Plaster of Paris
Iodine
Mercurochrome
Alcohol
Alcohol wipes
Gelled alcohol (hand sanitizer)
Hydrogen Peroxide
Oil of cloves
Antibiotic ointment
Fungicidal cream
Hydrocortisone cream
Calamine lotion
Acetaminophen tablets
Aspirin tablets
Benadryl tablets and liquid
Antihistamine tablets
Antacid tablets
Anti-diarrhea tablets
Laxative tablets
Epsom salts
Cough drops
Expectorate syrup
Cough syrup
Analgesic cream
Vaseline
Vicks vapo-rub
Eye drops
Mercury thermometer
Tweezers
Small scissors
Hemostats
Sutures
Scalpel
Cold packs
Vaporizer
Tongue depressors
Flashlight
Magnifying glass
Needles
Eyedropper
Stethoscope
Blood pressure cuff
Weight scales
In addition to these items I also keep a small snake-bite kit and a dental emergency kit on hand. Of course if you take prescription medications on a regular basis, you should lay in a good supply of these. Always keep medicines refrigerated as this will greatly extend their shelf life.
In addition to my home medical supplies I keep a well stocked first-aid kit in each vehicle, and I have a small first-aid kit in my bug-out bag.
It was a bad year for my small orchard. I have two peach trees, two plum trees, a nectarine tree, a fig tree, a Hunza apricot tree, and two pear trees. A late freeze and a very hot and dry summer meant no peaches, no plums, no nectarines, no figs, and no apricots. But my good old reliable pear trees paid off. 
I planted two Keifer pear trees about 20 years ago, and they are virtually indestructible. The reason I bought them originally was because I read that they are very resistant to fire blight. Fire blight is a disease that causes all of the leaves on the pear tree to turn black. Untreated fire blight will kill most pear trees, but my Keifer pears shake it off like nothing more than a head cold. I have pruned and sometimes failed to prune these trees. I have not fertilized them but once or twice. I have never sprayed them with any type of insecticide. This year it was horribly dry but I couldn’t water them for fear of running my well dry. And still they bore pears. Admittedly, the pears weren’t as big as usual, but there were probably a hundred of them on the trees. I gave pears to friends and family and still had more left than I will use. 
Keifer pears can be used straight off the tree to make pear preserves, but if you want to slice and eat them, you need to sit them up in the window for a week or two and let them mellow. The only real problem with Keifer pears is that they only produce a good crop every other year. On the off years they may only produce a dozen pears between both trees. But every other year they get so loaded that you have to pick some to keep the limbs from breaking. If you don’t have the greenest of thumbs, Keifer pears are the way to go.
Sorry that I’m a little behind in posting, but we have been having something of a crisis in East Texas. First, an unprecedented drought. East Texas is usually a pretty wet place, receiving about 45 inches of rain a year. But it hasn’t rained, other than a few sprinkles, in months. It hasn’t been this bad since the 1950’s. Then we’ve had over 70 days of 100 degree or higher temperatures. This has dried things out even more. Then over the last weekend we started having high winds due to a tropical storm that brought us only the wind and no rain. That’s when the fires started. Several thousand acres of field and forest, and dozens of homes have burned in our area. The mandatory evacuation area came to within three-quarters of a mile of our farm. So, my computer, along with other things, has been packed in the truck; ready to flee from the flames if necessary. The wind has died down, and the fires are all currently contained, but we’ve still had no rain. So now I’ve had to take a look at another disaster scenario that I need to plan for, WILD FIRE.
First I had to look at what we’ve already done right. A fairly good list..
(1) My house has a metal roof, so burning cinders will not ignite the house from above.
(2) We have smoke alarms and fire extinguishers in the house in case a fire starts inside the house, but this is of little help in the case of a wild fire.
(3) All of our important legal documents are stored in a portable fire-proof lock box. These items include birth certificates, social security cards, passports, land and car titles, insurance policies, etc.
(4) Our fire insurance policy is paid up
(5) We have digital pictures of every room in the house from several angles showing all of the furnishings, appliances, etc. We have exterior shots of the house from all angles. We have shots of the shop and all equipment and also of the storage building and contents. Insurance companies brag about how on-the-spot they are and how they settle claims right away. They do this so you will sign off on a settlement before you have a chance to really think about all of the things that you have lost. Take pictures to document what you have, then take your time to make a complete list of lost items. Don’t let the insurance company rush or intimidate you.
(6) We have a good communication net with our neighbors to warn of coming danger. One neighbor has a cleared pasture that is about 300 acres. In the middle of it is a hill, and on top of the hill is his two story house. He has an unobstructed 360 degree view for miles around. During the recent outbreak of fires we discovered that watching the news is a waste of time. Their information is inaccurate, incomplete, and hours behind real-time. Instead, my neighbor and his wife took turns scanning the surrounding area from their high vantage point. When they saw smoke they would zero in on it with a 60X spotting scope. They would then call one of the other neighbors or me and give us a bearing on the fire. We would drive over and access its potential threat to our area. We would then report back via cell phone to the other neighbors. It worked well for us.
Now to the stuff that I’ve done wrong or haven’t done at all.
(1) The Forest Service used to come out and do controlled burns to clear underbrush, fallen limbs, leaf litter, and other things that could fuel a major fire. I had this done years ago, but a lot of debris has built up since. I don’t know if the Forest Service still does controlled burns, but I definitely need to check. If you are in a similar situation, you should check into this also.
(2) The tree line is far to close to my house on at least one side. I need to spend this winter clearing underbrush and small trees, and selling larger trees for pulpwood. My goal is to have at least 50 yards of open ground completely around the house.
(3) Flammable fuel is stored too near the main structure. I need to move these items farther out. It will be kind of a pain when I need a new fuel bottle for the stove, or gas for the generator; but seeing aerial video of houses exploding in your area has a sobering effect. I will walk the extra distance.
(4) I have no active fire suppression system. A friend of mine rigged a nice little system around his house using PVC pipe so that when he turns the system on it sprays down the outside of his house with a constant blanket of water, kind of an upside down lawn sprinkler system. Looks like a pretty good idea. I will definitely check into it. Another friend has a submersible pump in his swimming pool that he can use to spray down the outside of his house. I don’t have a swimming pool, so this isn’t an option for me; but it may be for you. If you already have lawn sprinklers it might be a good idea to run a leg around the house that you can turn on to spray down the outside of the house.
So I guess the moral of this tale is that there’s no end to preparedness. There’s always something else. Don’t get paranoid, and don’t be overwhelmed, just look at it as another little home project that you need to take care of.
Here’s an interesting variation on the flint and steel fire. Old-time woodsmen often used their flintlock rifles to start a fire, and if you have a flintlock you can do the same thing
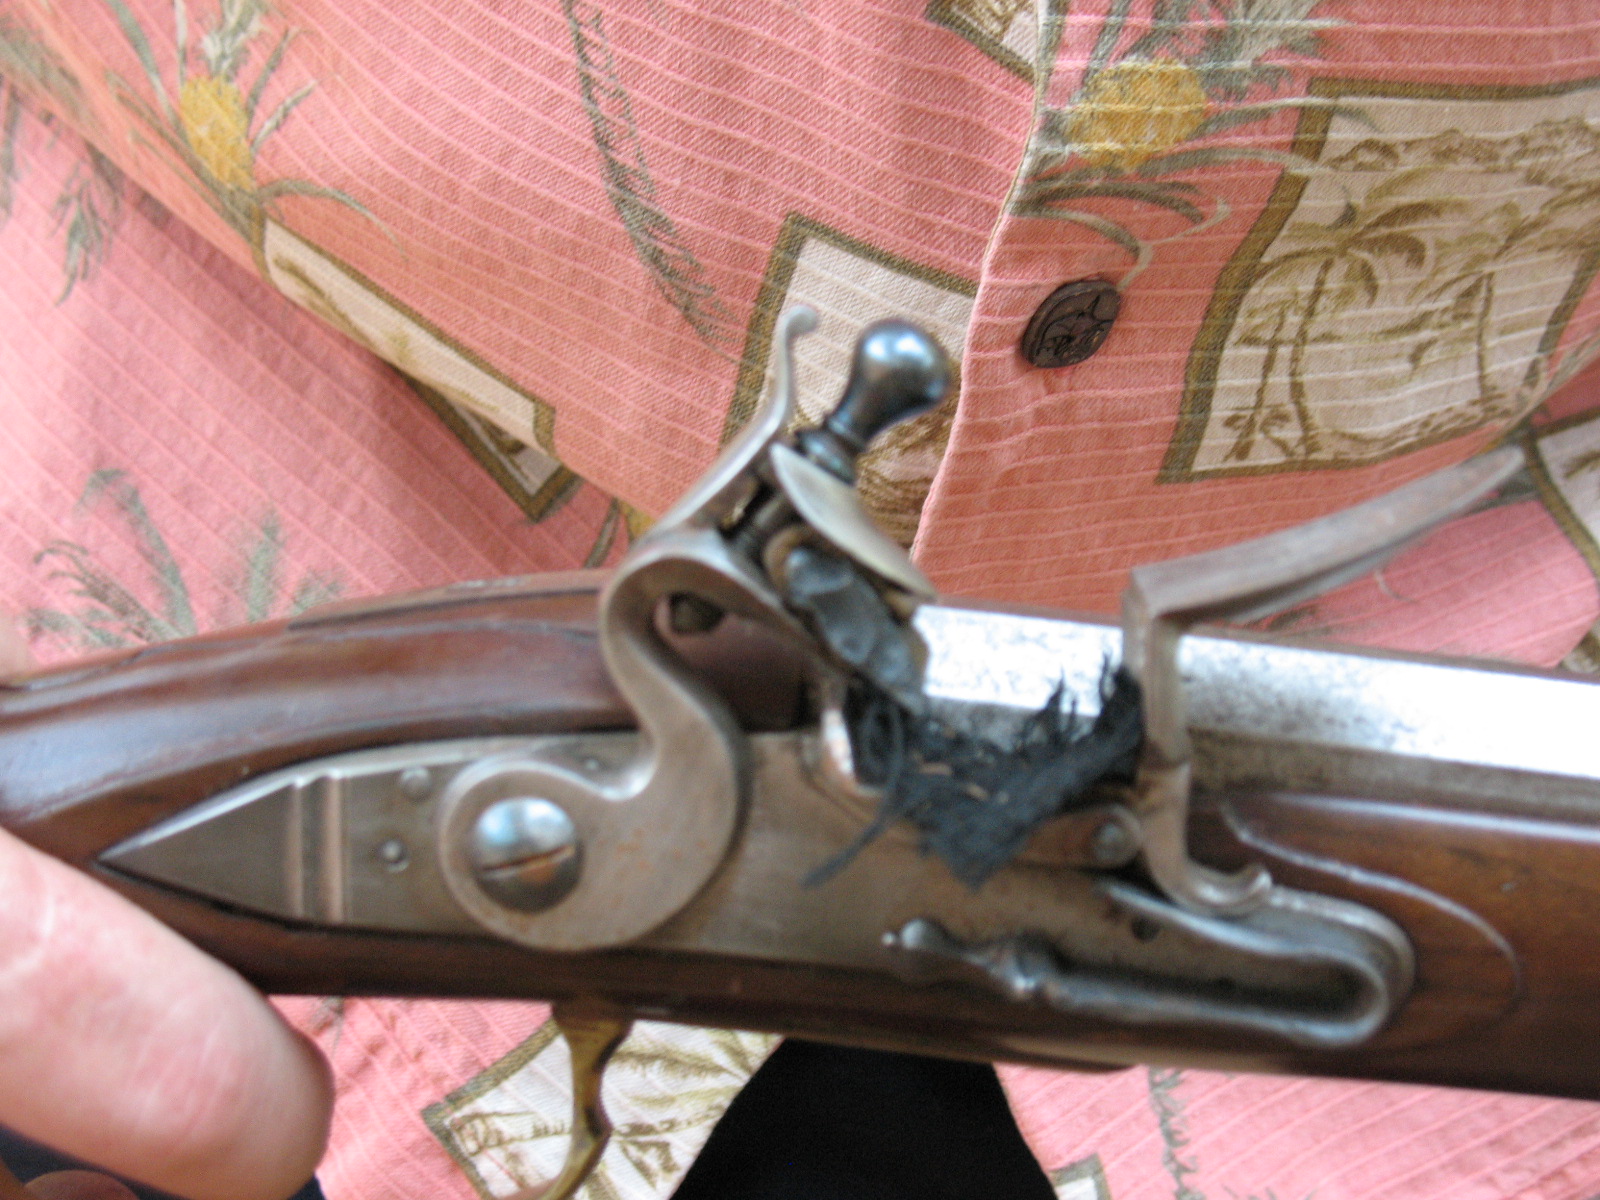
For those of you not familiar with how a flintlock works, I’ll provide a very brief description of the relevant parts. The “lock” or hammer assembly is on the side of the gun just above the trigger. The outside of the lock has four main parts: (1) the hammer, which has a clamp holding a small piece of flint-rock, (2) the powder pan, which is a small pan that holds priming powder, (3) the pan cover, which is a small, hinged lid that closes over the top of the powder pan, and (4) the pan spring, which keeps a little tension on the pan cover to keep it closed. When you pull the trigger, the hammer falls and the flint rock strikes the upturned portion to the pan cover, called the frizzen. The pan cover is knocked open and a shower of sparks from the flint falls into the powder pan. Pictured below: Lock of a flintlock rifle.
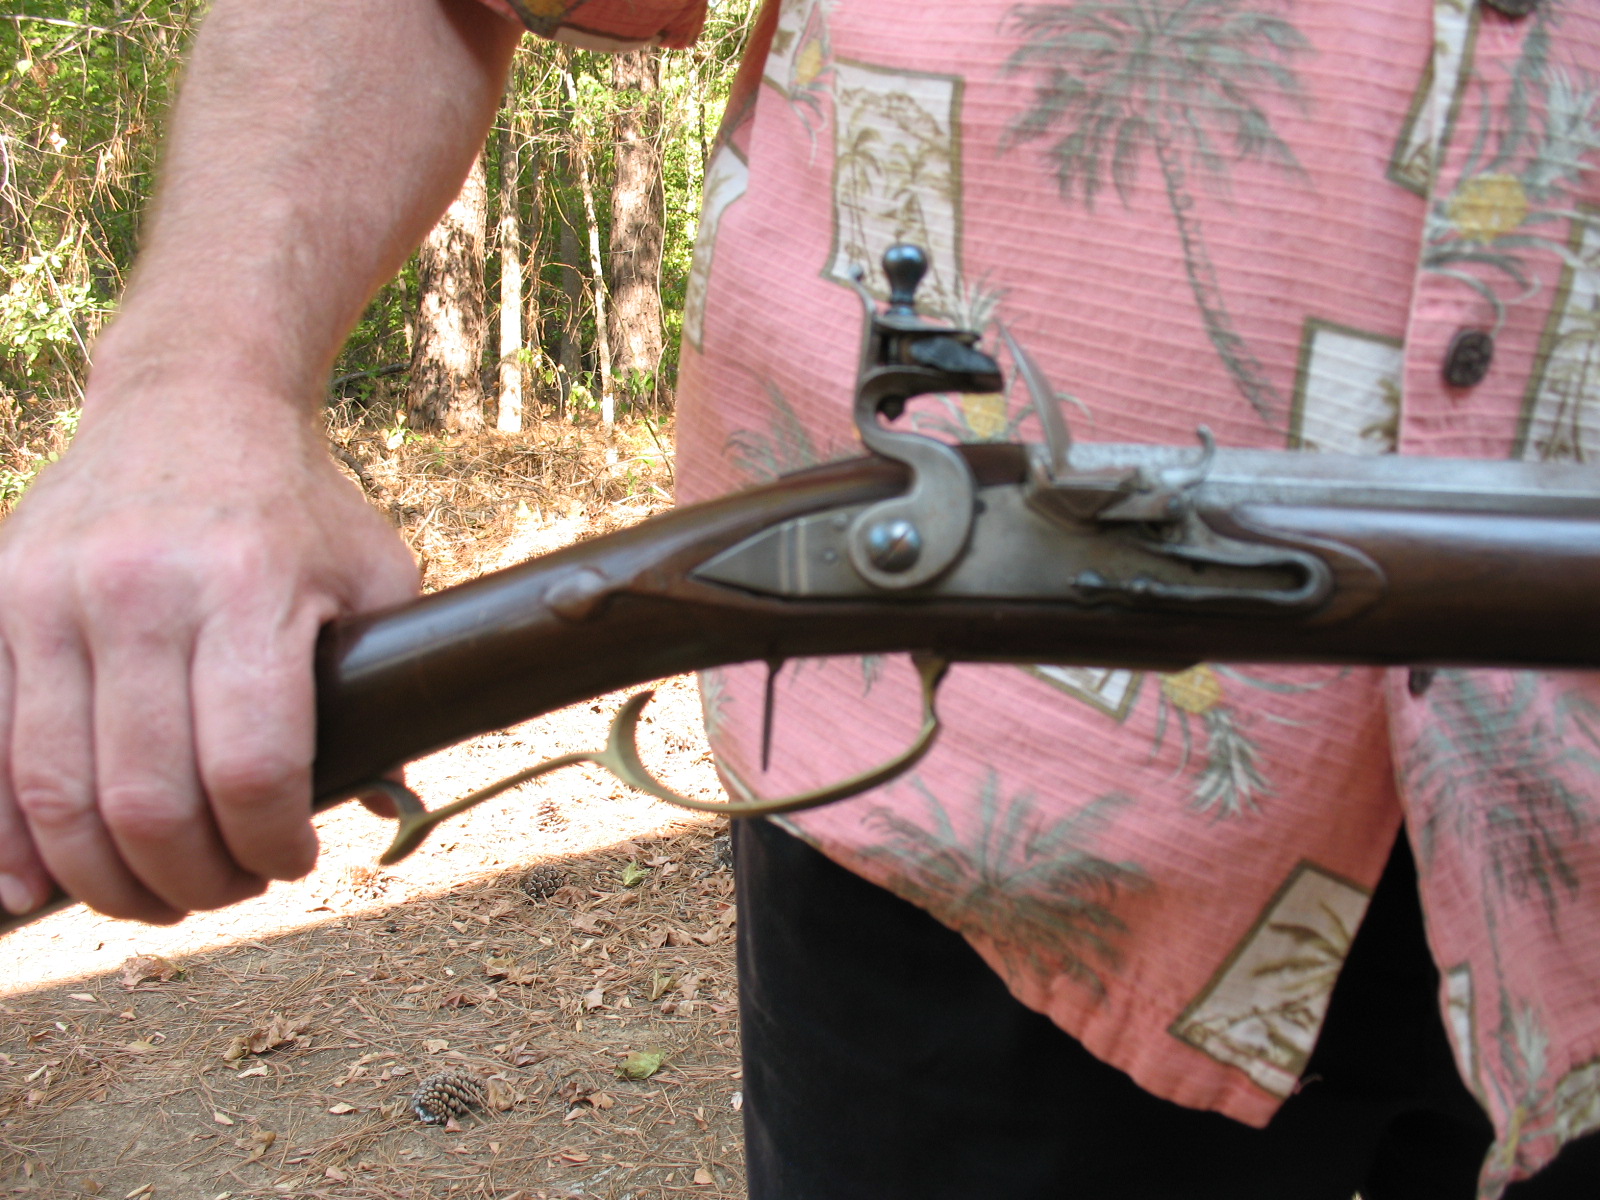
As you can tell from the above description, the flintlock uses flint striking steel to produce a spark; just like you do when you use your fire steel and a piece of flint.
So, here’s how you start a fire with a flintlock rifle. First MAKE SURE THAT THE GUN IS NOT LOADED. Never, never, never try to do this with a loaded gun. The gun may discharge and injure you or someone else. After you’ve made dead certain that the gun isn’t loaded, cock the hammer back to half cock, lift the pan cover, lay a piece of char-cloth on the open pan, and close the pan cover. Pictured below: top, flintlock with pan cover raised and char-cloth in pan; bottom, pan cover closed on char-cloth.
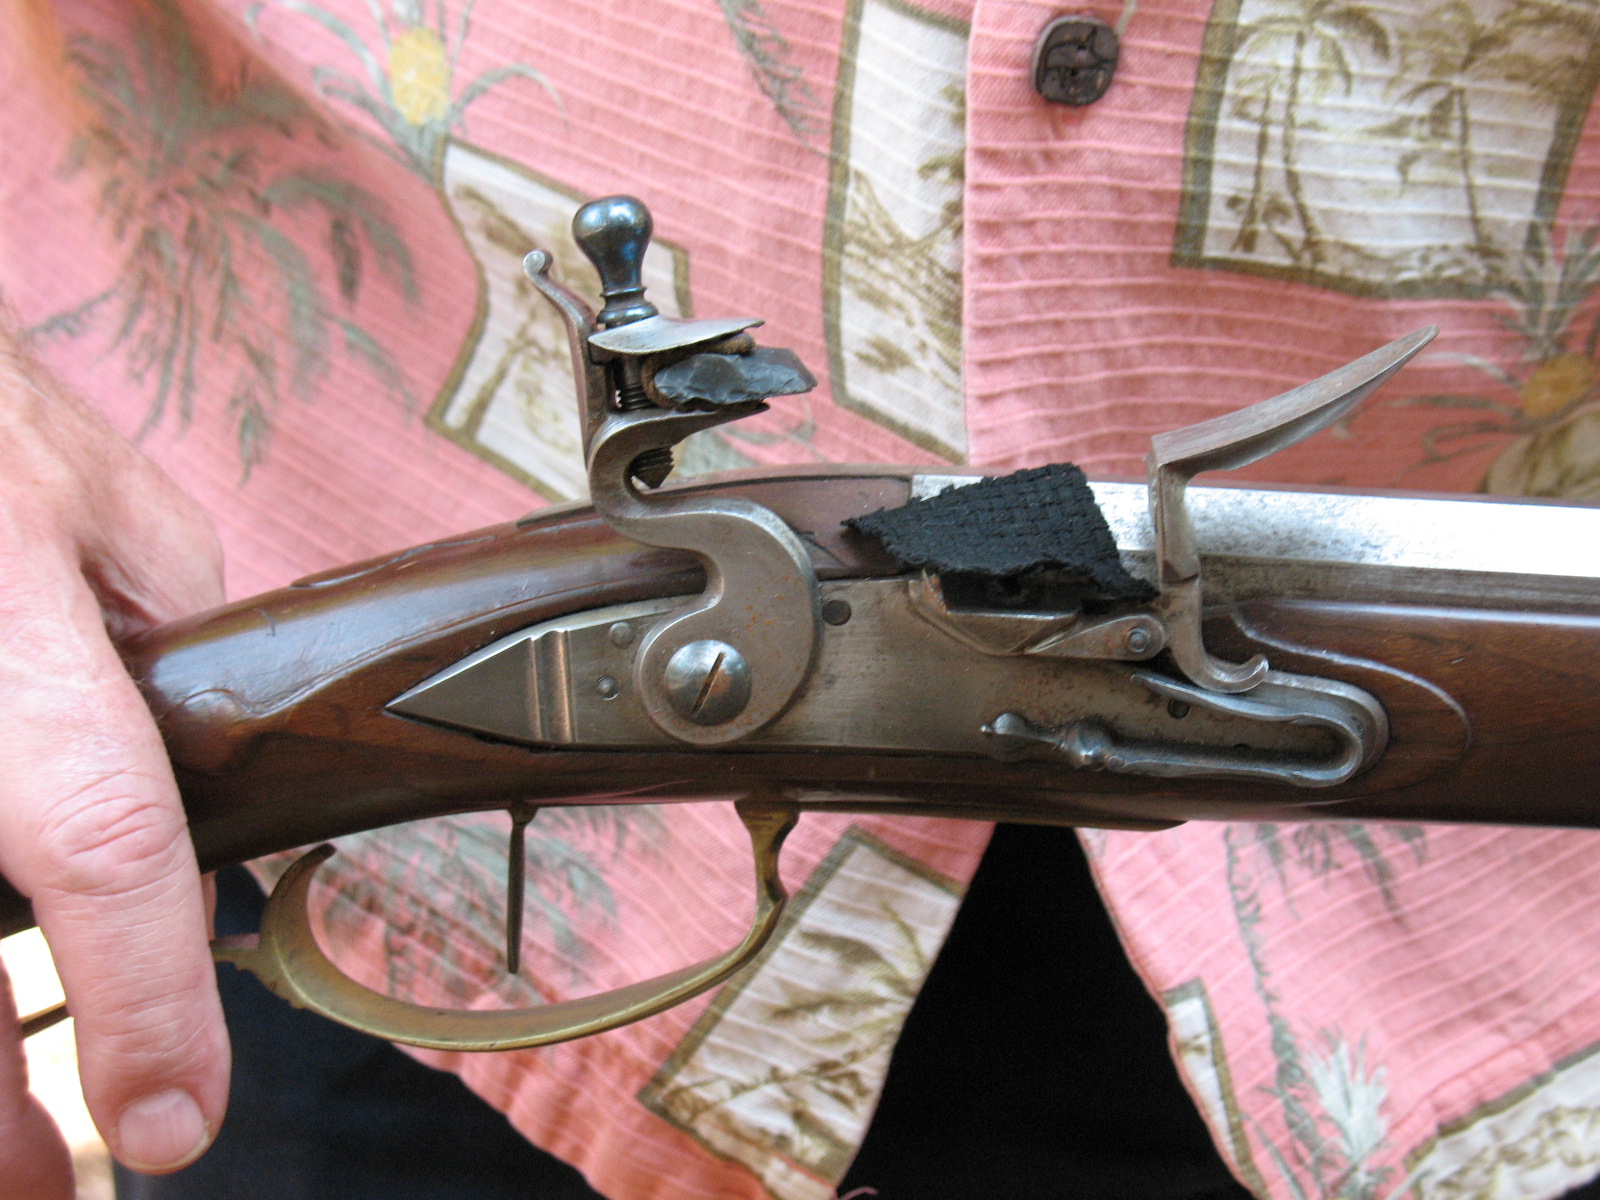
Now all you have to do is point the gun in a safe direction (safety first, even though you made sure that the gun wasn’t loaded), pull the hammer back to full cock, and pull the trigger. The hammer will fall, the sparks will fly, and your char-cloth will be burning. Pictured below: top, Flintlock after trigger pull; bottom, glowing spark on char-cloth.
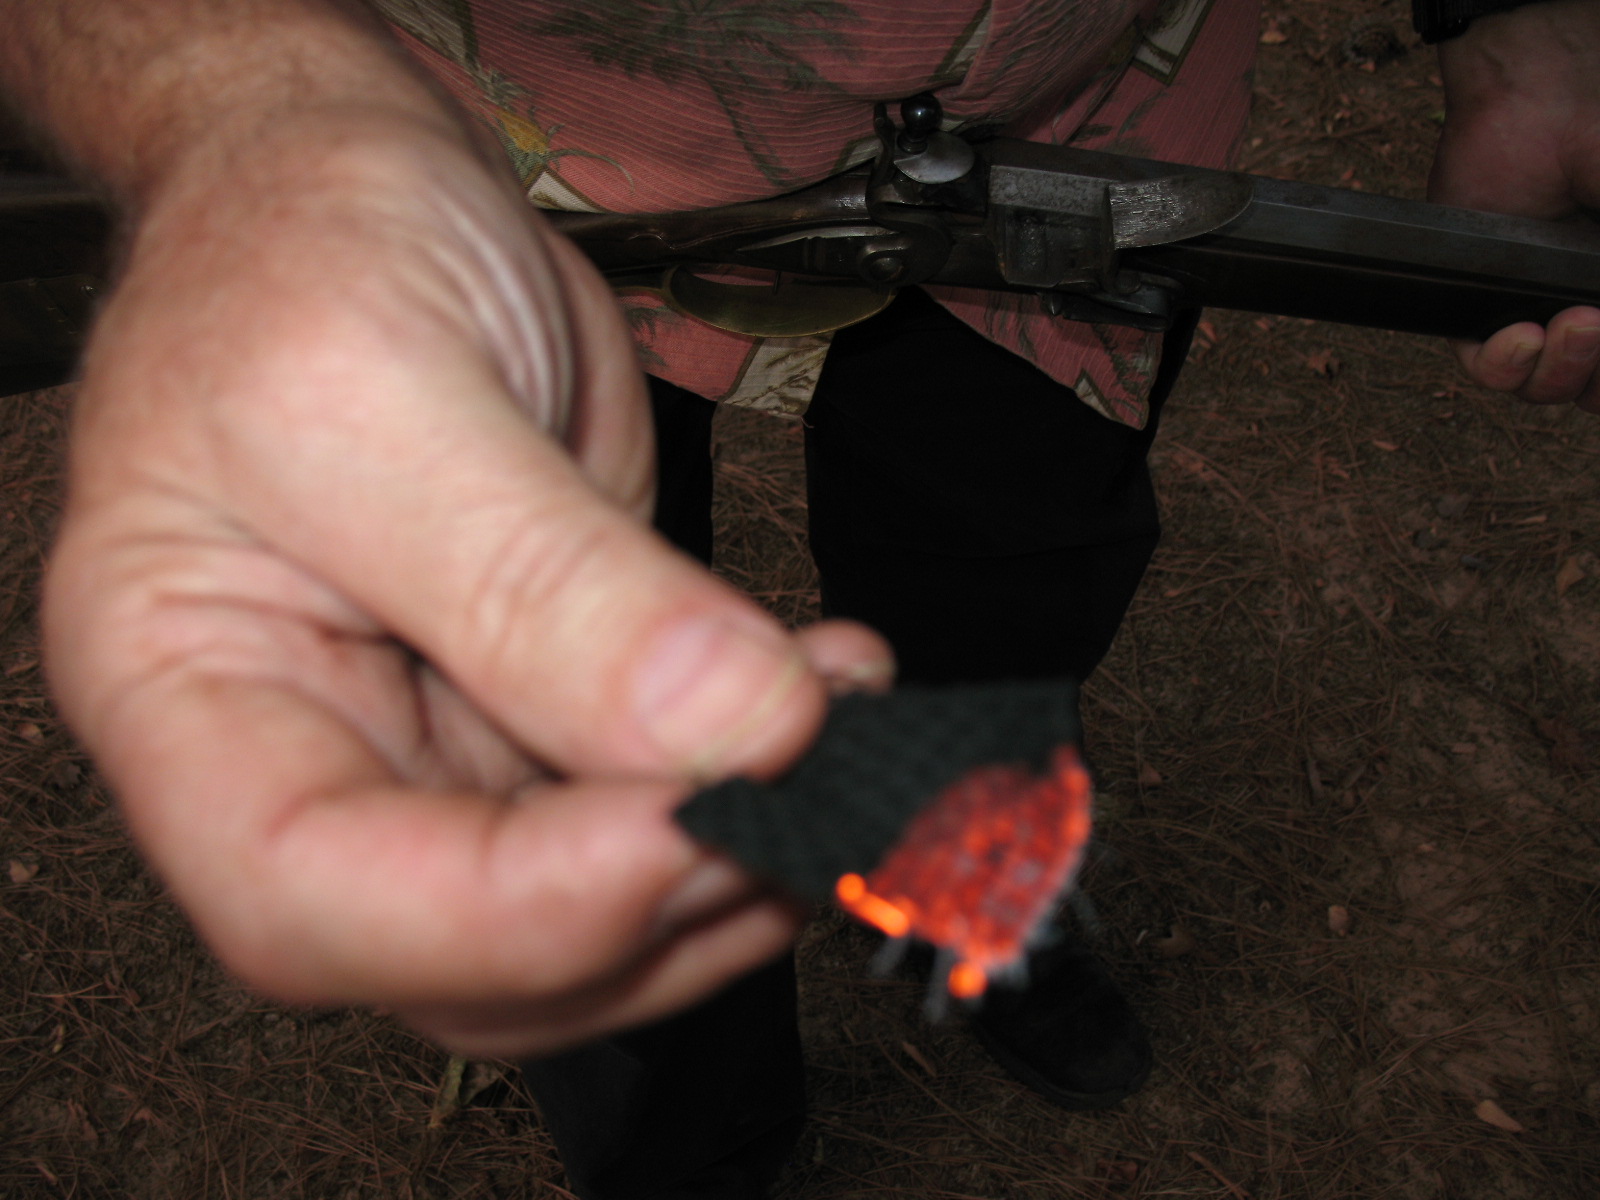
Calmly open the pan cover, retrieve the smoldering char-cloth, and place it in your tinder bundle. Blow gently and the tinder will ignite. Pretty simple huh?
Back in the day they actually made a device with a flint lock and an attached hopper to hold tinder. It was designed to do nothing but start fires. Kind of an early version of the cigarette lighter.
Speaking of cigarette lighters, you can actually use a smoldering piece of char-cloth to light a cigarette, cigar, or a pipe. I occasionally smoke a pipe, and I have used this method of lighting it many times.
